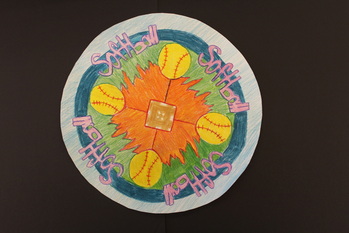
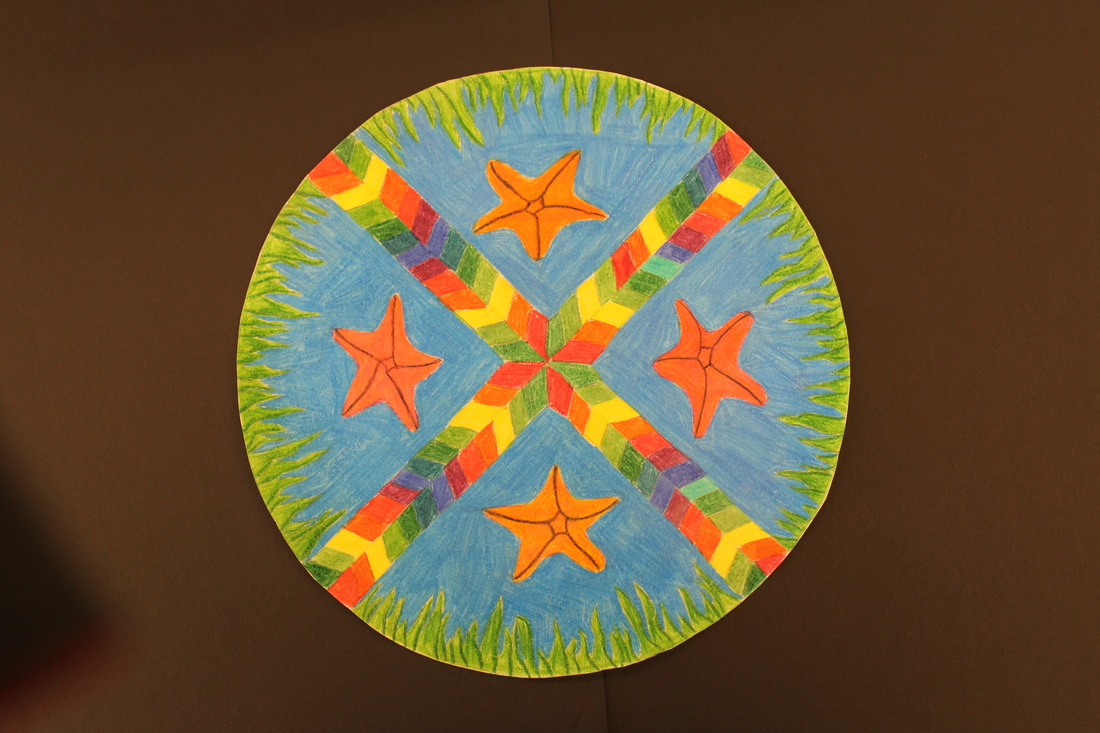
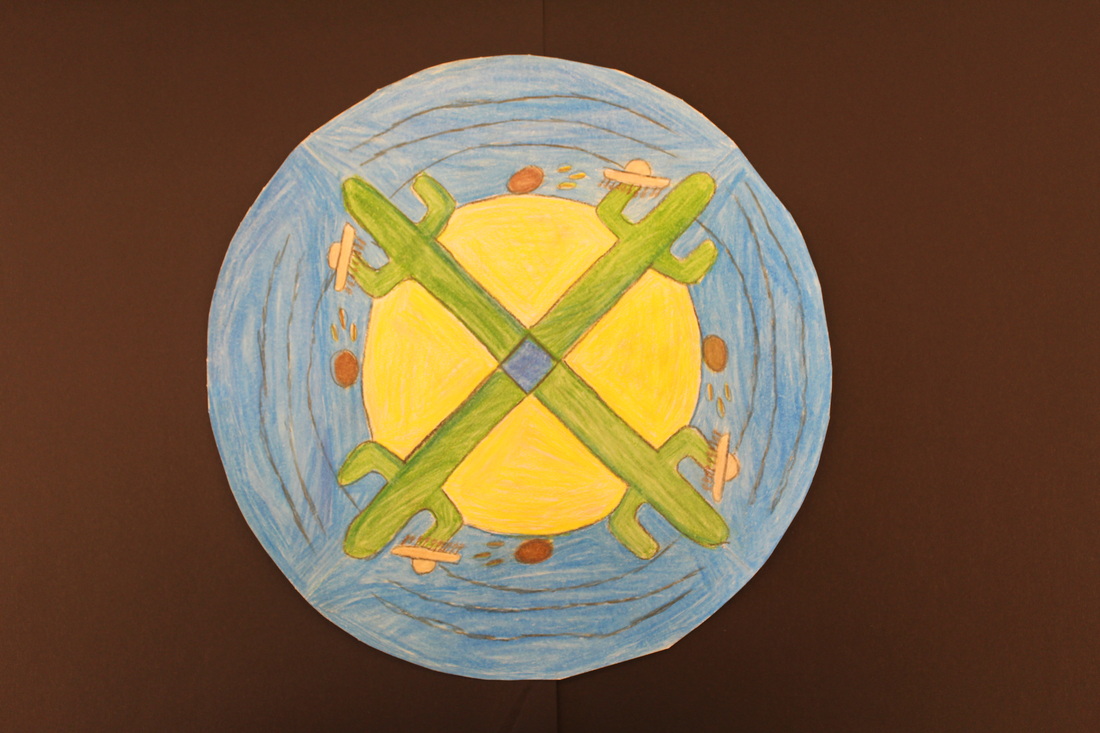
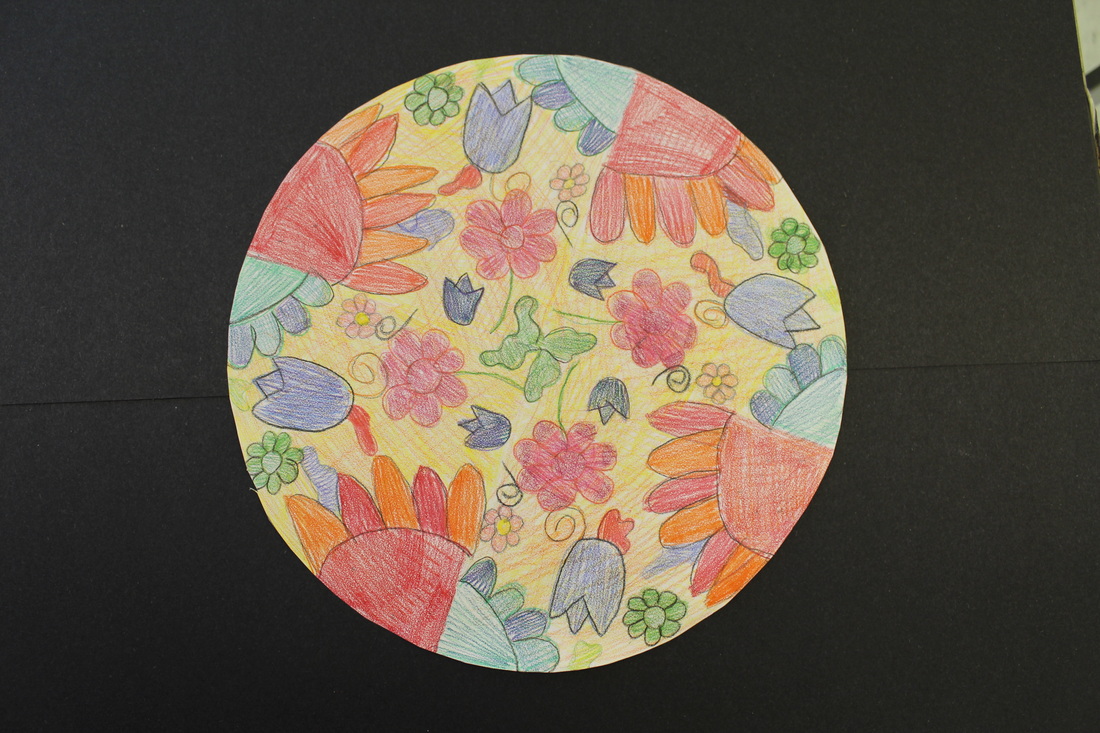
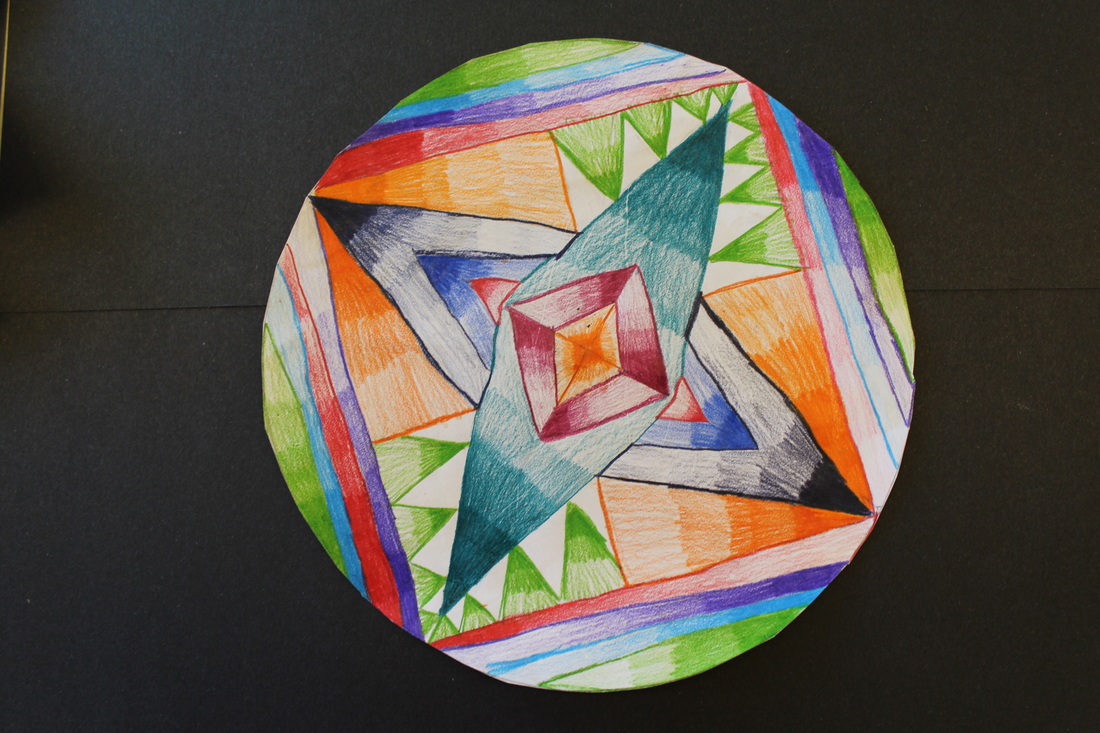
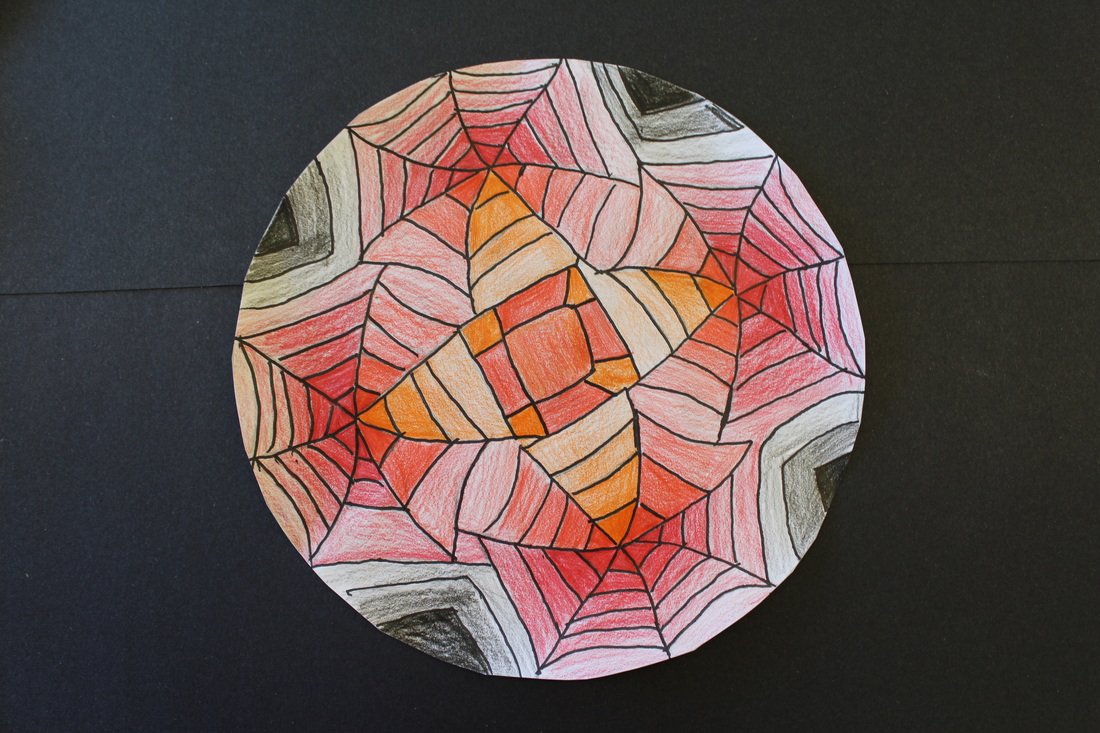
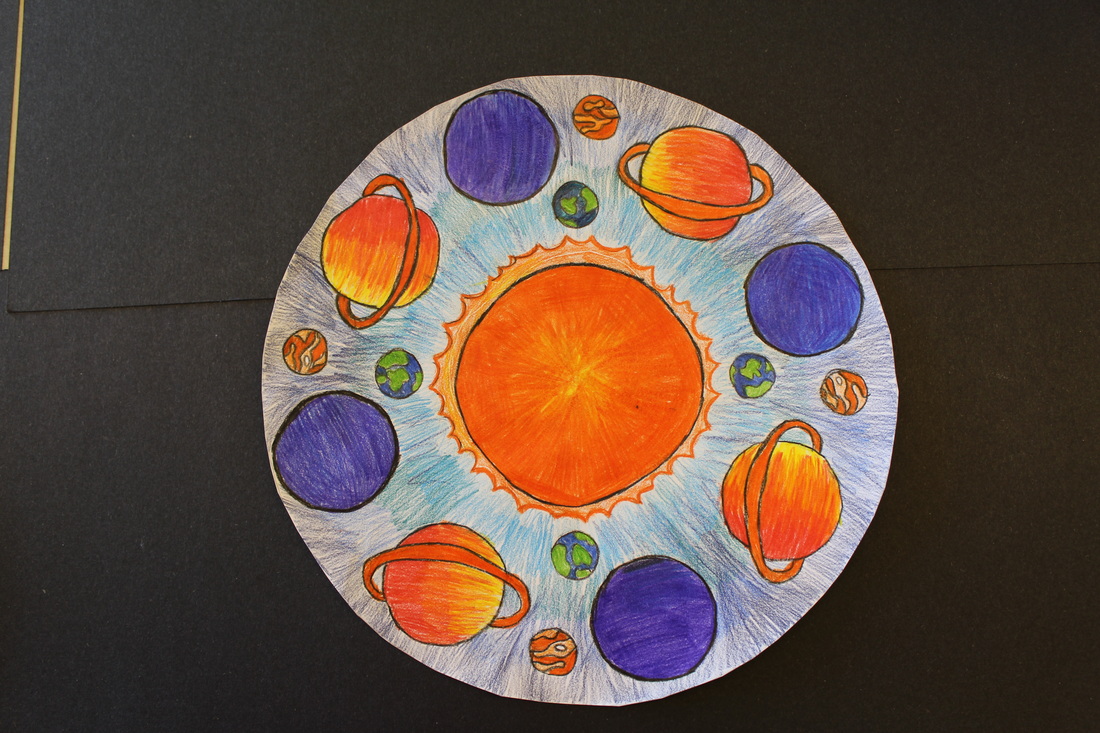
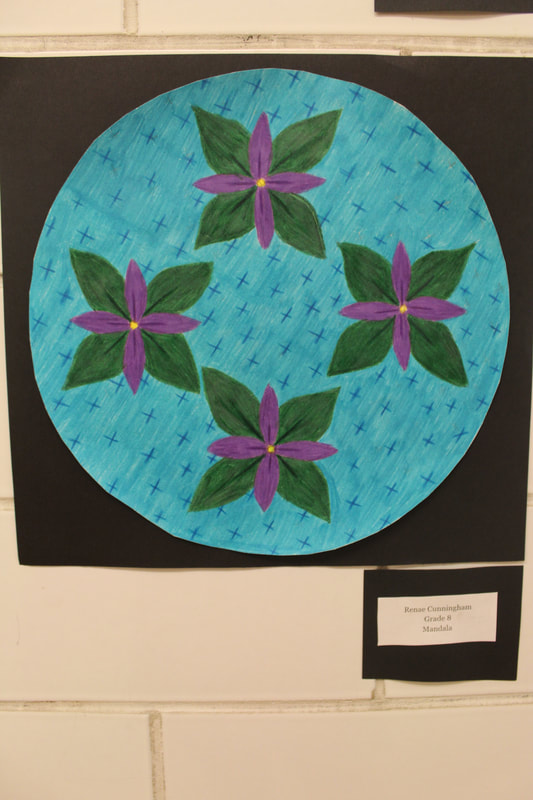
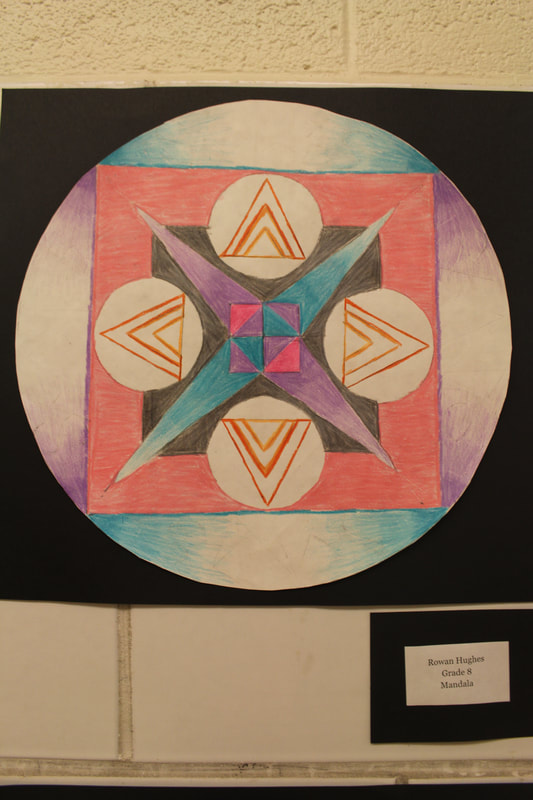
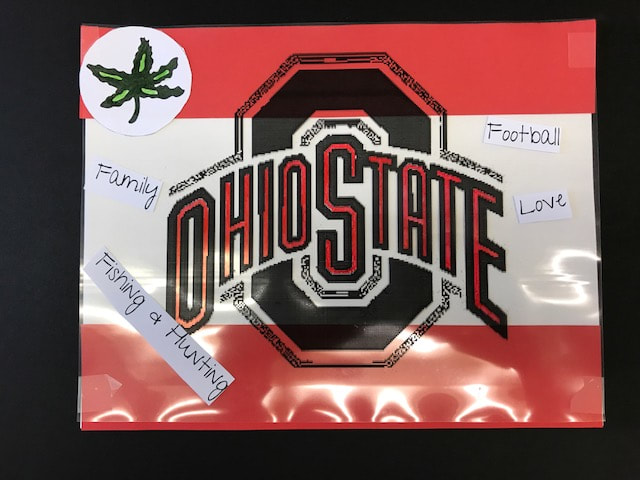
Mandalas
|
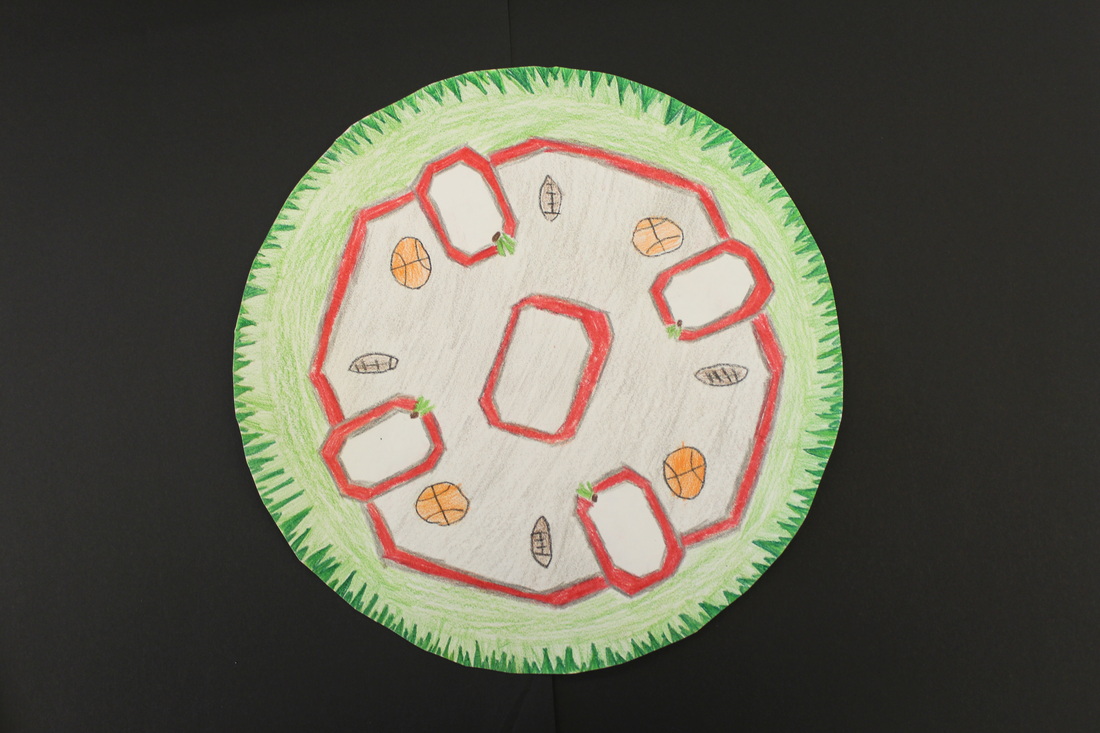
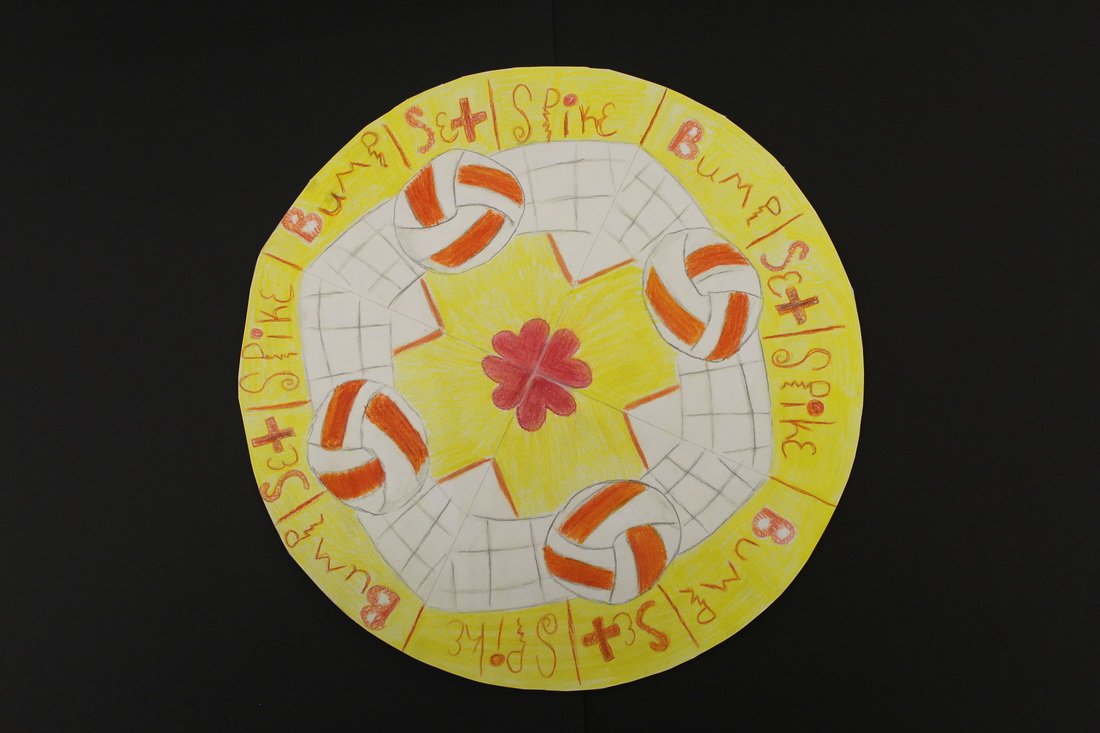
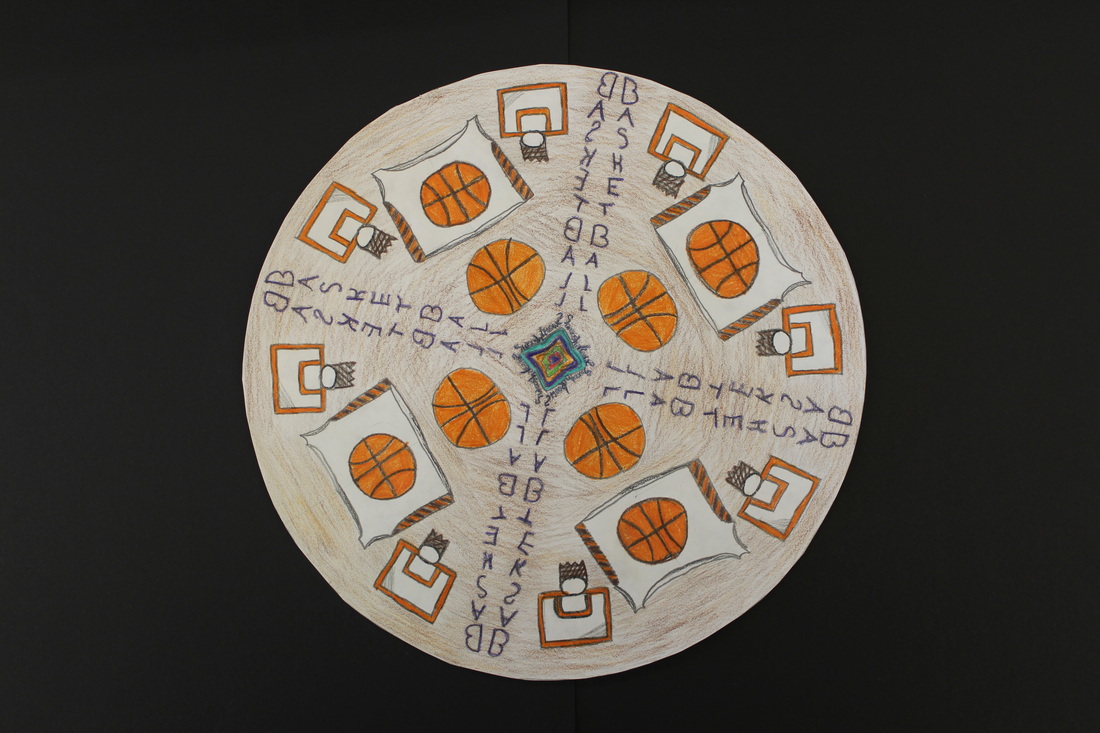
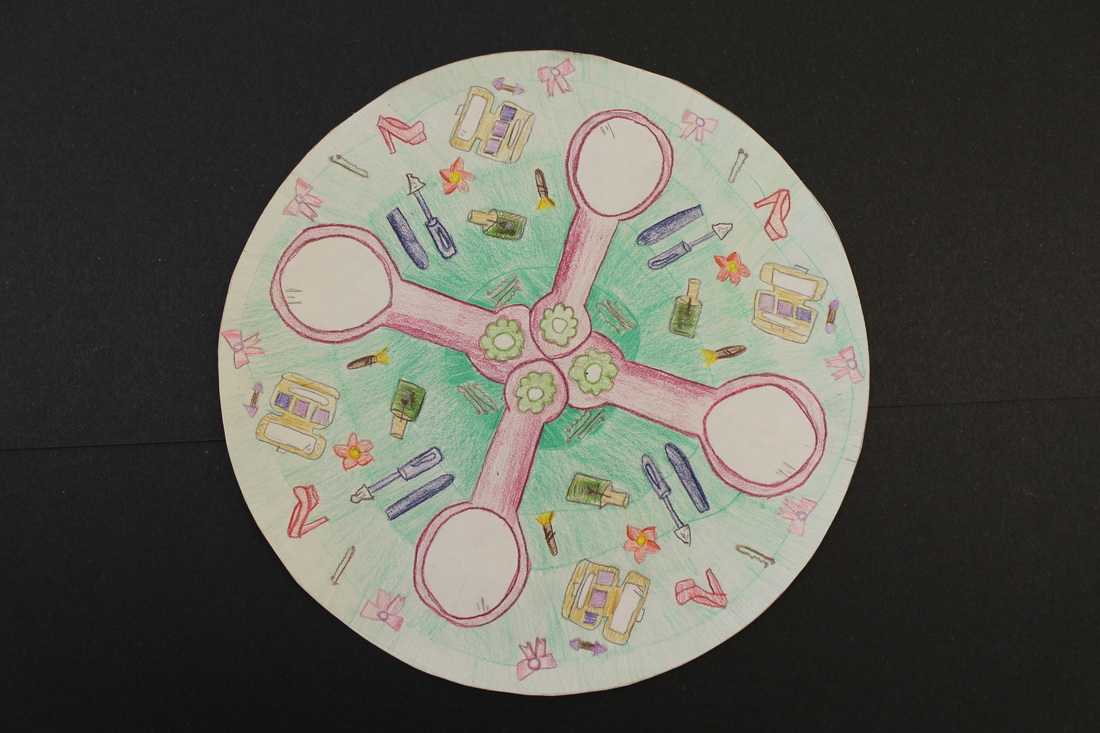
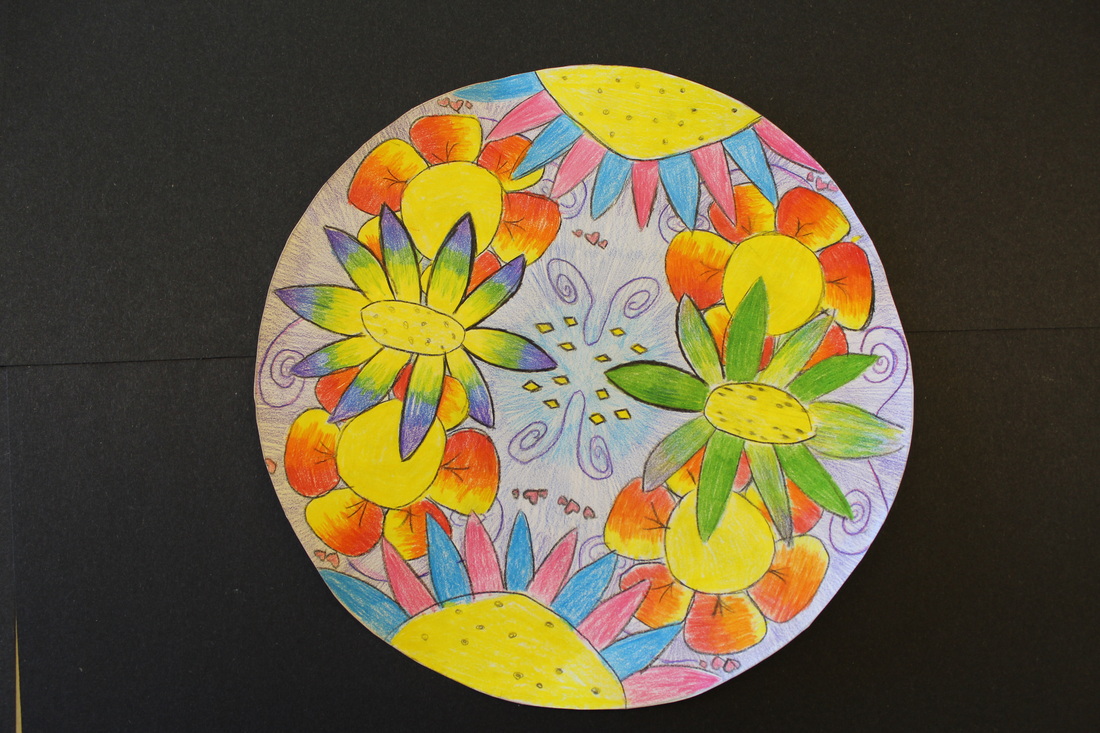
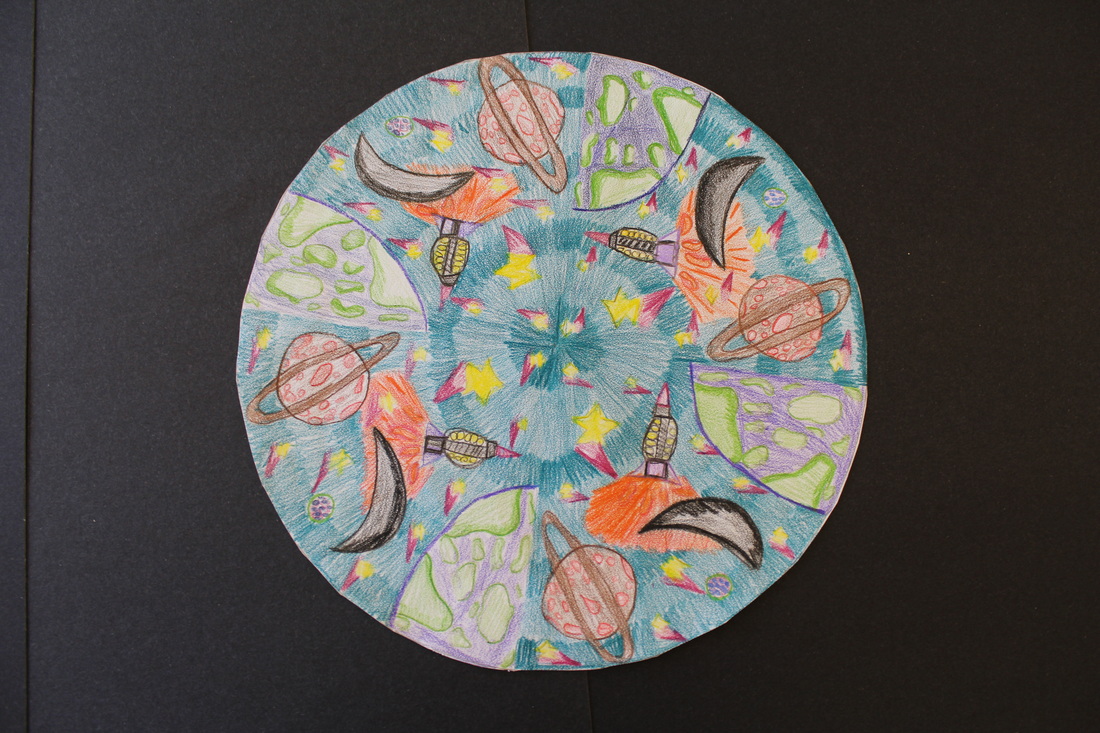
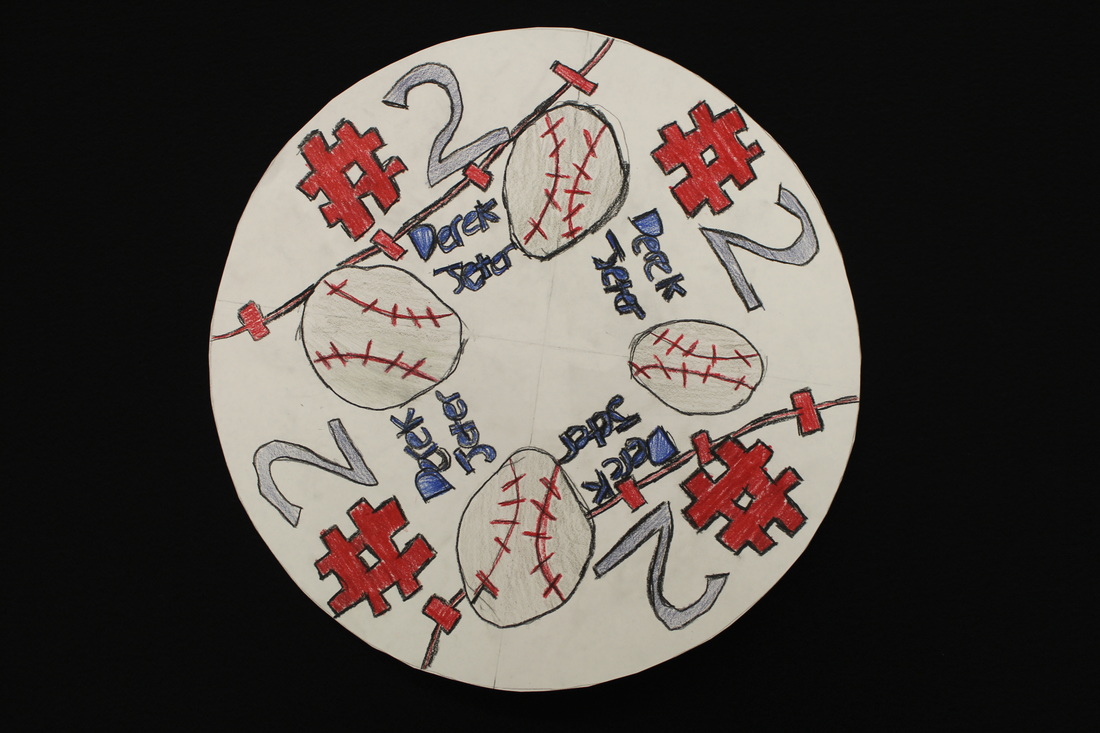
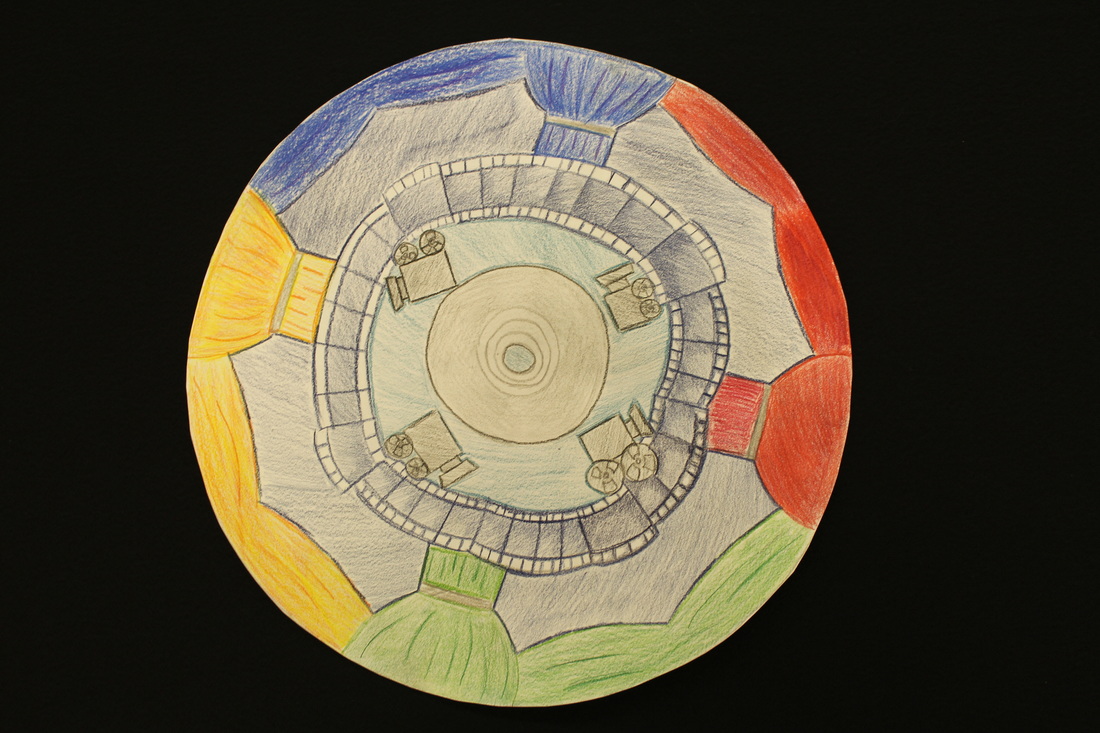
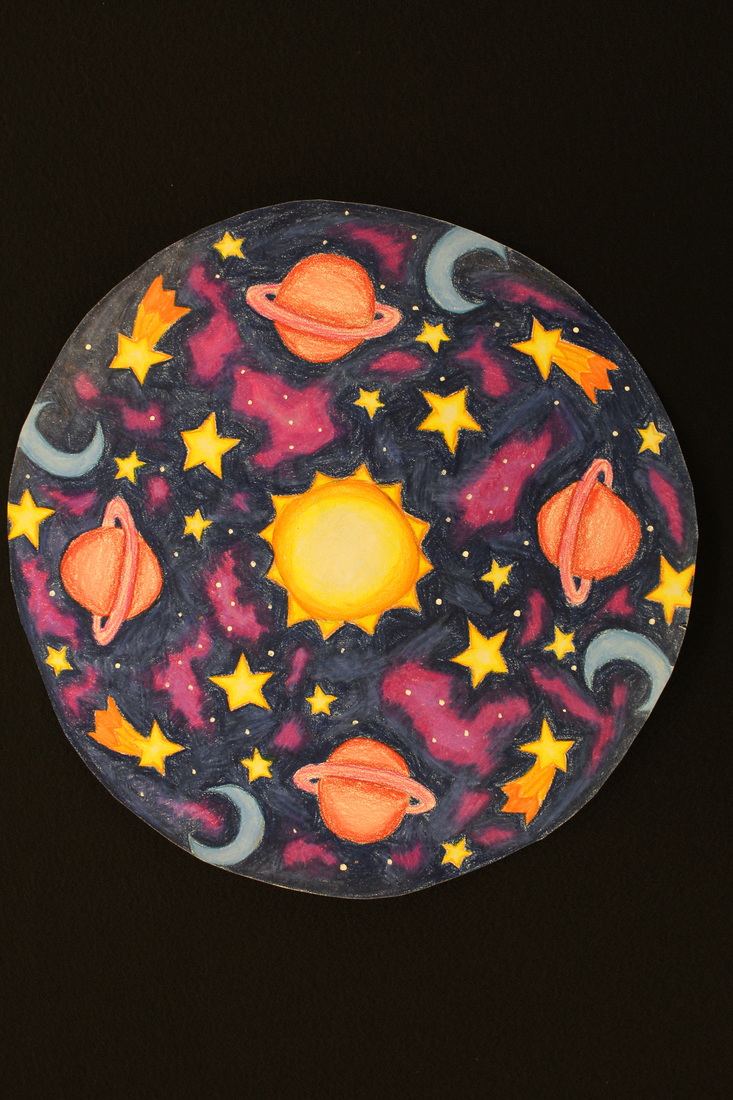
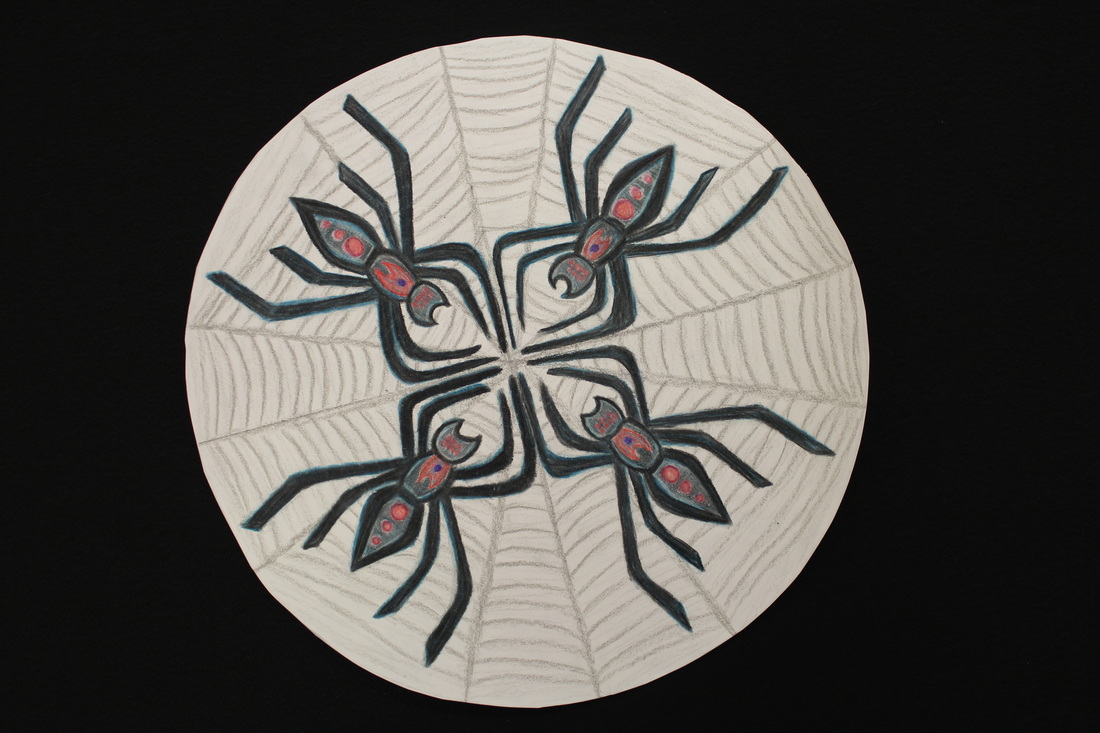
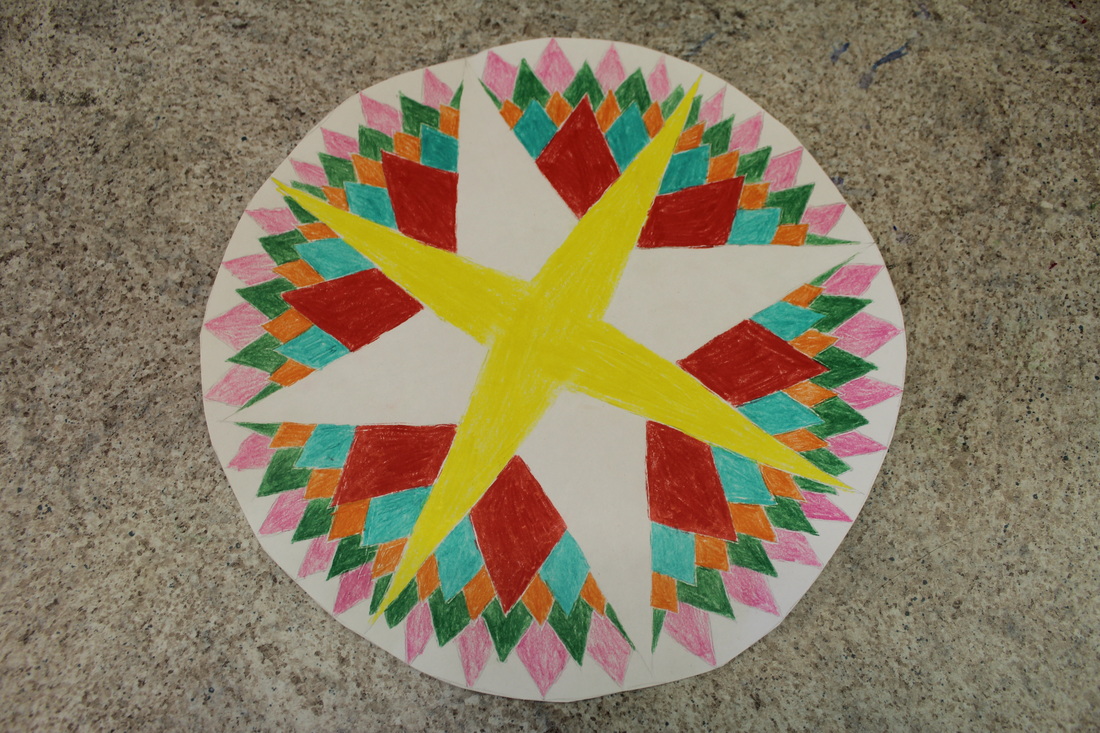
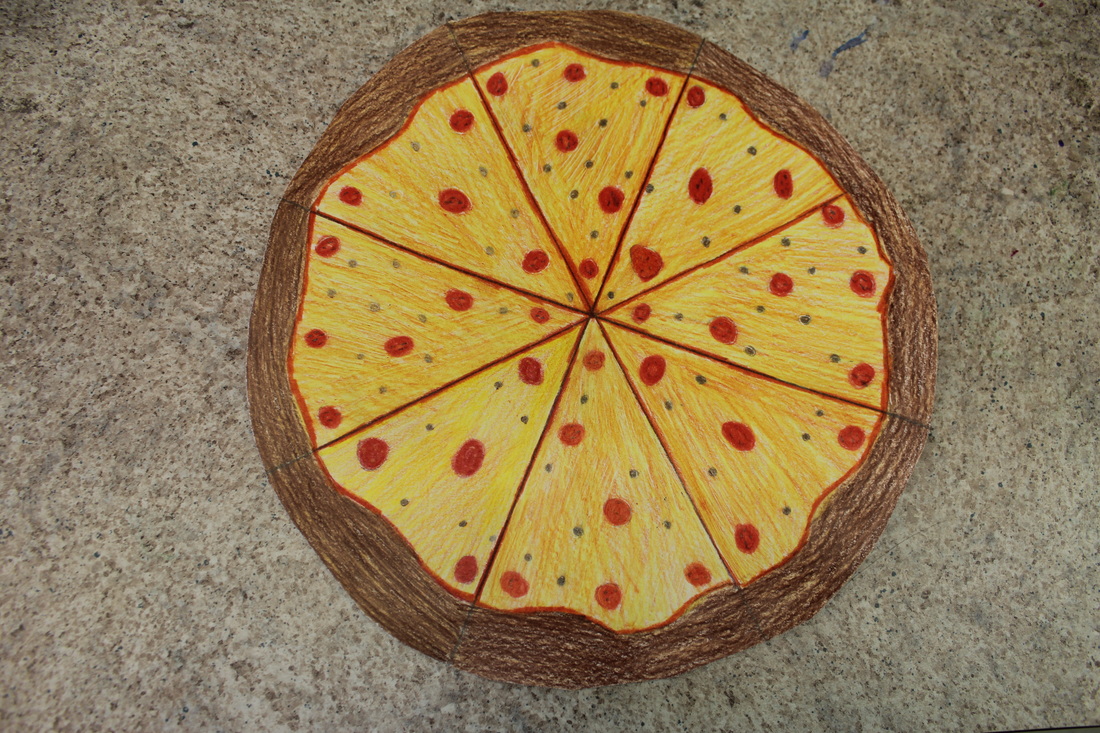
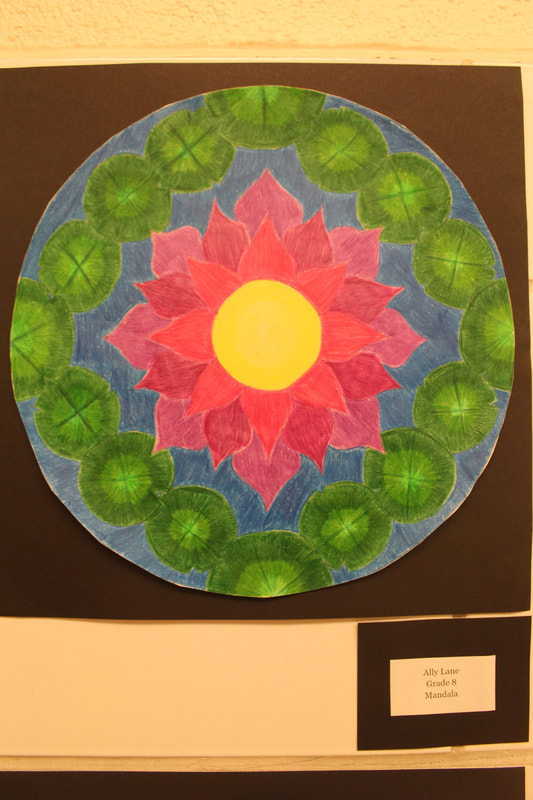
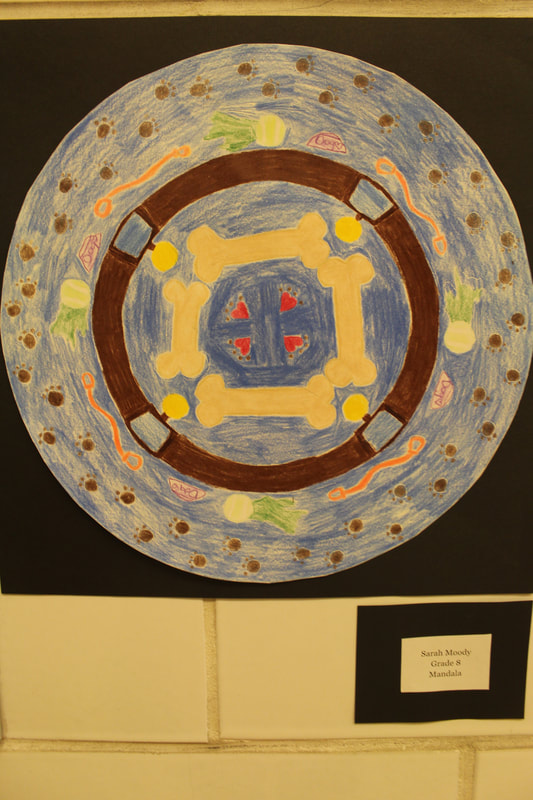
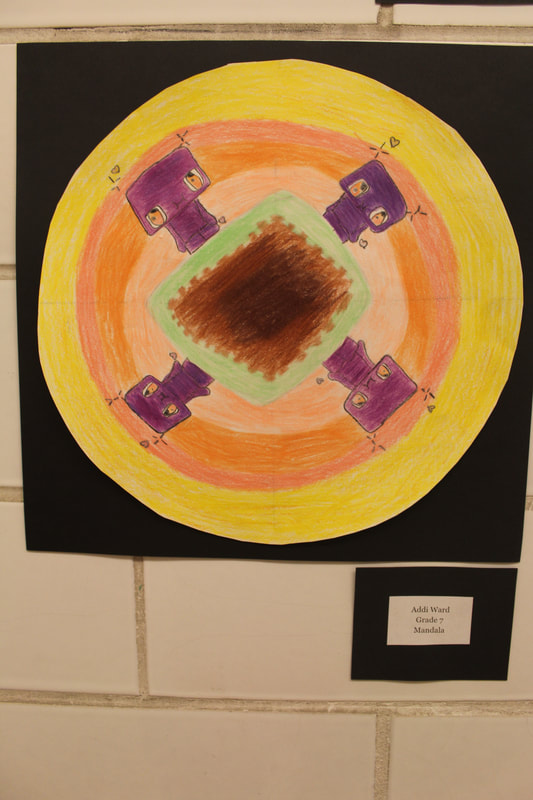
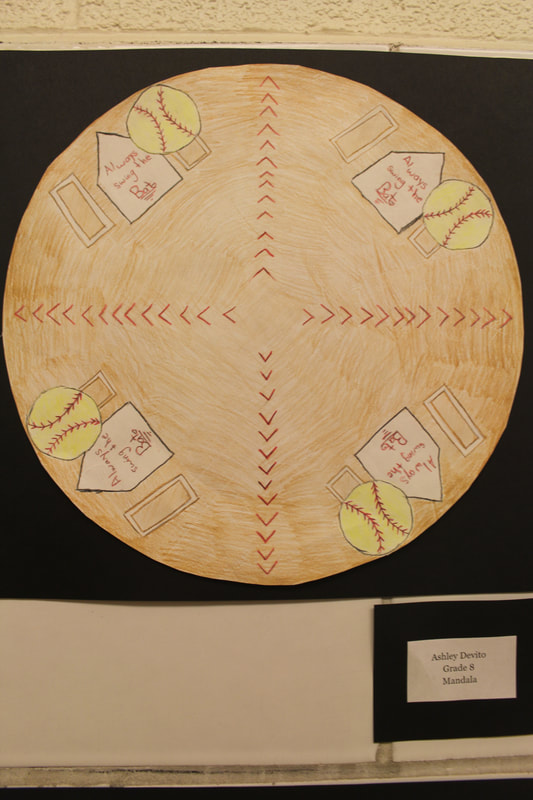
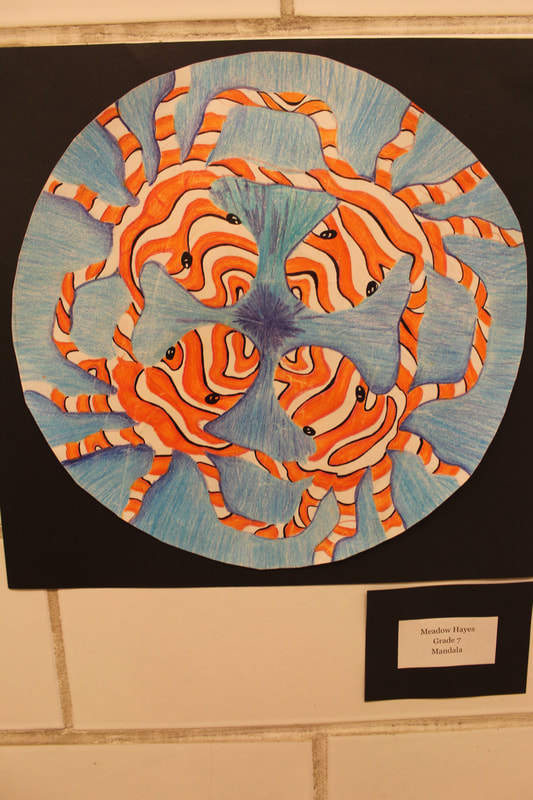
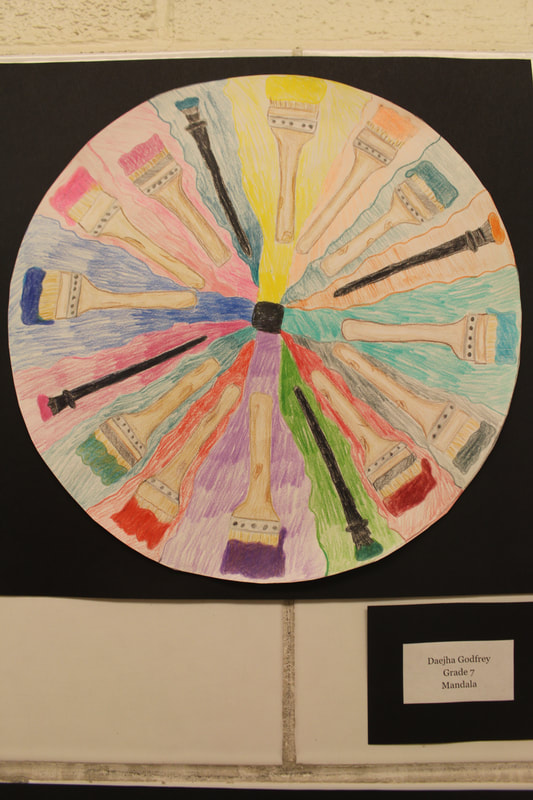
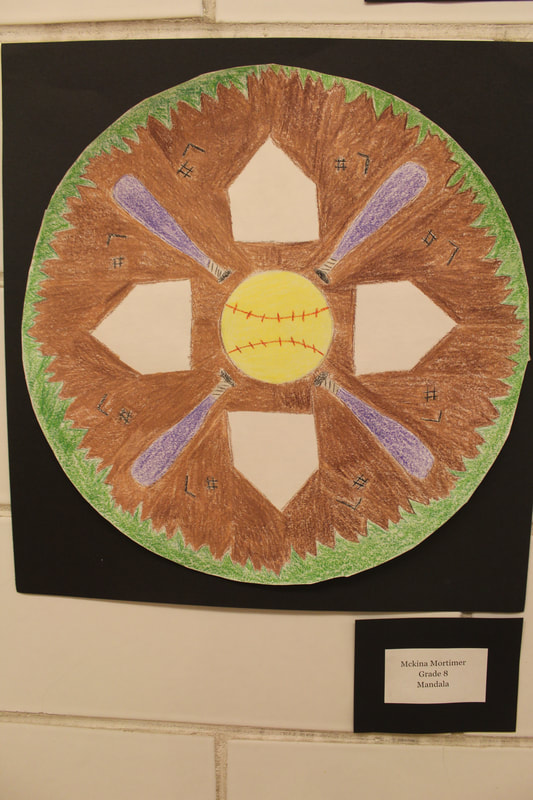
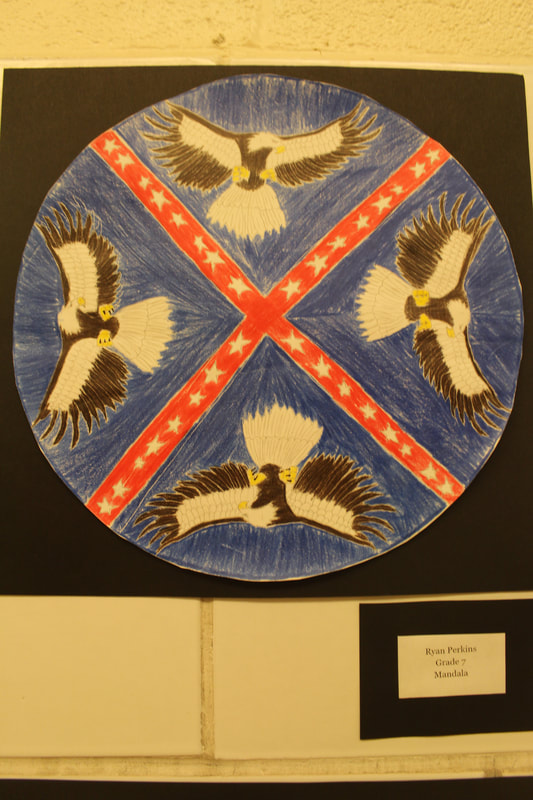
For this project students learned about the ancient art form of a mandala. The artwork involves creating a repeating pattern by designing a quarter of a circle that repeats around to complete the whole circle. We then learned about colored pencil techniques to blend and mix colors. The best part about this being our first project is that I got to learn something about my new students. The mandalas are based solely around the individual creating the artwork, so there were all sorts of amazing designs, from flowers, to sports, to video games.
|
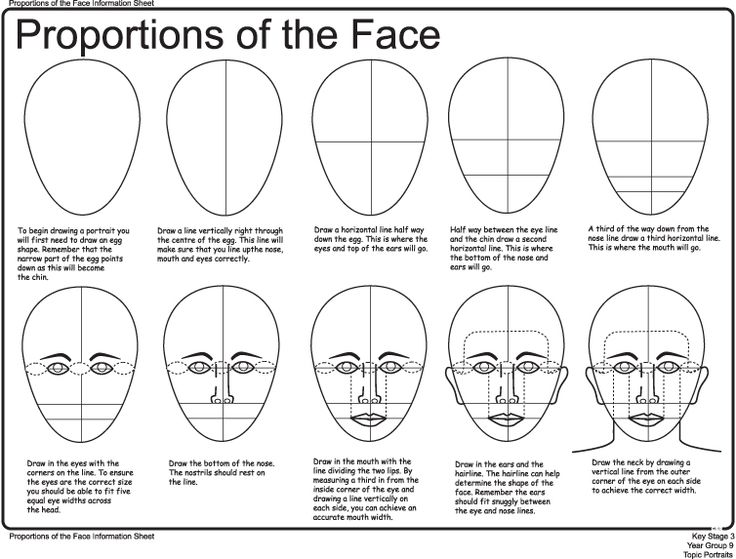
Self Portrait
|
|
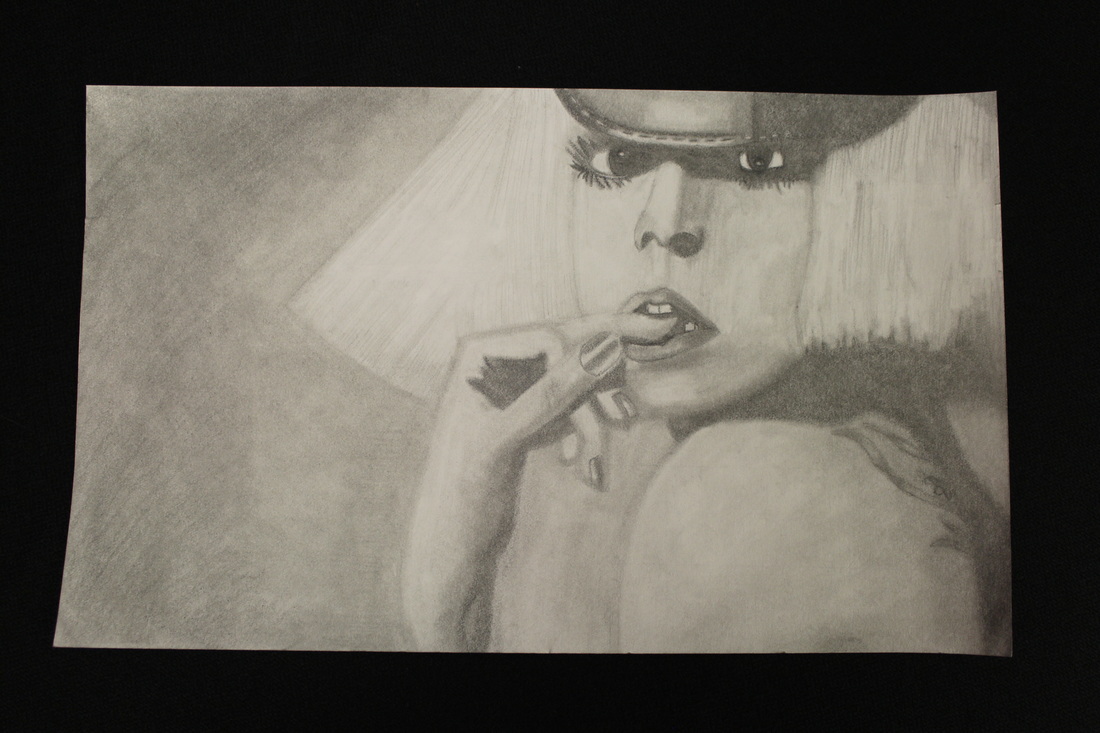
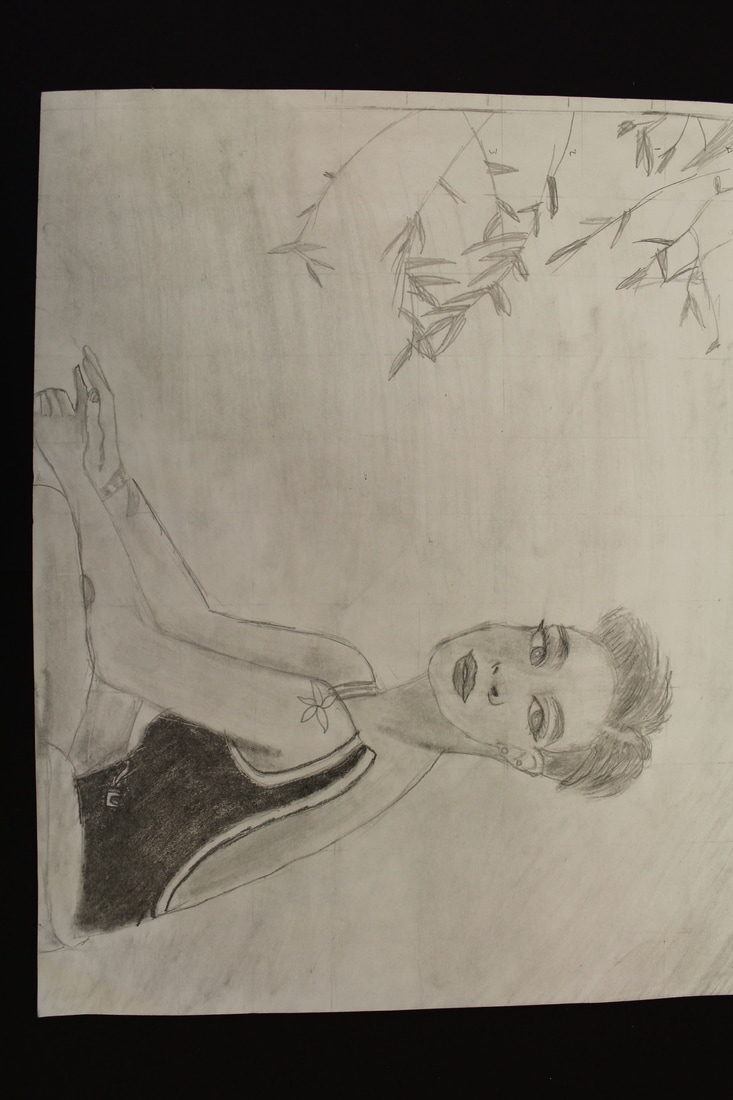
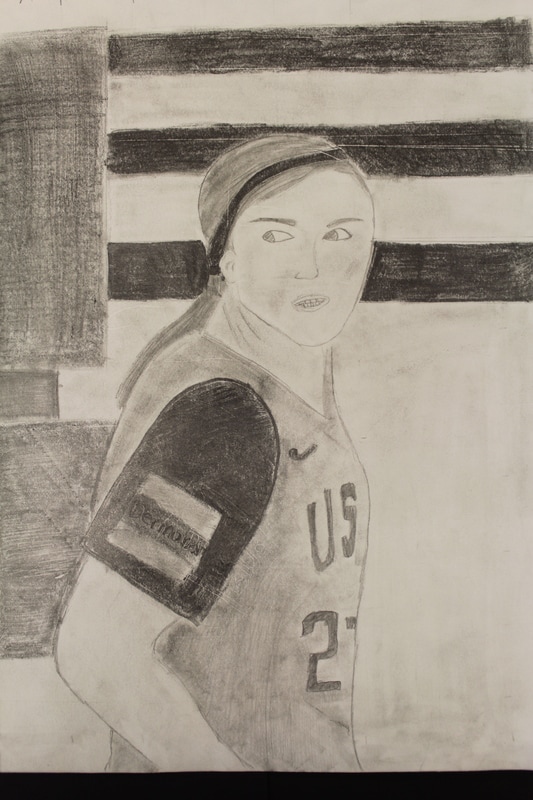
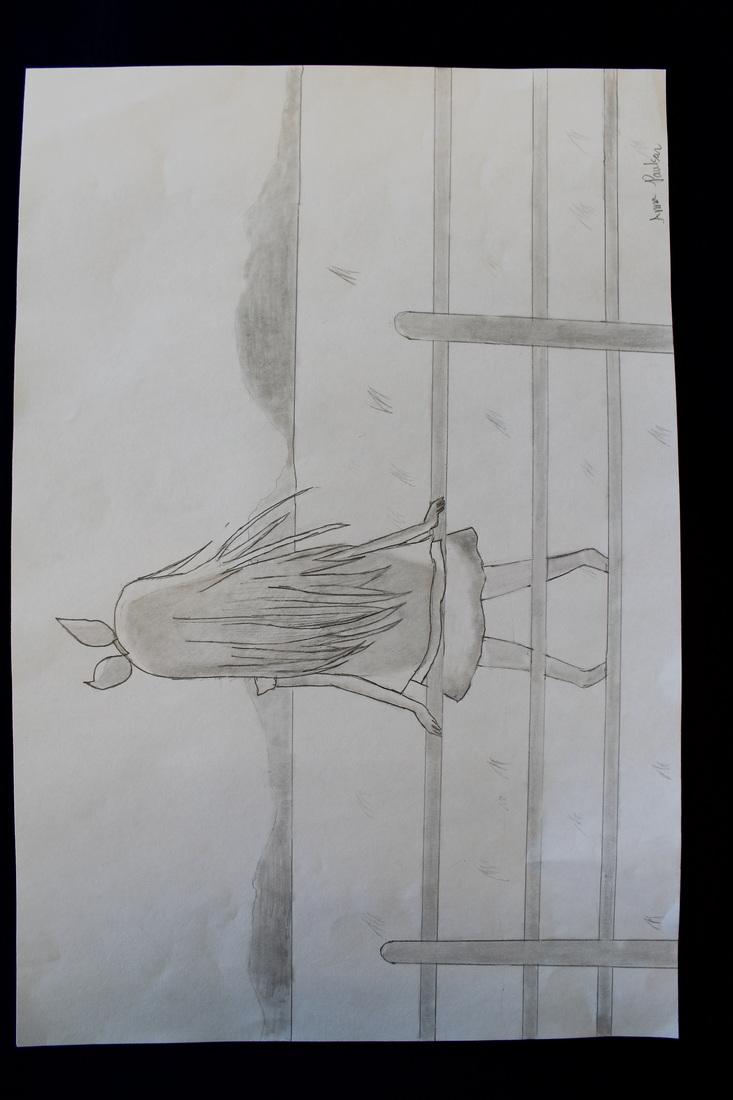
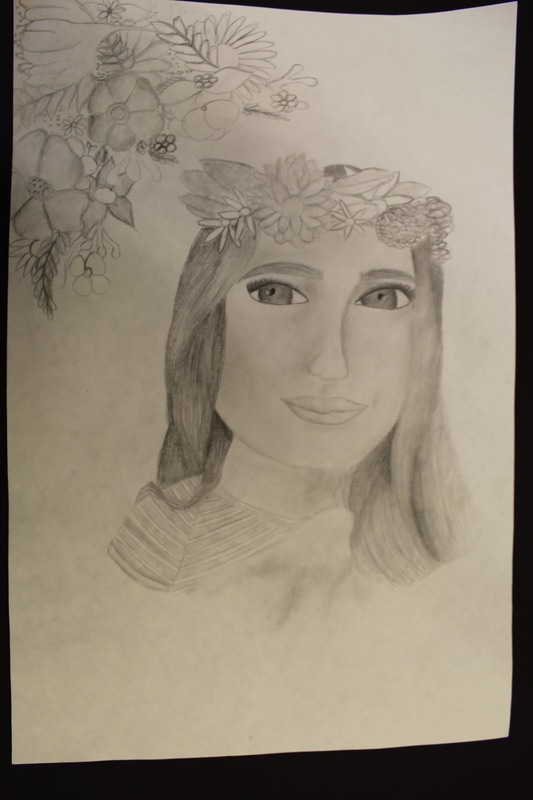
For this project students learned about the basic proportions of the human face and learned about shading with drawing pencils and blending tools. Check out some of the cool facts on proportions of the face. Though we all are different, in general there are some guidelines for drawing a face that really help to make it look real. For example, our eyes are half-way down the head to allow room to see the top of the head/hair. By doing this one tip, it usually helps the drawings tremendously because we usually draw the eyes too far down. They then used a mirror to draw a themselves in a self portrait!
https://s-media-cache-ak0.pinimg.com/736x/68/d0/d6/68d0d6fe75981977dd227c66cf5e2a36.jpg
|
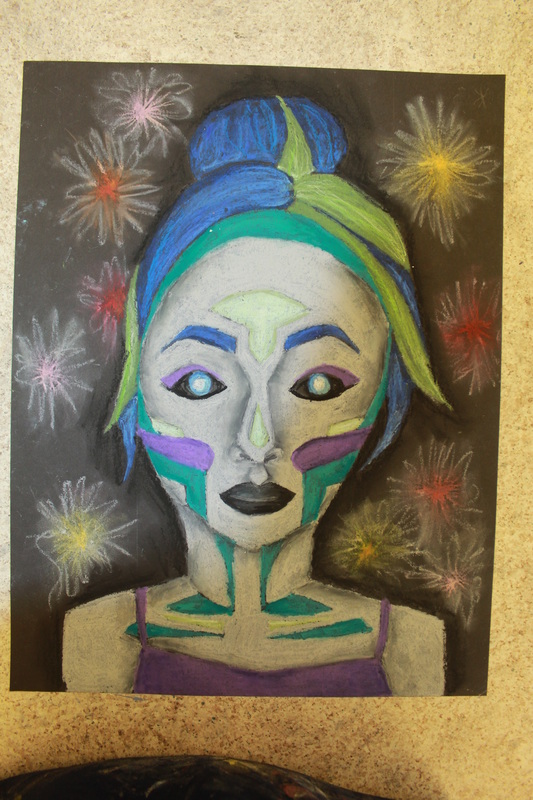
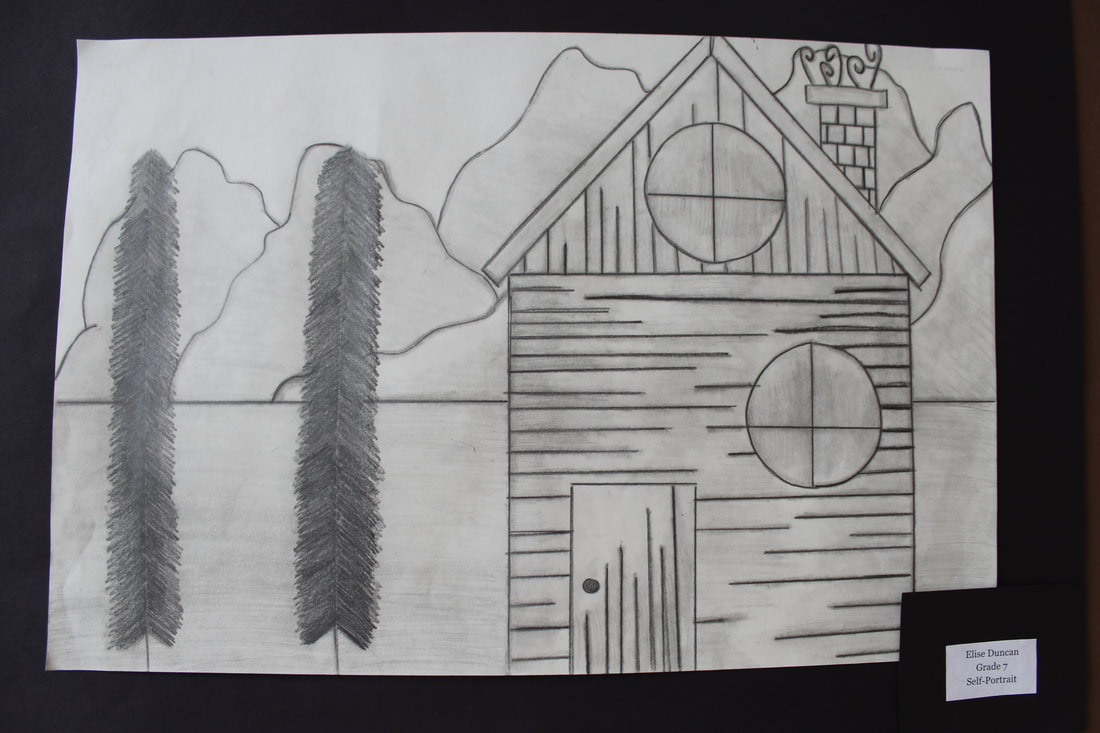
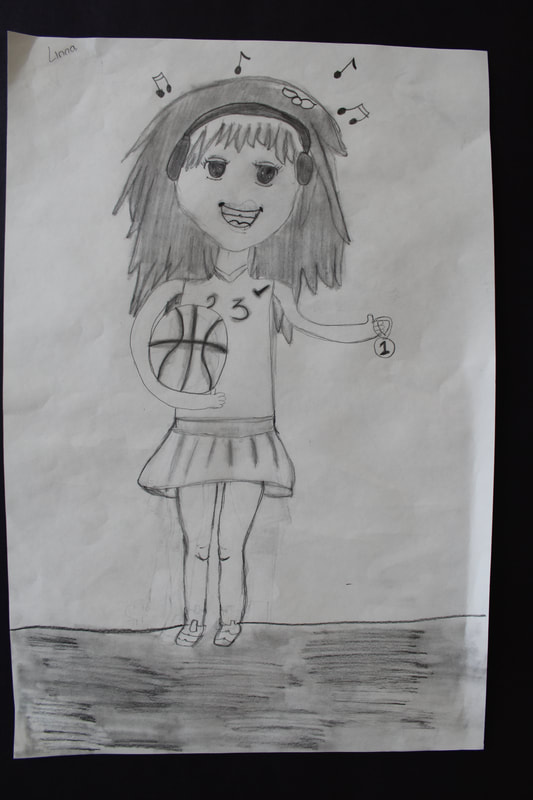
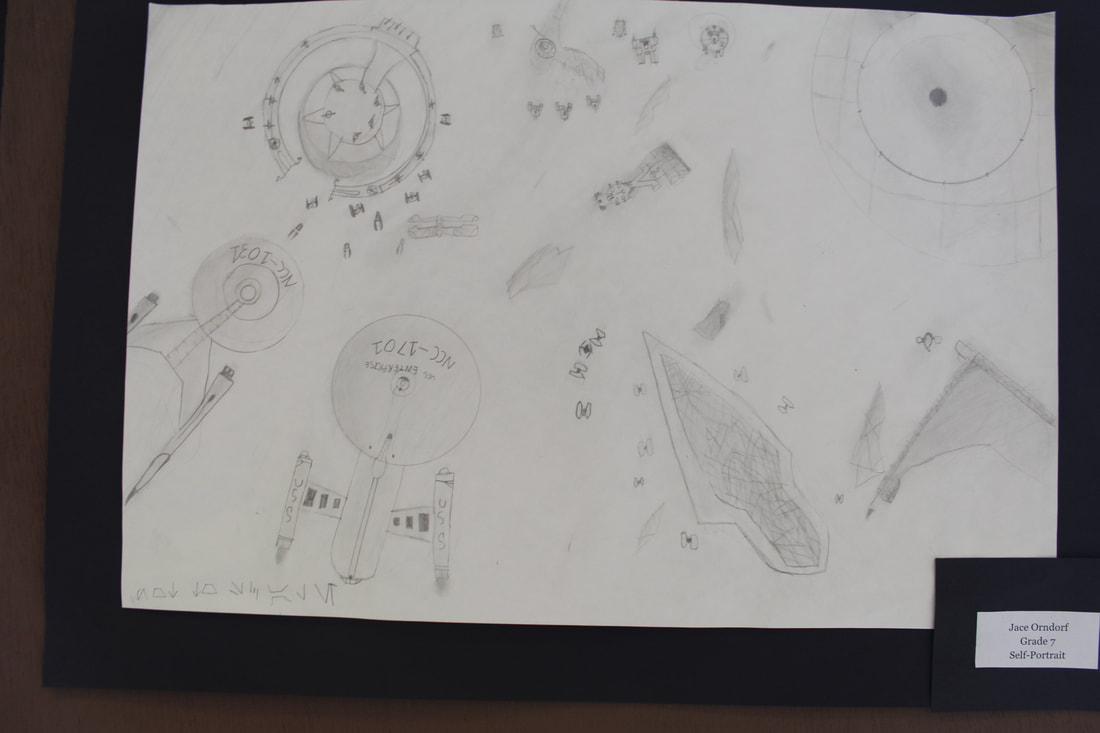
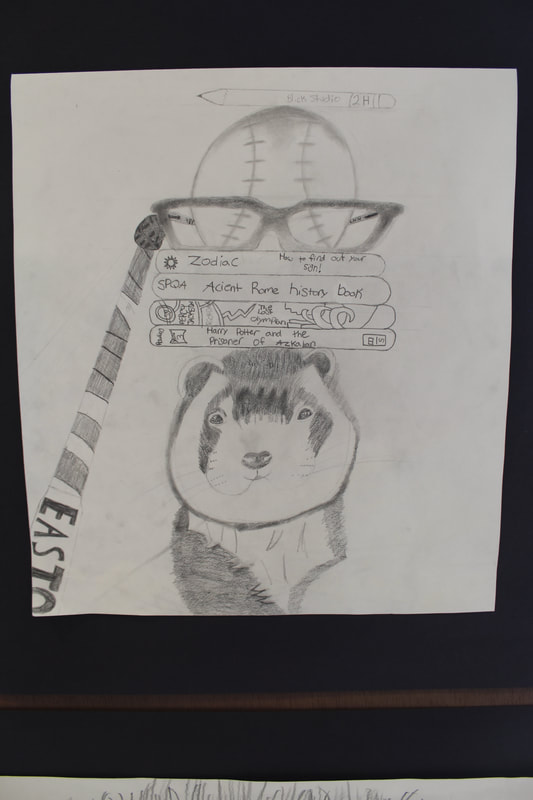
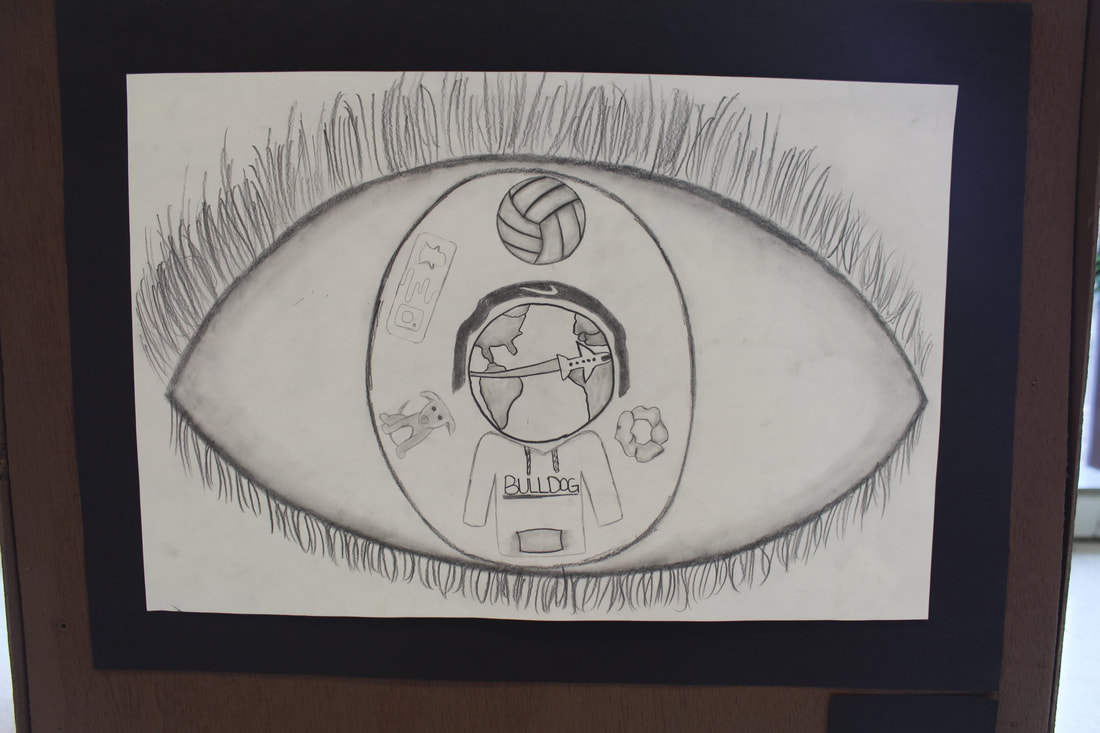
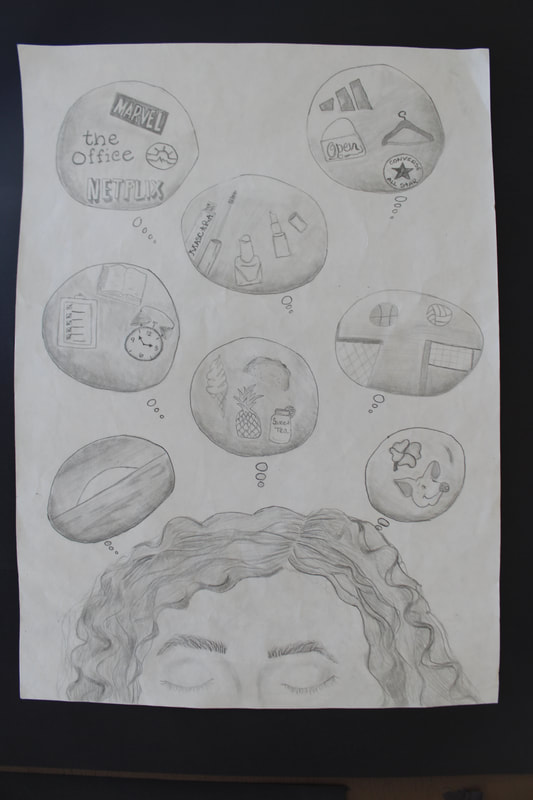
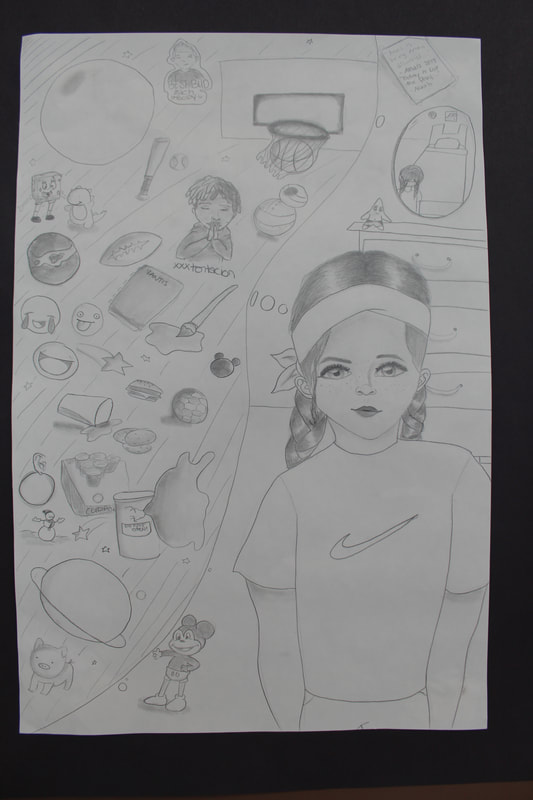
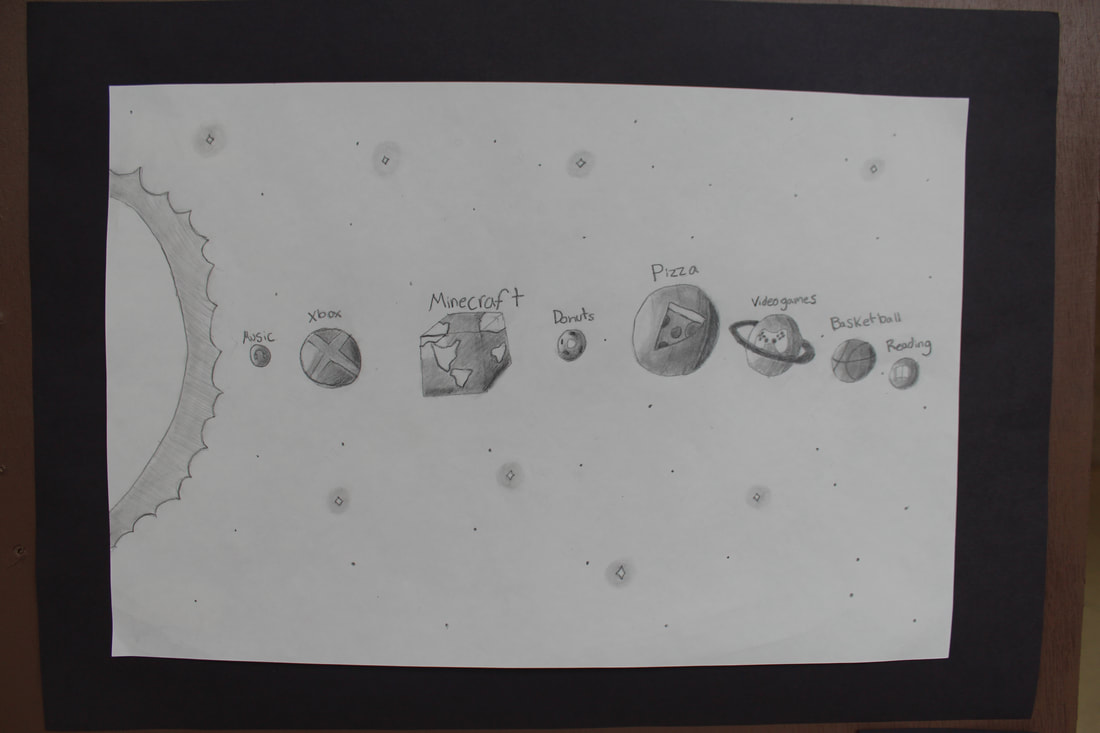
We also do a self portrait project where the students design a project based on themselves "self-portrait" but they don't have to draw their face, which is the traditional format of a self-portrait. Some of the students really surprised me with their creative ideas and how they approached creating a projected based on themselves.

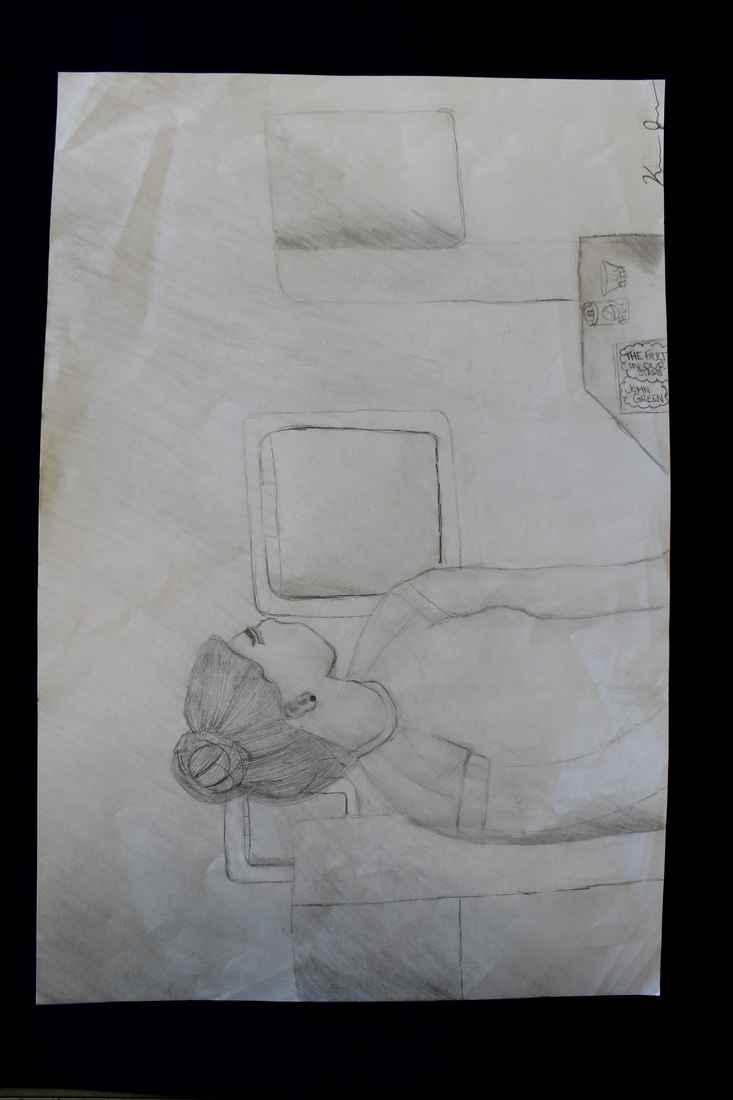
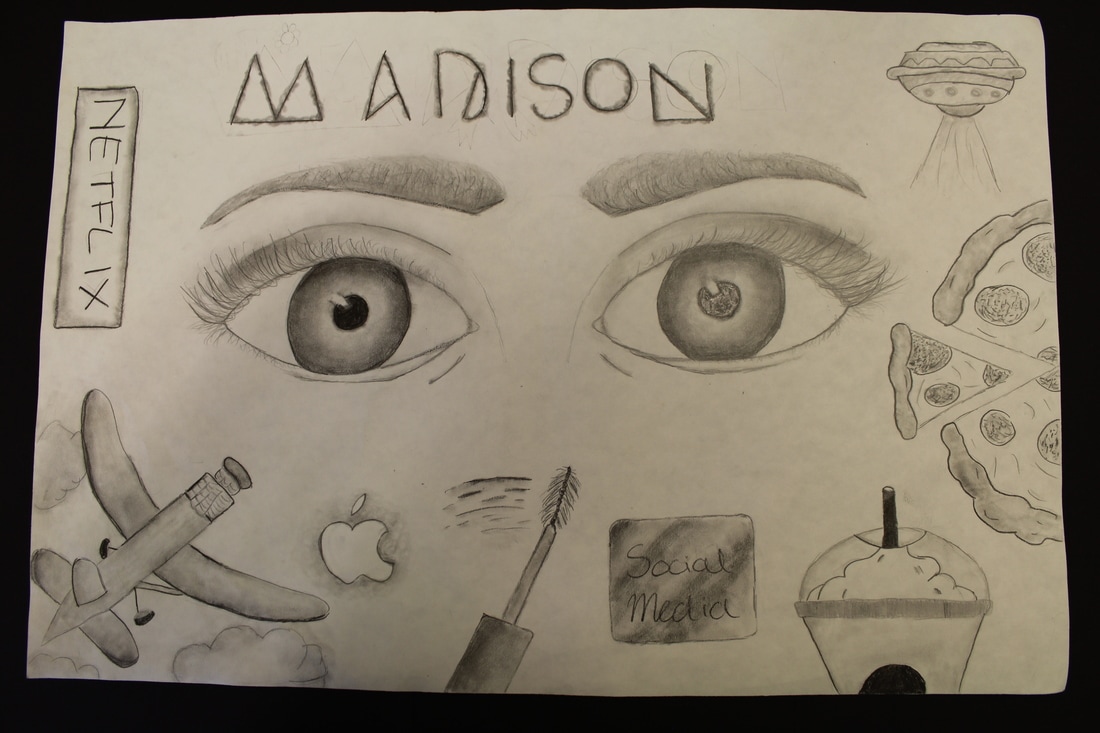
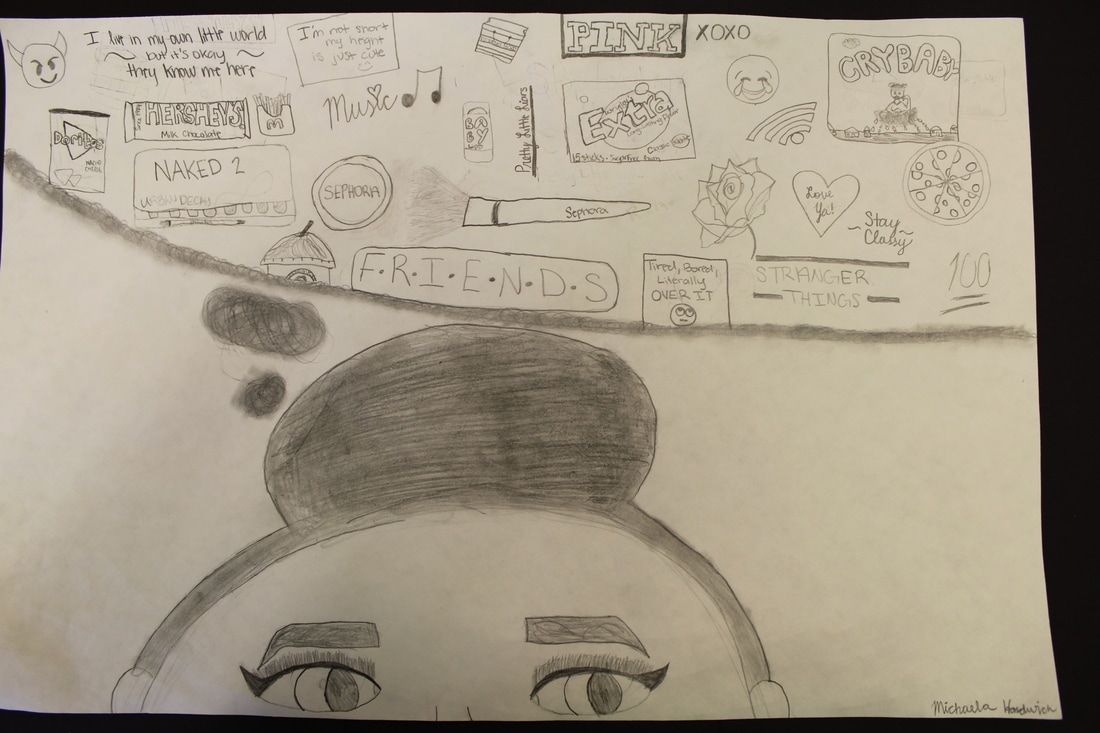
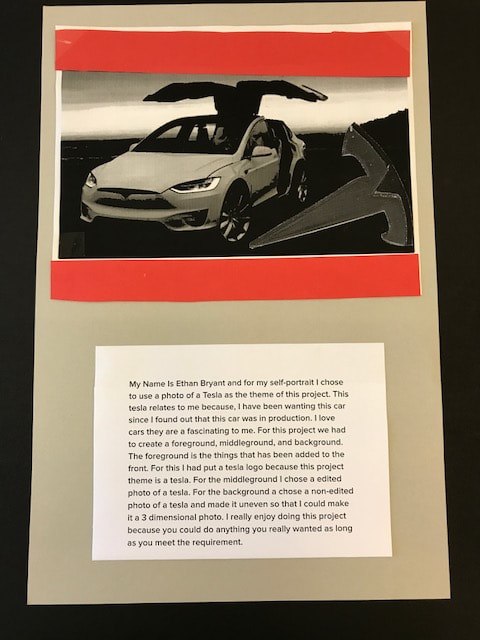
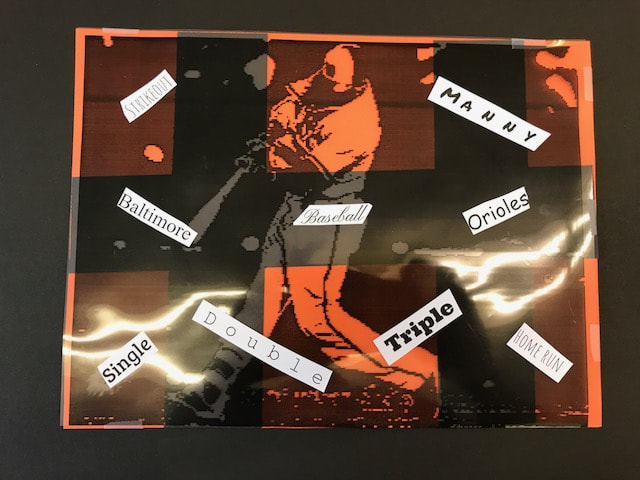
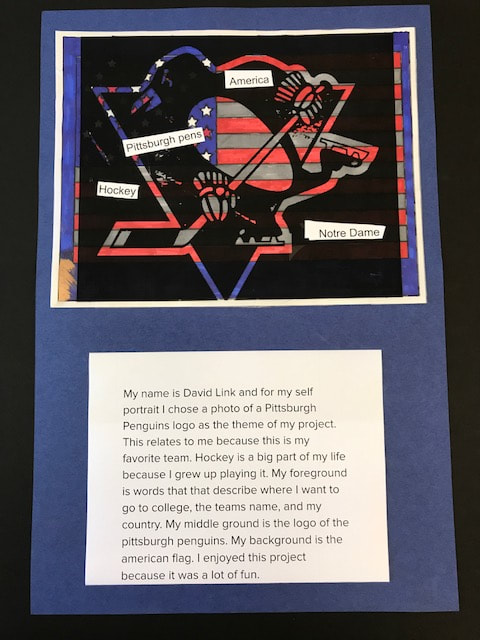
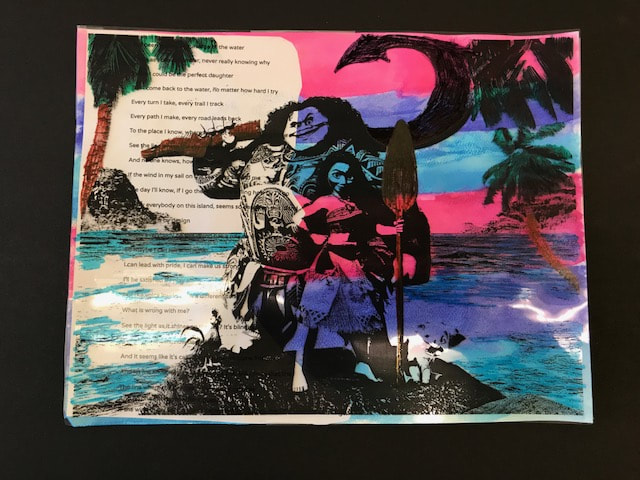
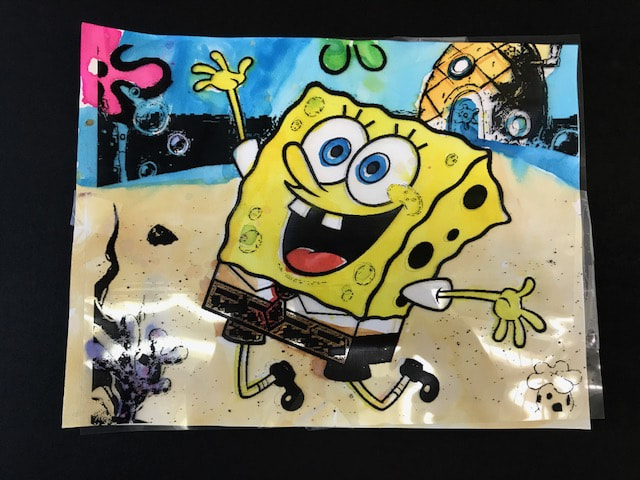
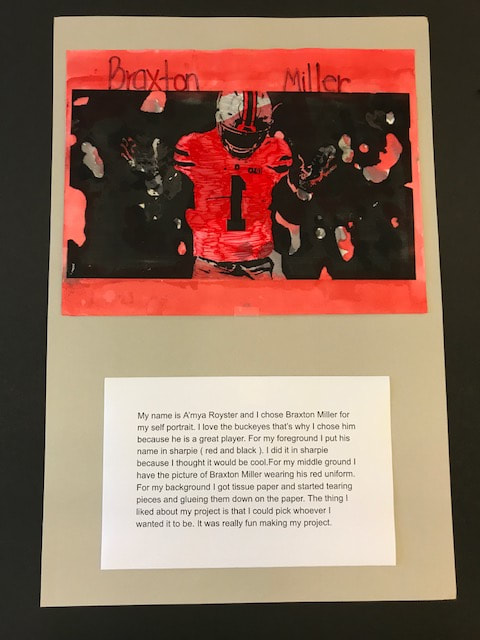
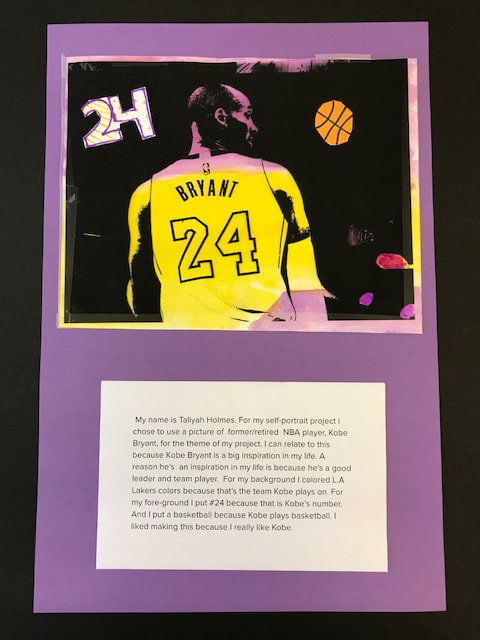
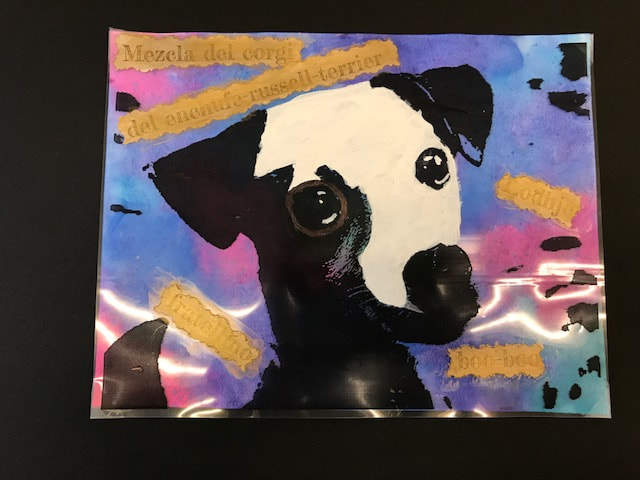
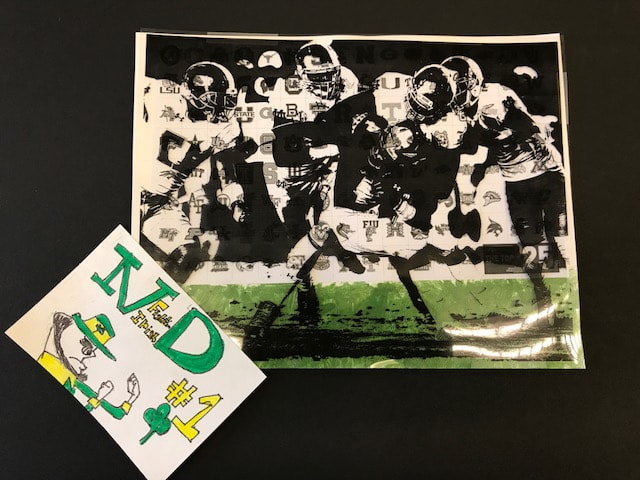
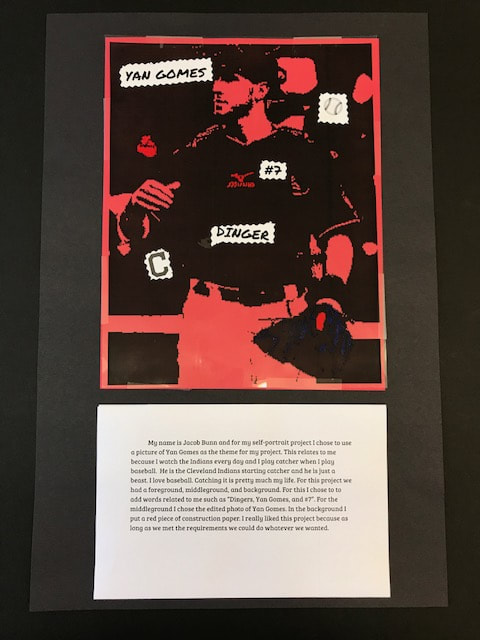
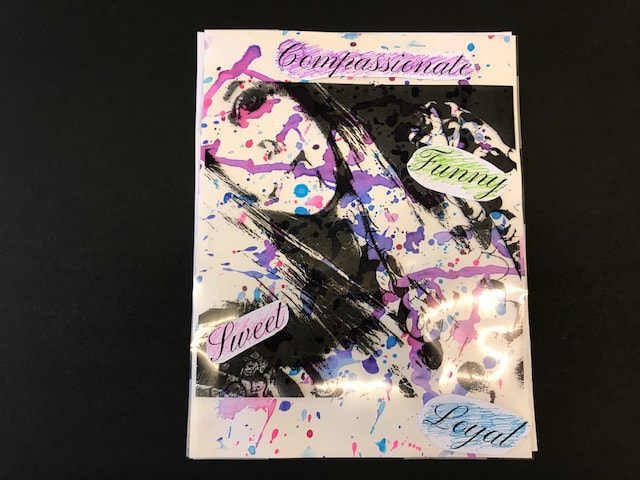
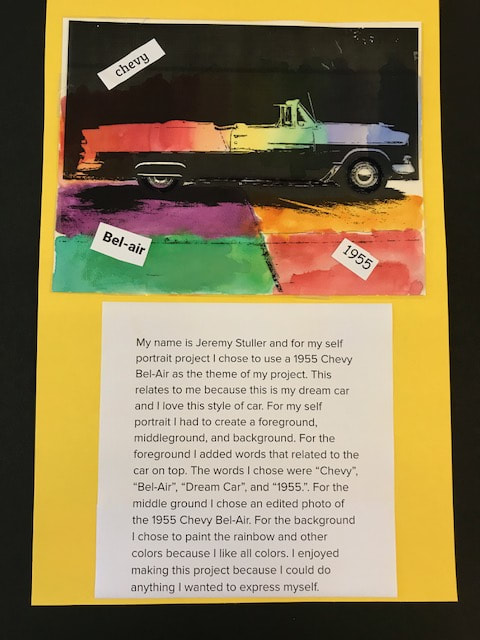
"Express yourself" Self-portrait project
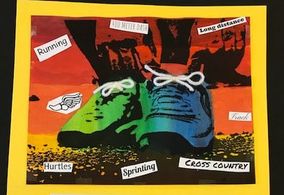
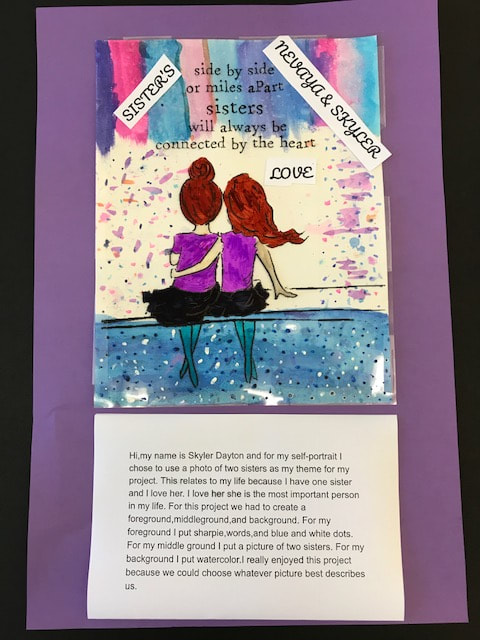
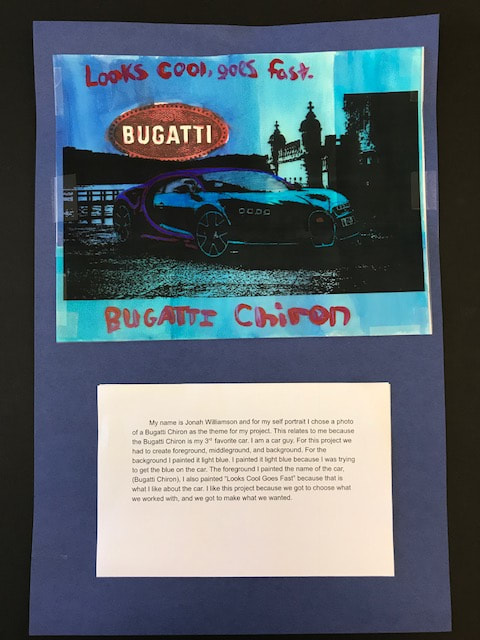
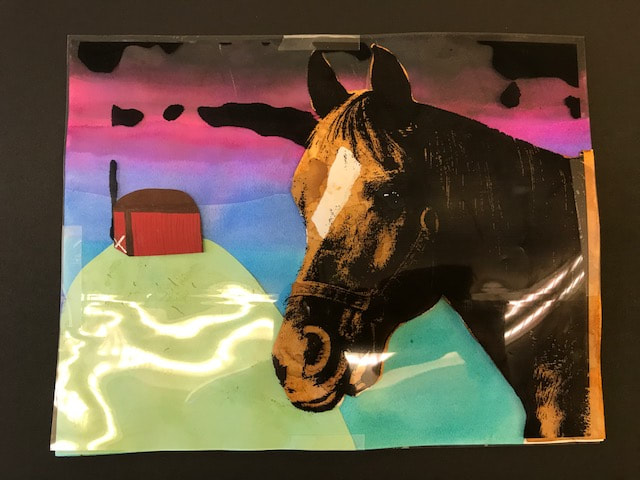
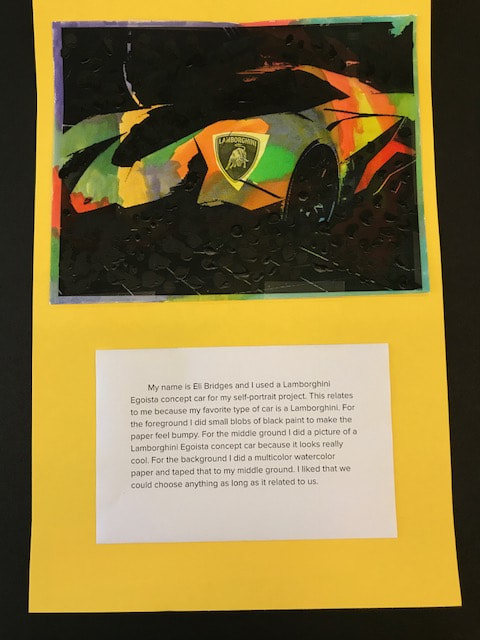
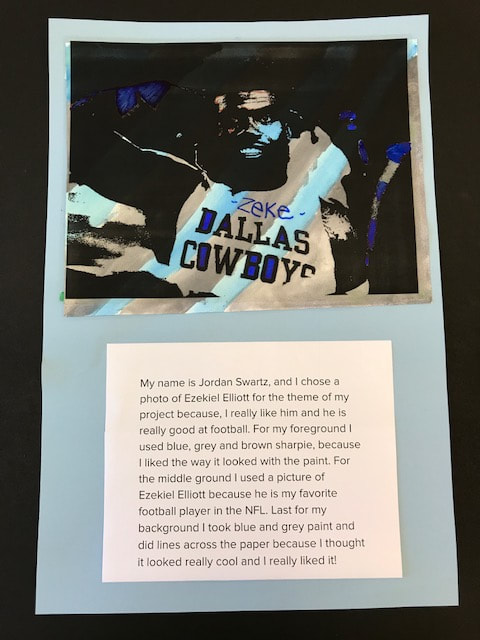
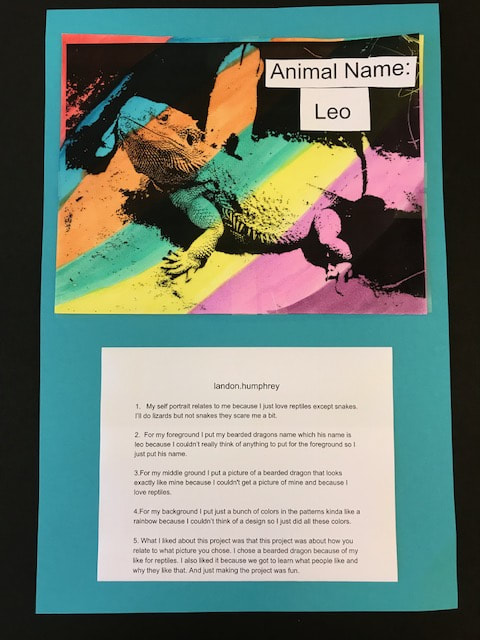
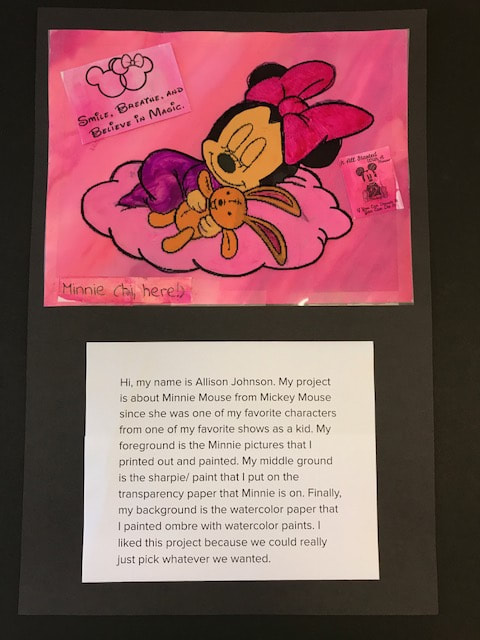
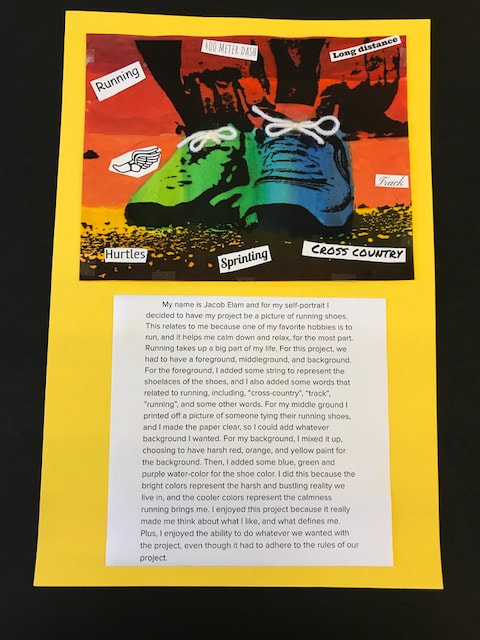
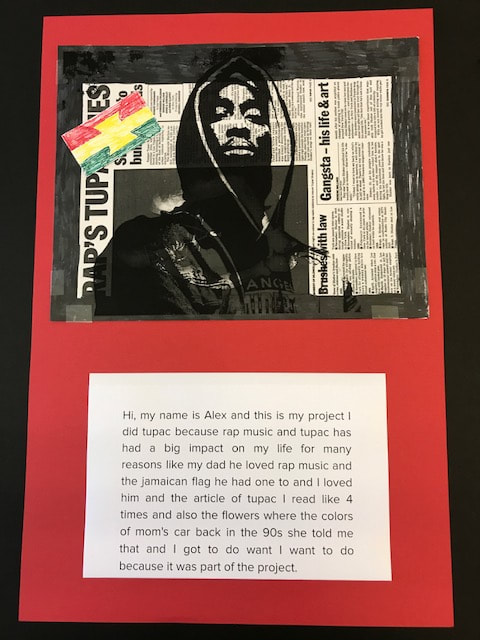
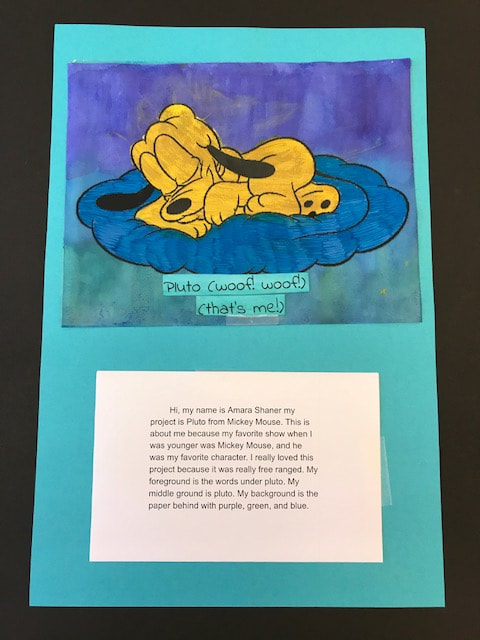
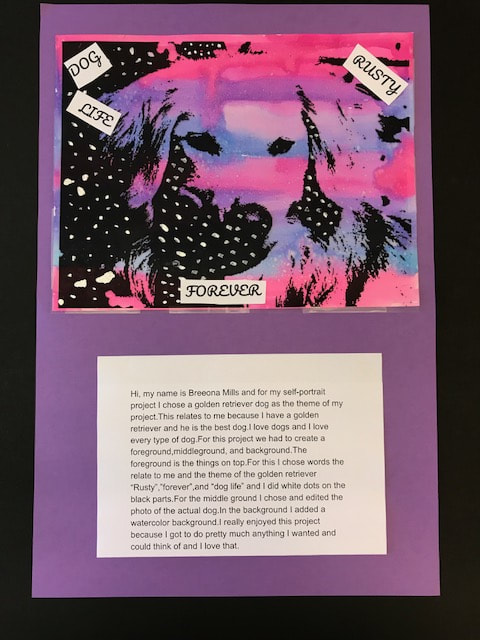
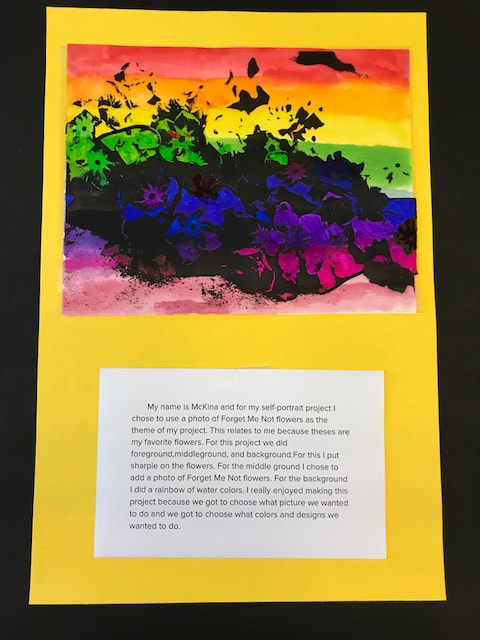
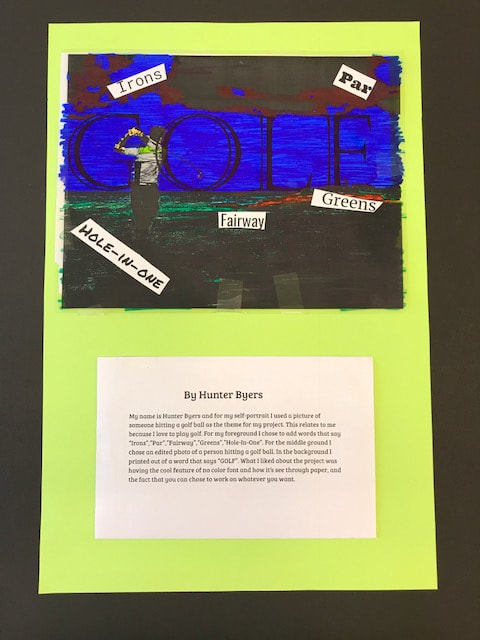
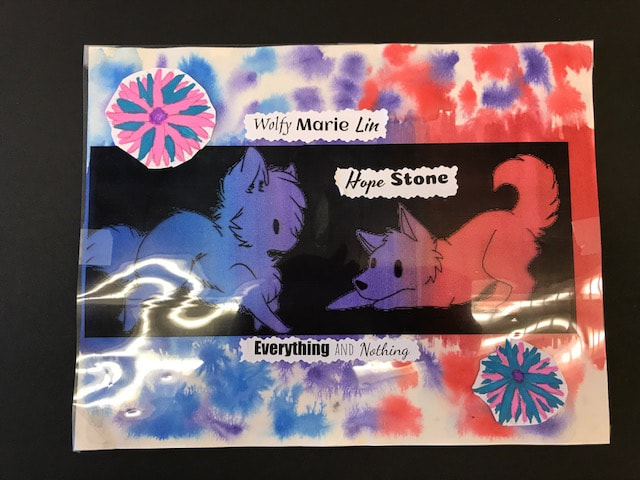
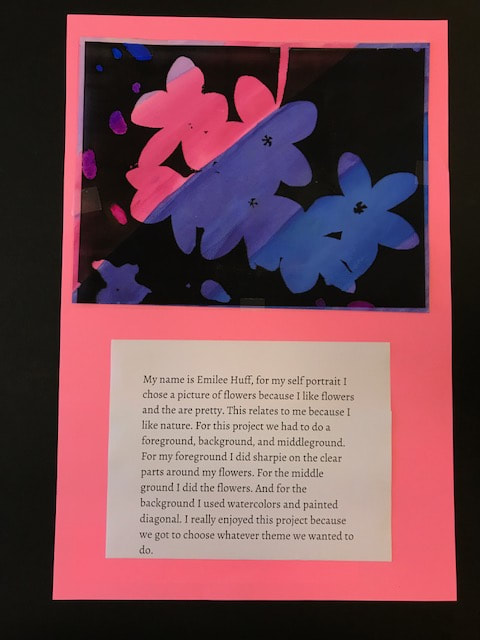
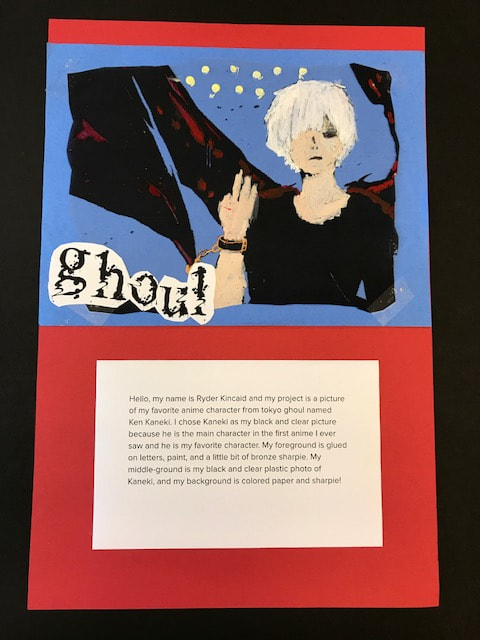
The students were asked to create any artwork with two requirements in mind: work within the "express yourself" theme and work on transparent paper. We decided to use the theme express yourself to create a self-portrait themed project. Students set out to create a project about them, first choosing a photo from the internet that meant something to them. They learned how to edit the photo in a photo editing app called Pixlr and then printed that photo on transparent paper. Students were asked to show demonstration of three different art techniques (for example: Watercolor, text and sharpie) and they needed to have a foreground (items added on top), middle ground (their transparency), and a background (items added behind). The students really impressed me with their ability to work with layering. Students ended the project by writing an artist's statement explaining what their project was about, the materials they used, and what their foreground, middle ground and background were.
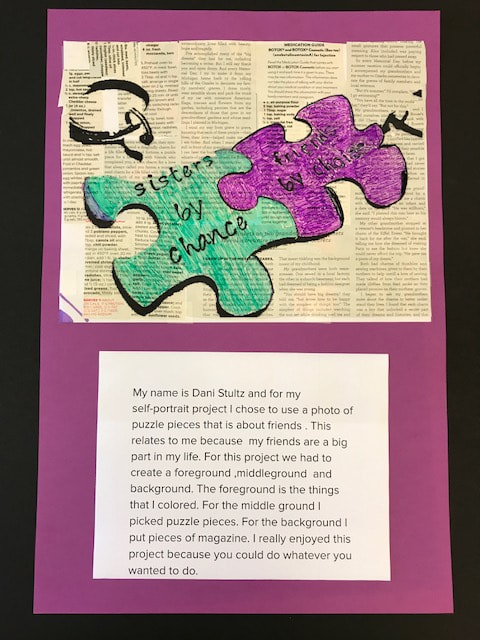
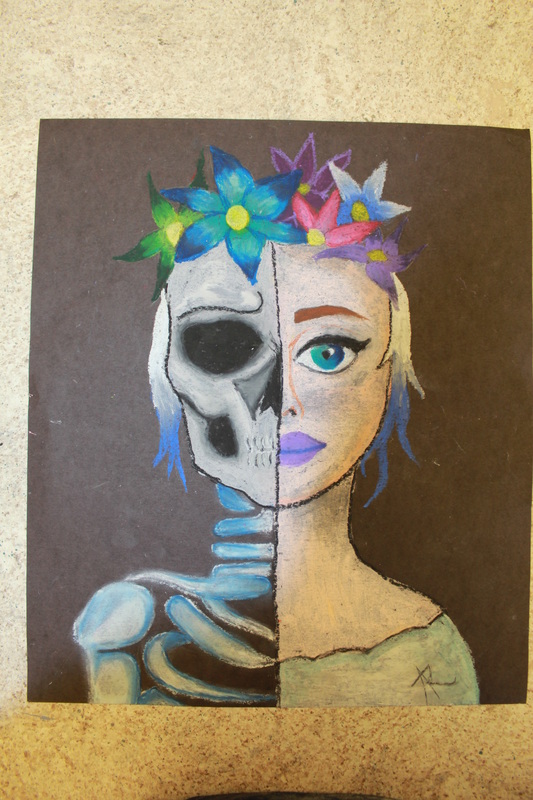
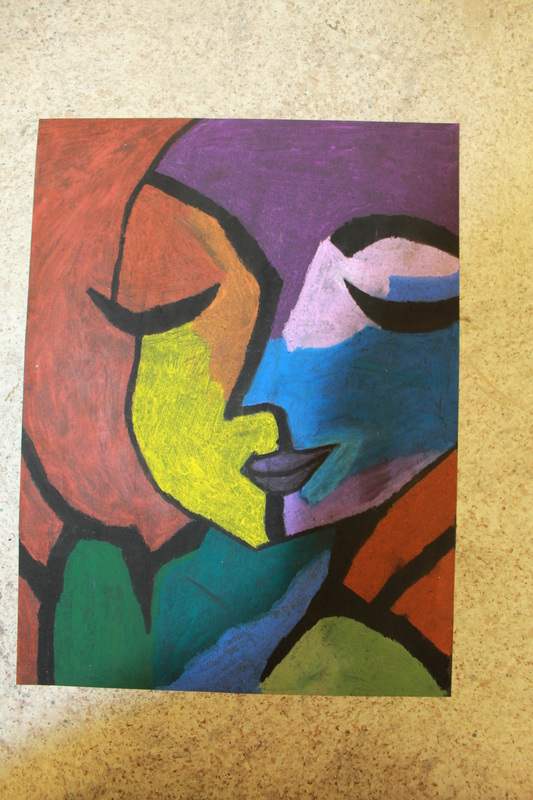
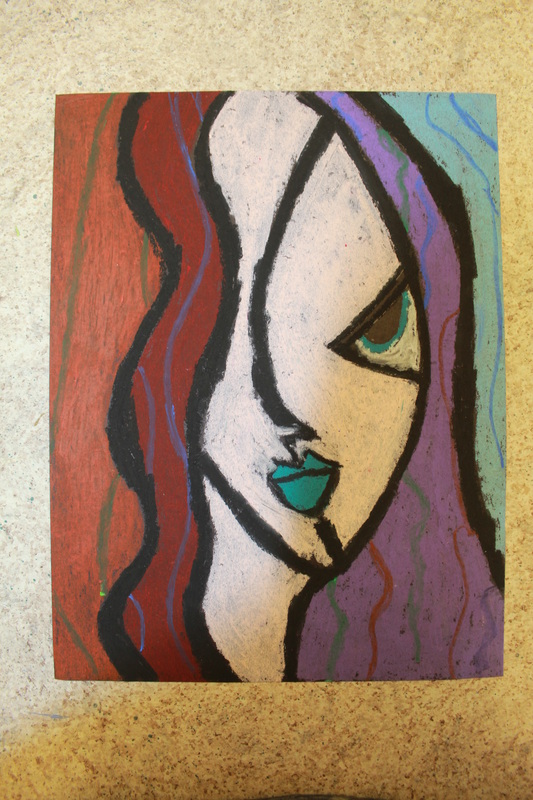
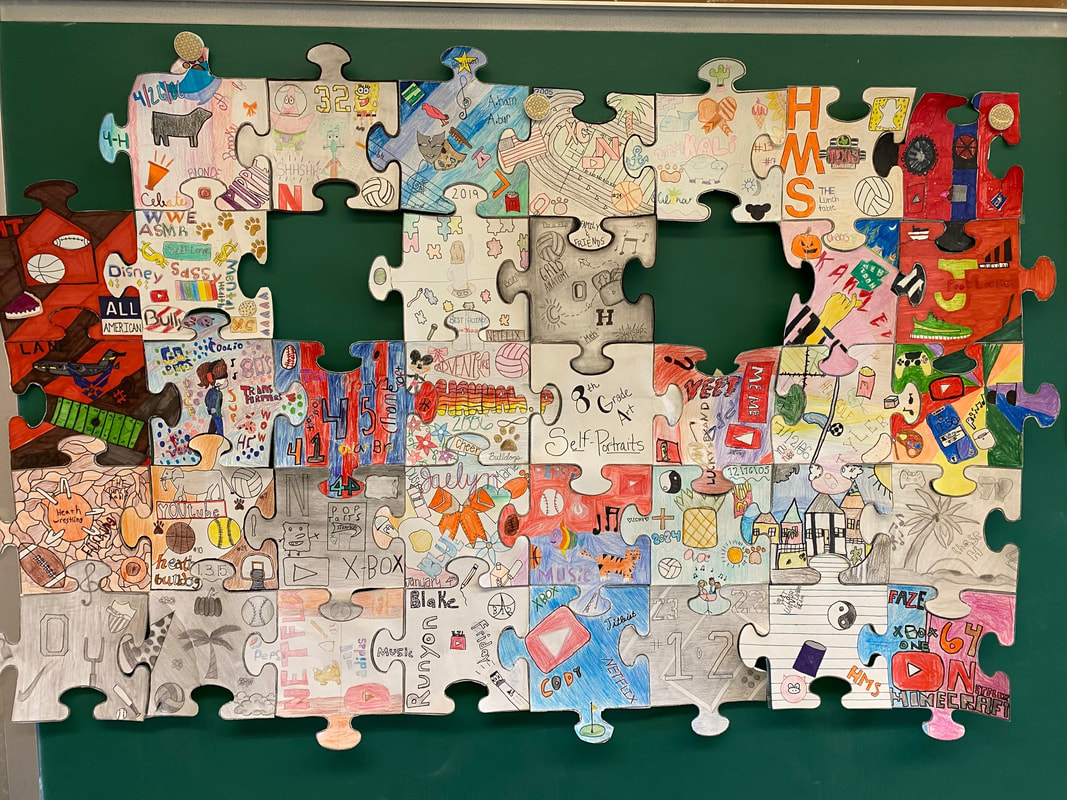
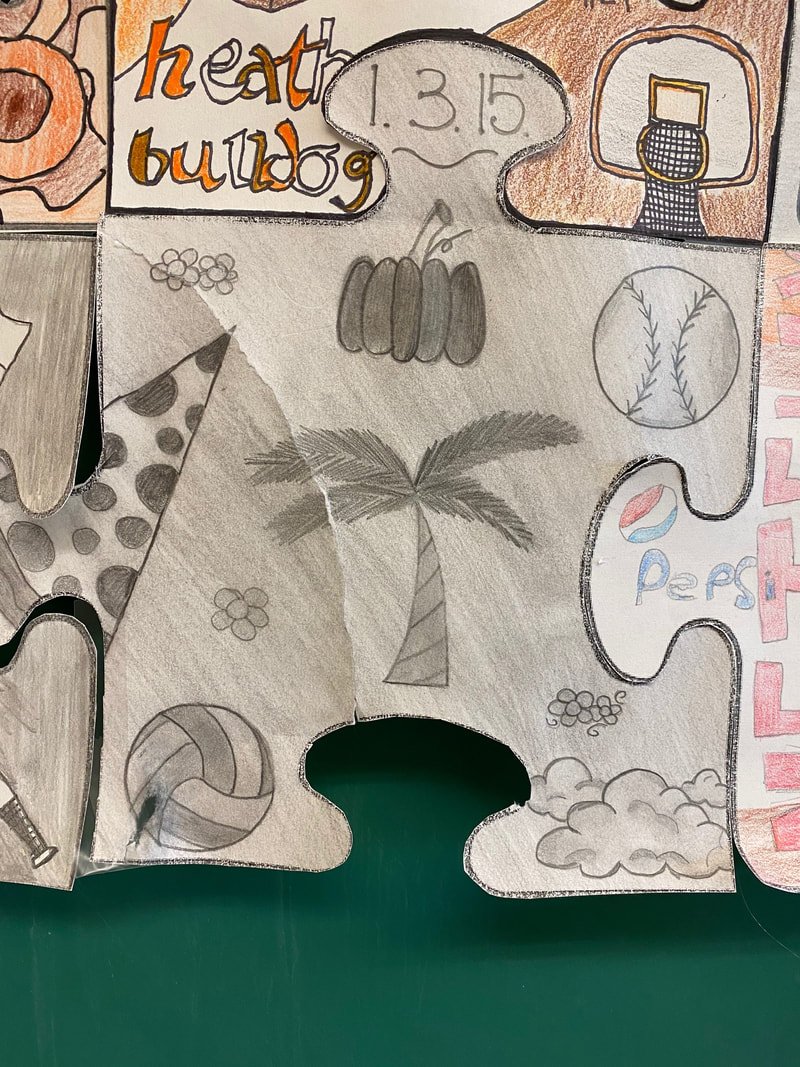
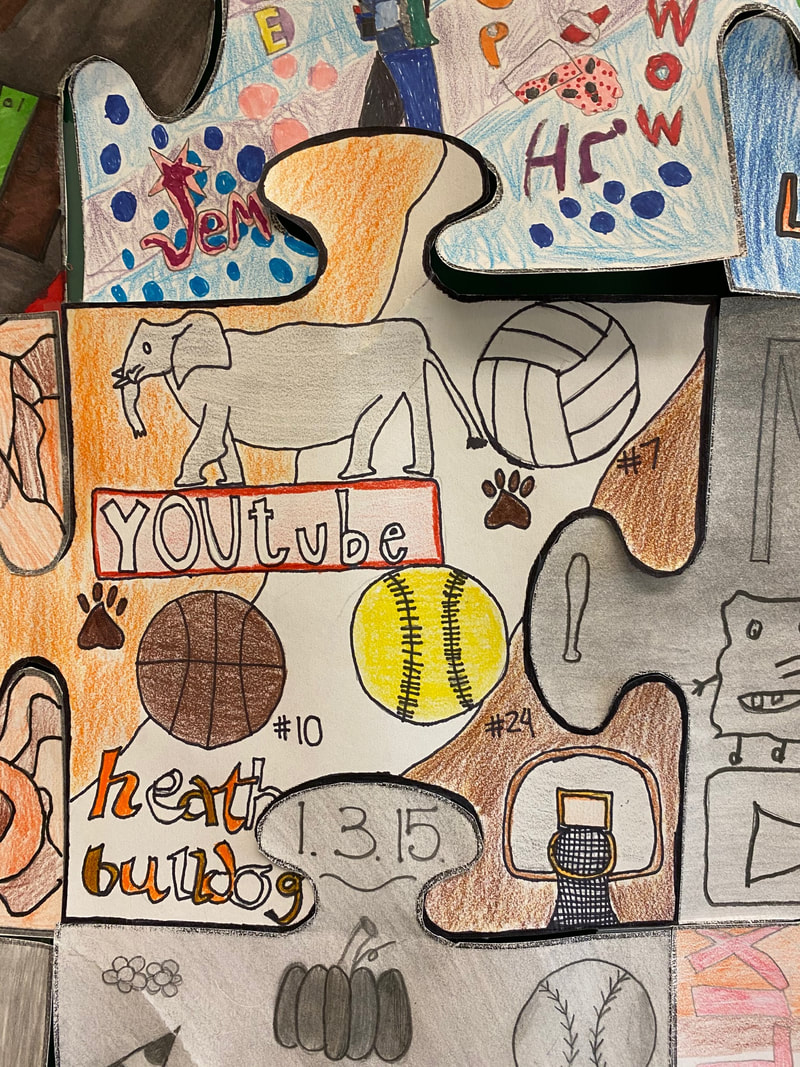
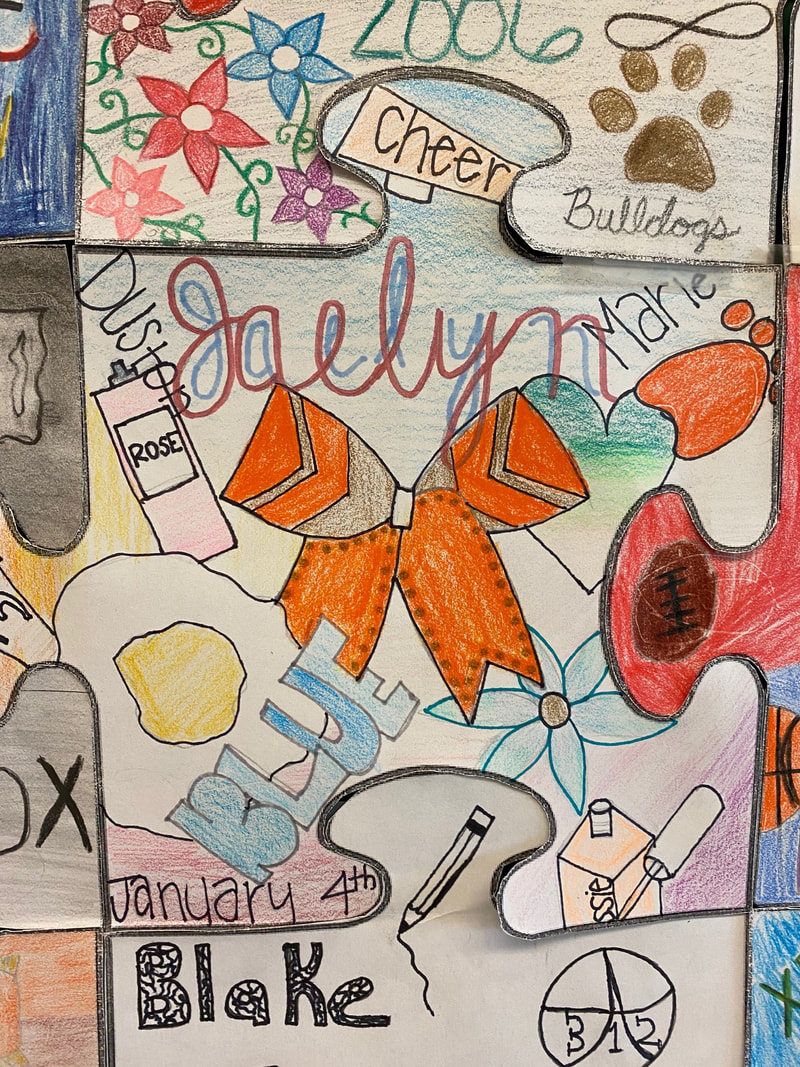
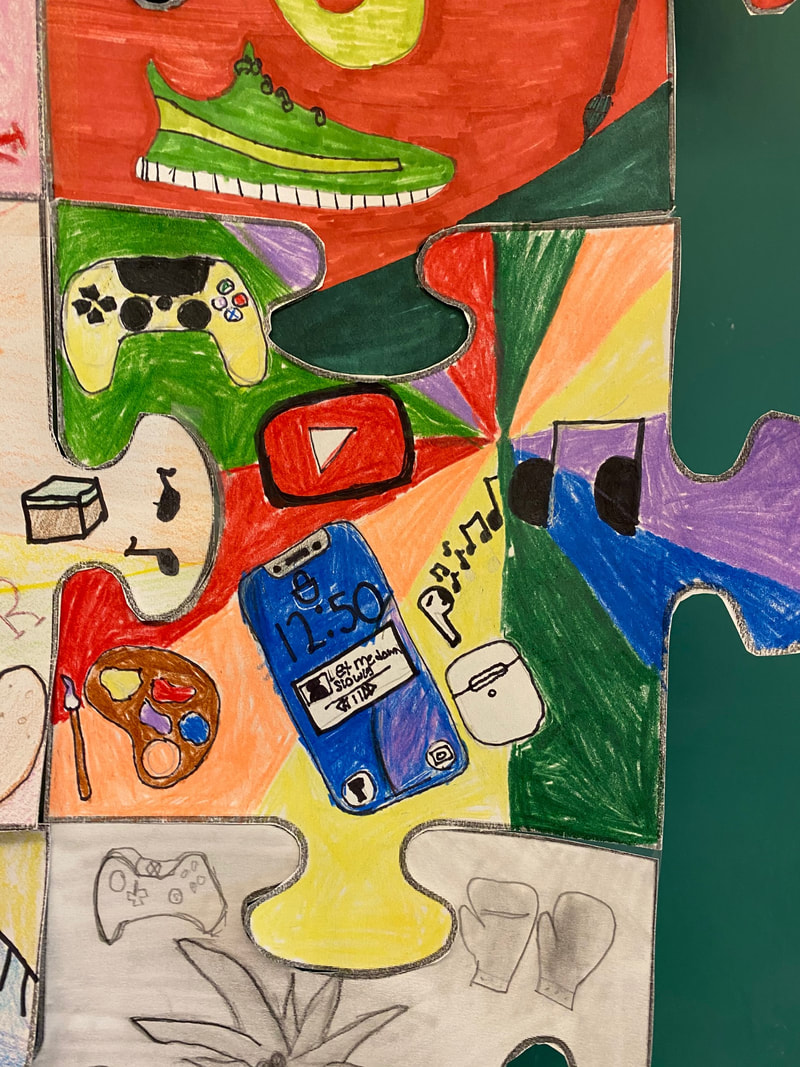
Puzzle Piece Self-Portraits
|
|

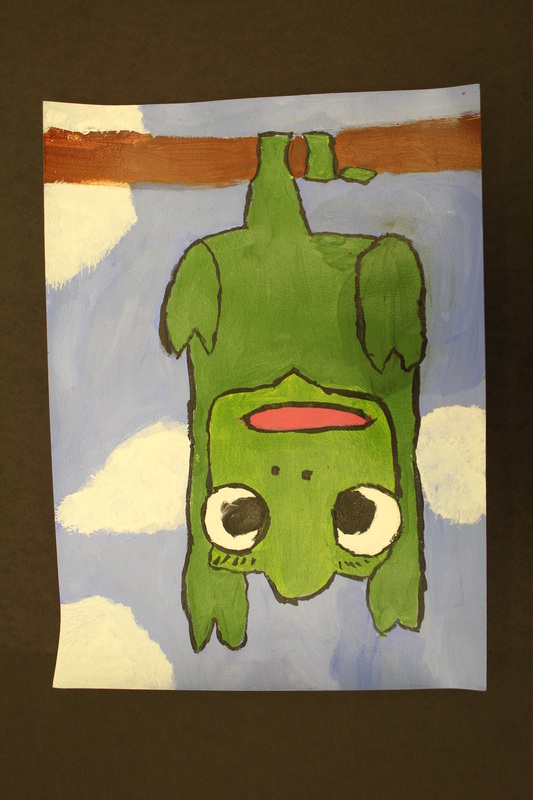
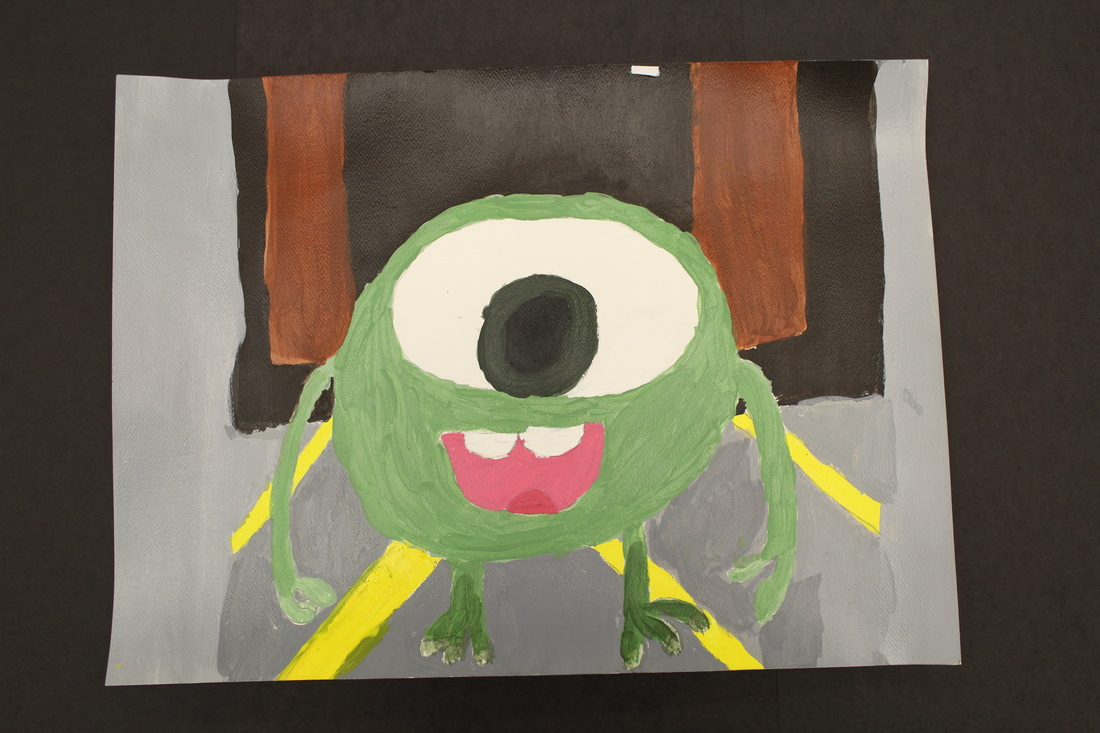
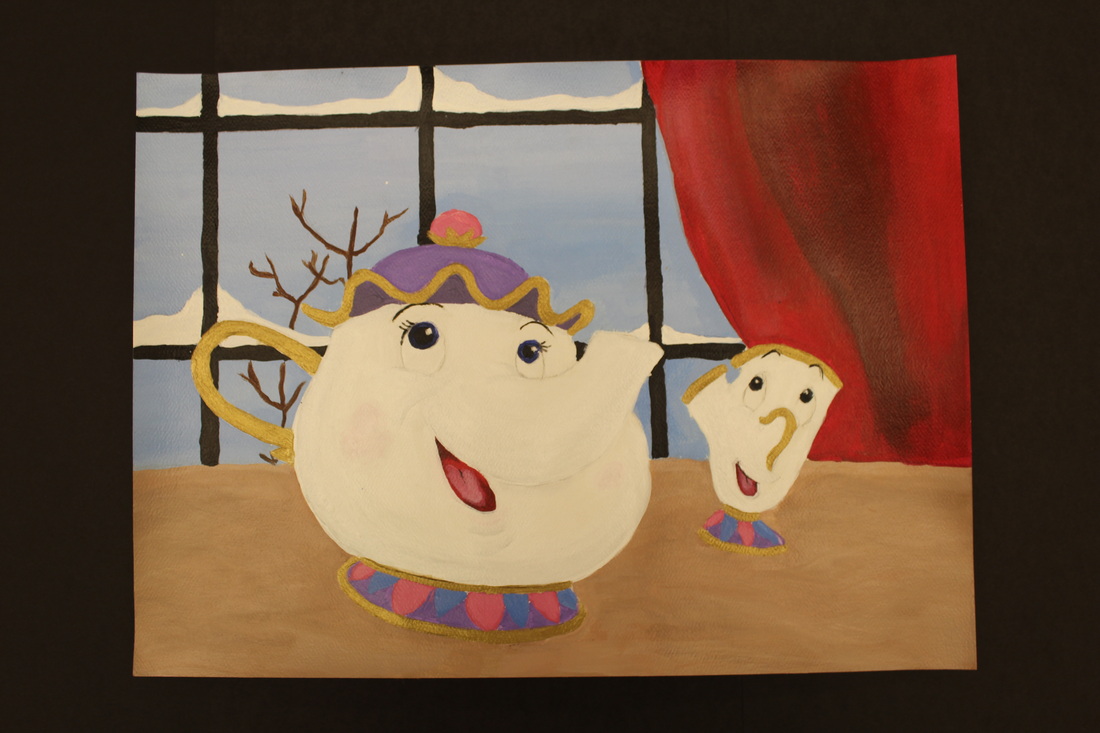
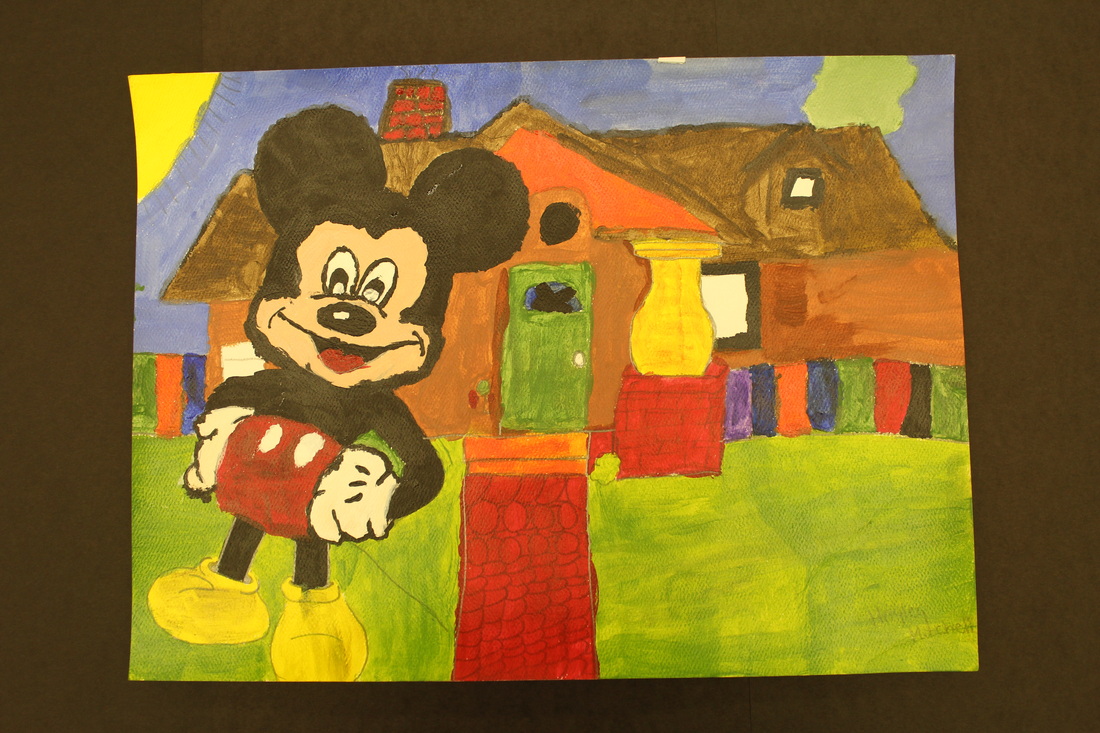
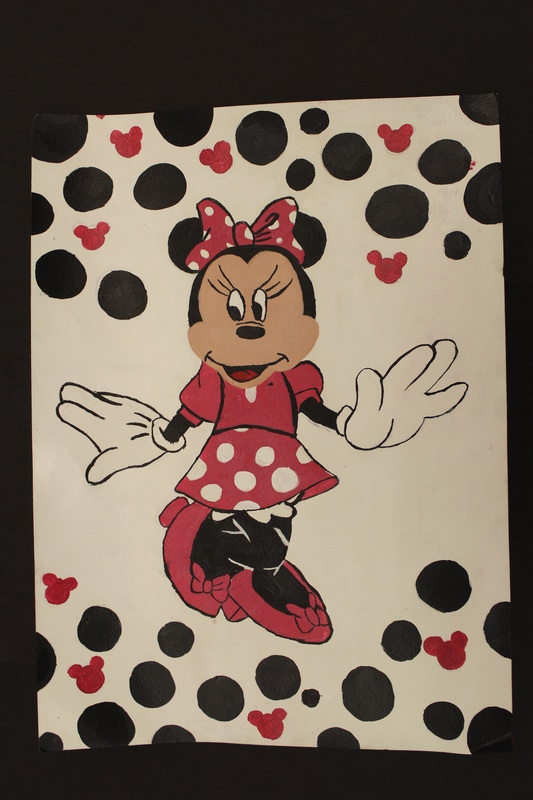
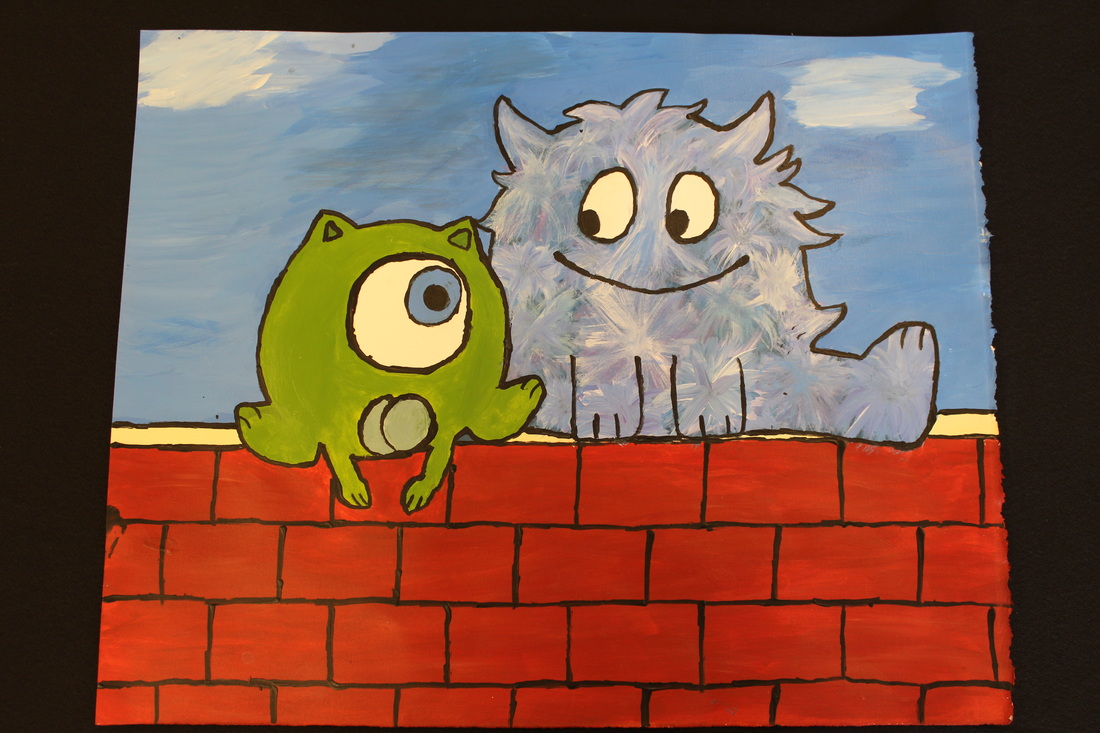
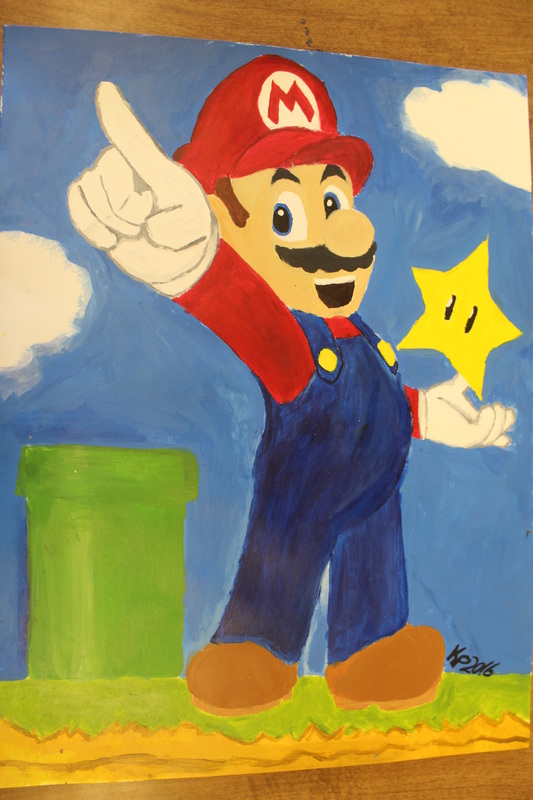
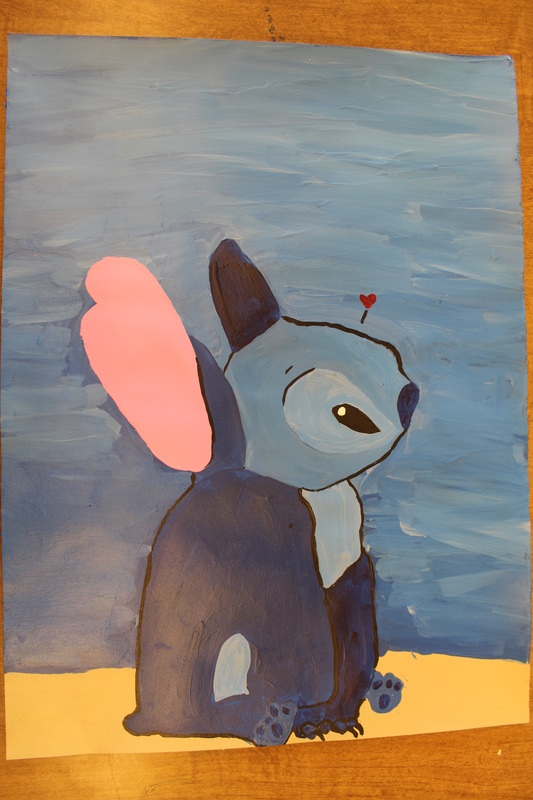
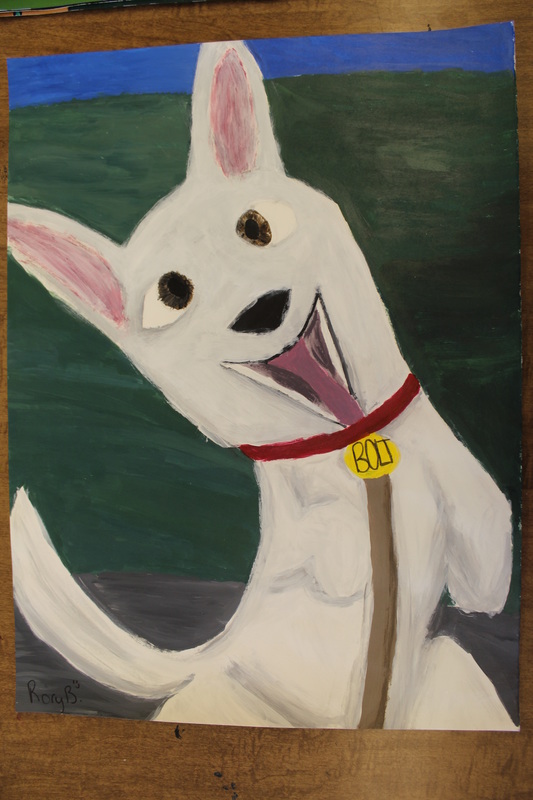
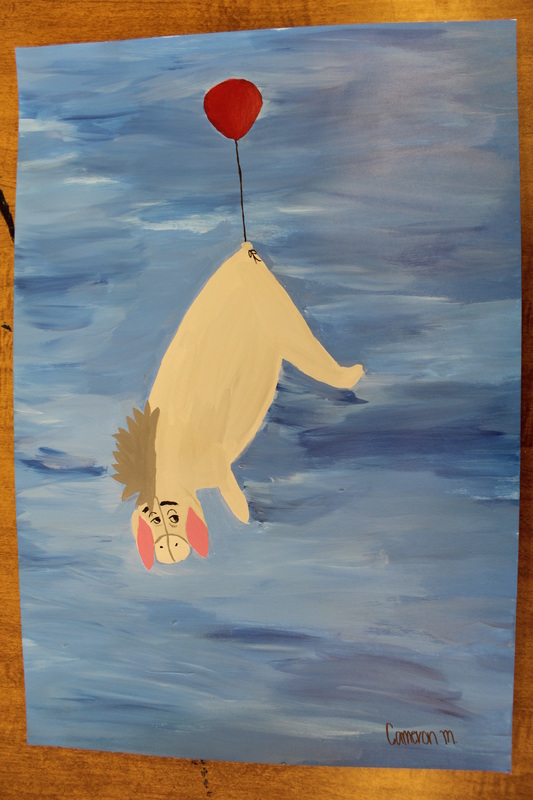
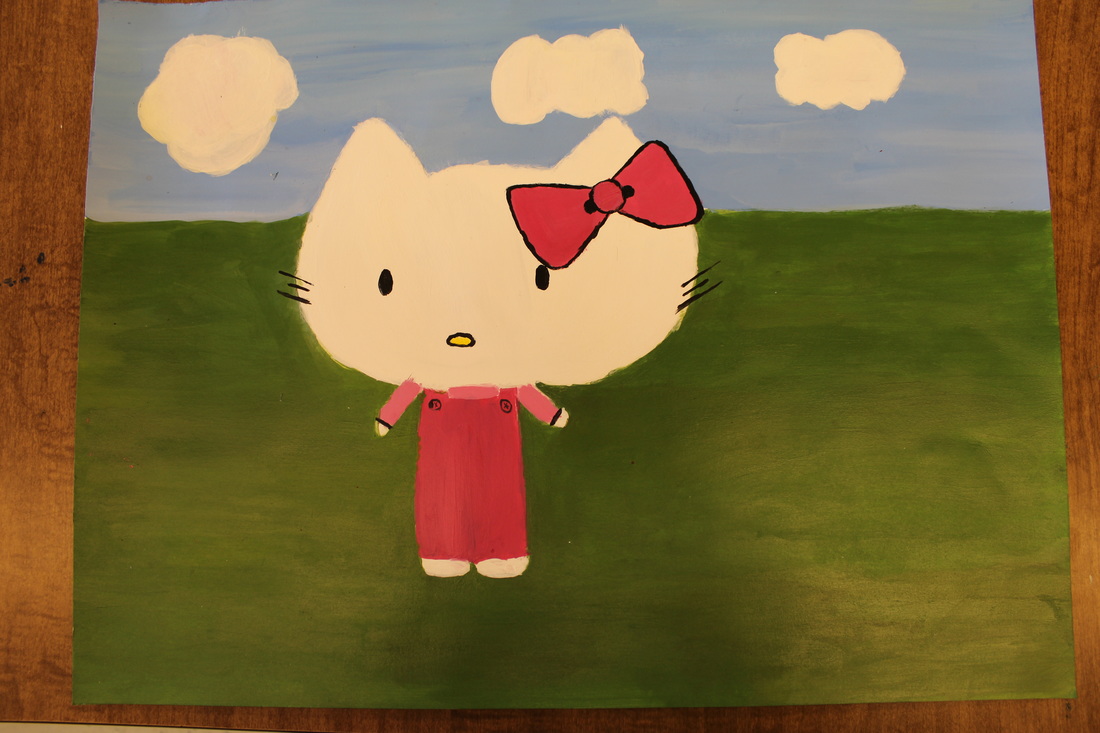
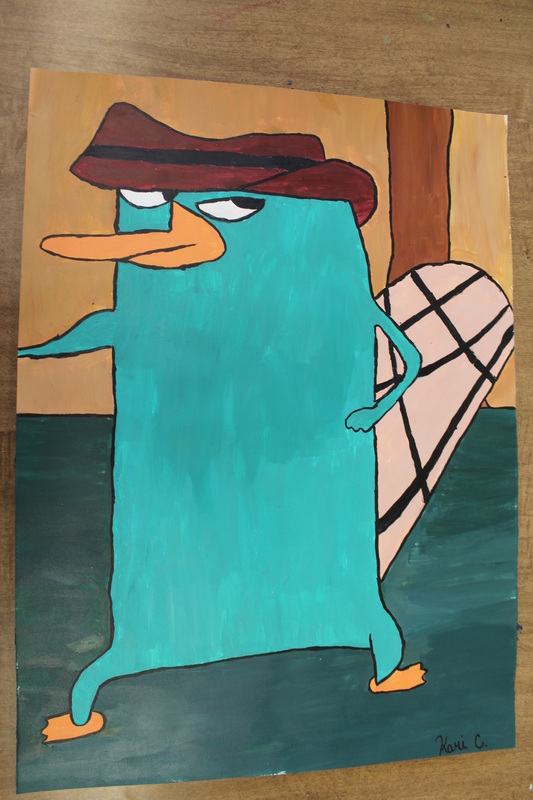
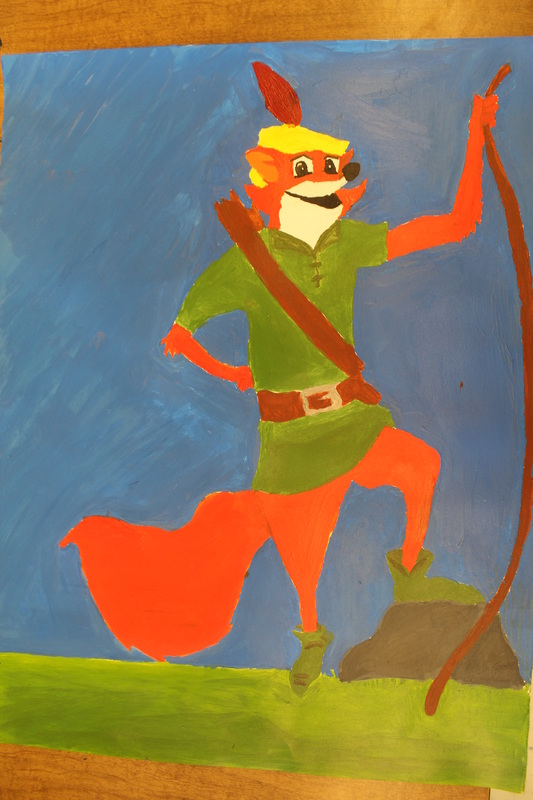
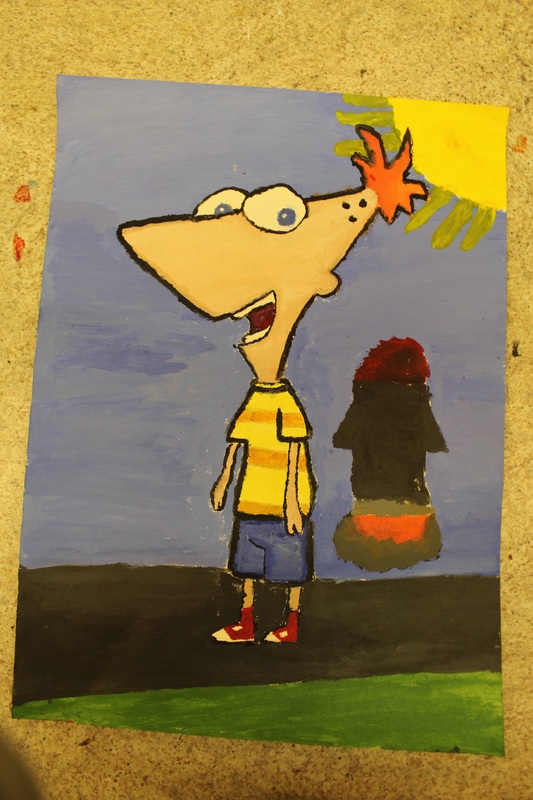
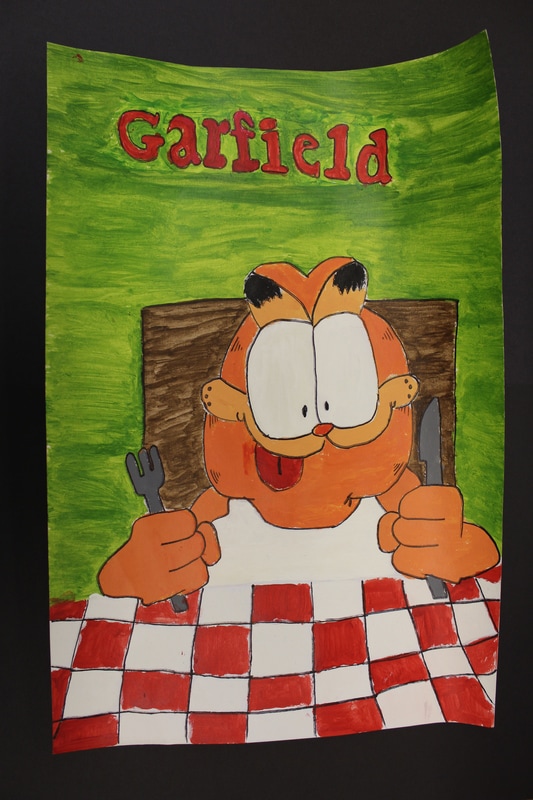
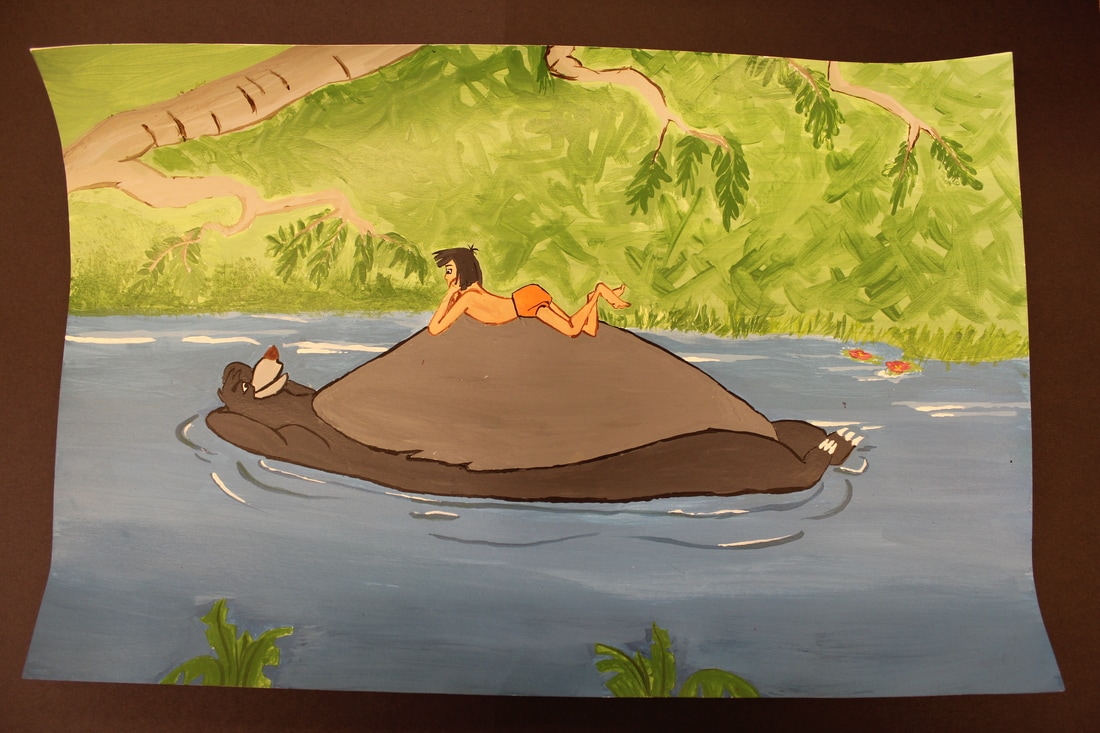
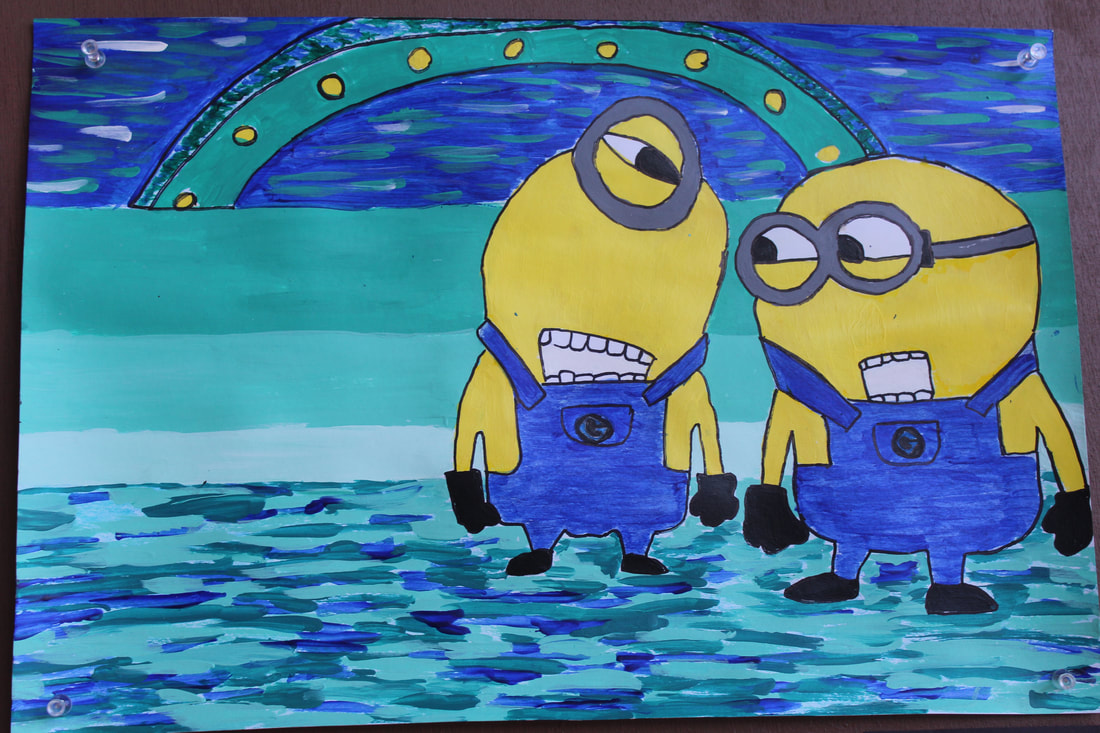
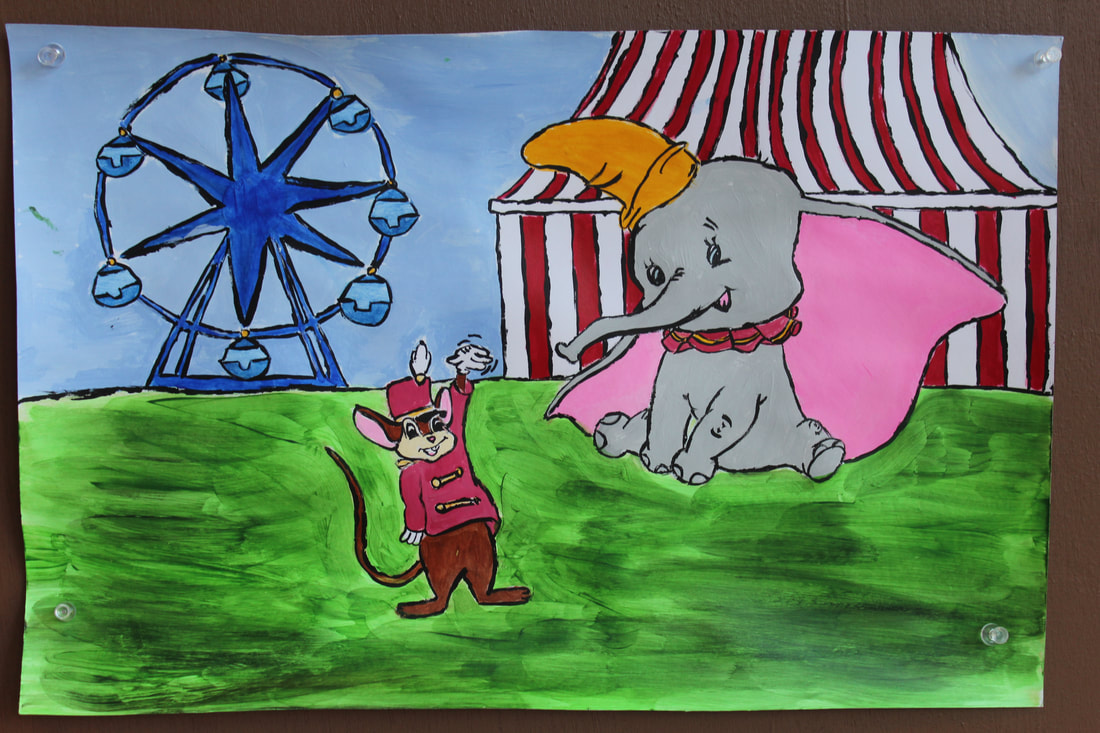
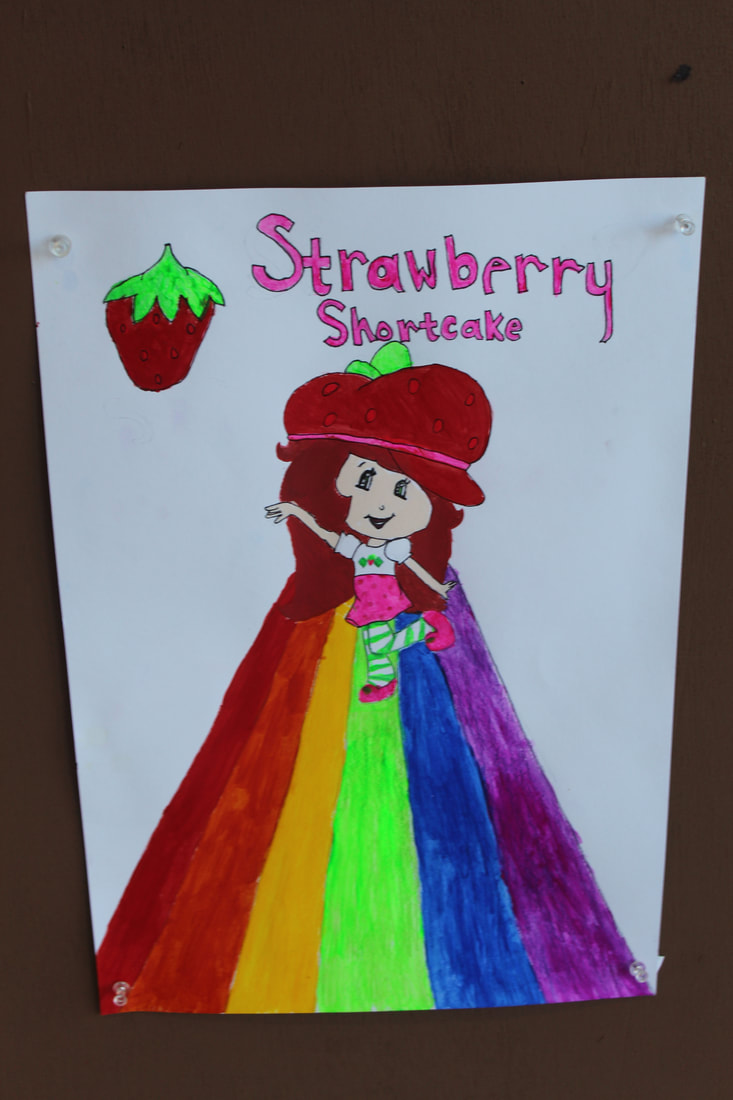
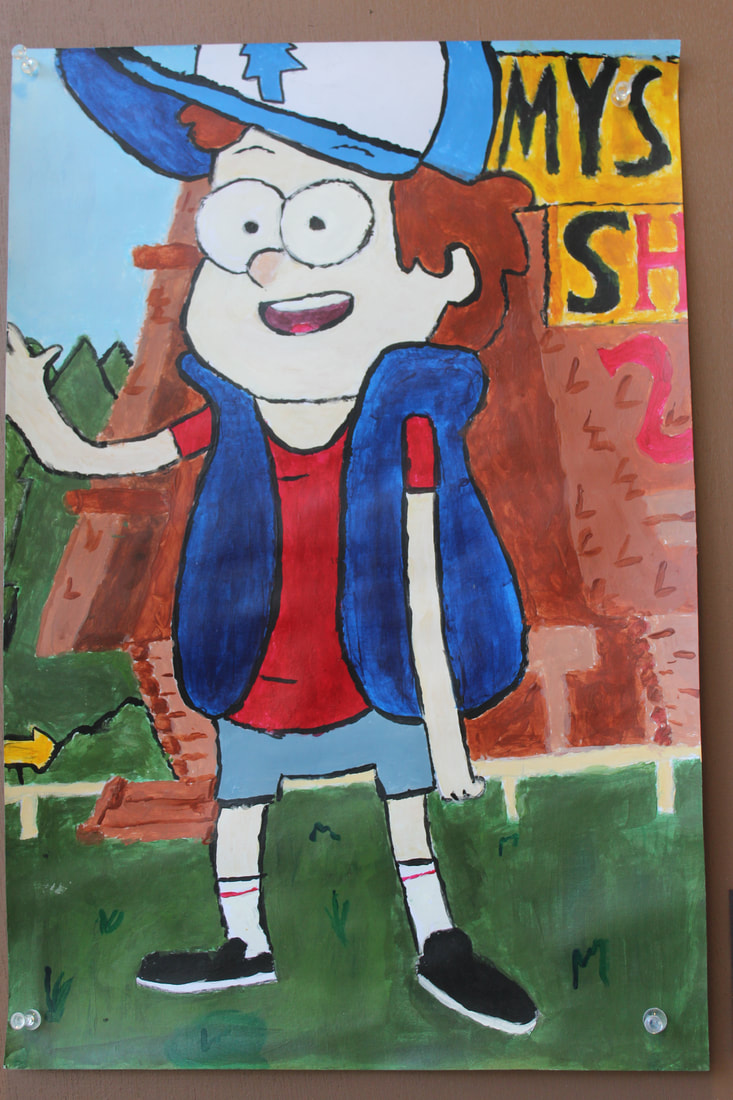
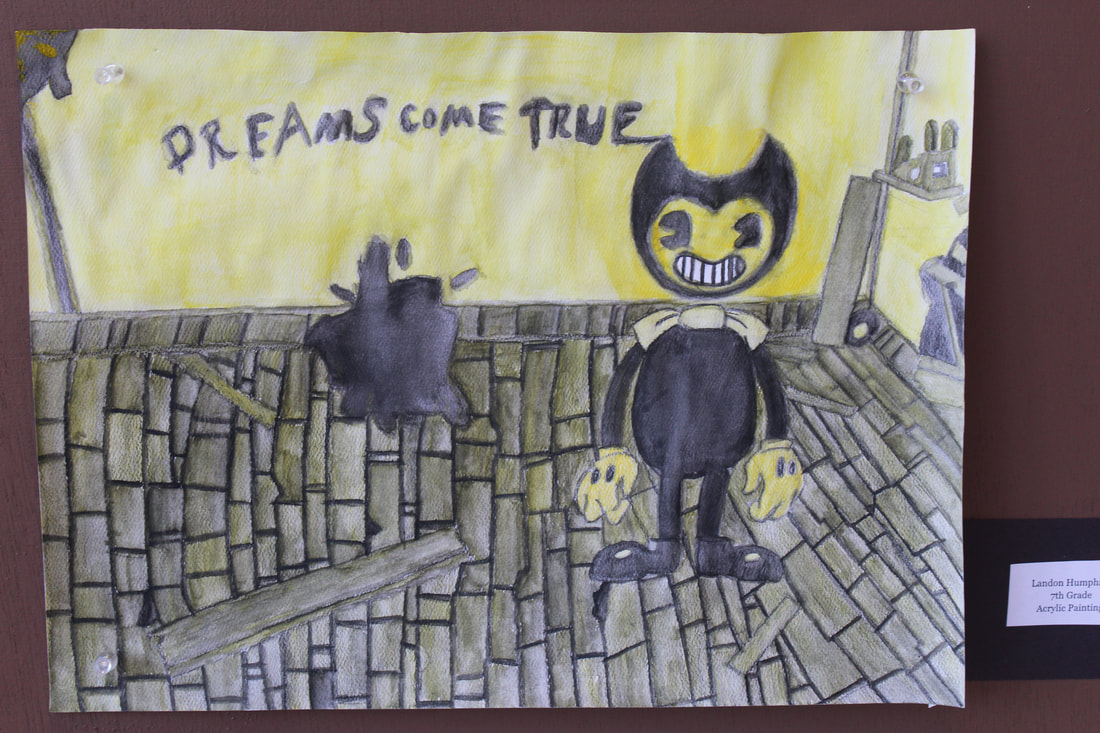
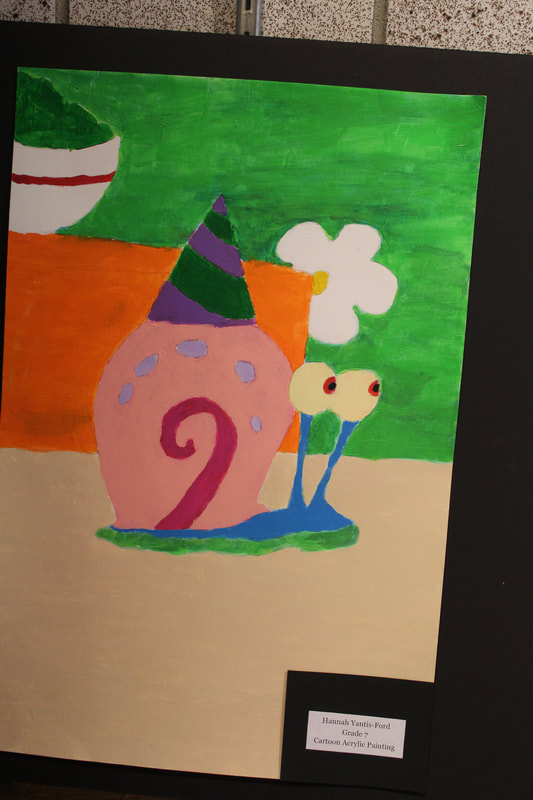
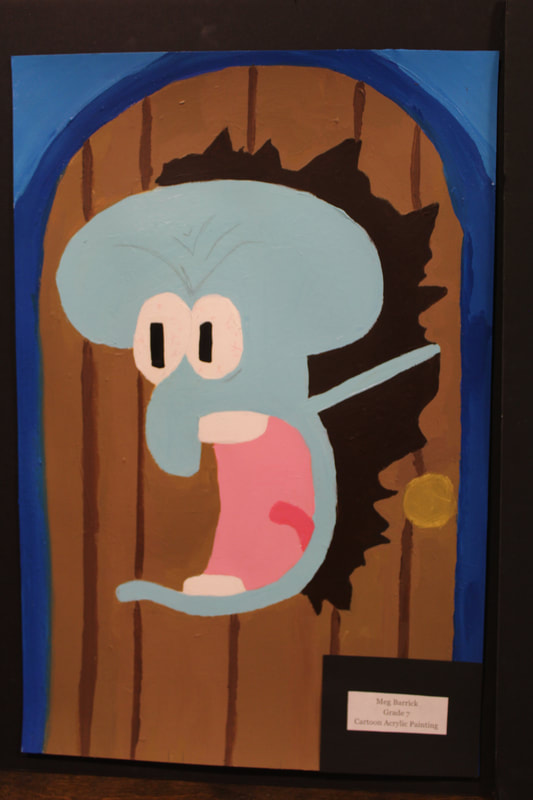
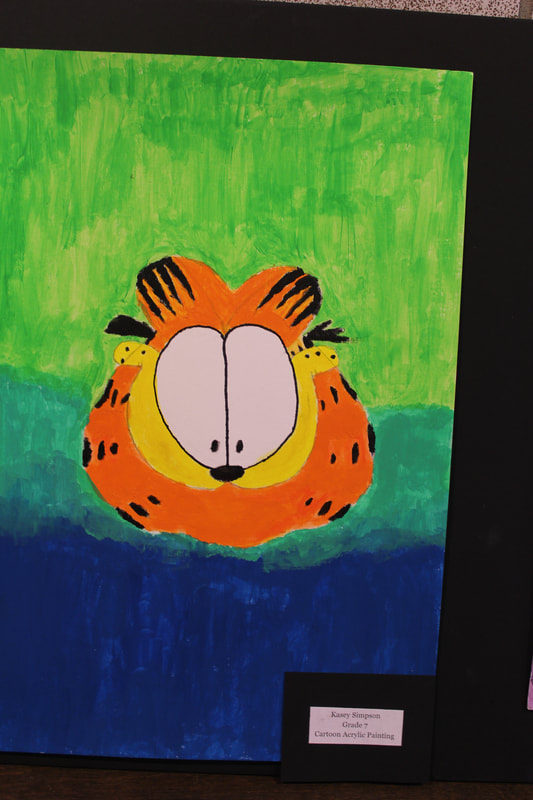
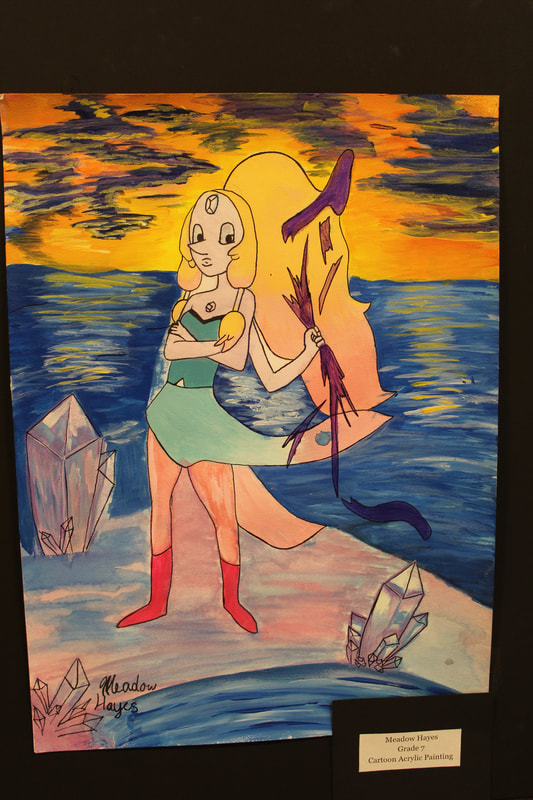
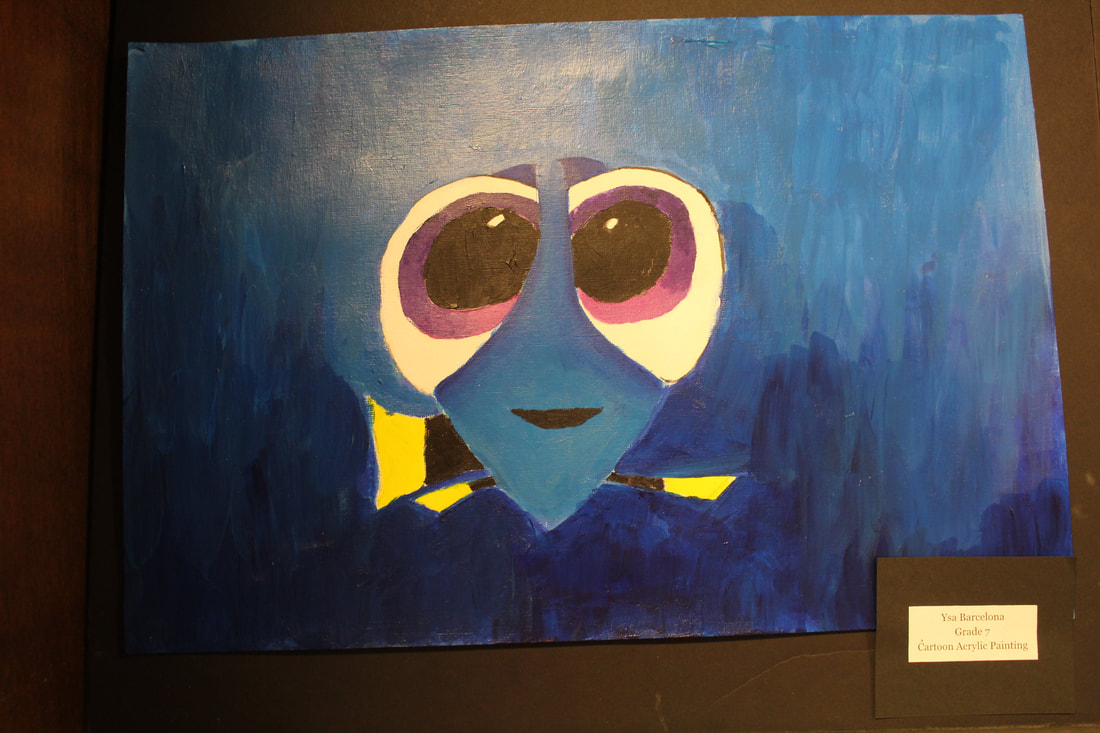
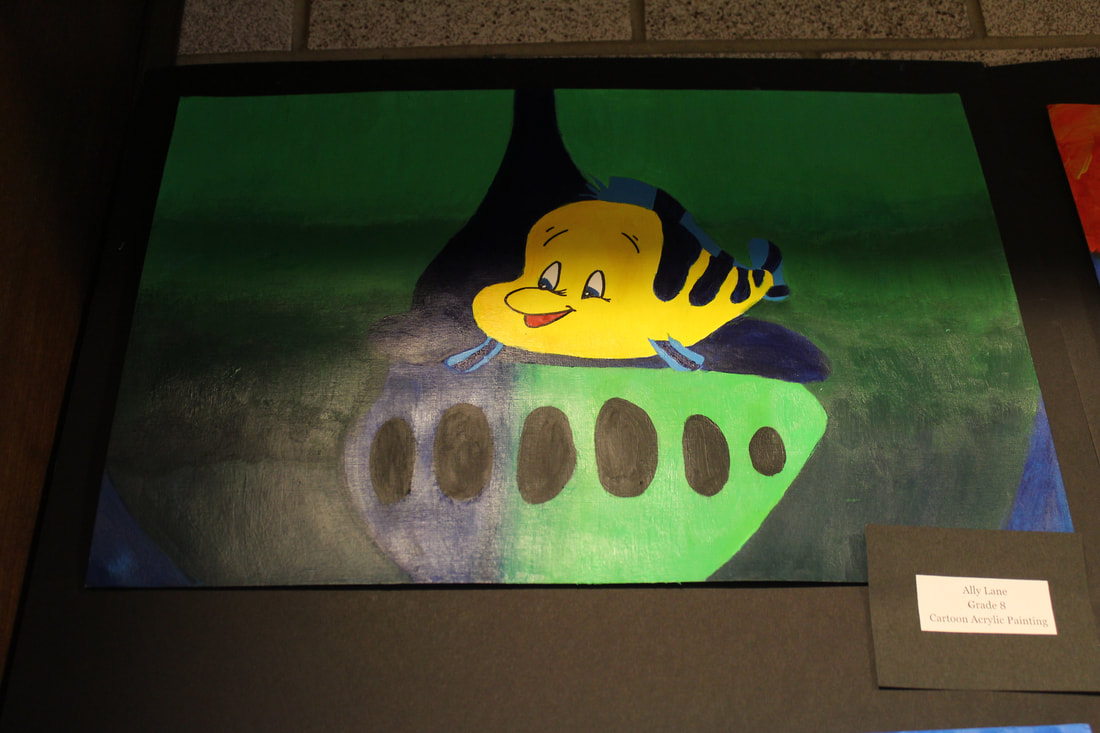
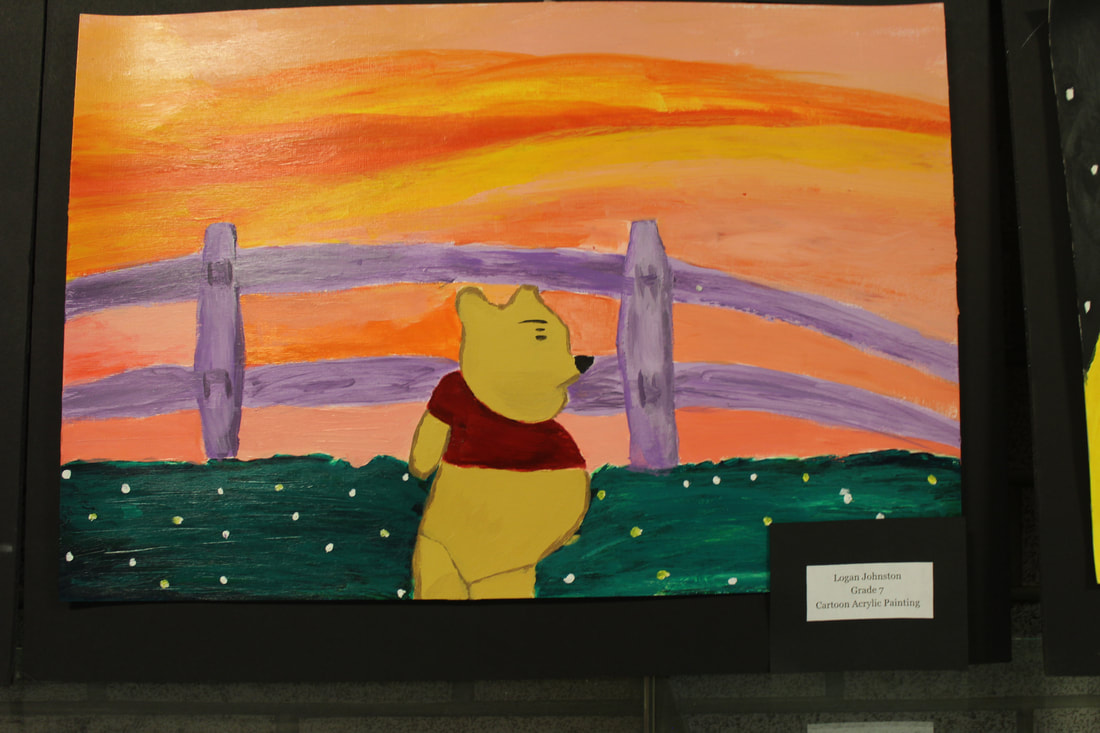
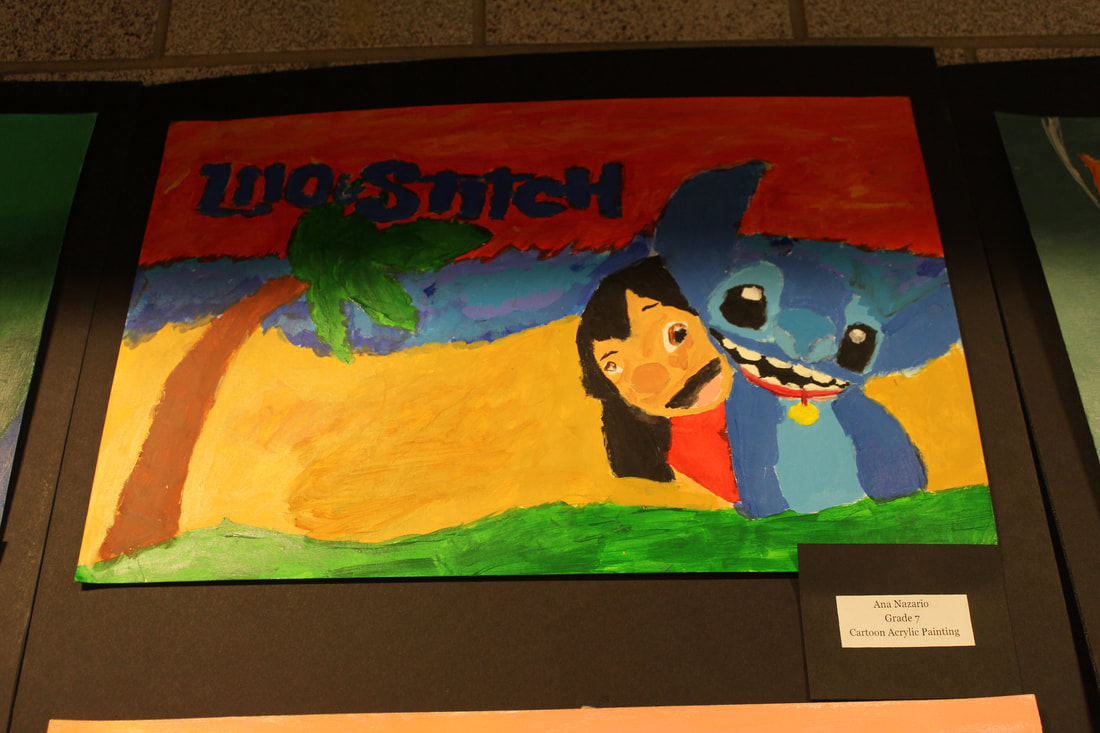
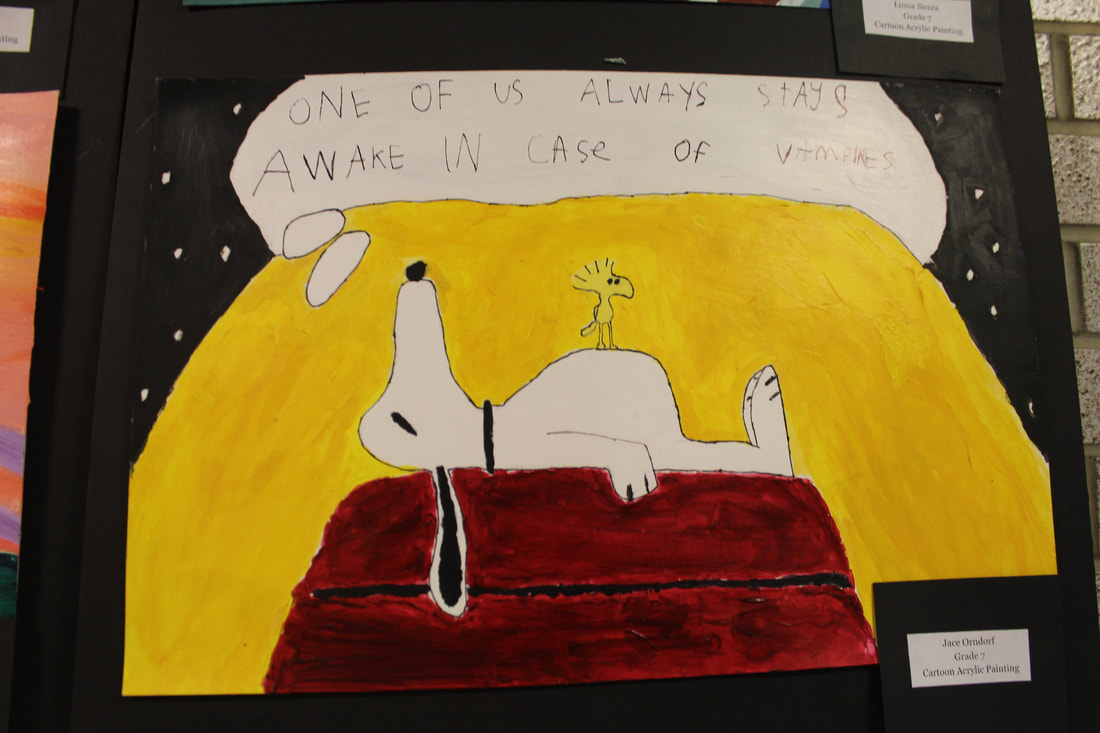
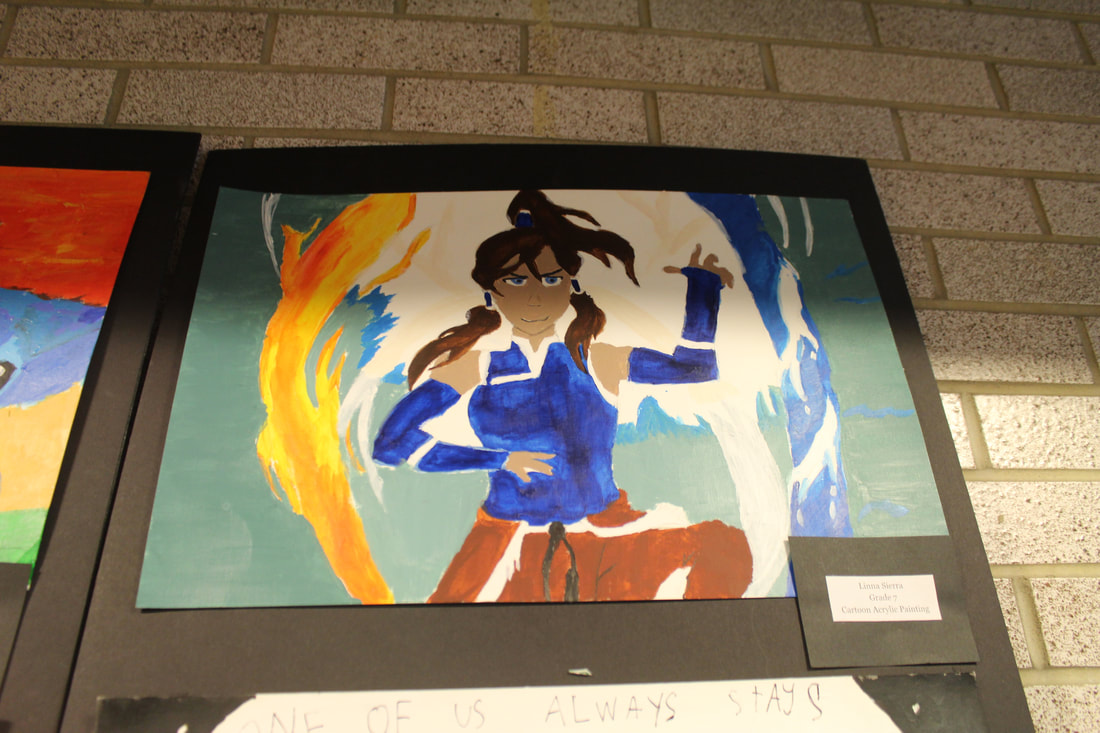
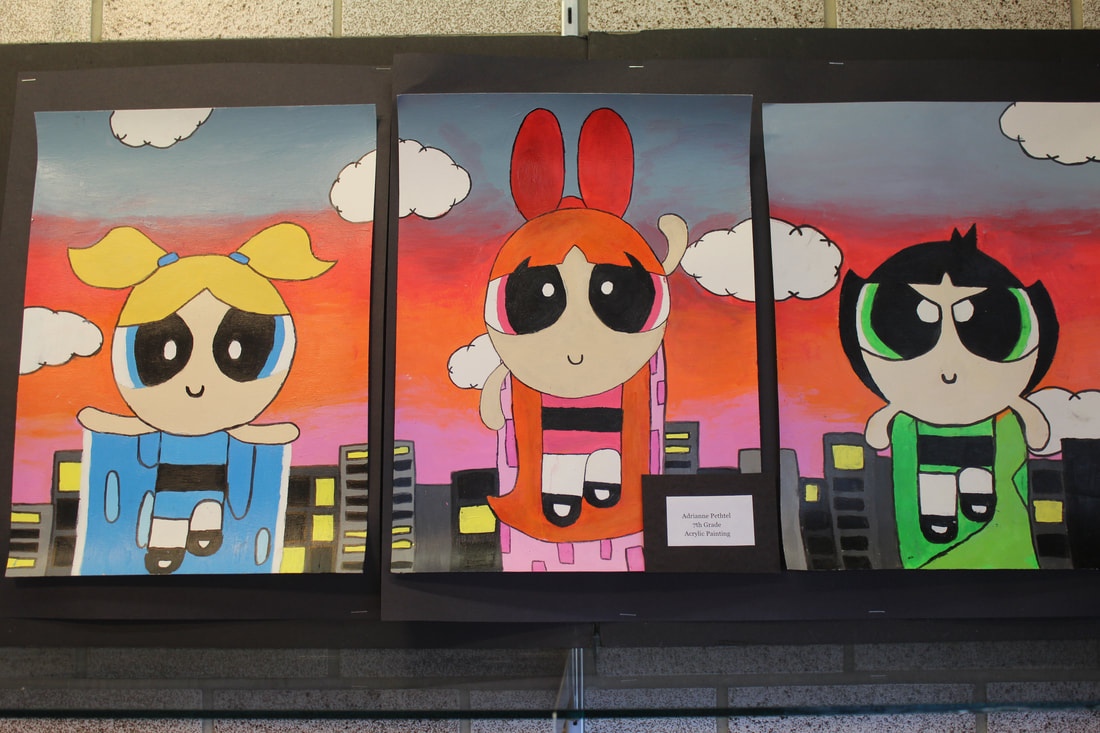
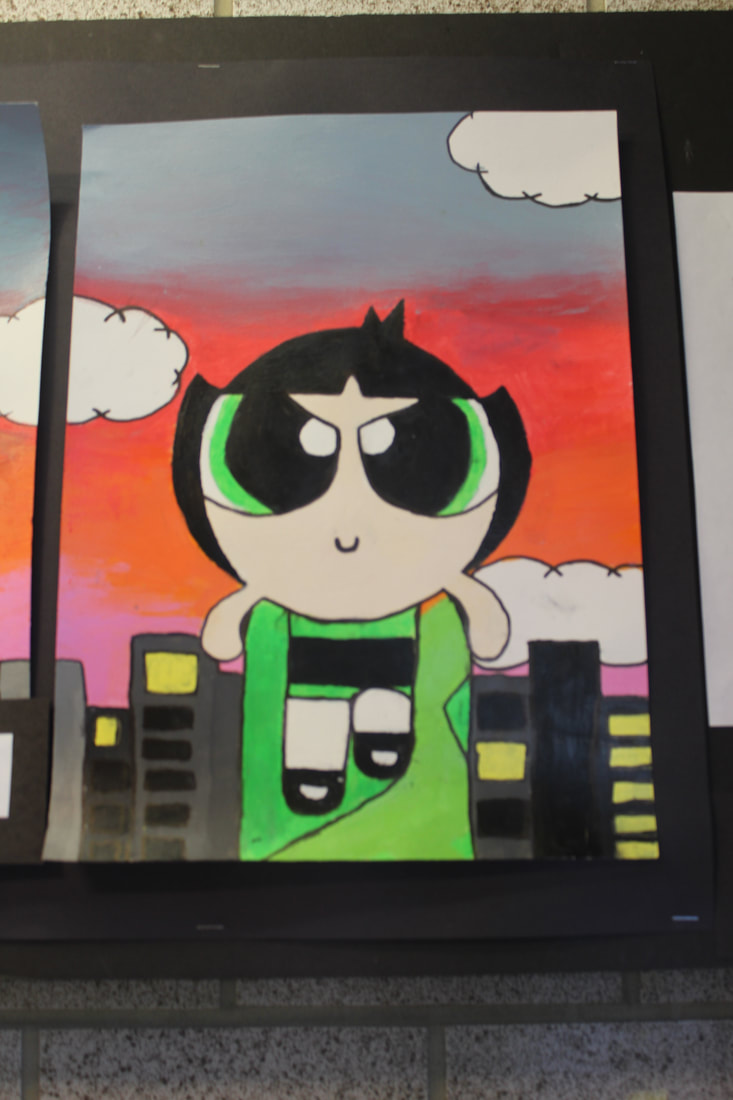
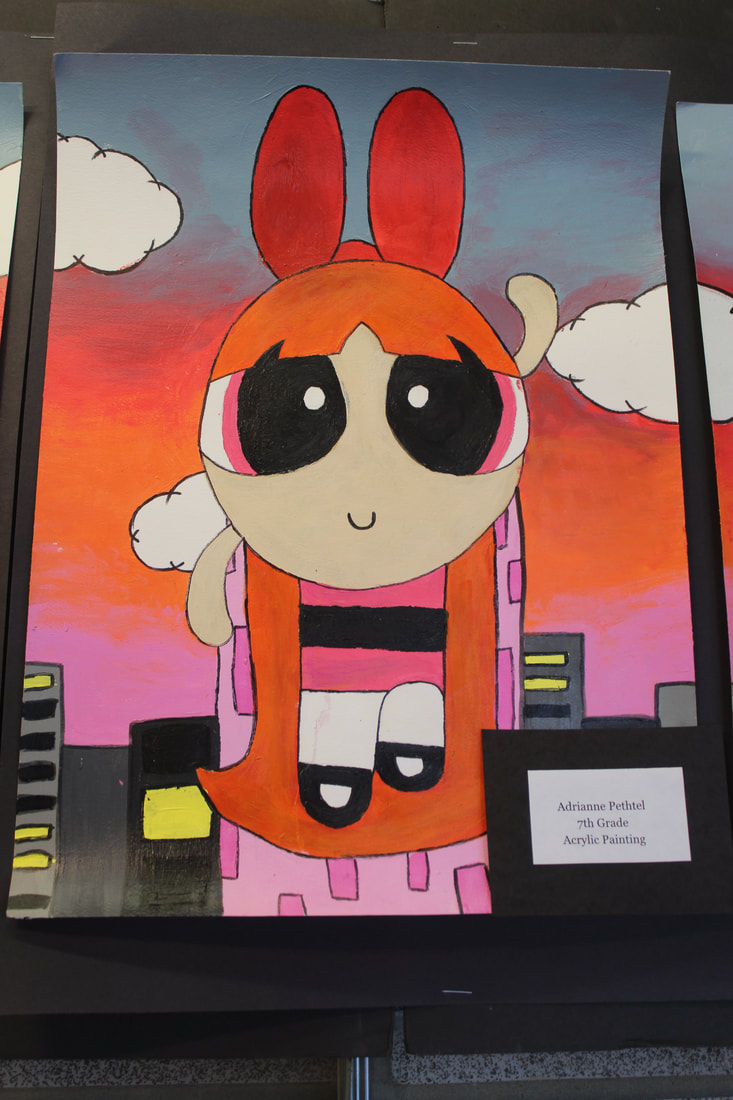
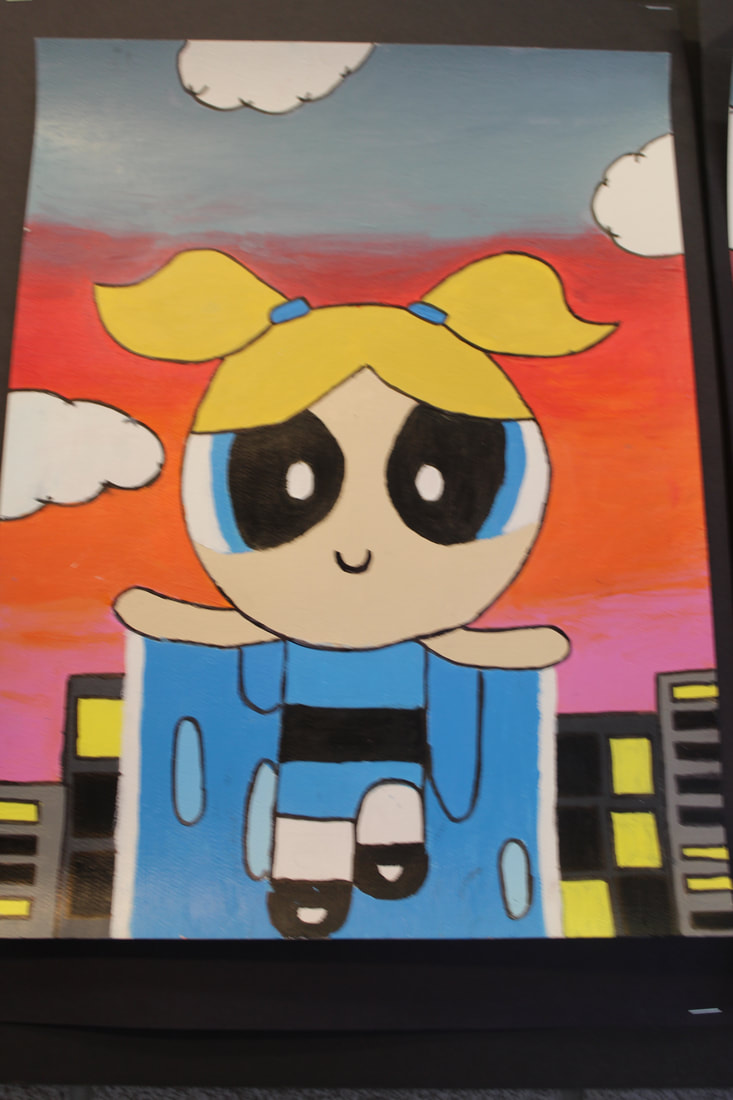
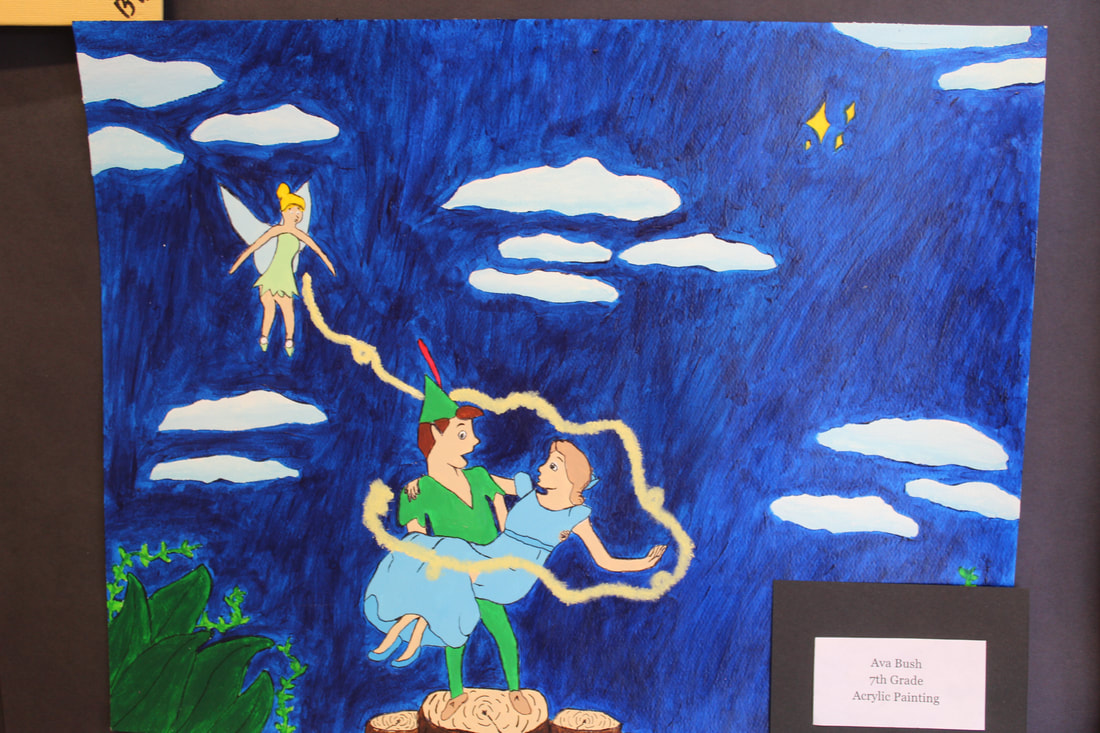
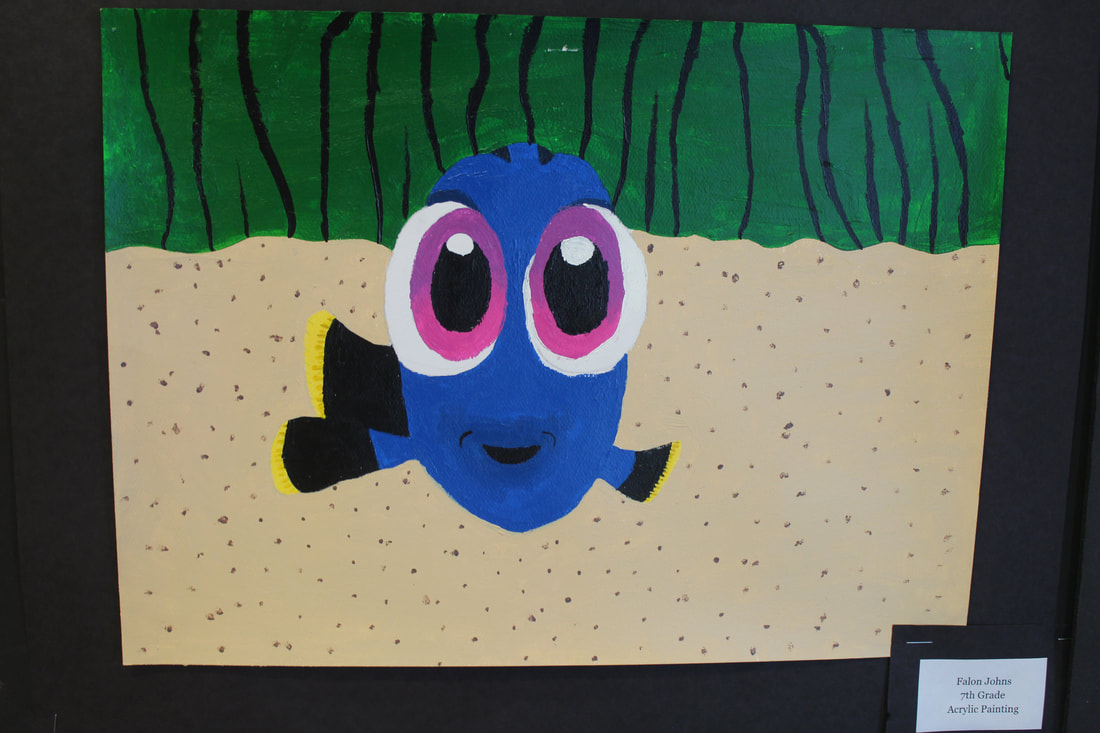
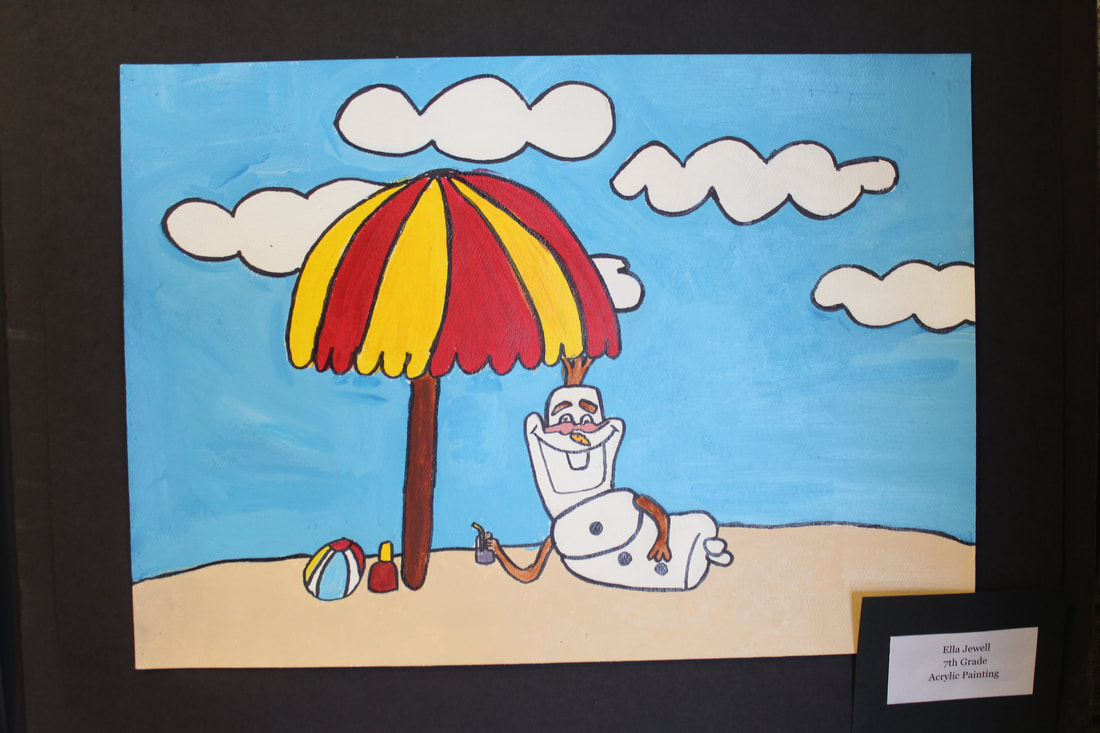
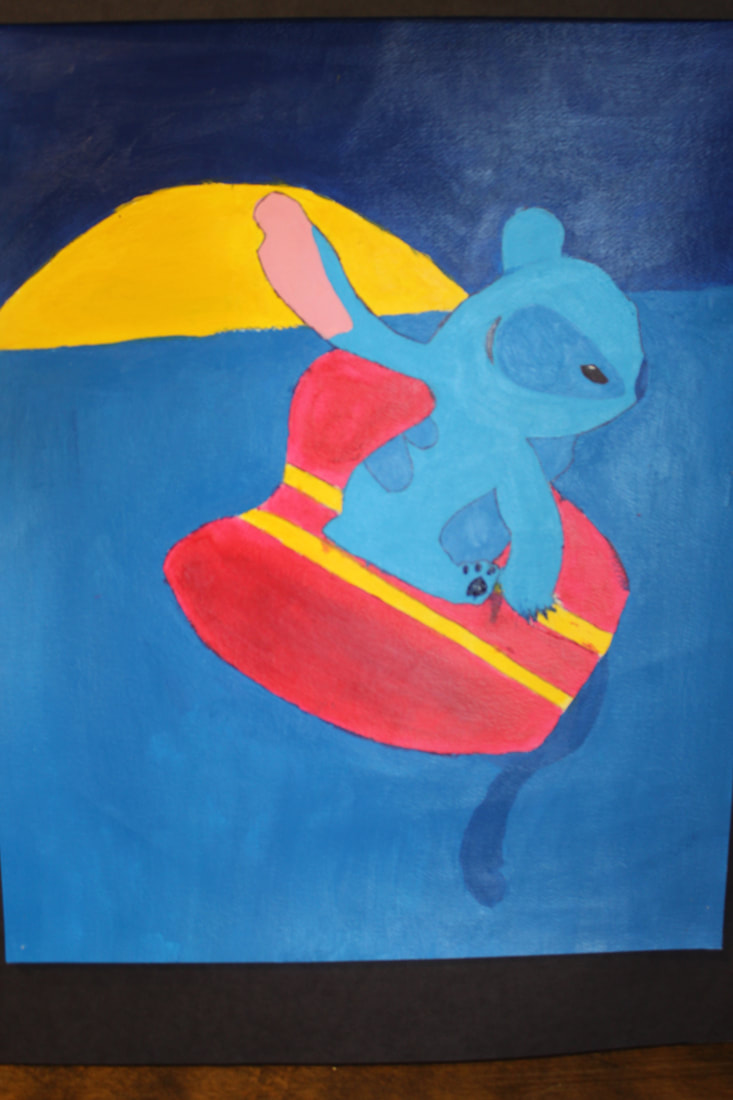
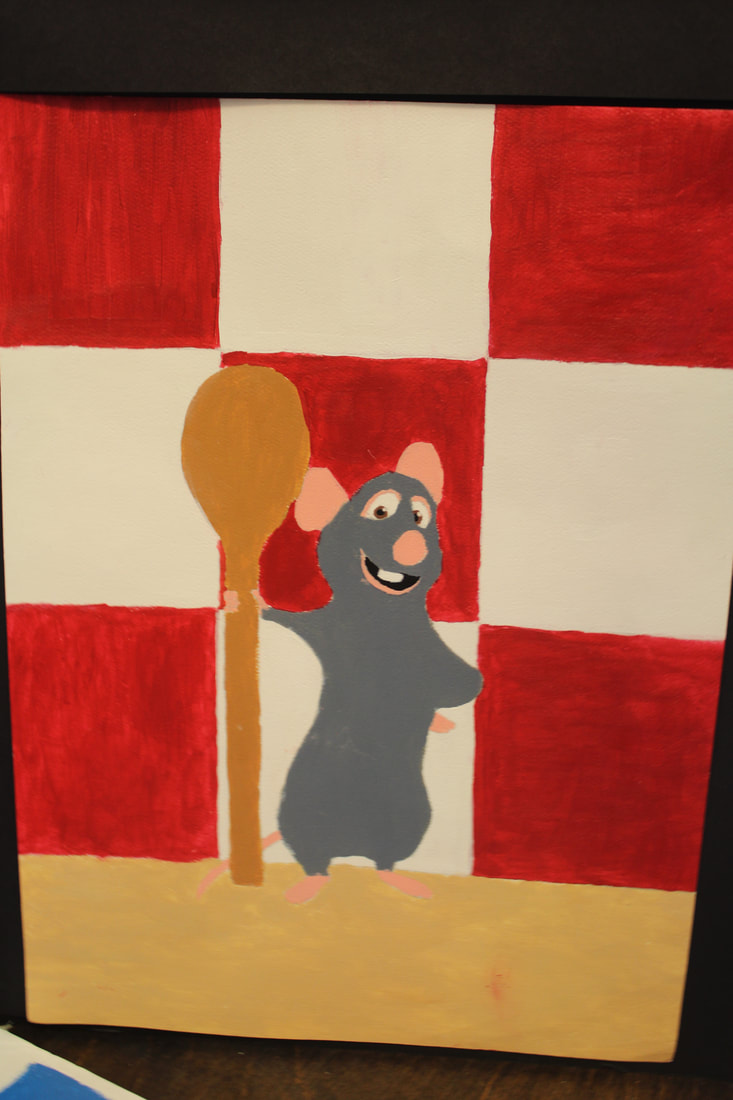
Disney/Cartoon Paintings
|
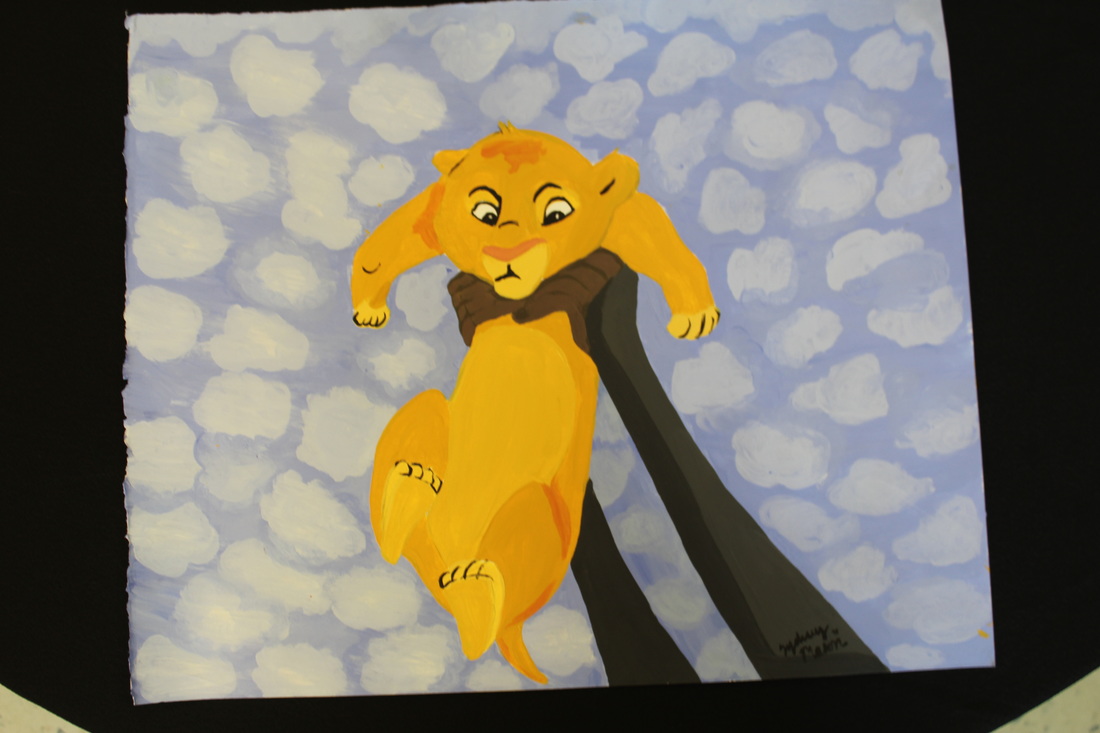
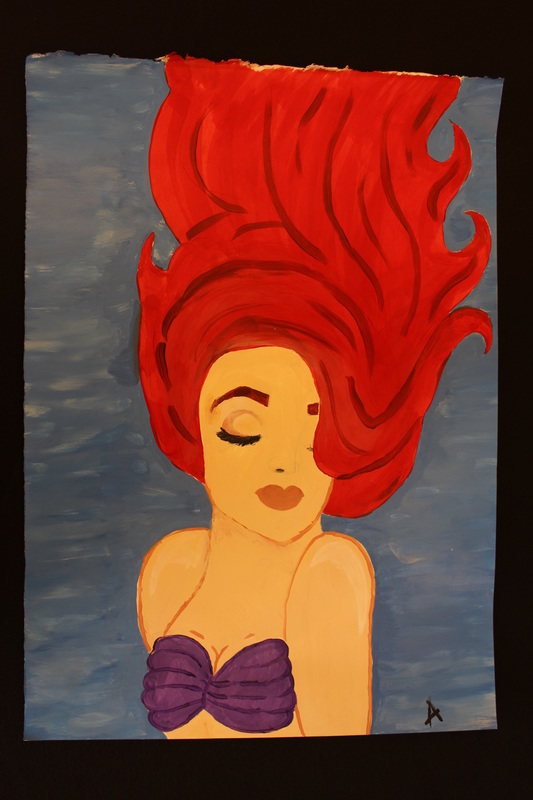
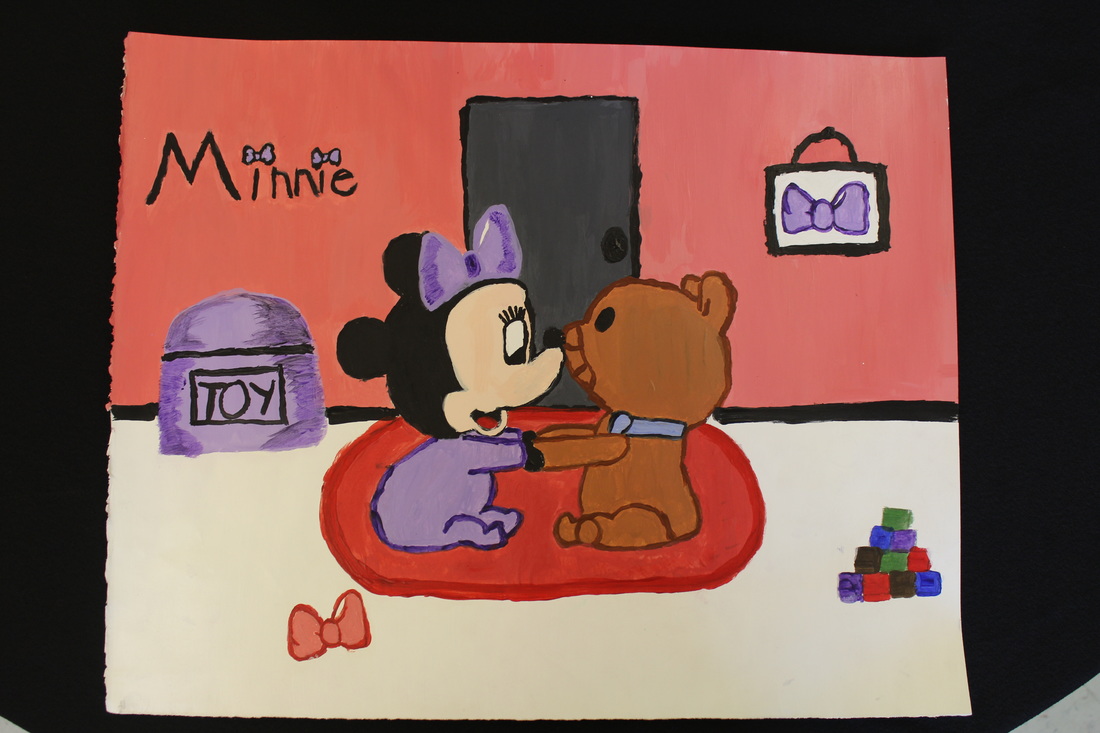
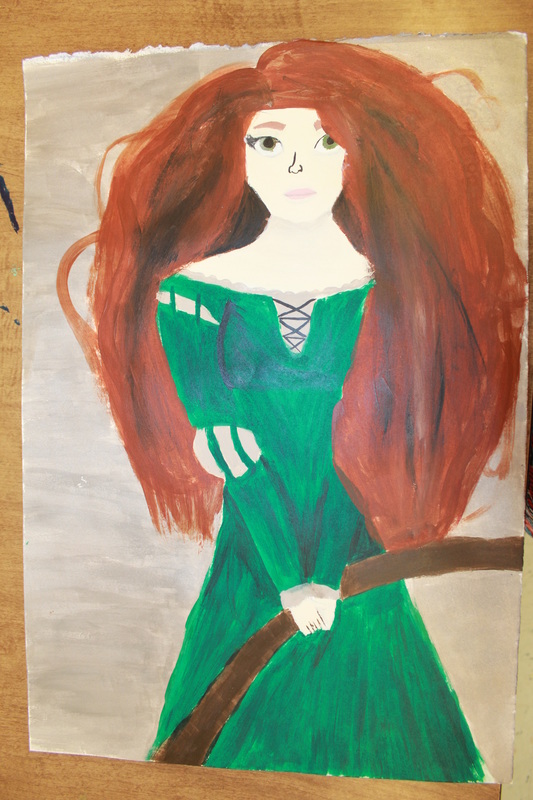
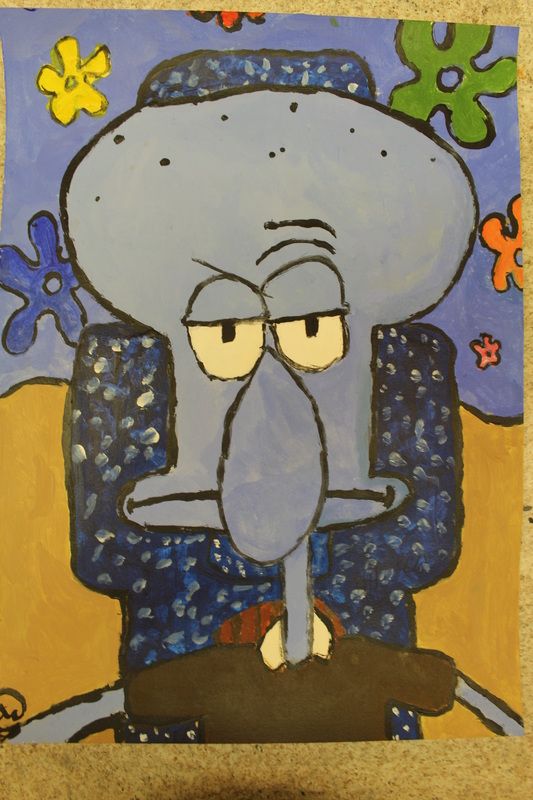
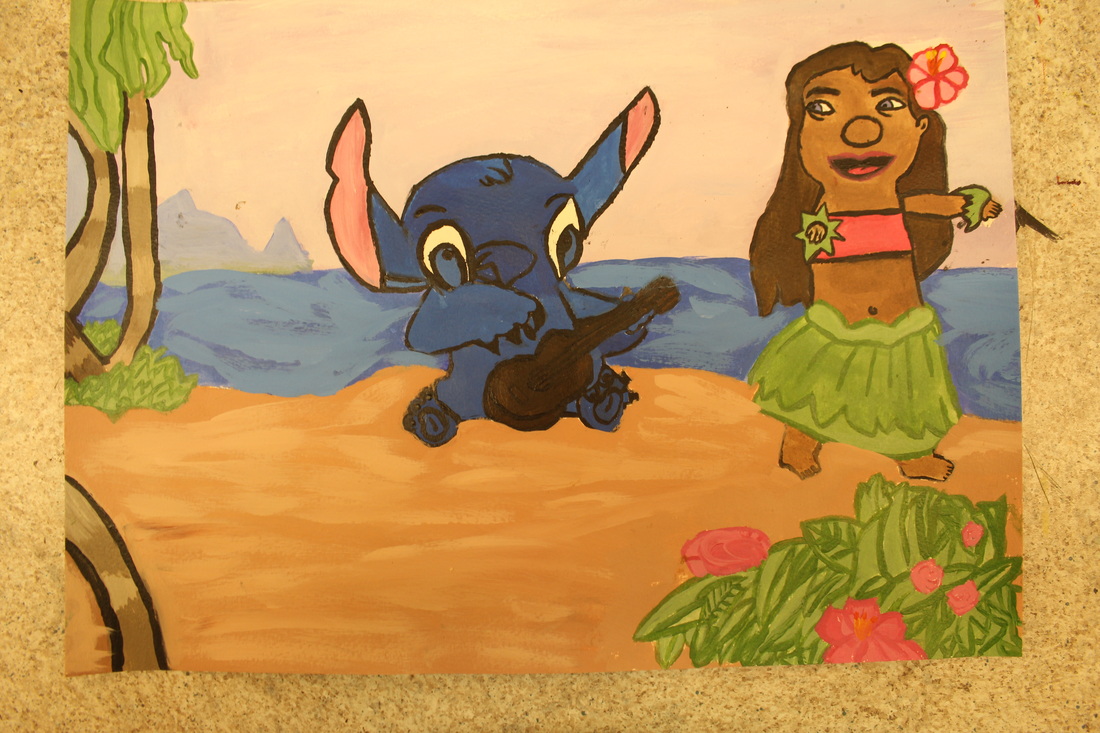
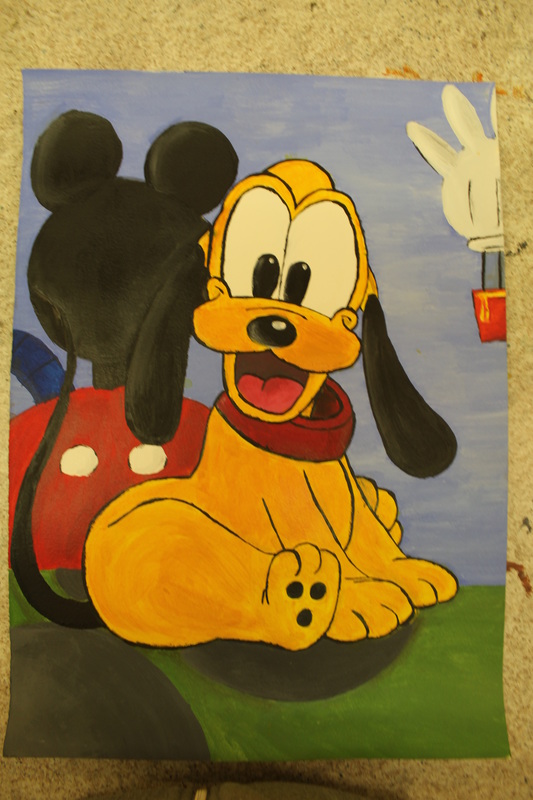
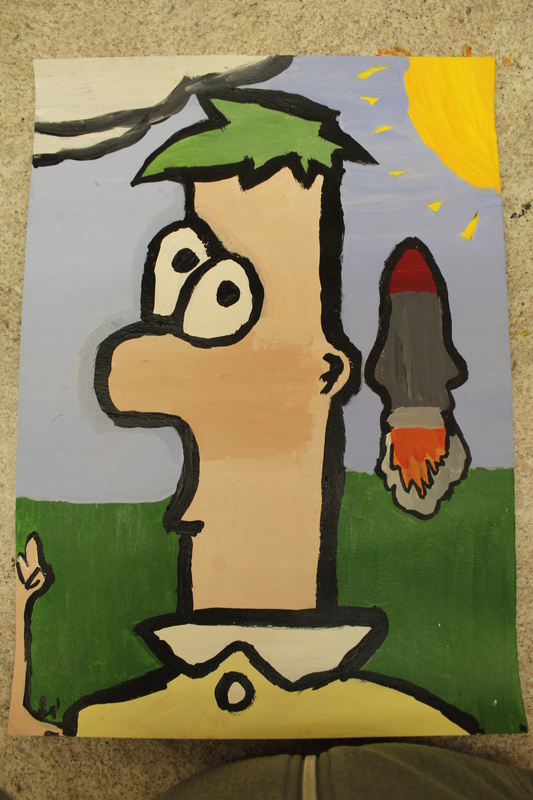
For the Disney Painting Project, we first set out to learn about painting basics. Students learned to mix colors, created a color wheel, and also practiced painting techniques. It is very important for a beginning painter to learn how to paint smooth coats of paint, a thin detail line, and also how wait in between layers to dry so your colors don't get smeared together. The students then picked a Disney character (or in a couple cases a Pixar character) practiced drawing them, and then created a painting.
|
|


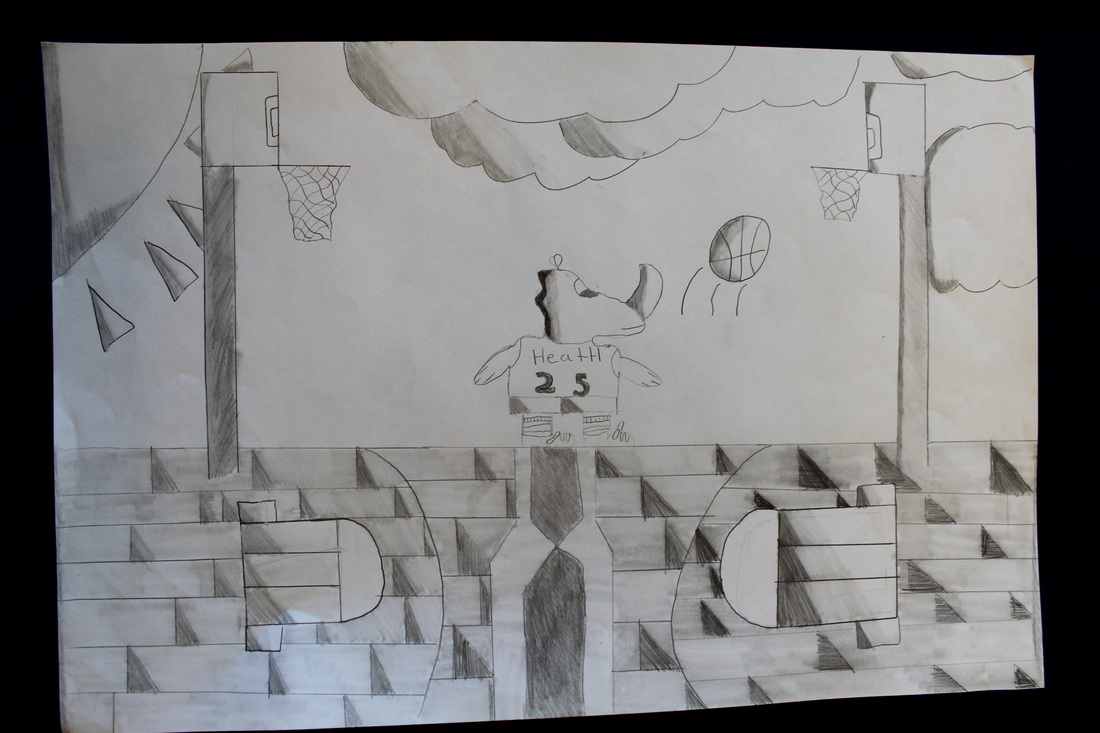
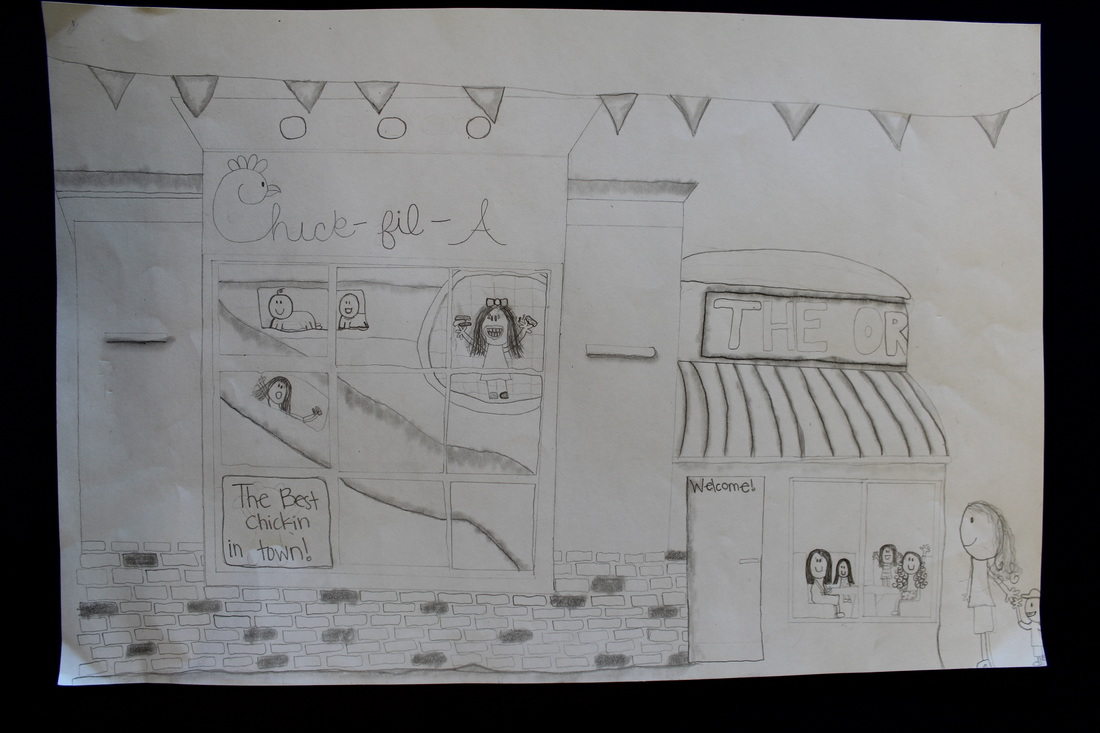
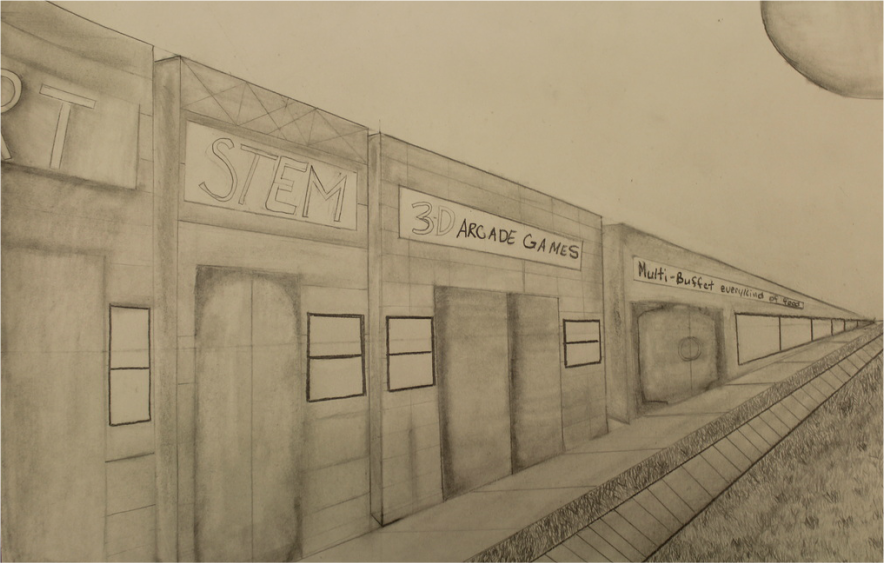
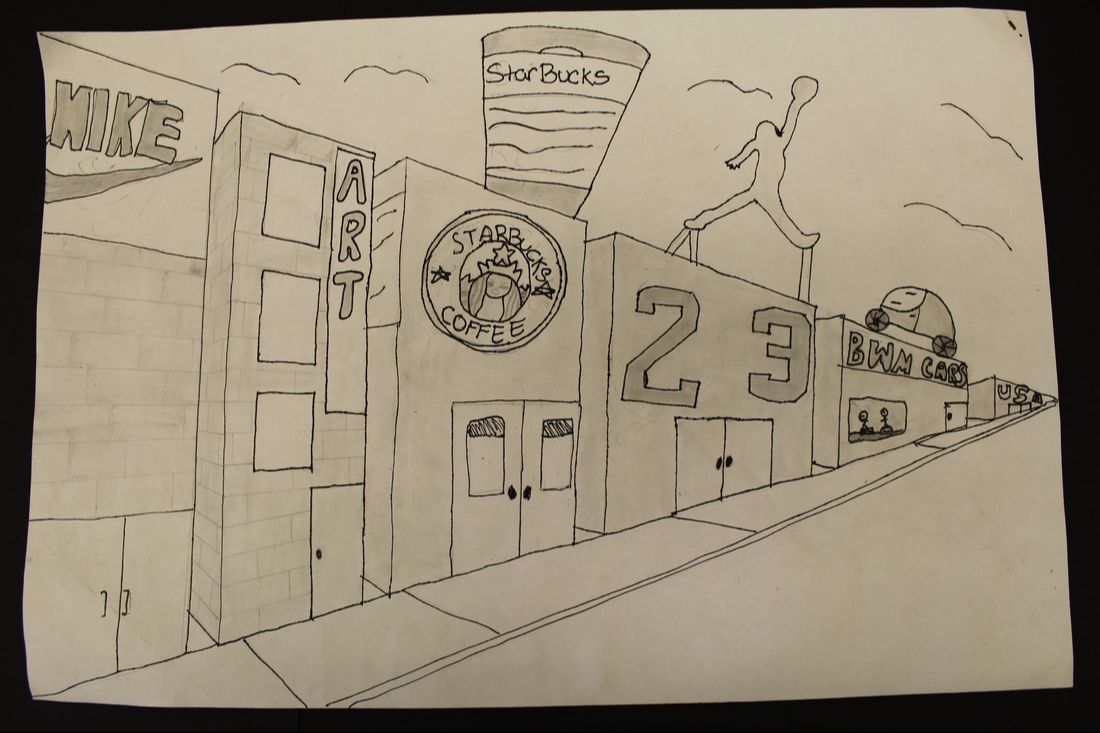
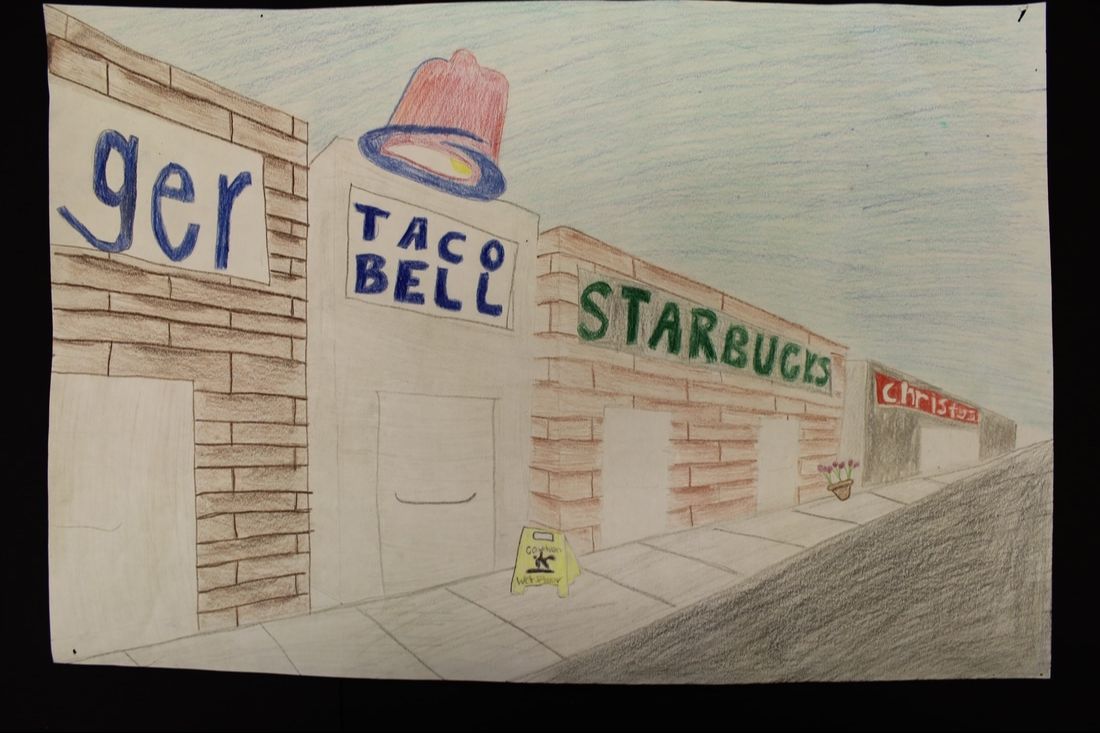
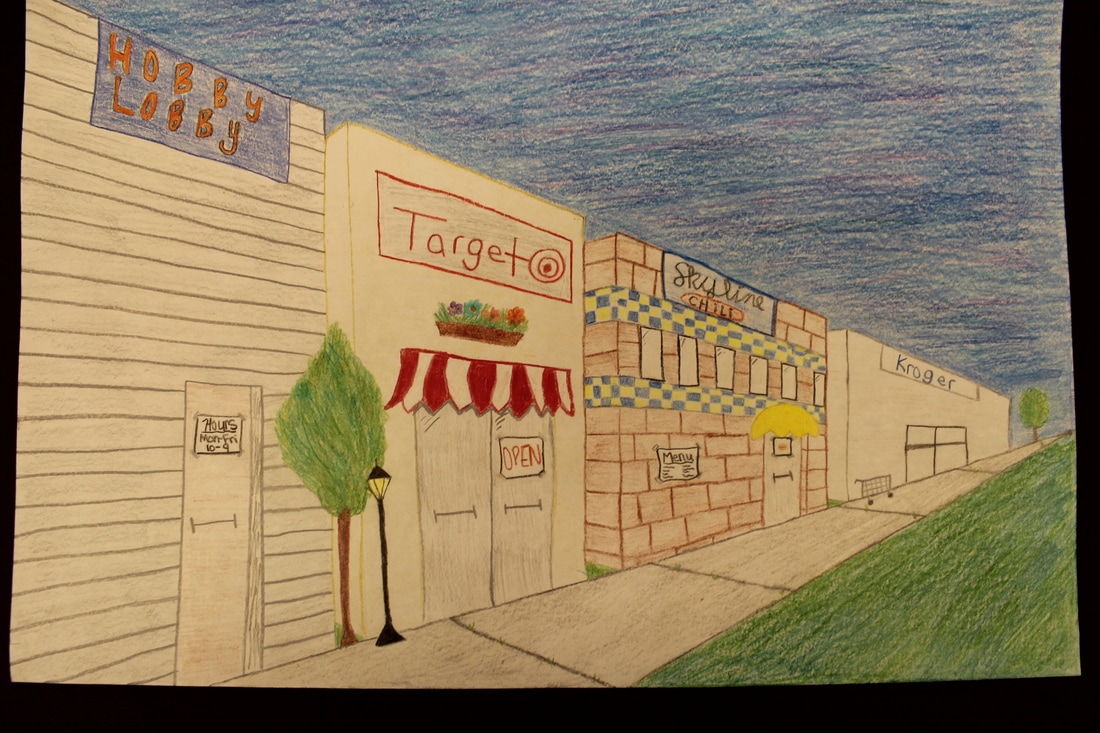
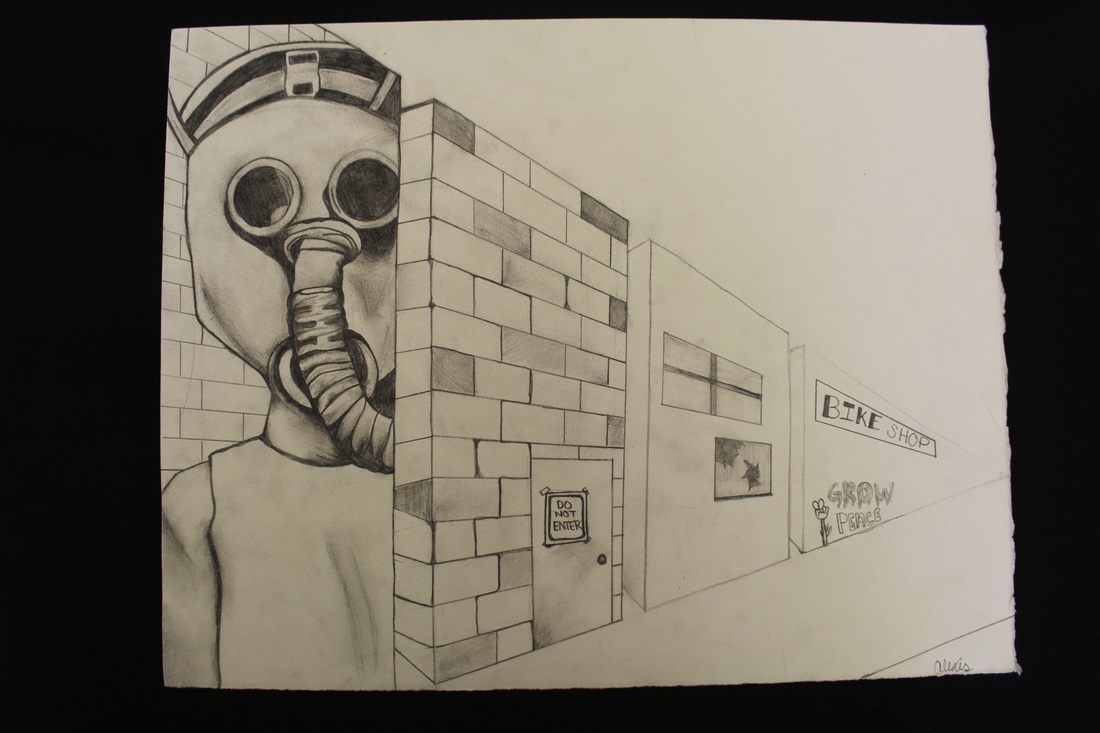
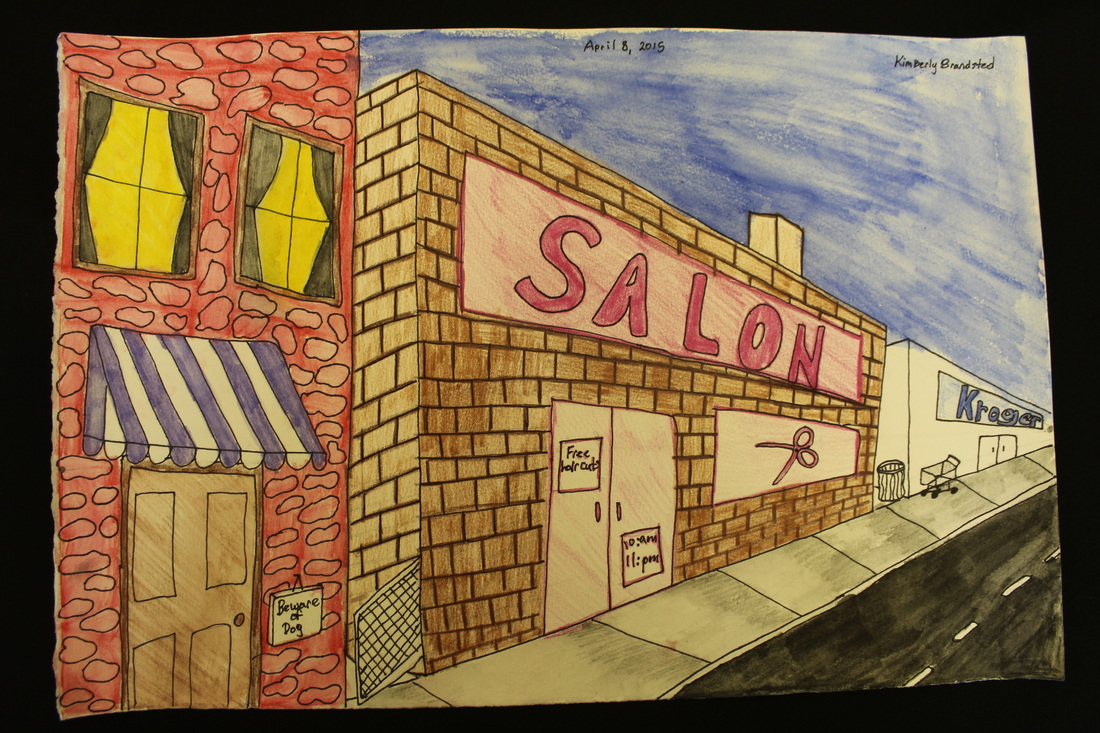
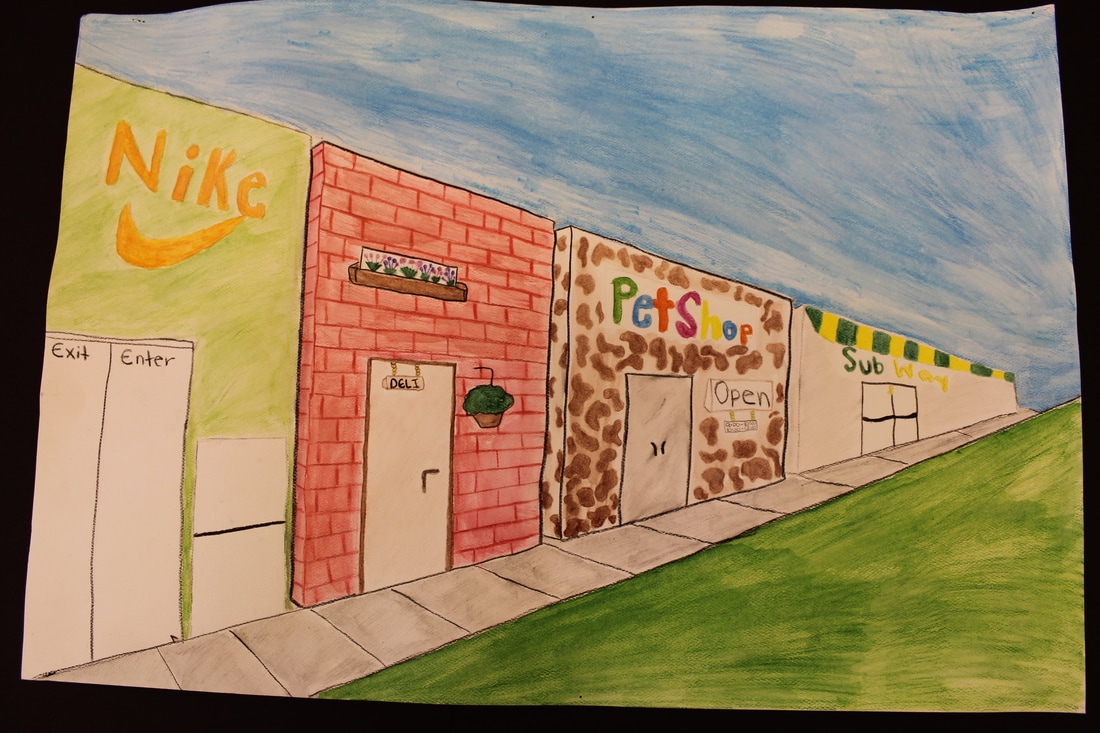
Two POint perspective store front
For this project students followed along with a demo in class how to draw a grouping of store fronts for a strip mall design. Students learned about drawing in one point perspective and created their own store designs.
|
|
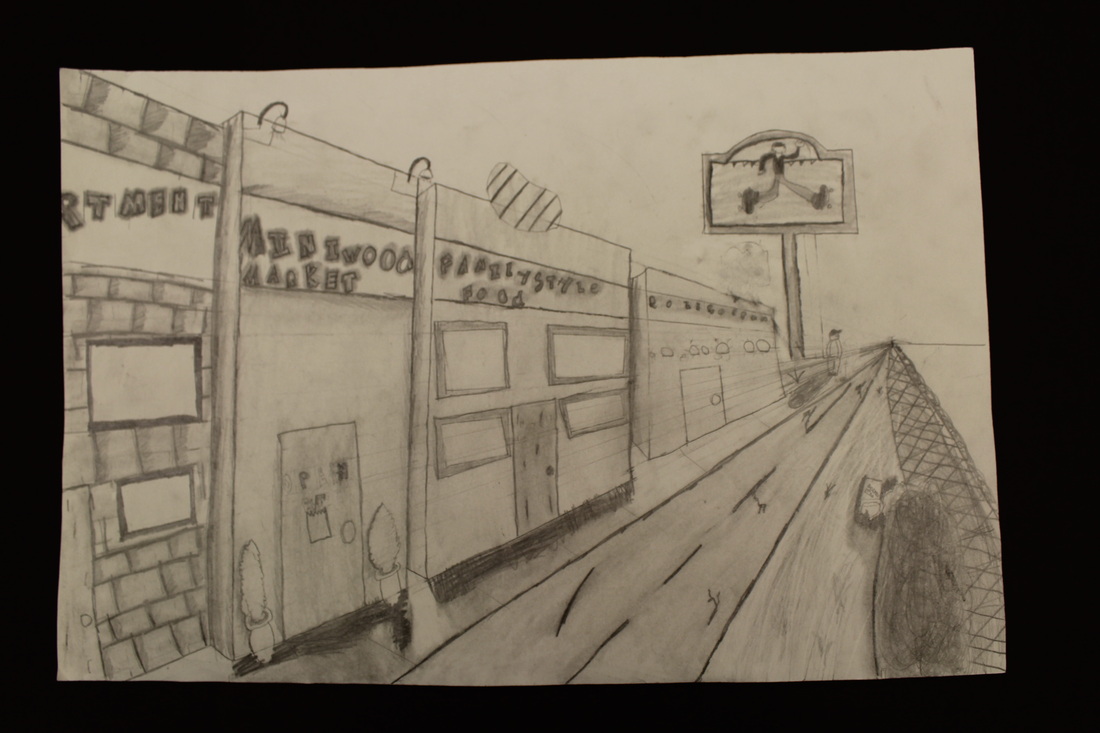
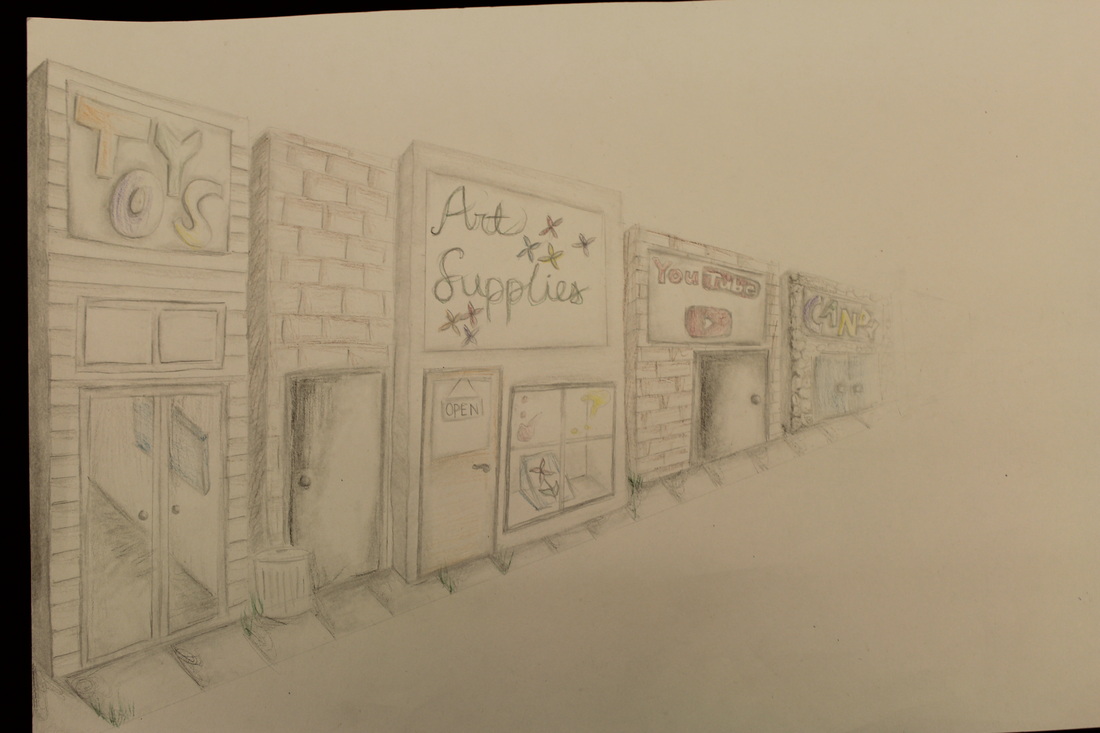
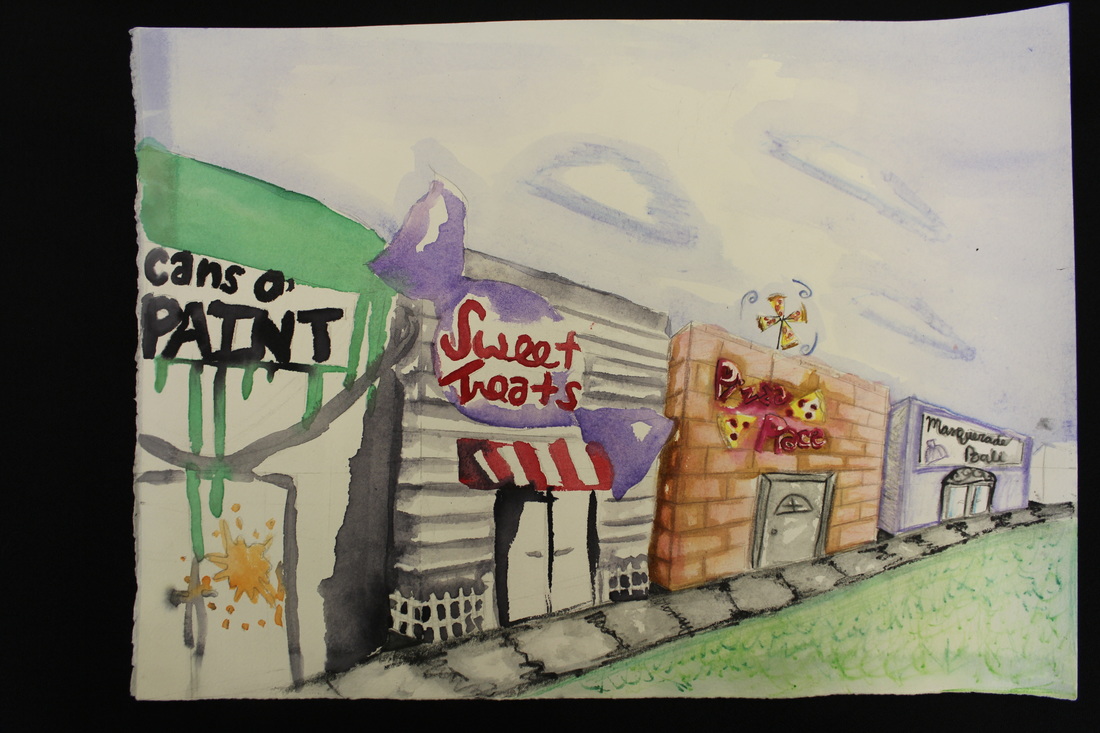
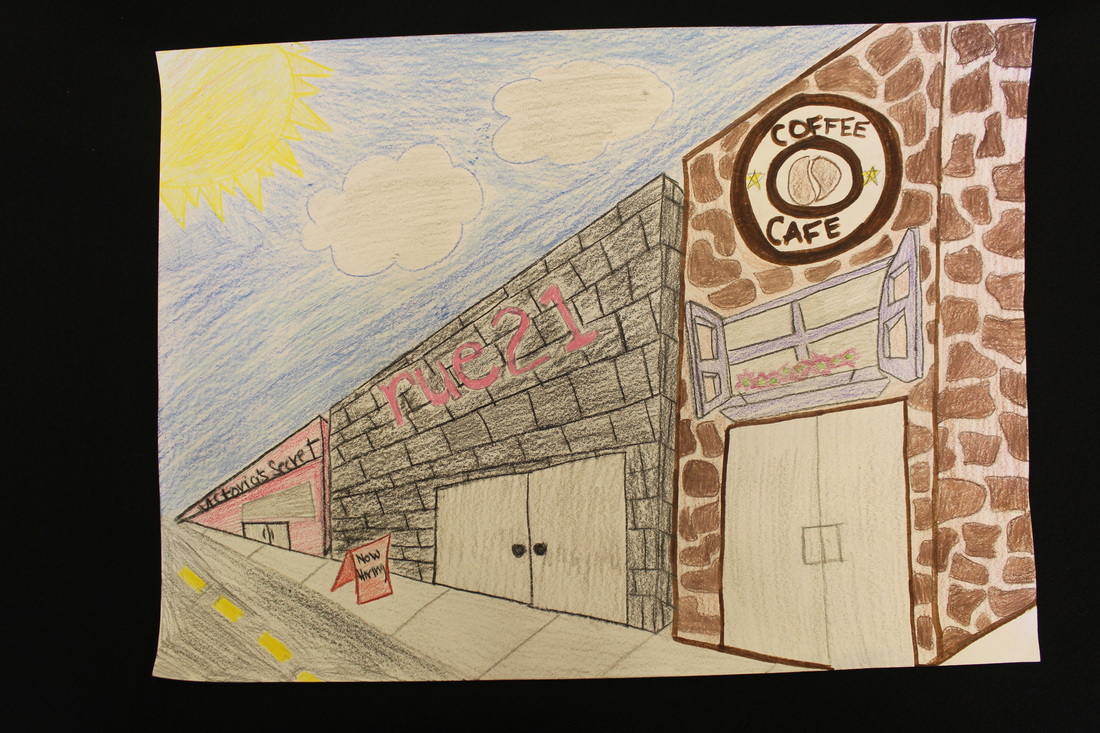

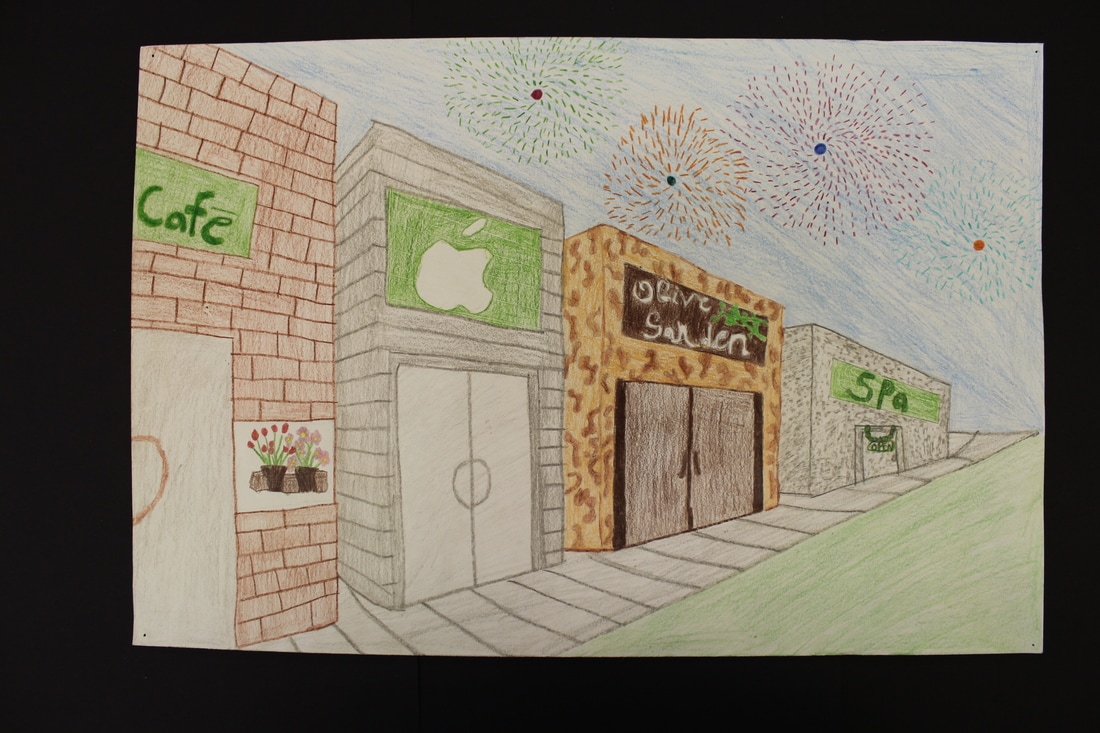
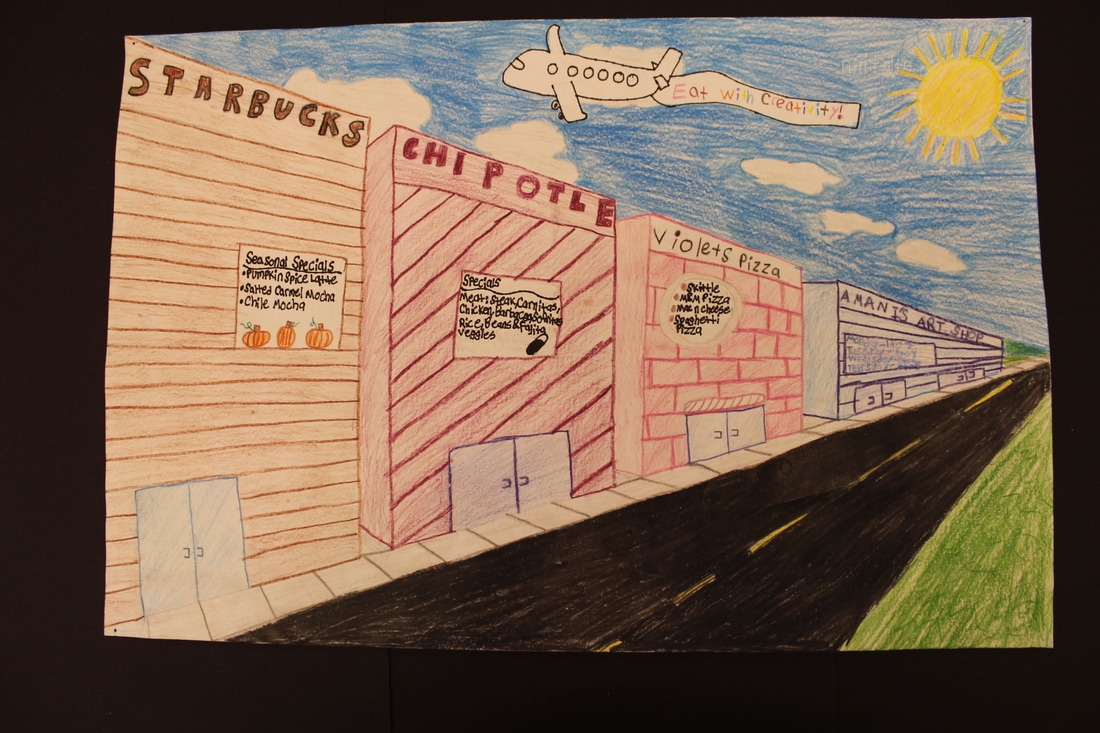
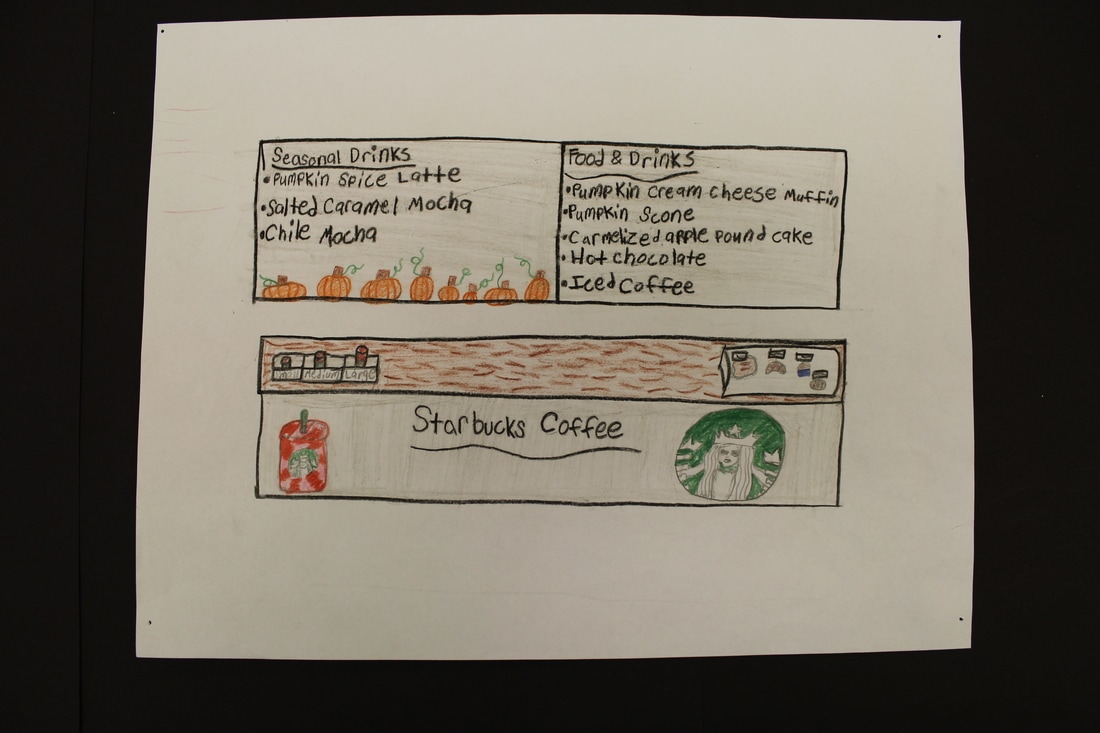
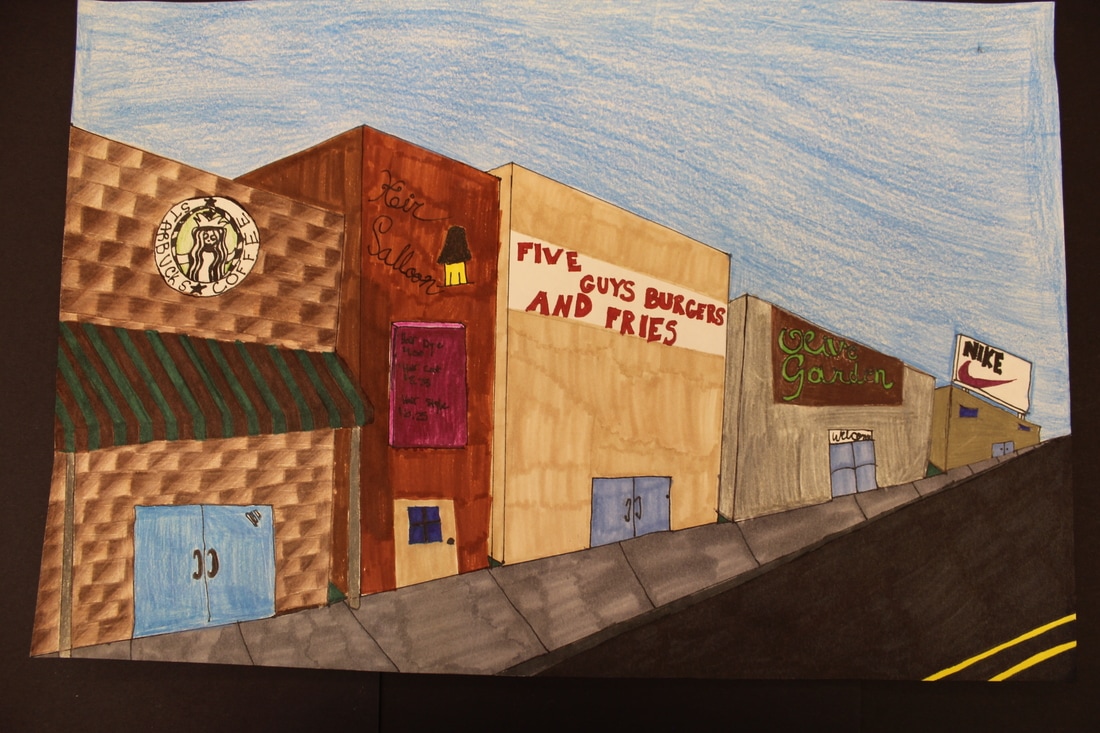
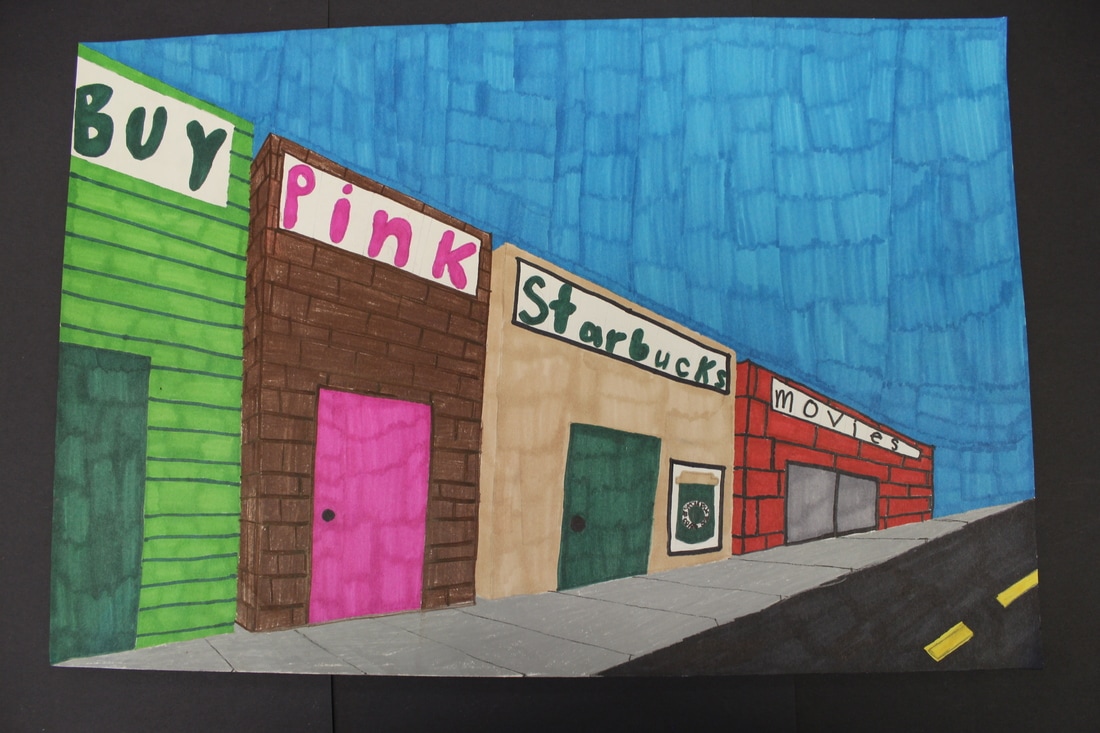
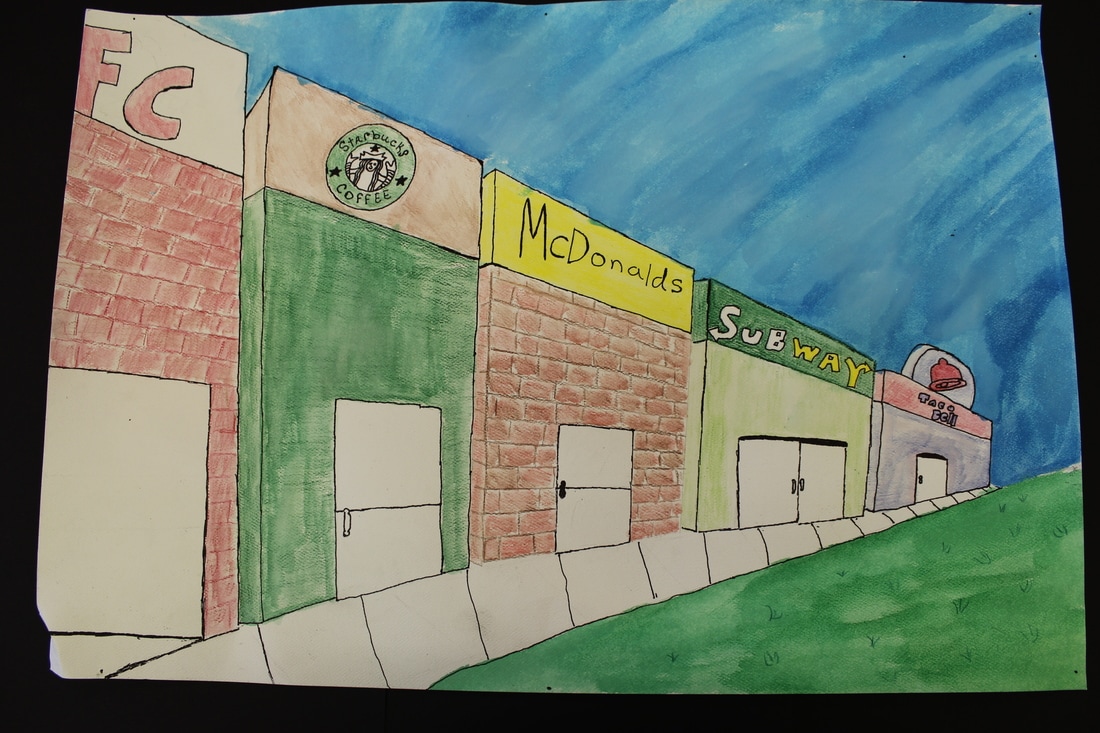
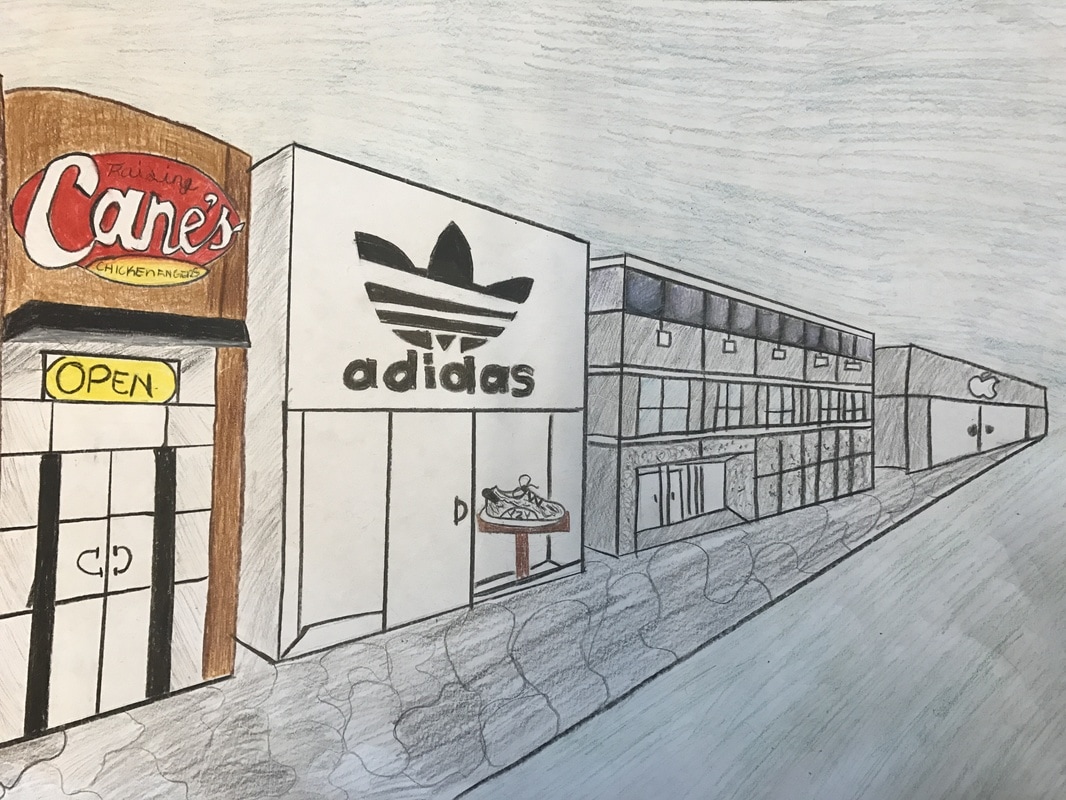
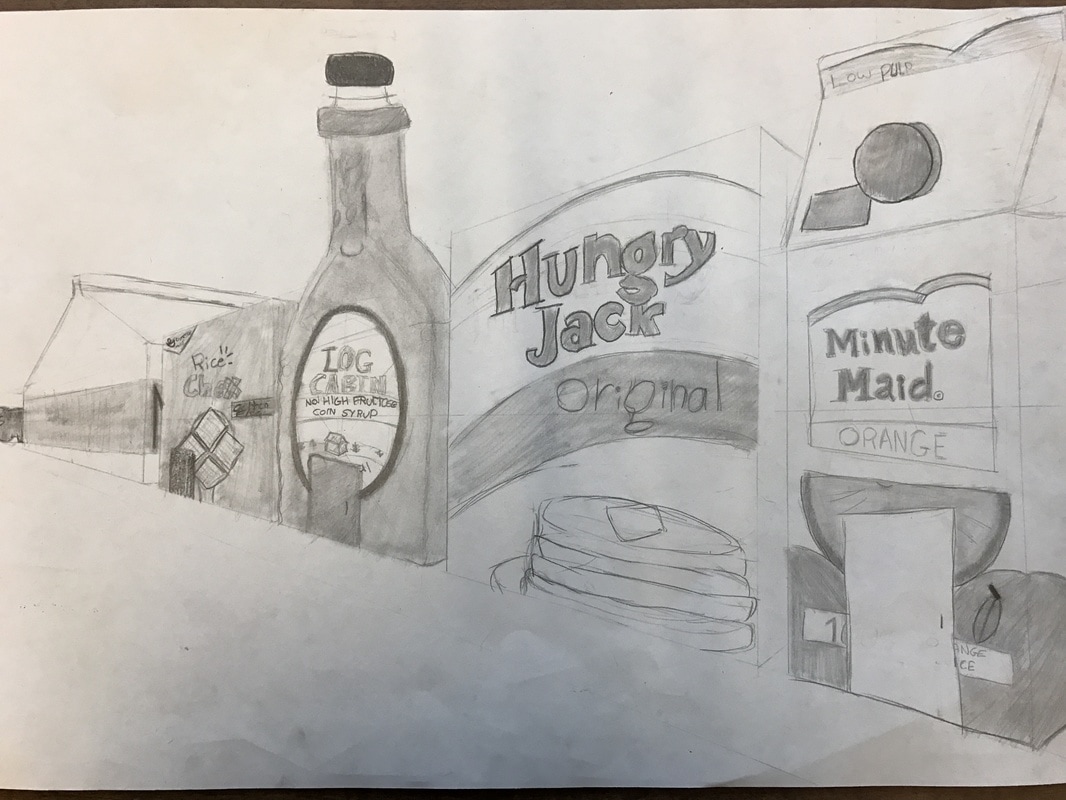
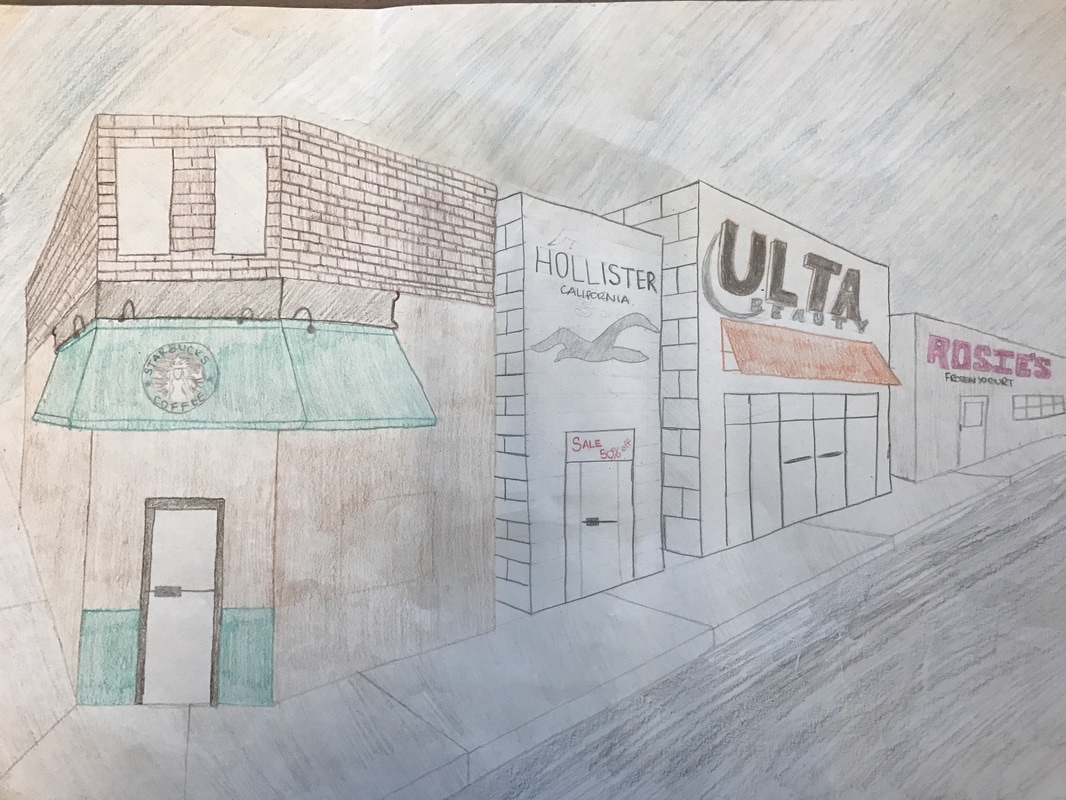
Notice the creativity that came out of my 2016-2017 second semester 7th period 7th grade (pictured directly above). They did such a super job with their 2 Point Perspective Stores that it took them an extra week of hard work because they challenged themselves to go above and beyond expectations. No one prior had tried to do a corner building like the Starbucks we see pictured third. Also no one had thought so out of the box to design all of their buildings around breakfast foods! (pictured second). They are a great creative group of students that I have very much enjoyed working with.
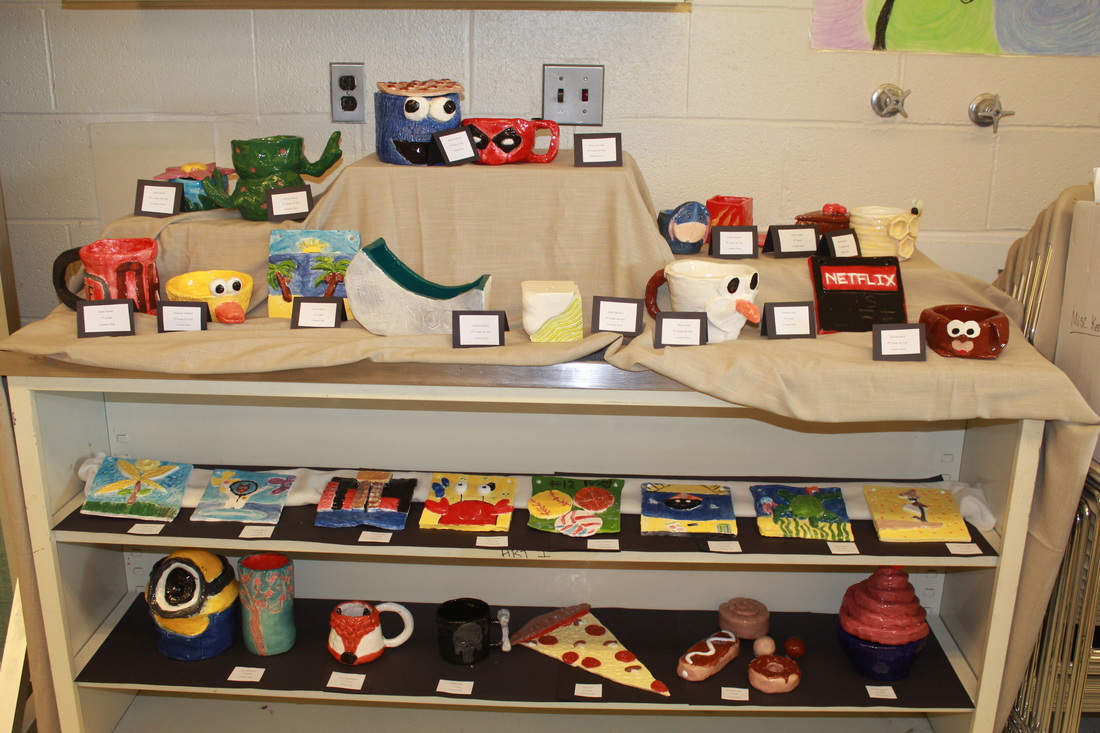
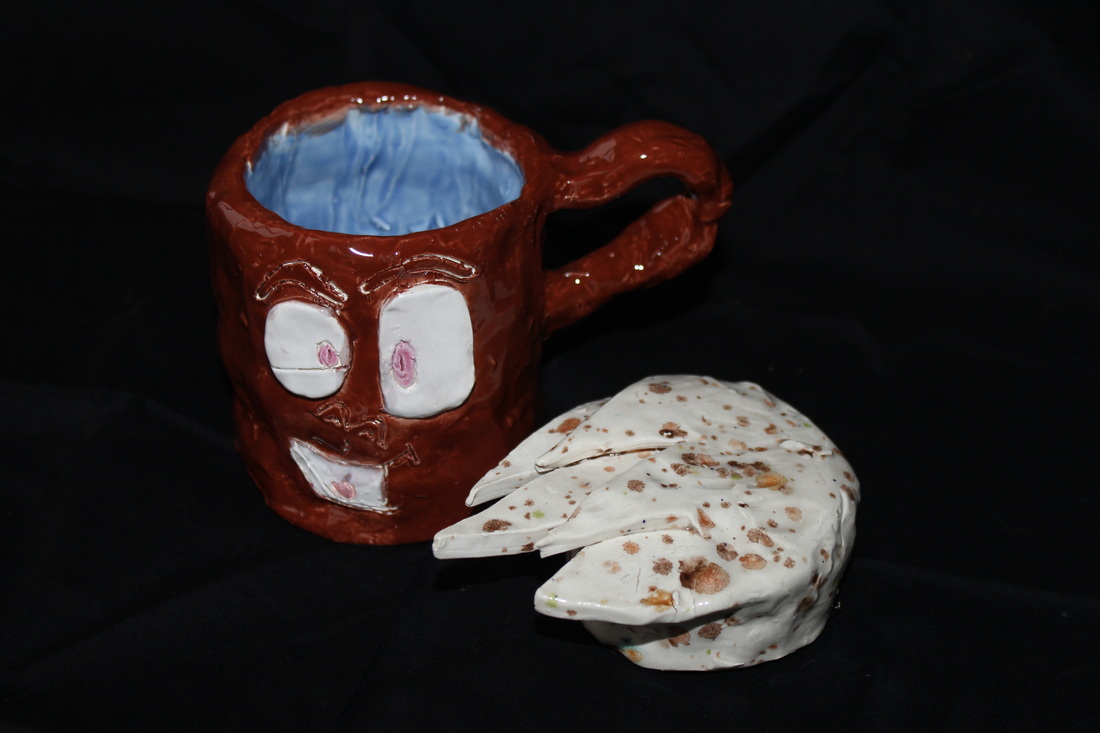
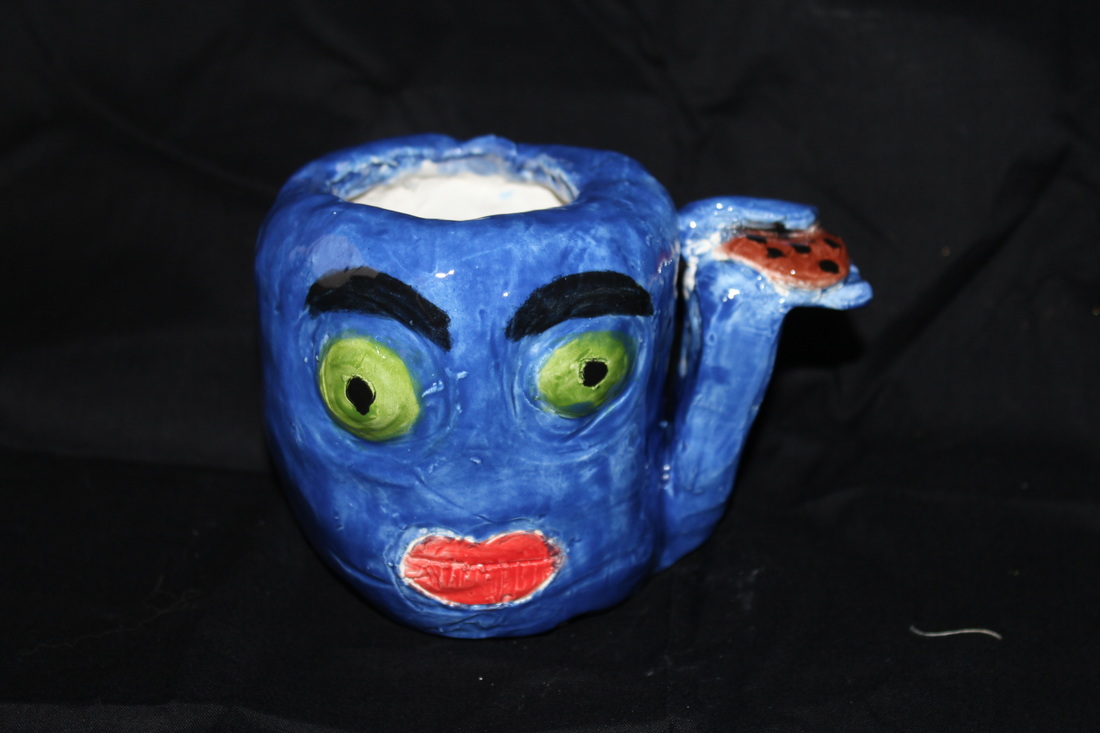
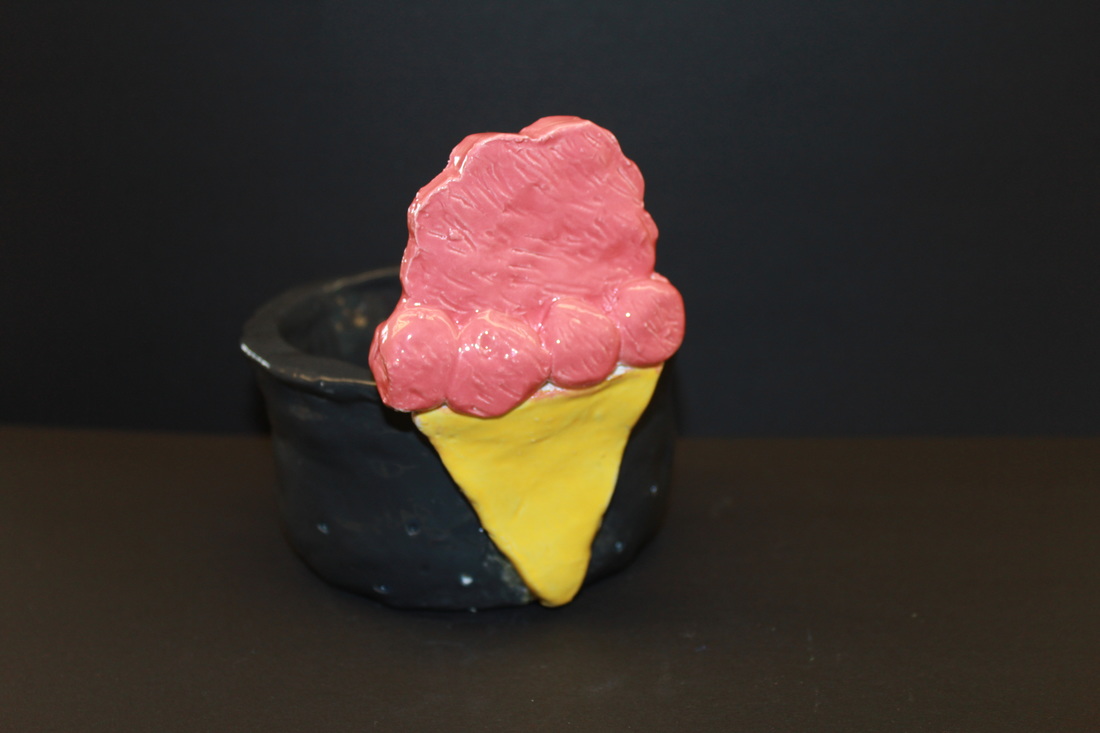
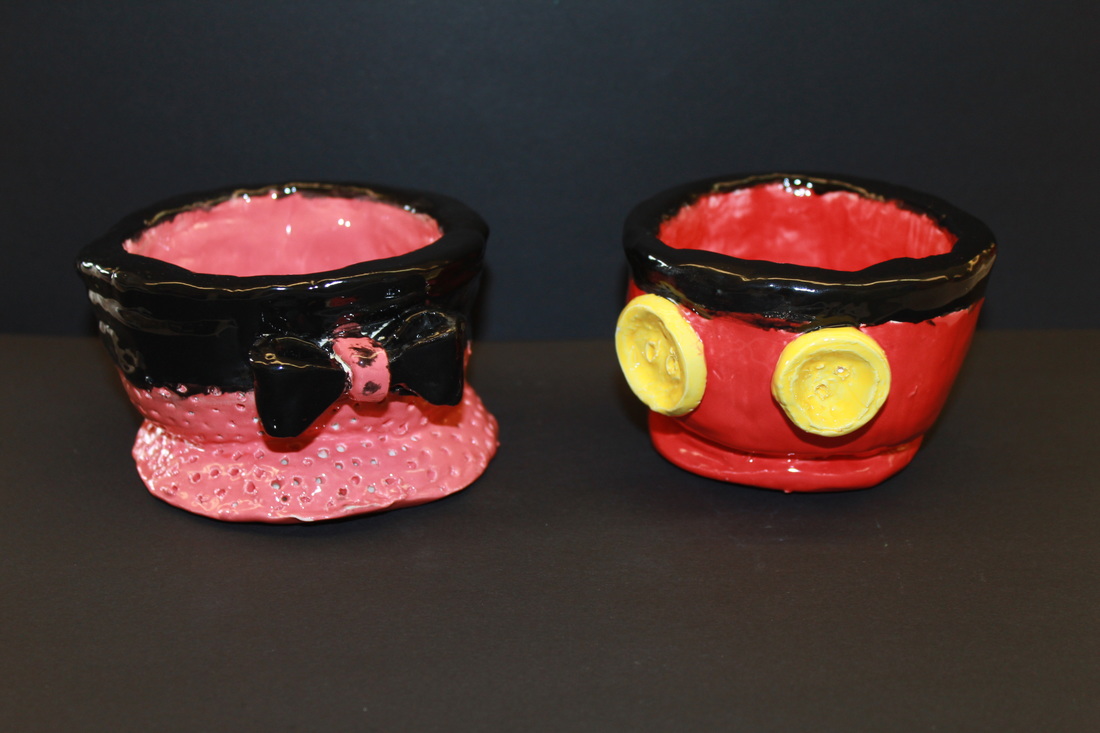
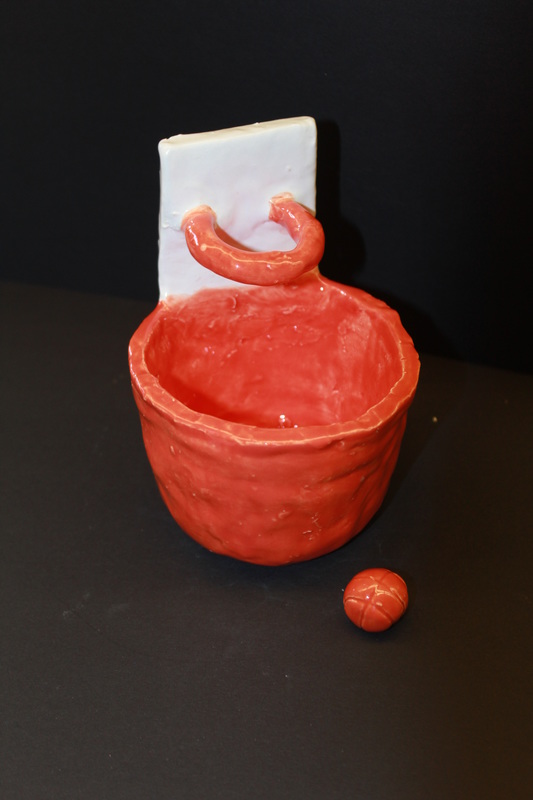
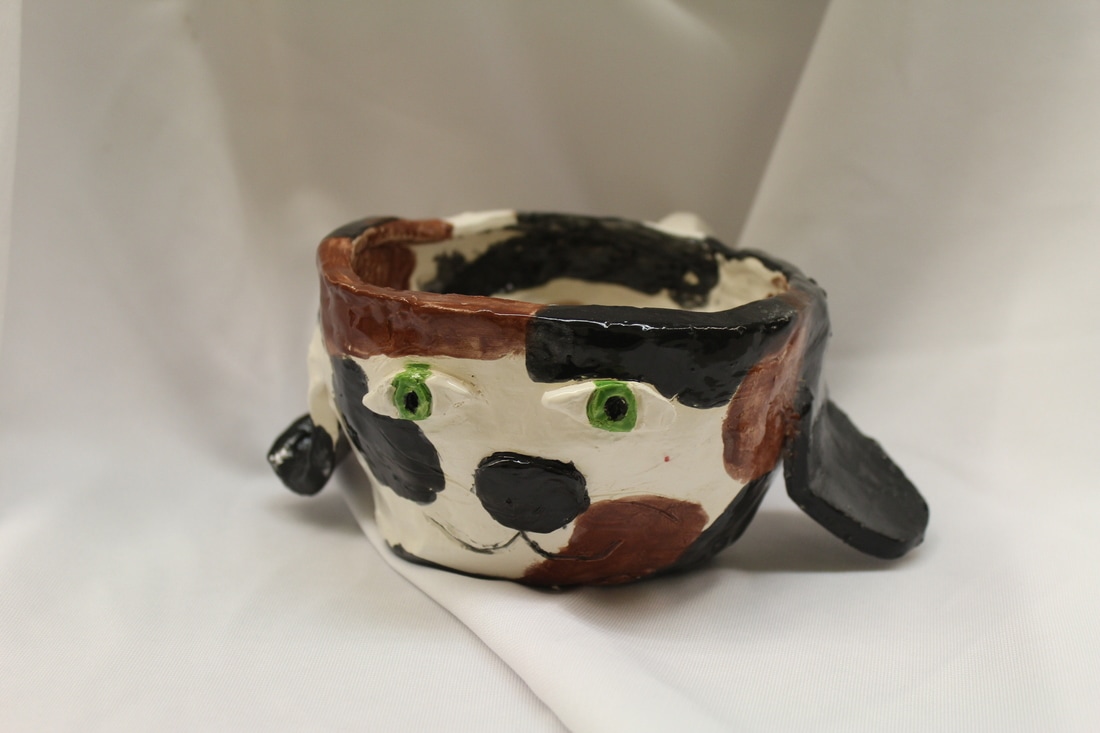
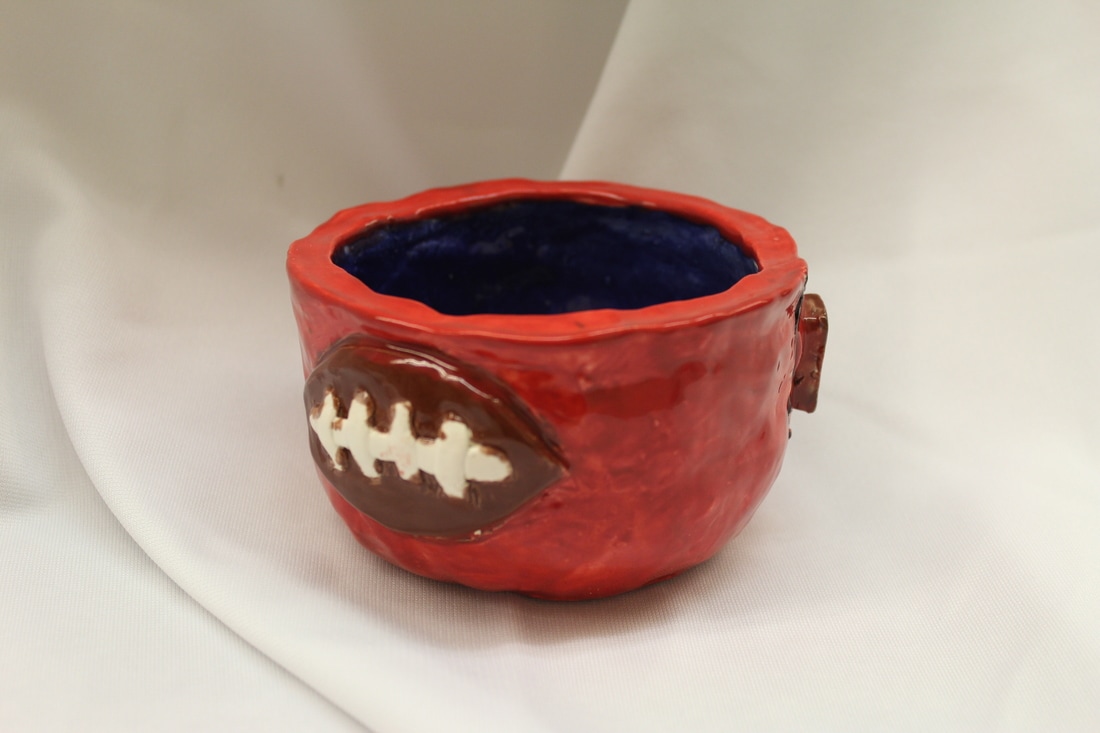
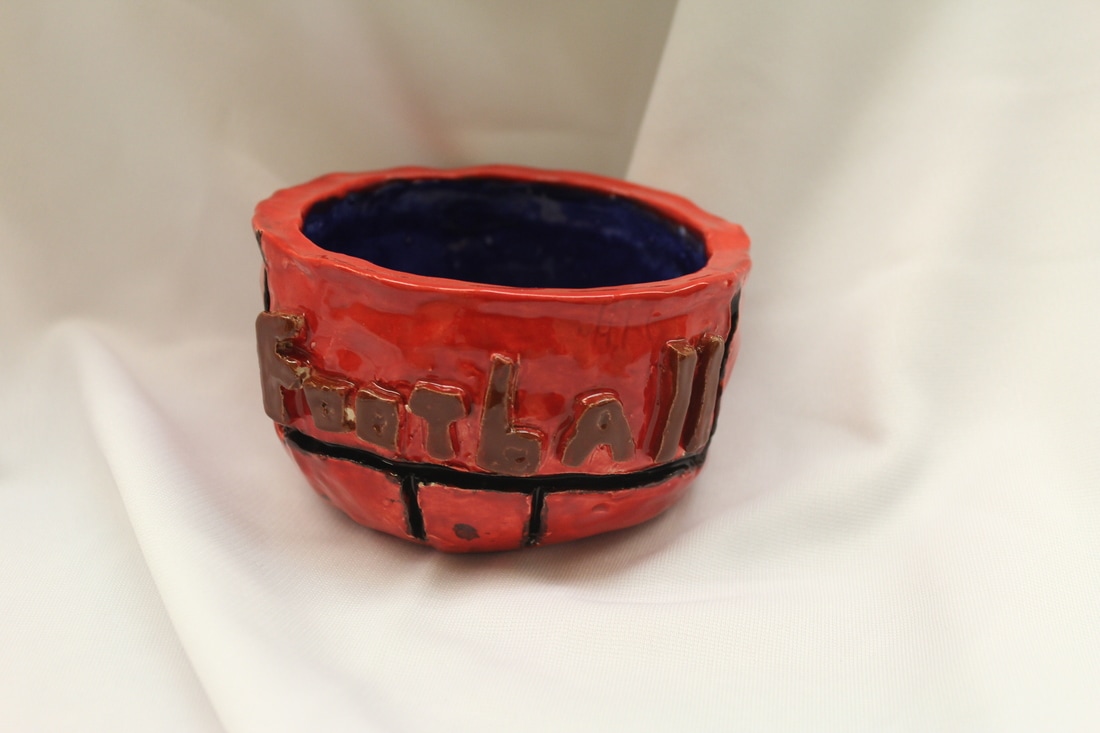
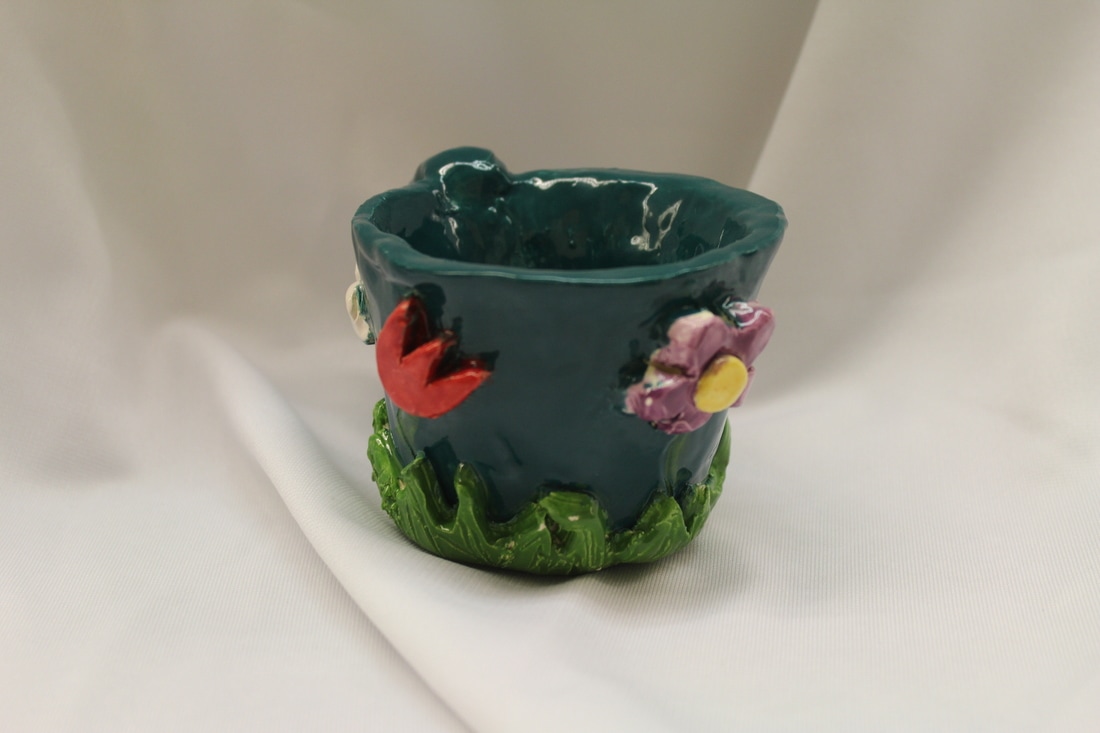
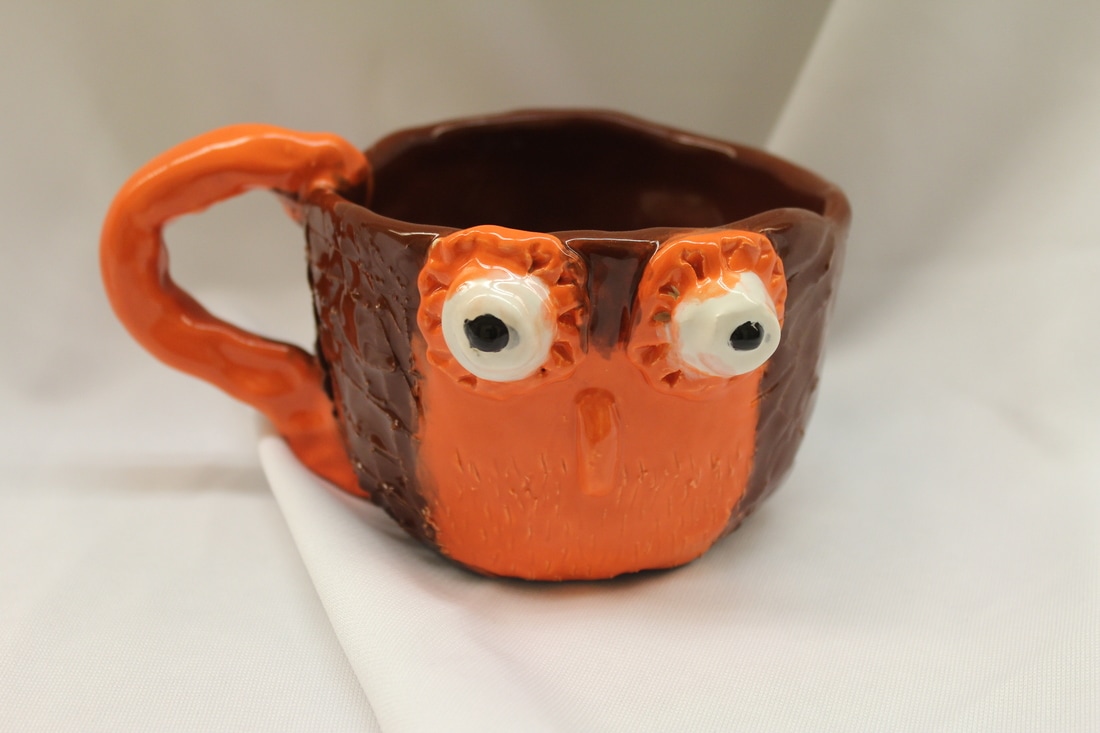
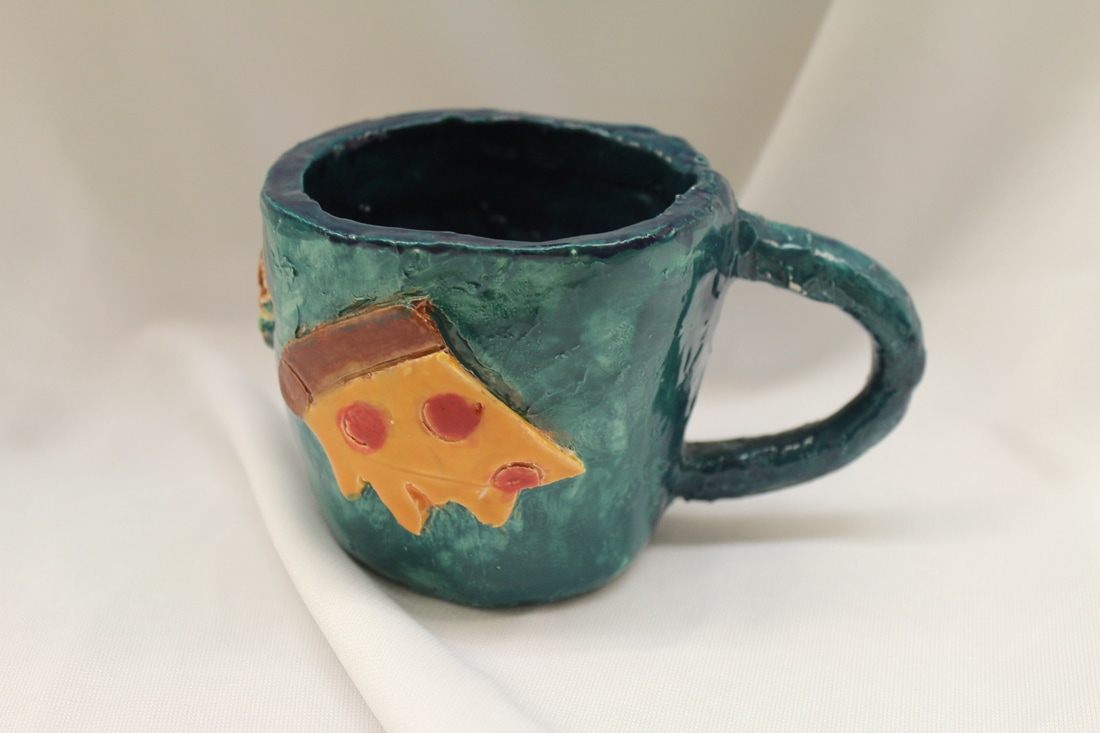
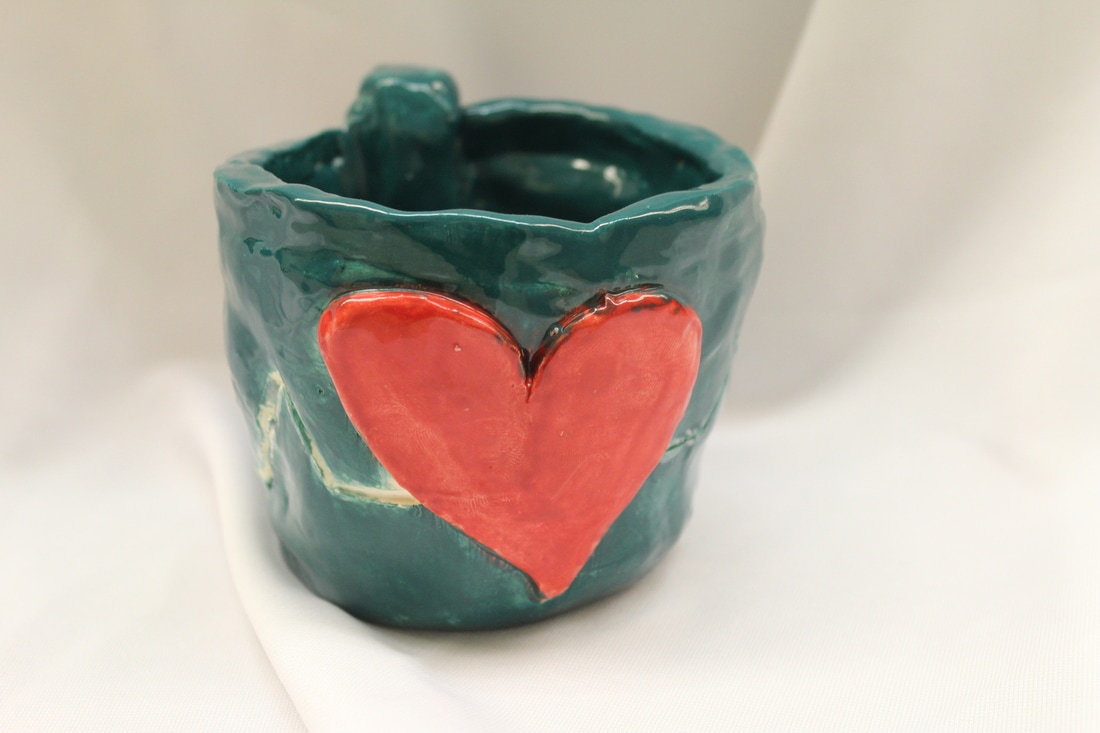
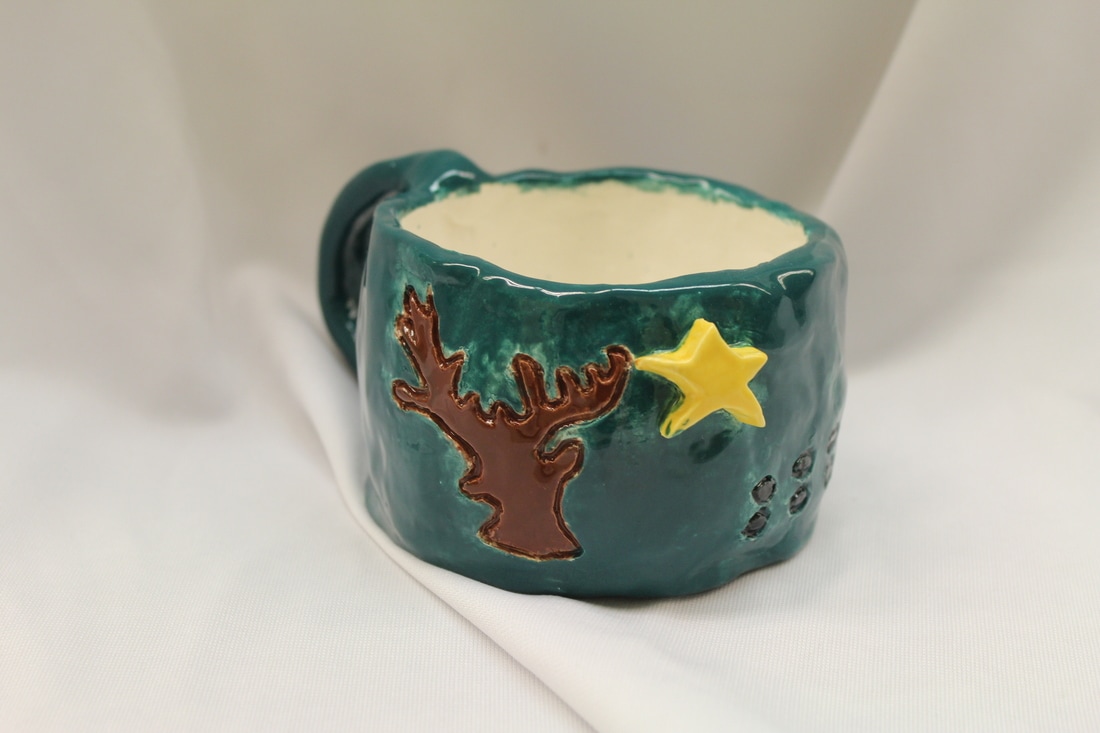
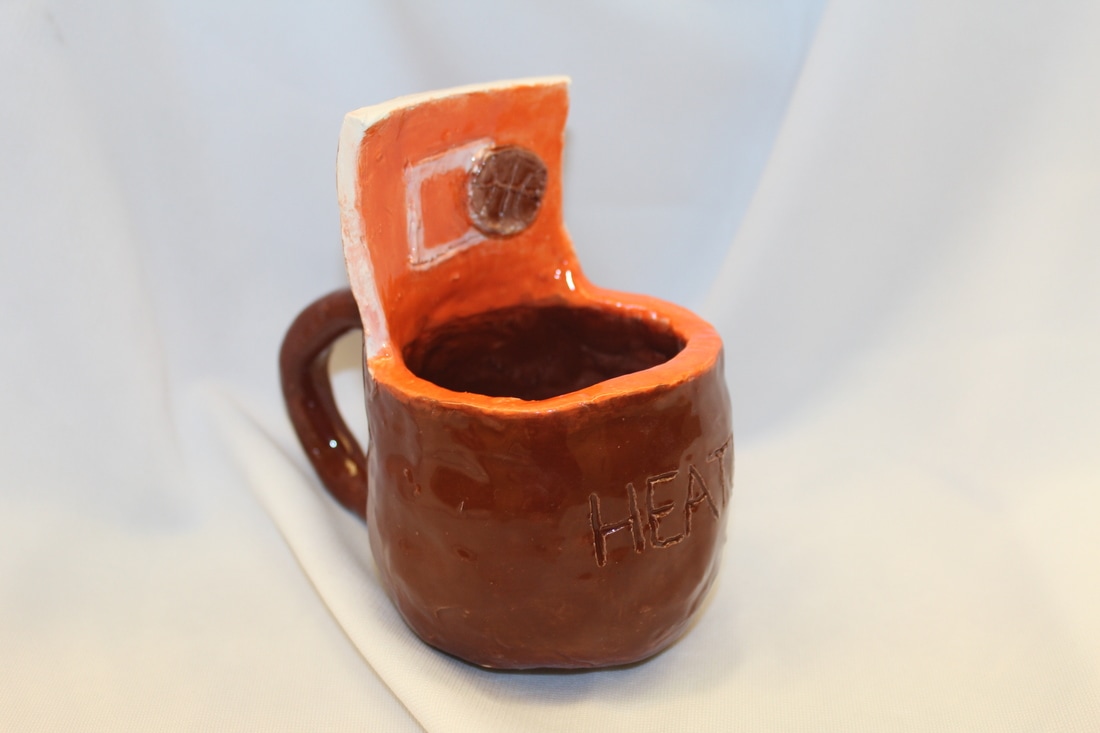
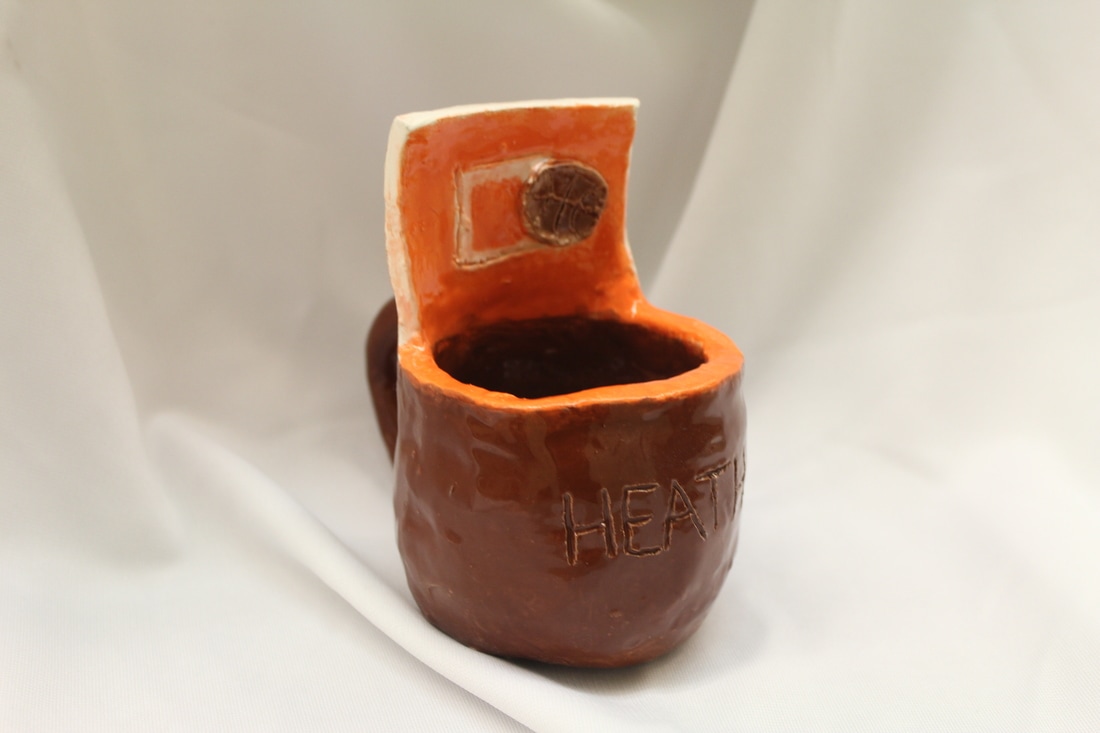
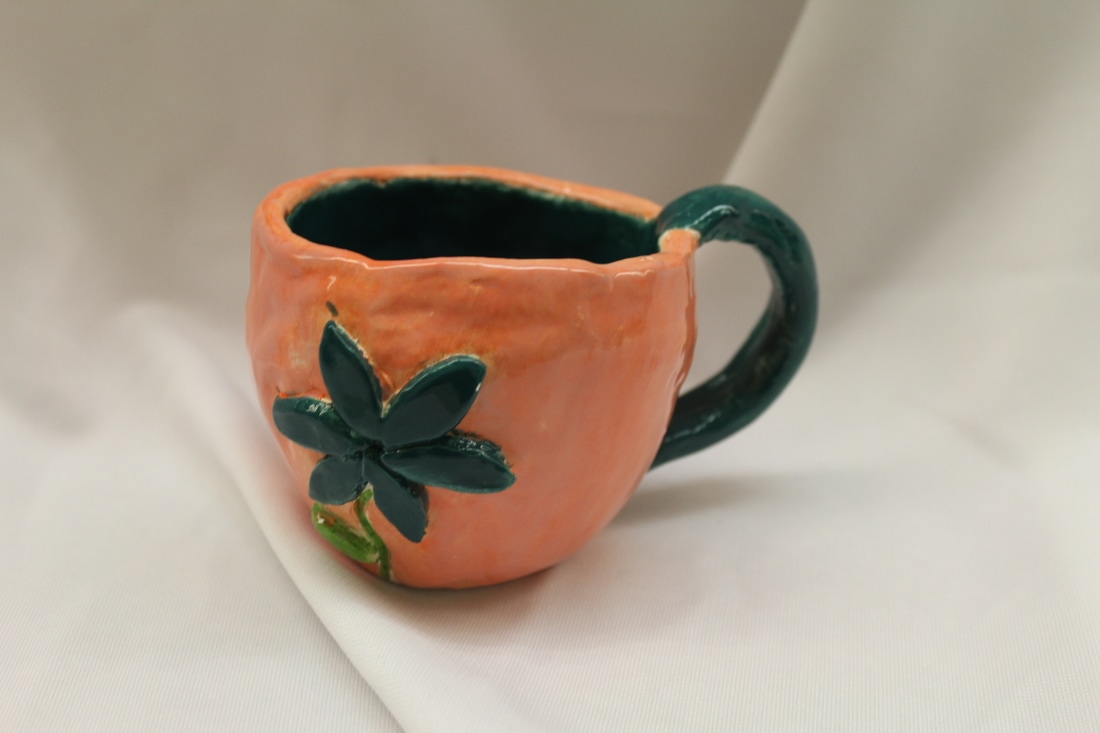
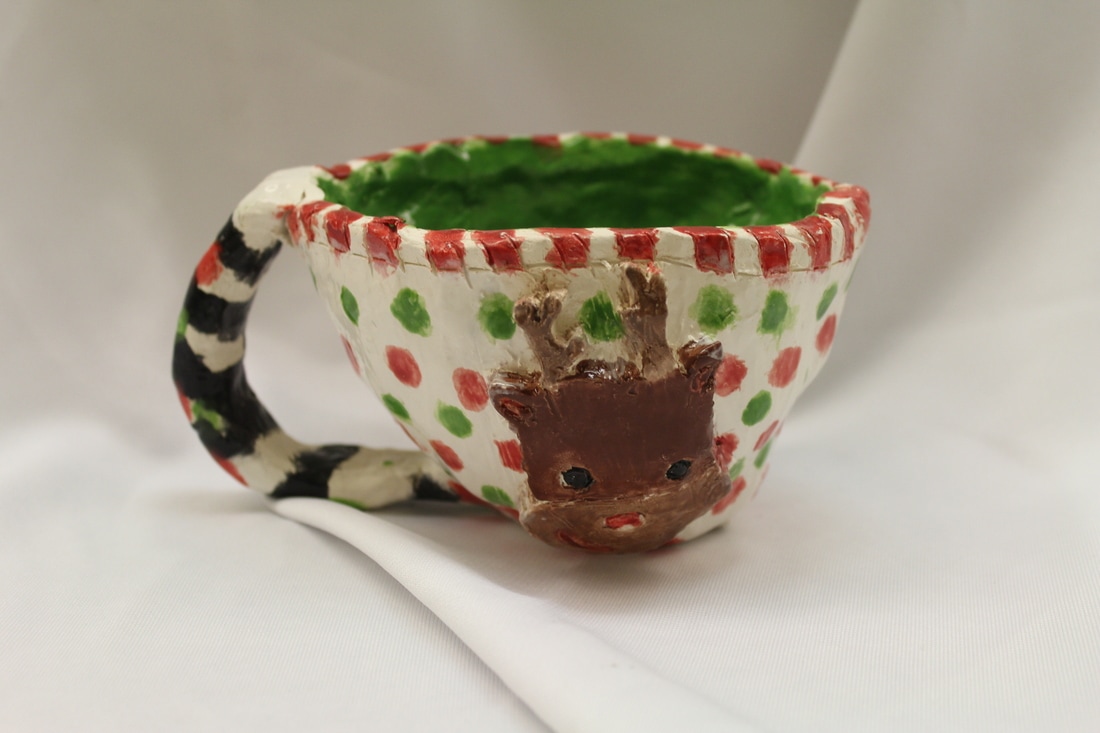
Clay Tea Cups/coffee cups
Students got the chance to design their own coffee mug or tea cup for this unit. We focused on learned about the stages of clay that were best for building, carving, or even the stage that meant their clay was to dry to work with. We used coil building and pinch pot techniques to create the shape then students made 3D and carved designs to add to their cup before putting it in the kiln to be fired and ready for glaze. They then selected glazes. At the end of the project we had a little tea/hot chocolate party to use our cups. It is the longest unit we work on. From start to finish it takes us 3-4 weeks.
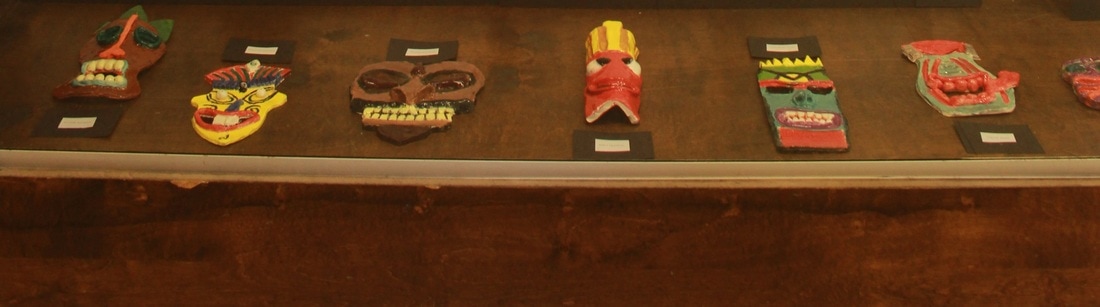
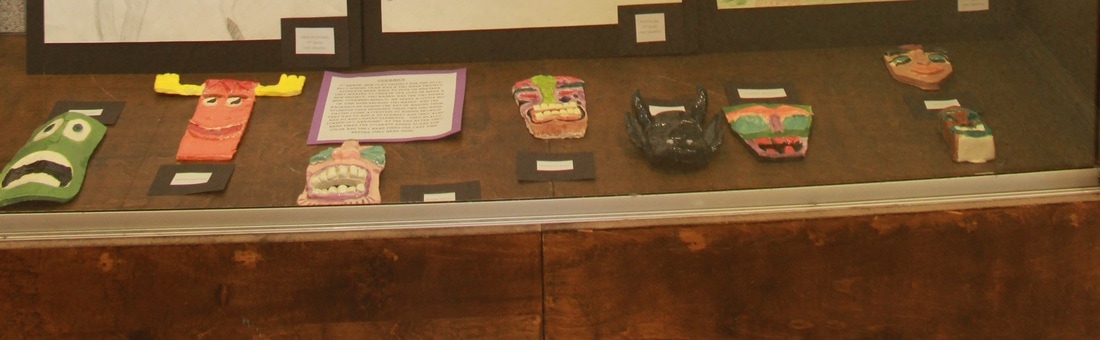
Clay Tiki Masks
New clay project for the 2016-2017 school year was a tiki mask project. Students were able to vote on whether they wanted to create tea cups or make a new project, tiki masks, and the tiki masks won! Overwhelmingly! We spent a little bit of time researching tiki masks, and the background behind the art of making them. Students then designed their own tiki mask, paying close attention to adding details! They had to add a 3D element and they also had to add carved elements. They really turned out awesome! At the end after they were fired the students added glaze for color and they were fired one last time before they were done.
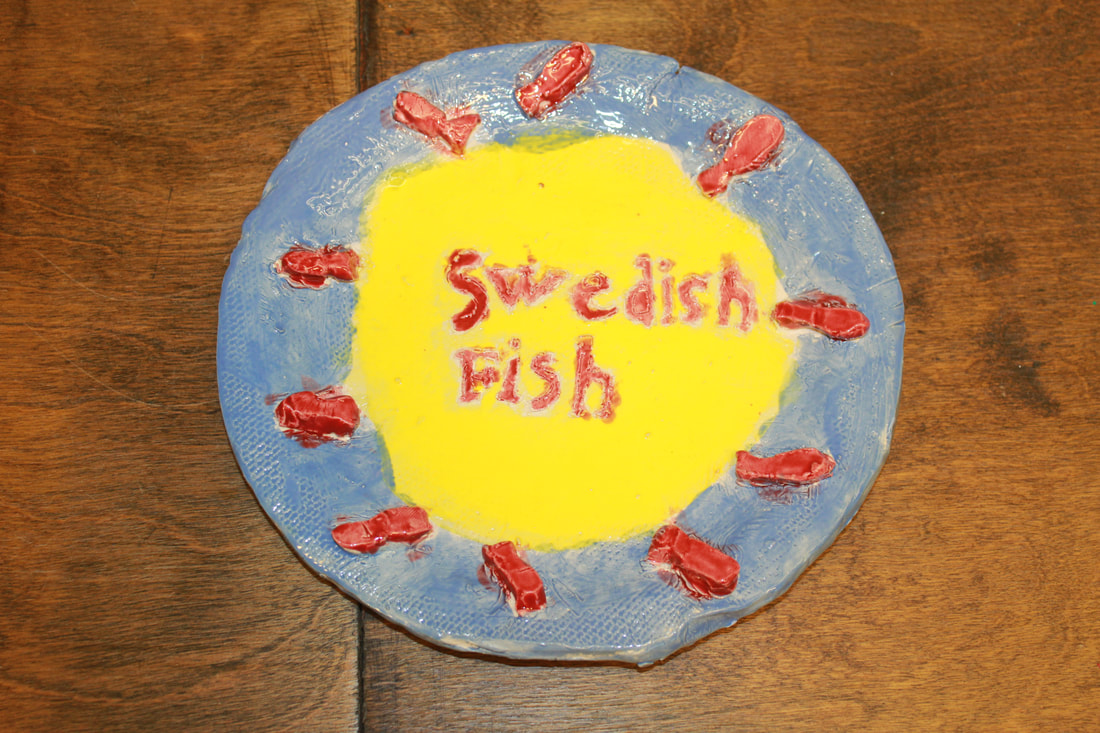
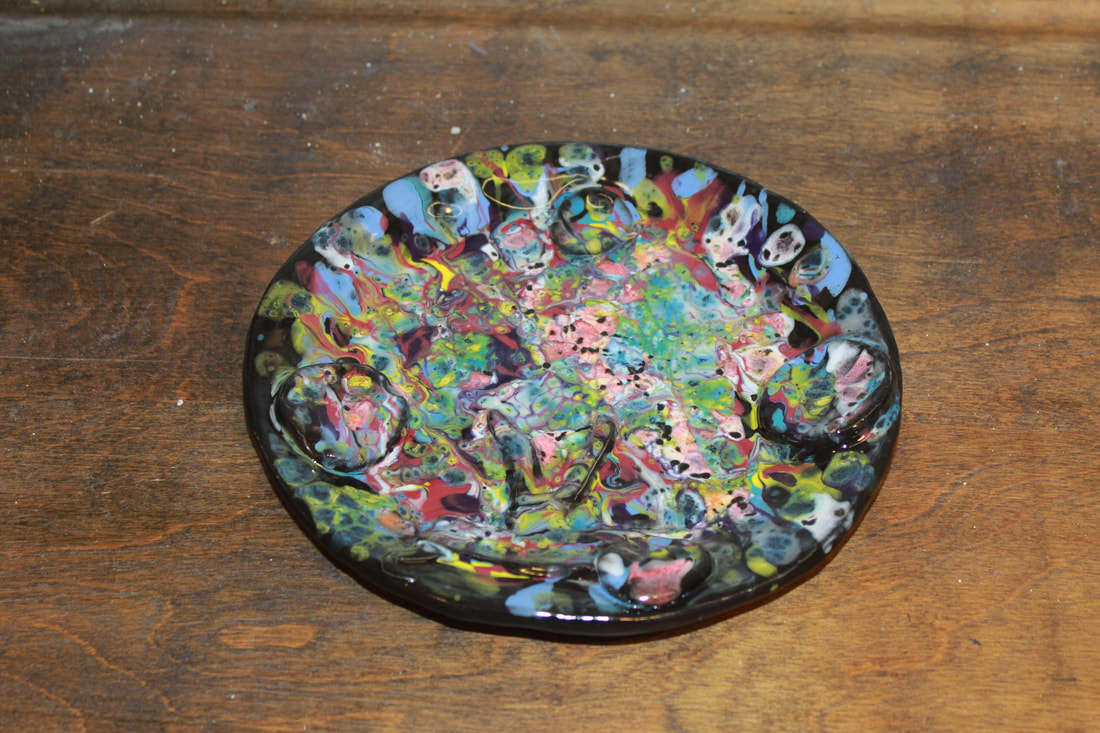
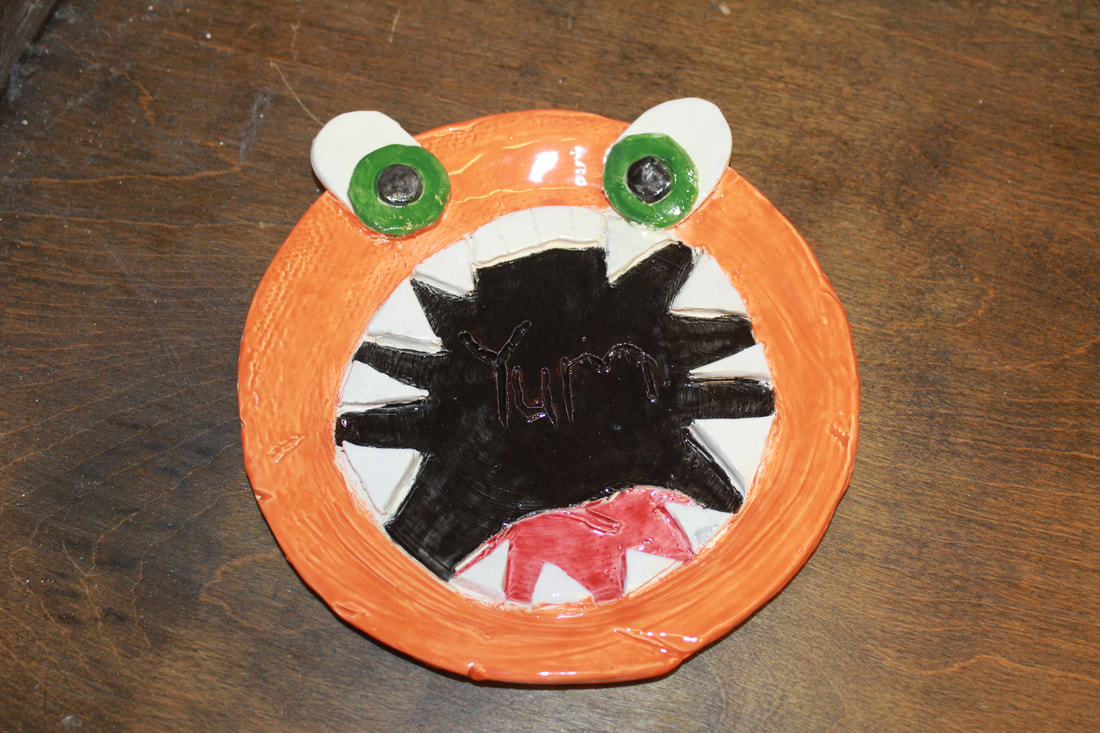
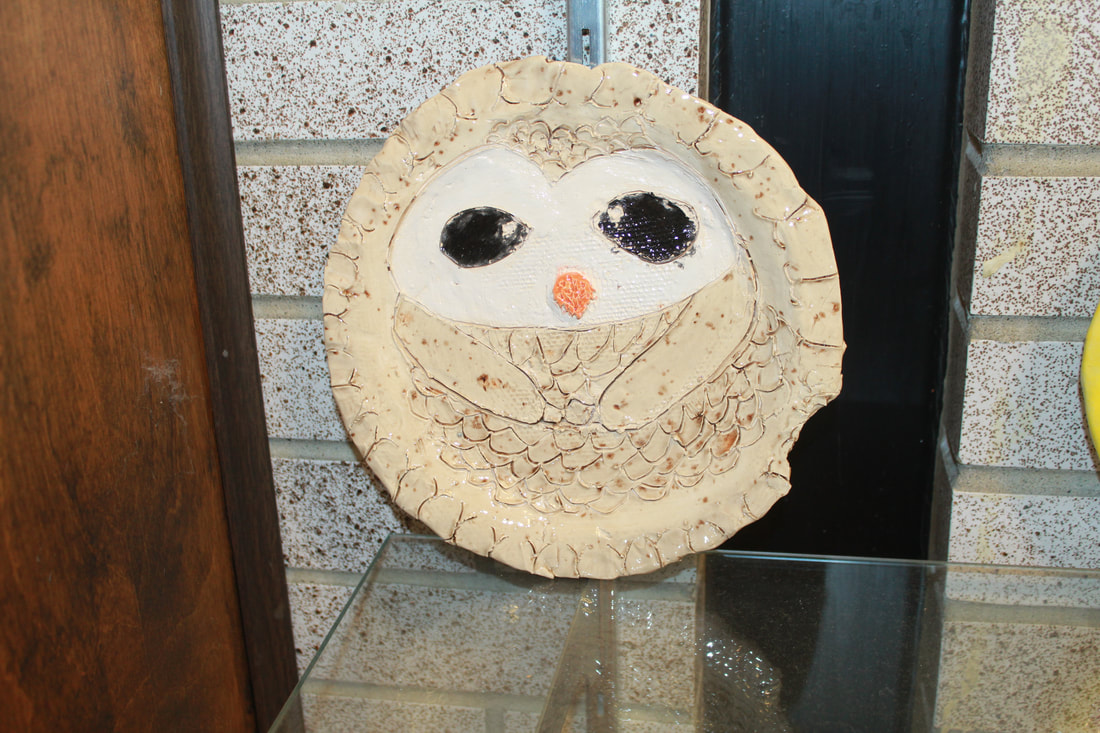
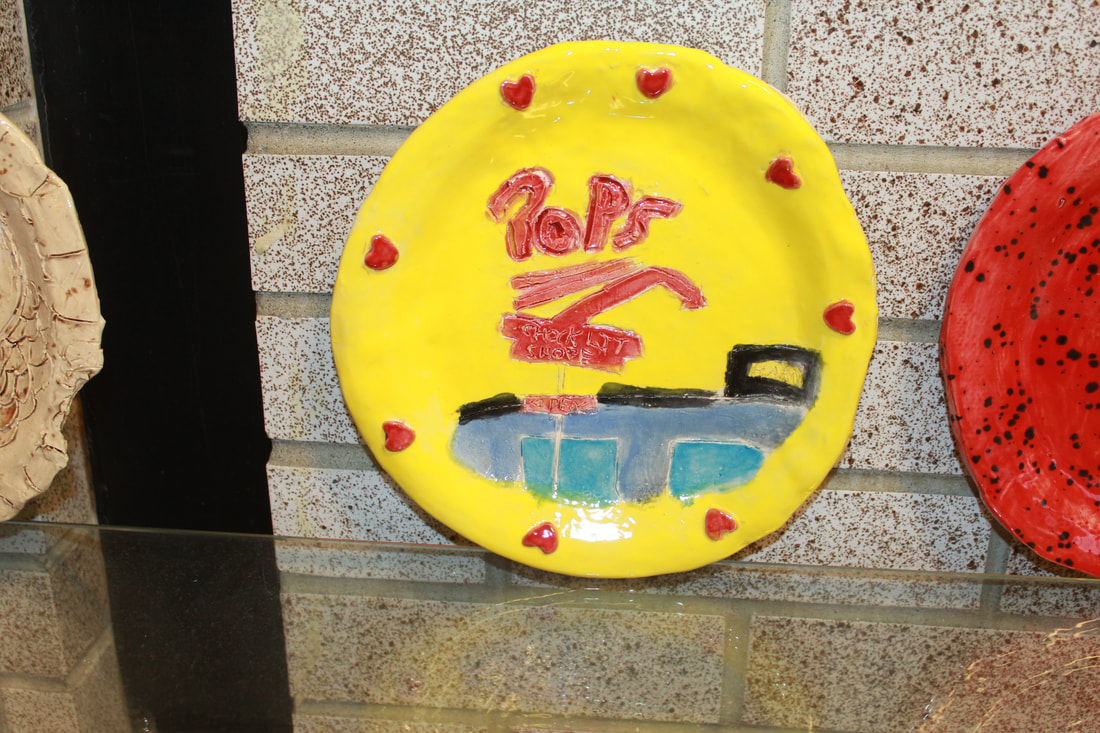
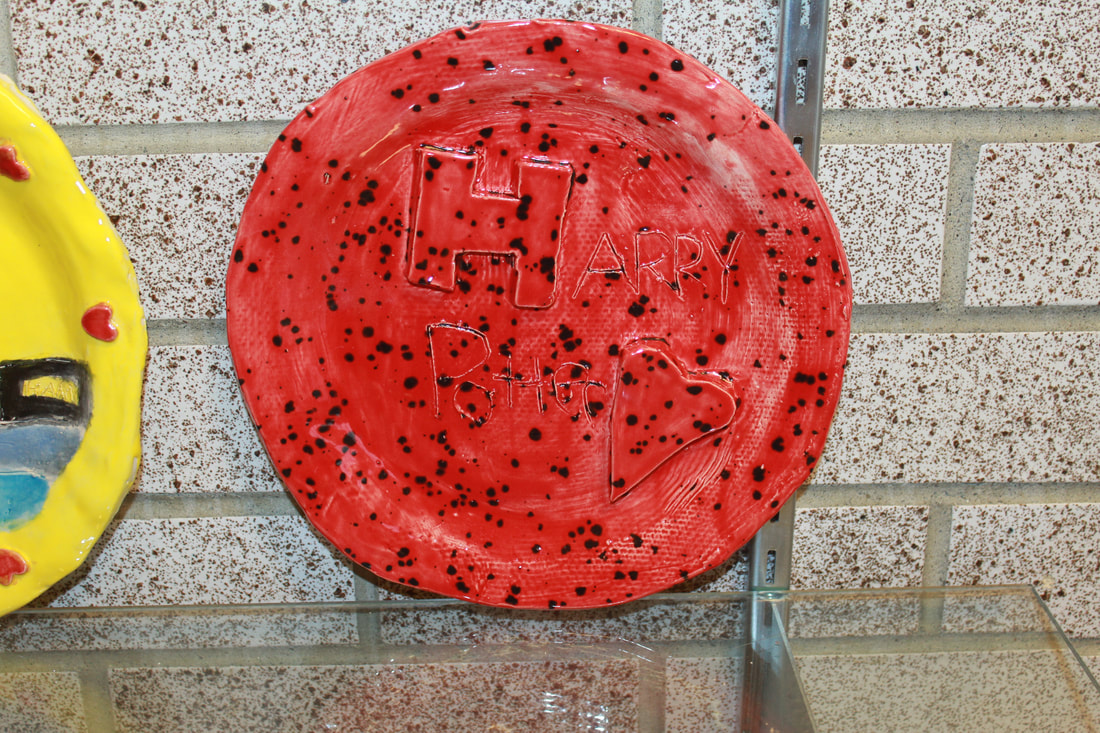
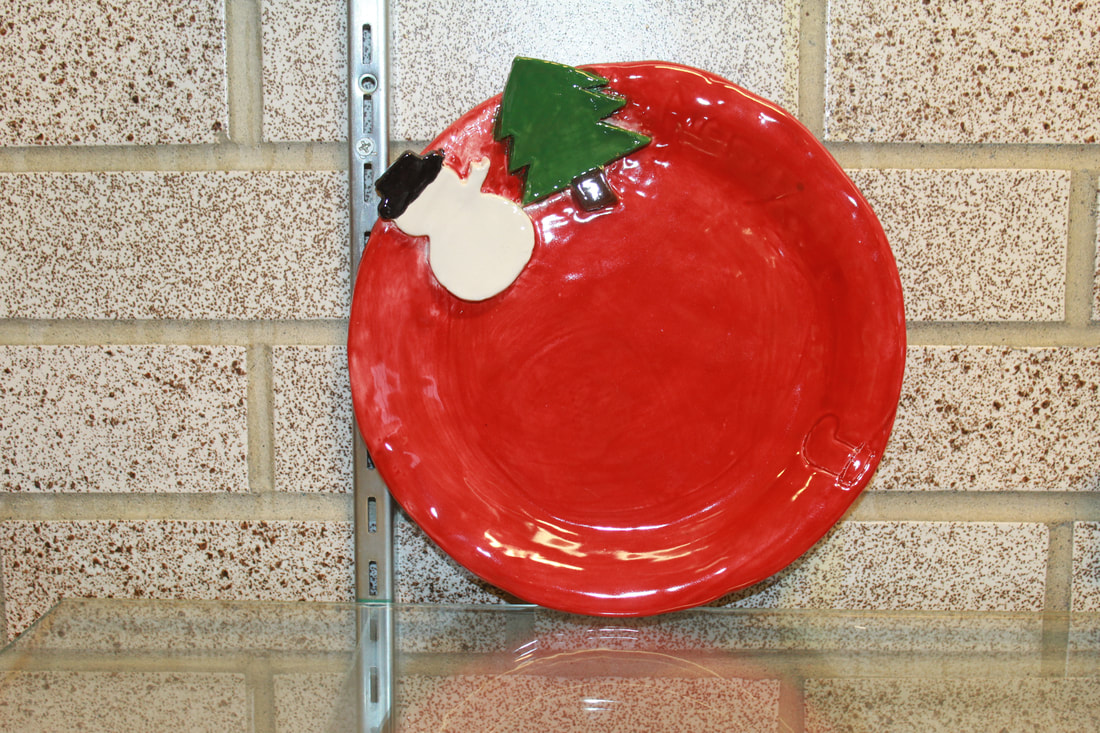
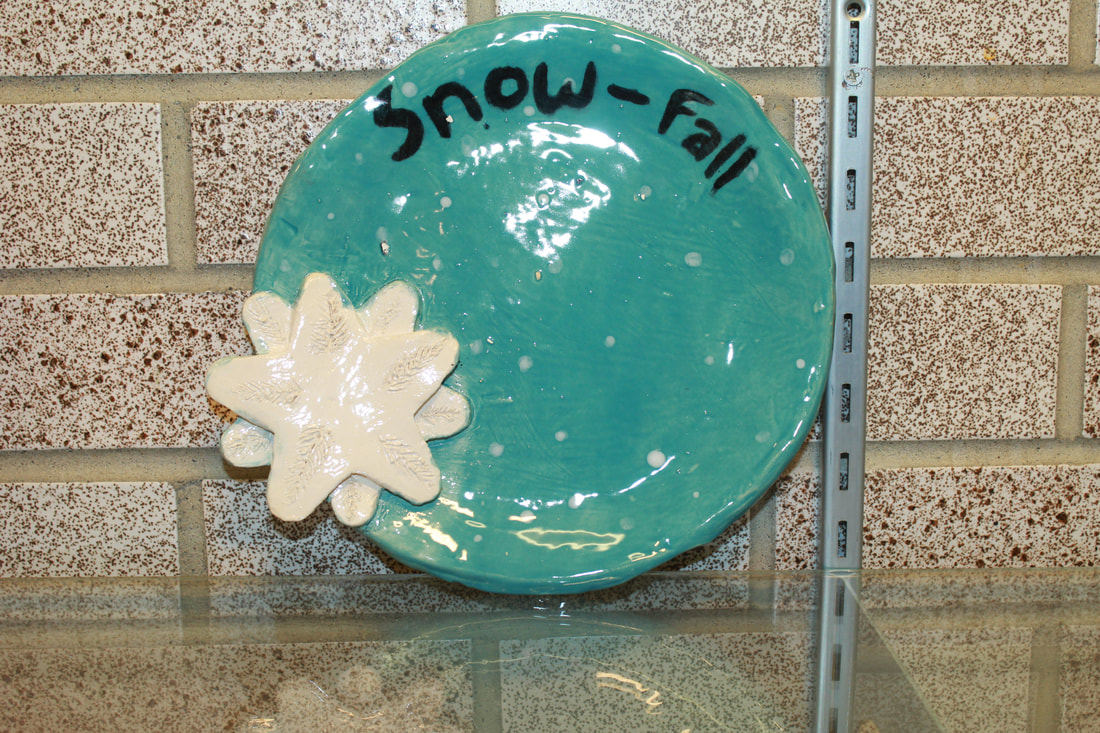
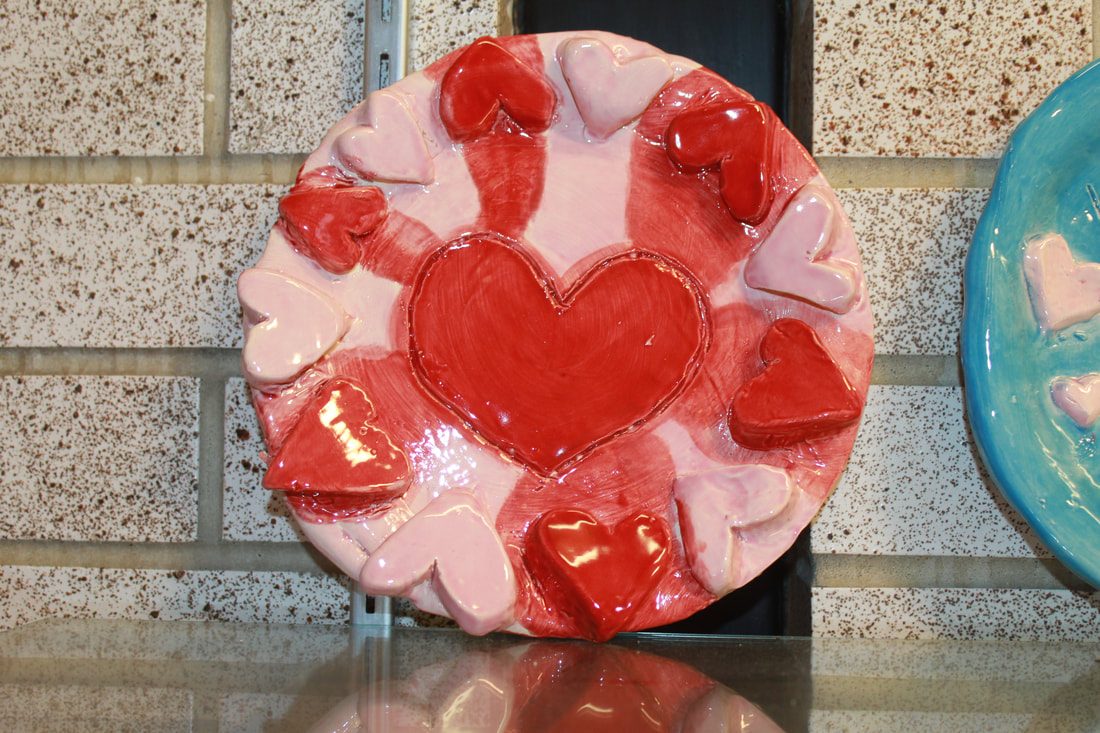
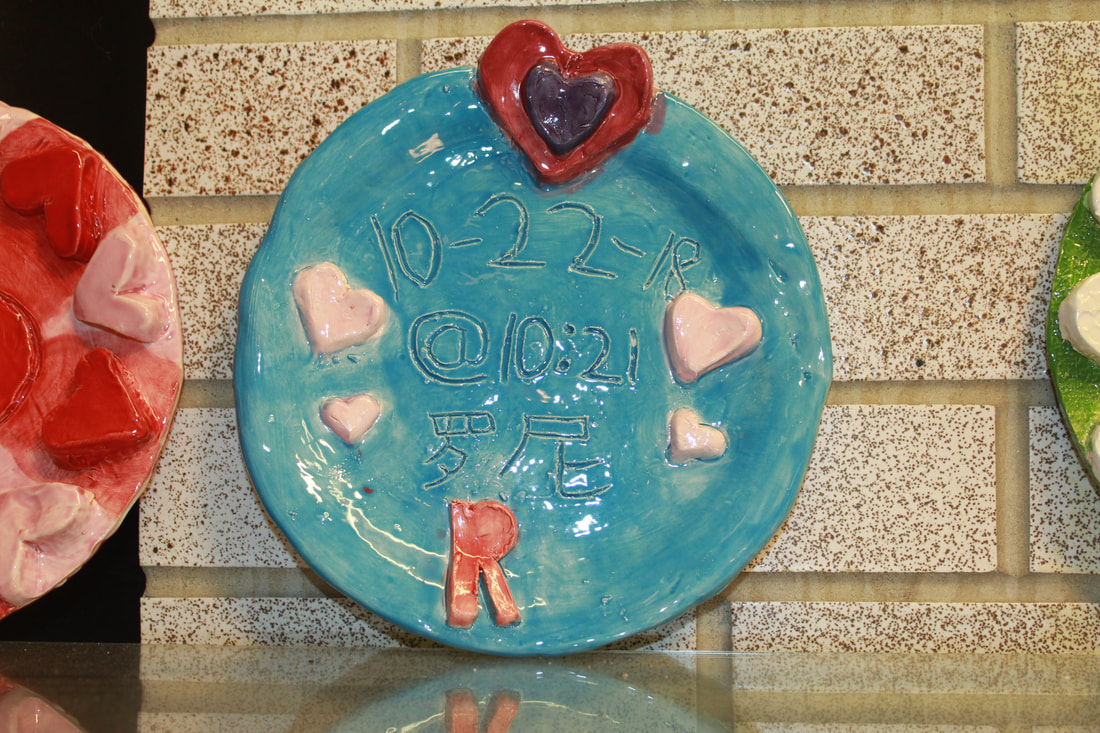
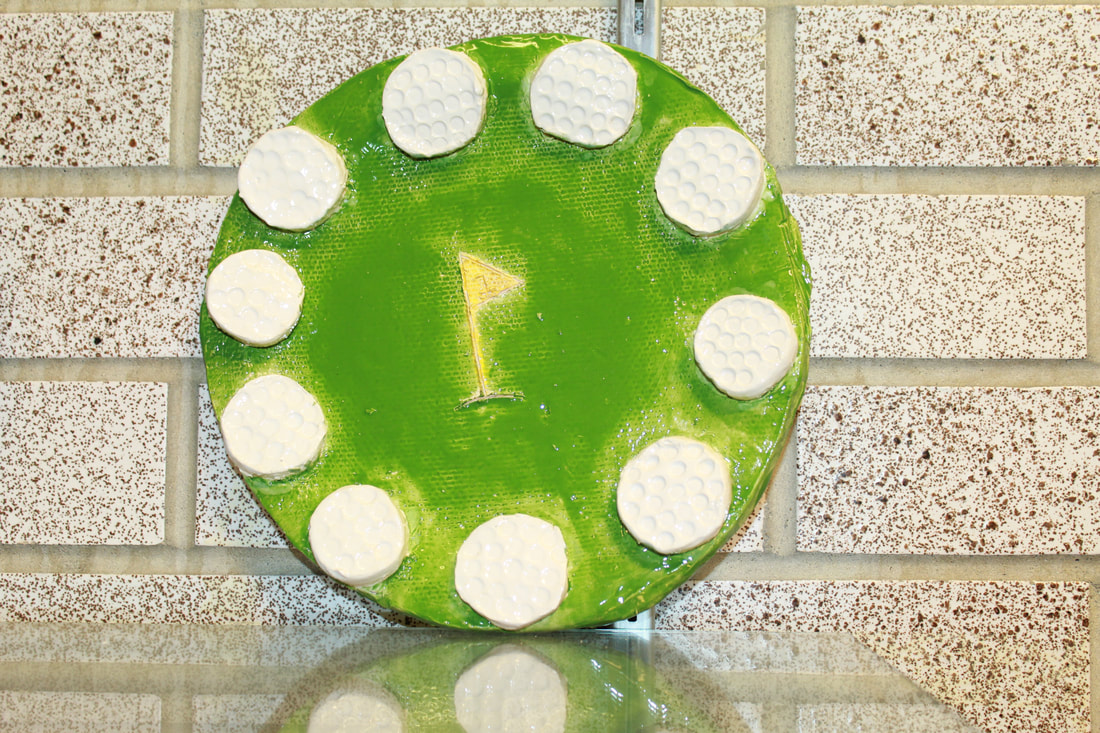
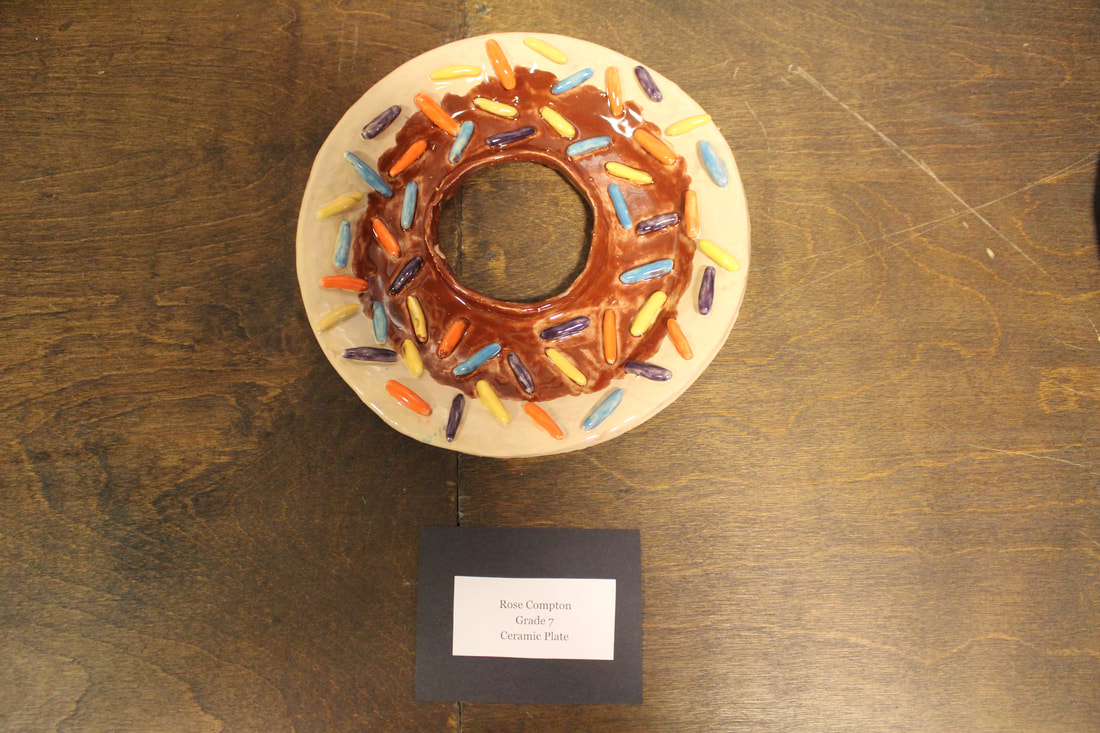
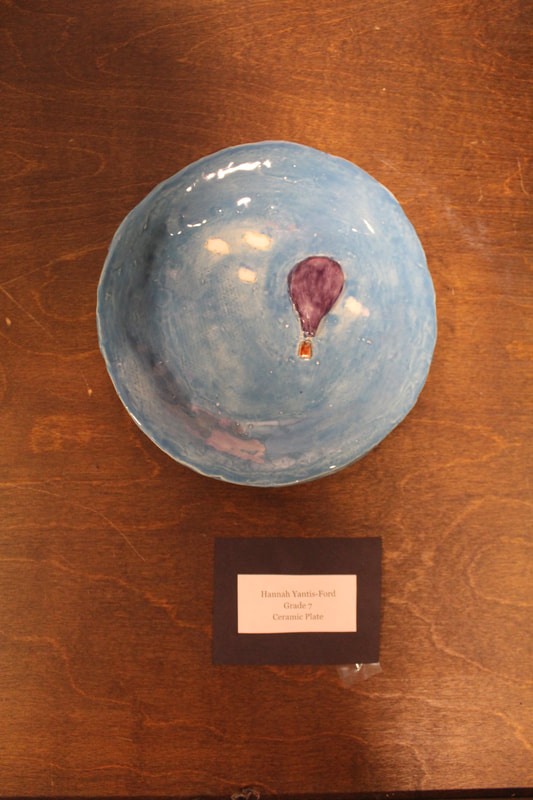
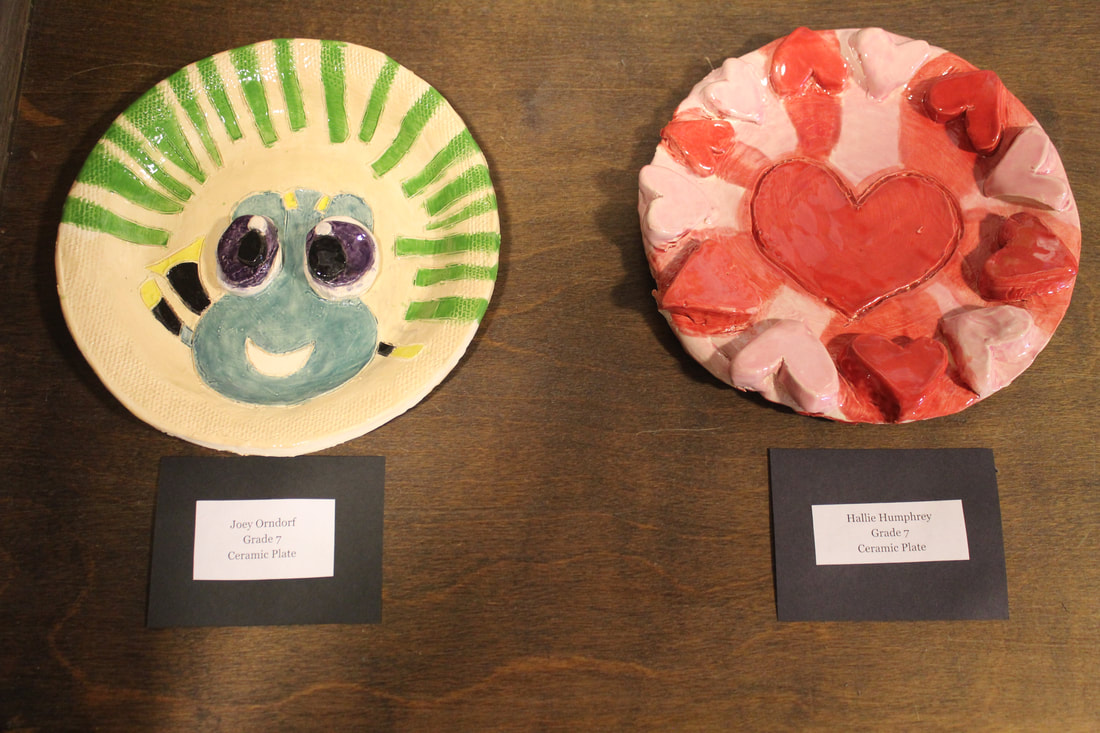
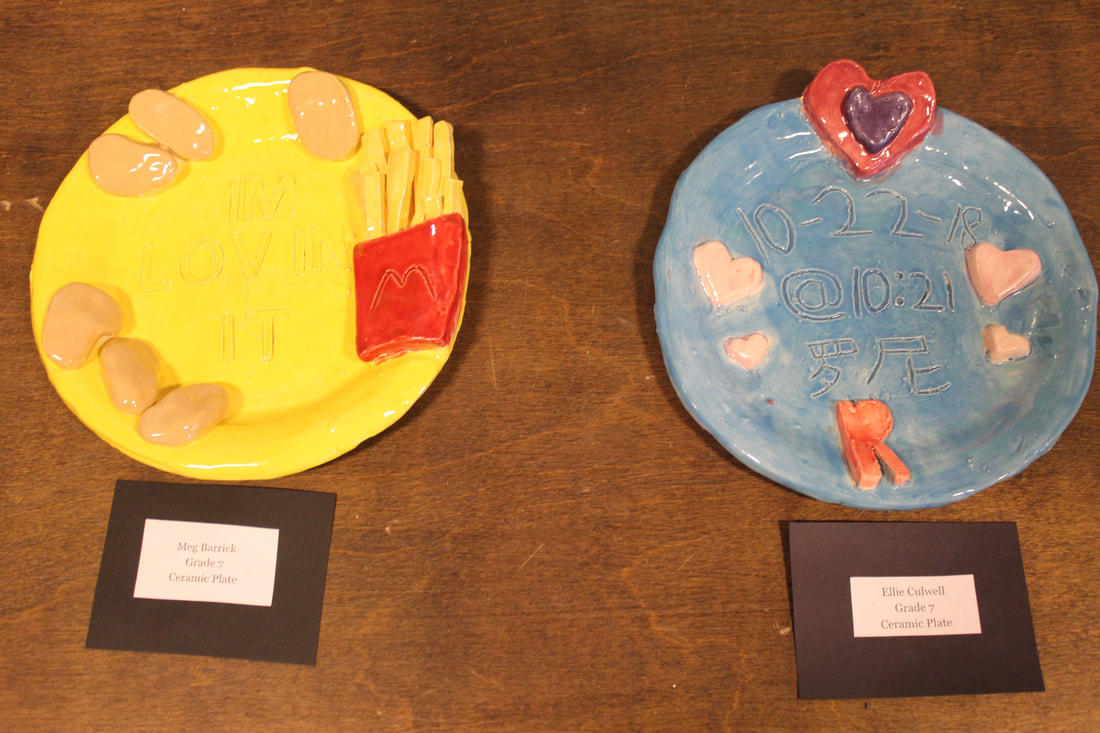
Clay Plates
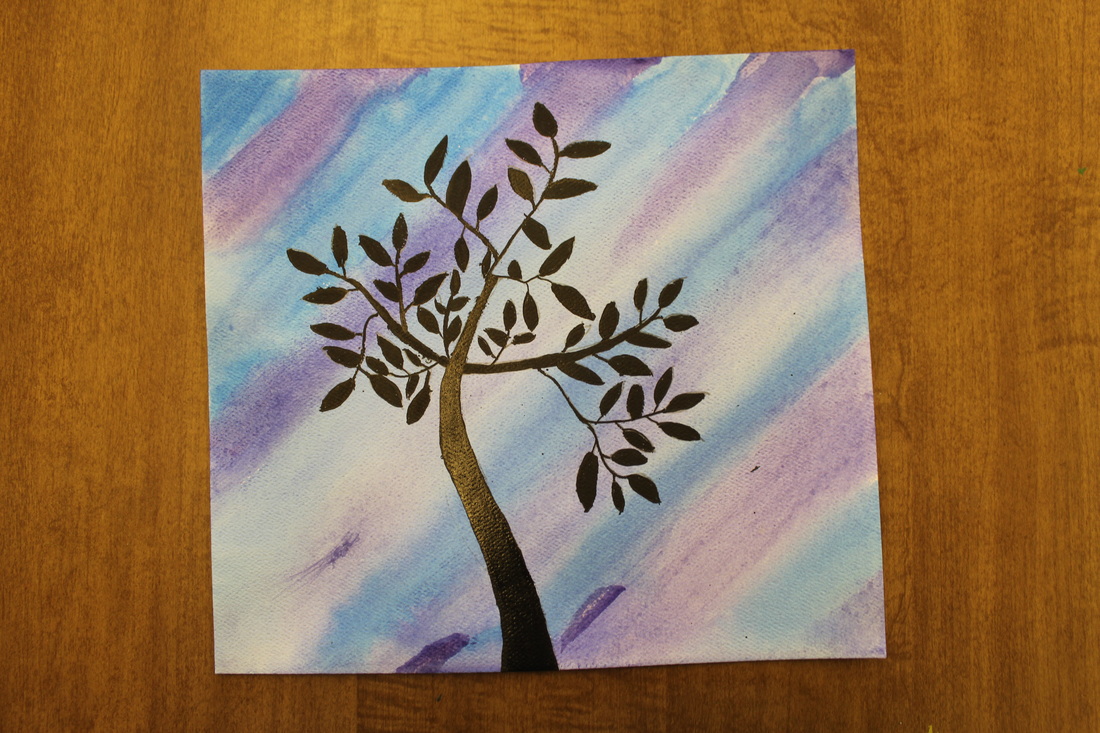
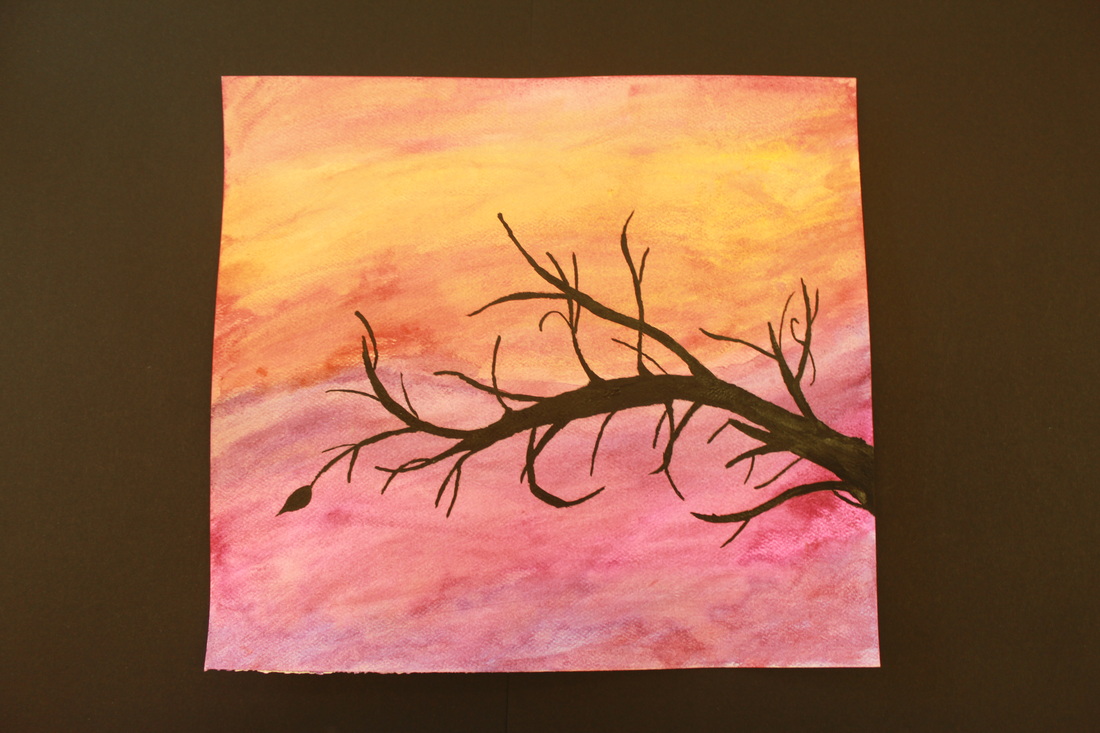
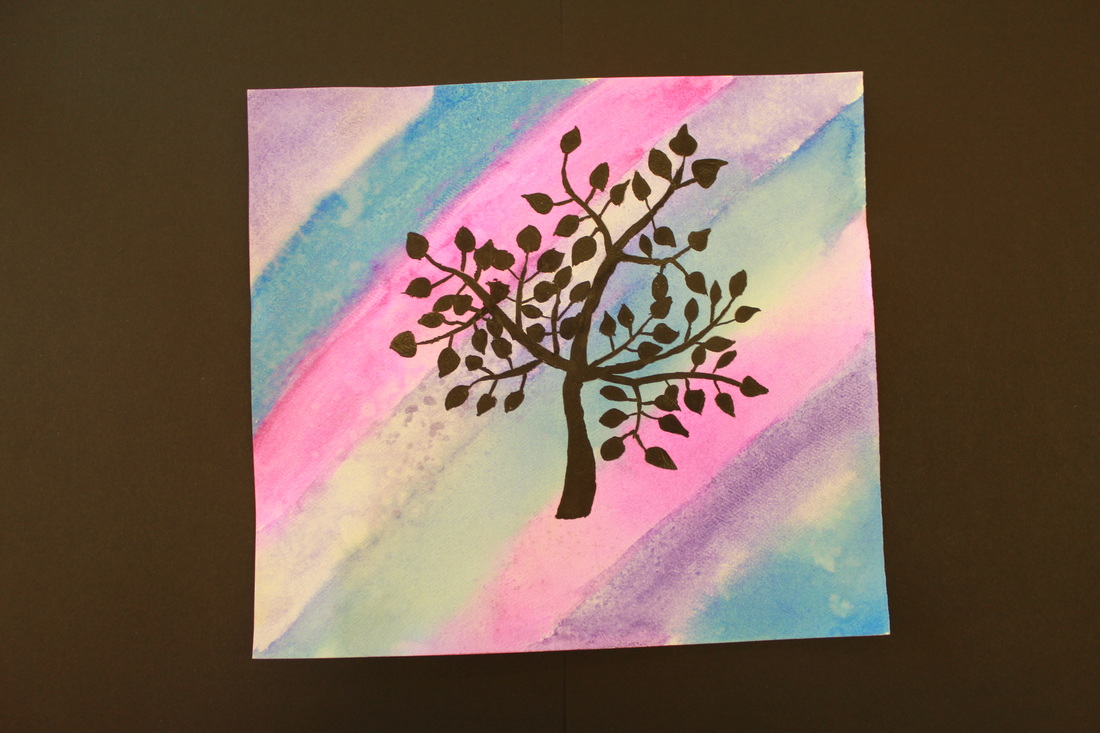
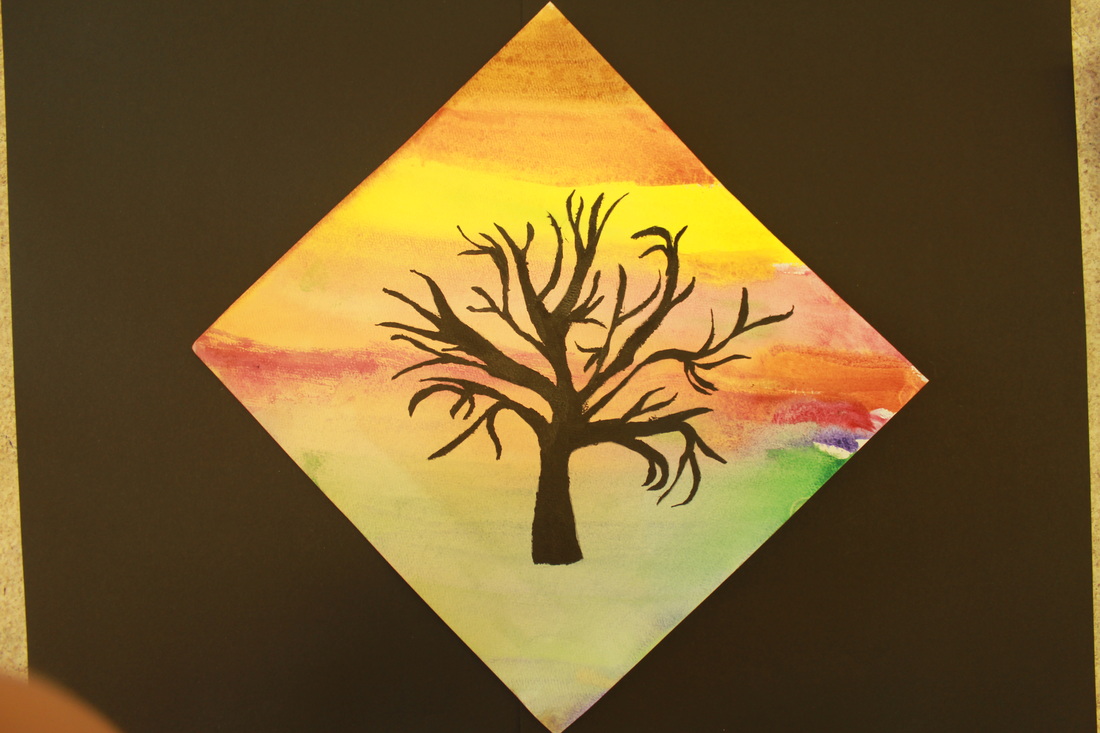
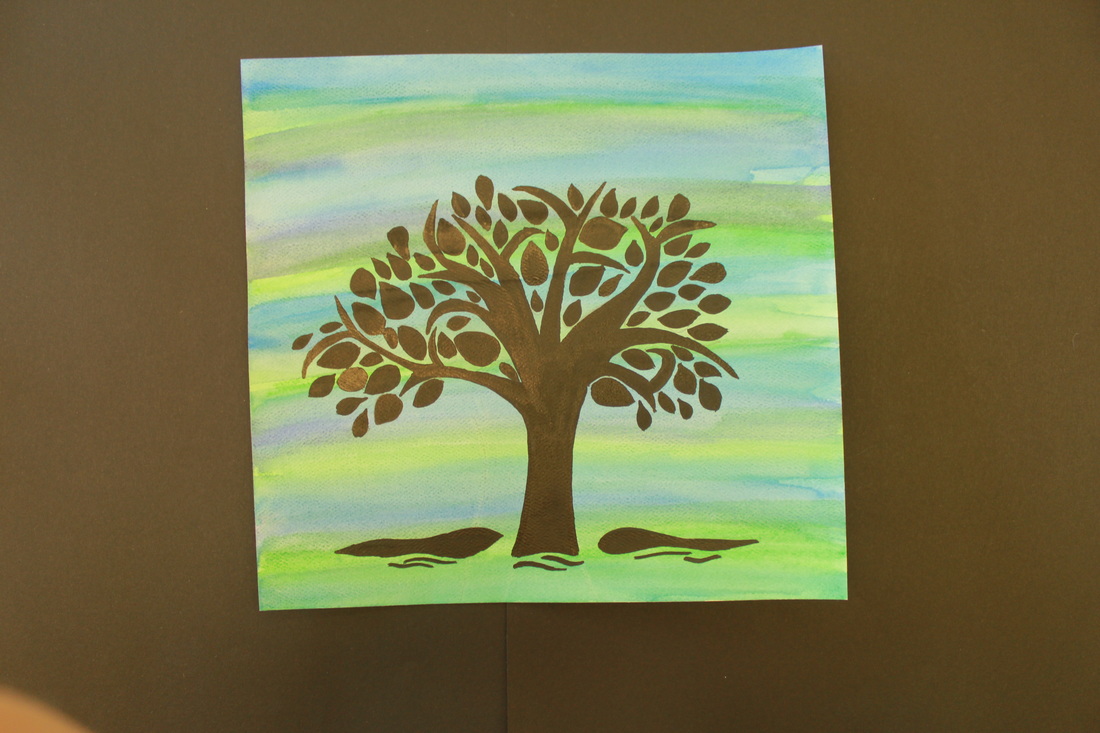
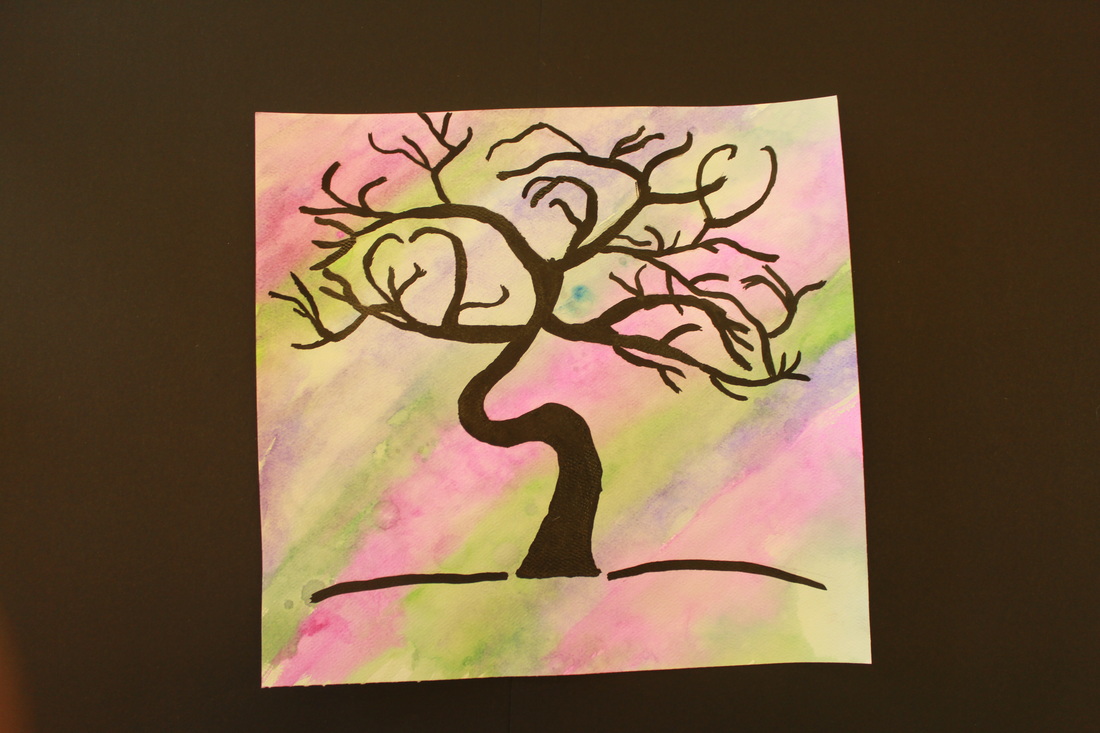
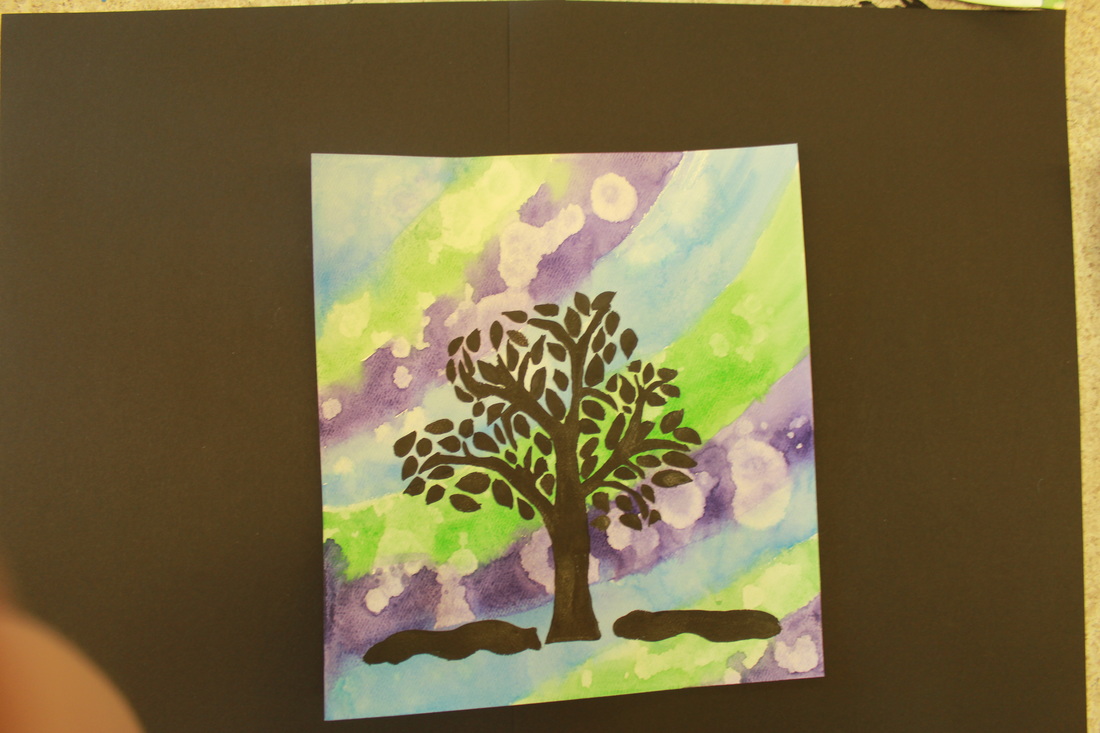
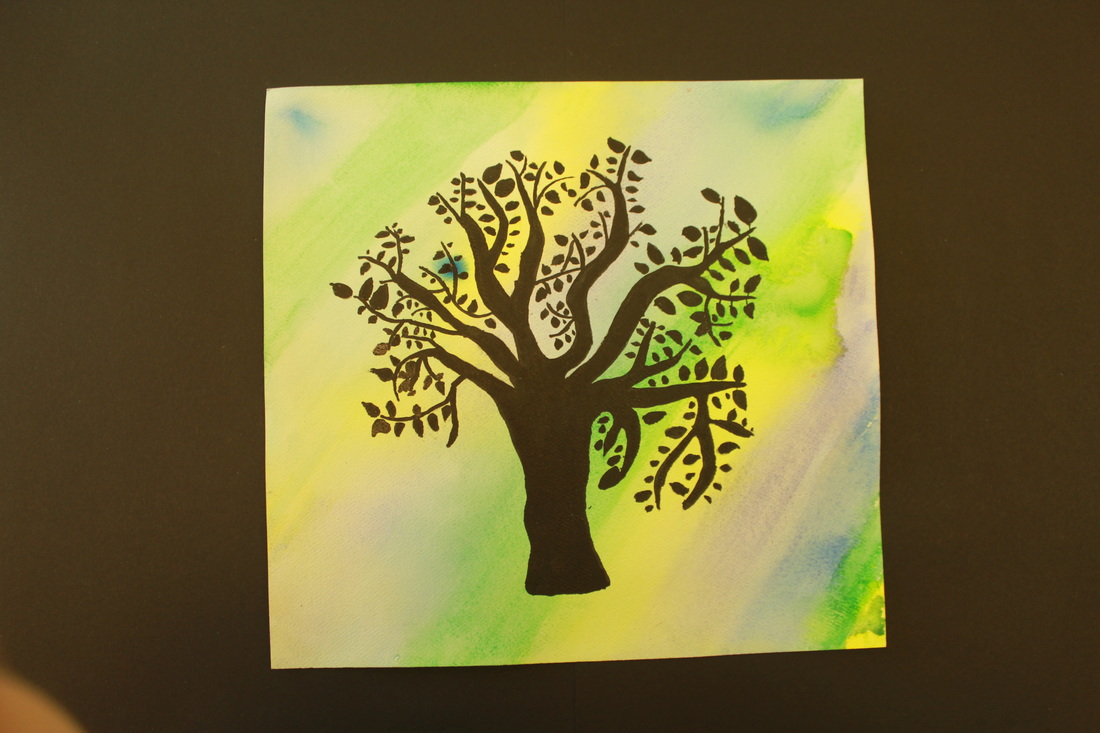
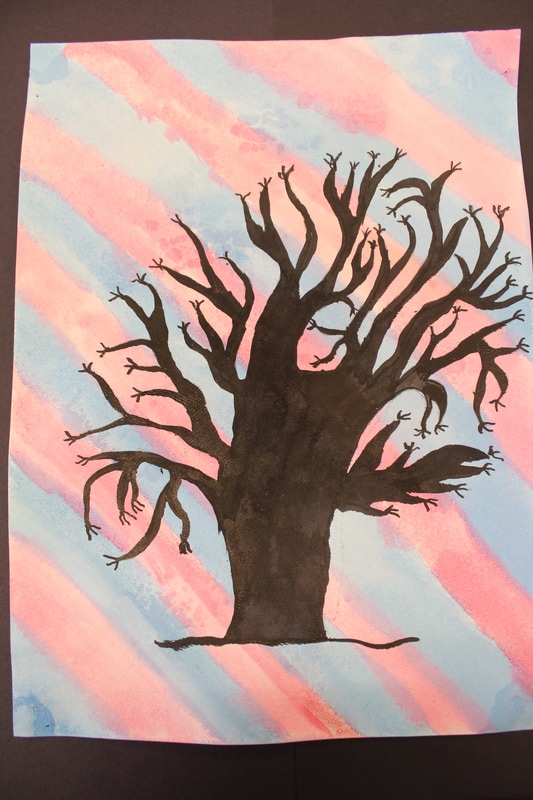
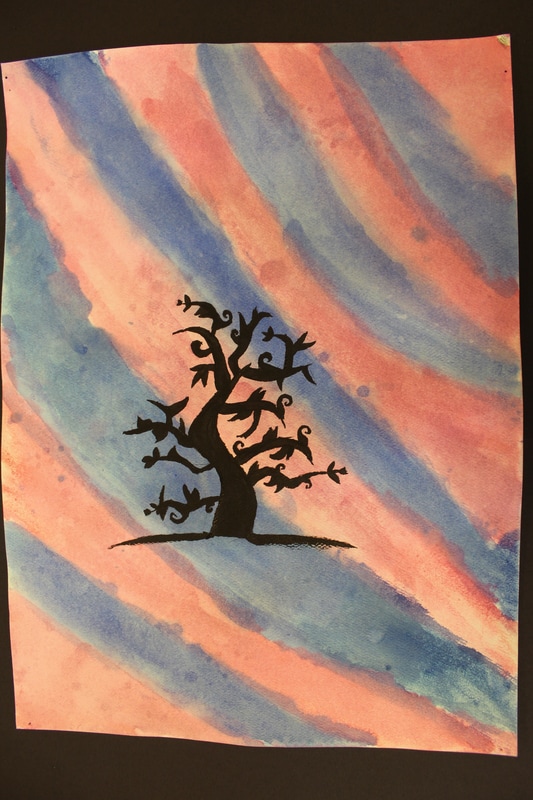
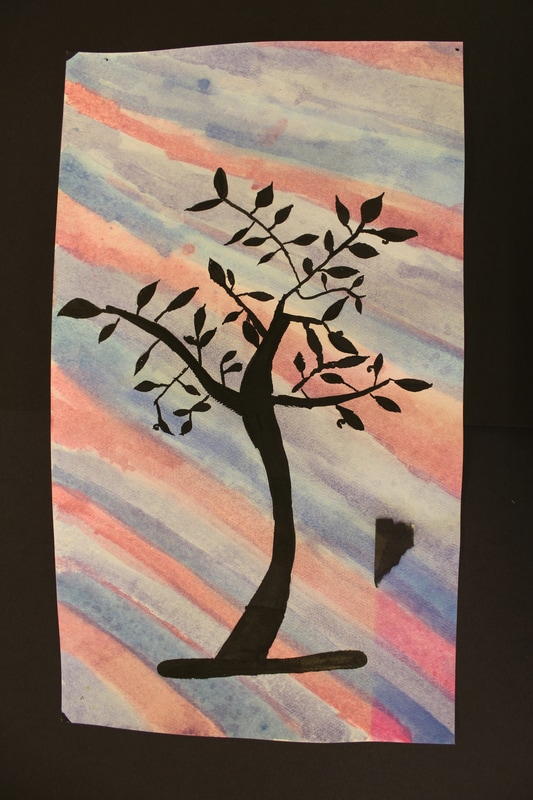
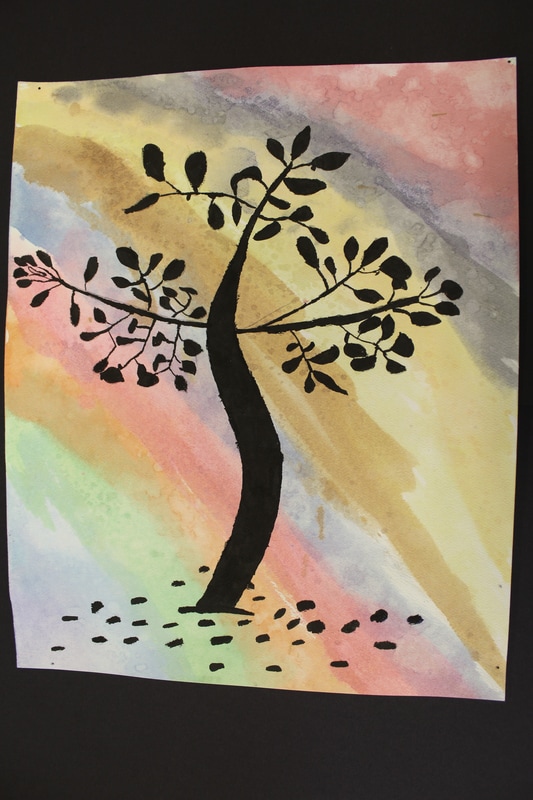
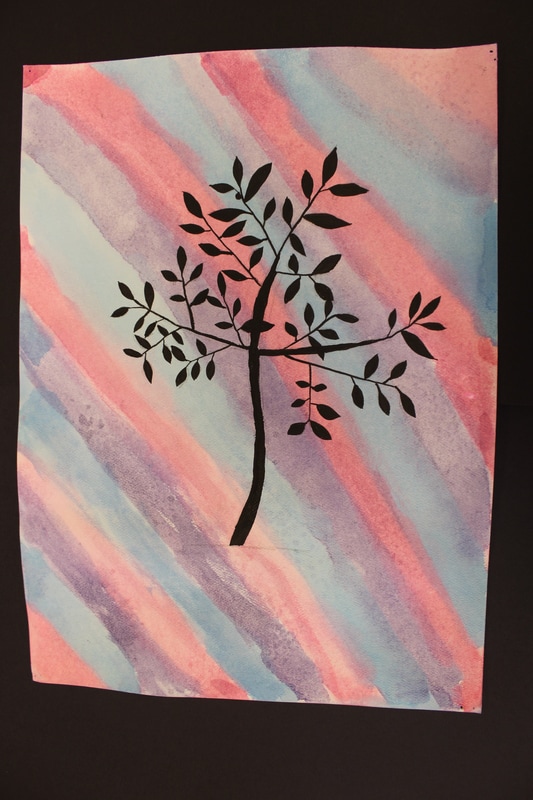
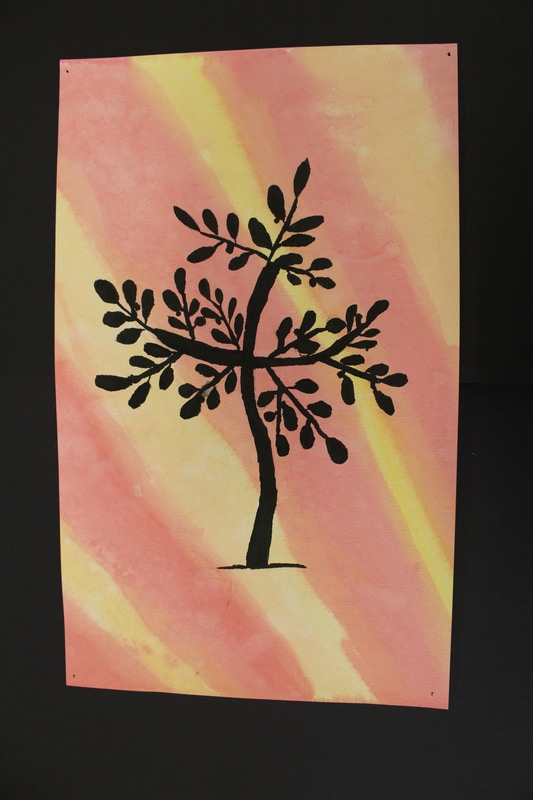
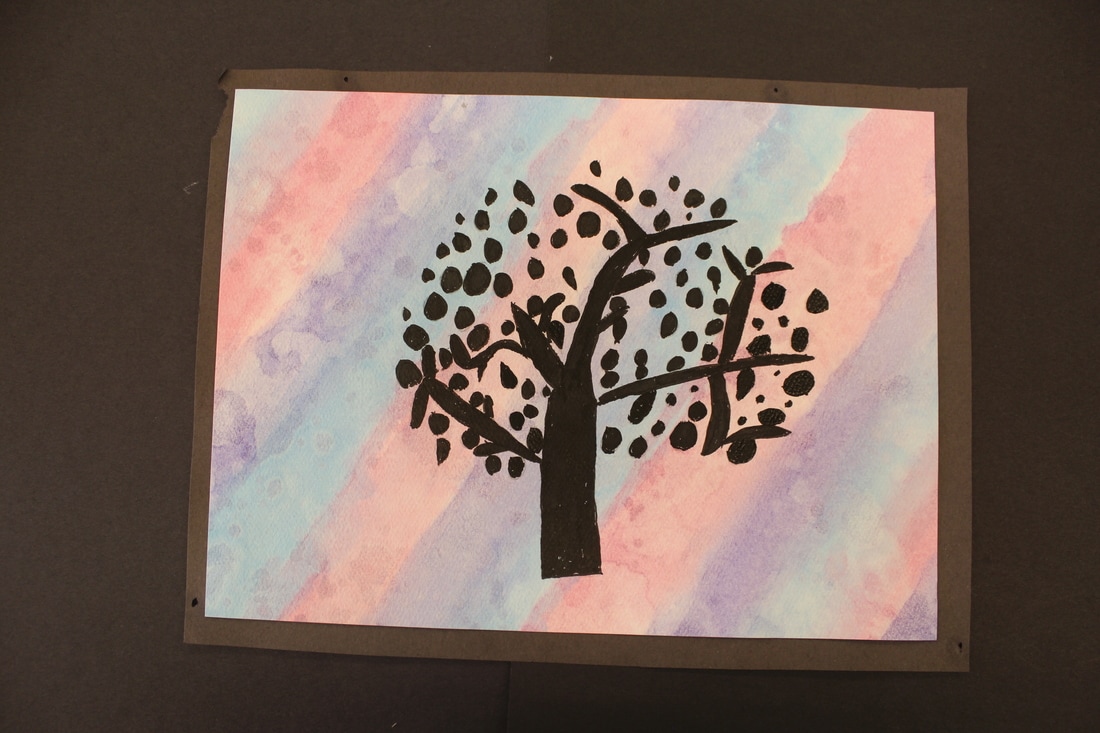
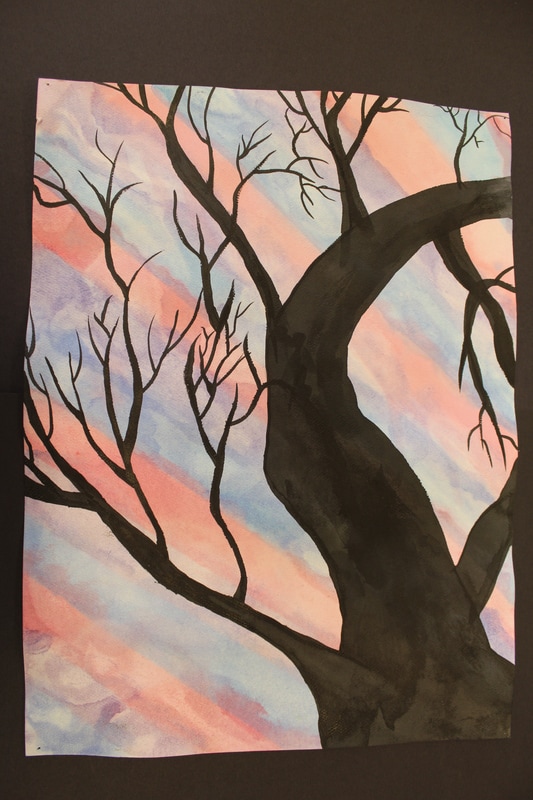
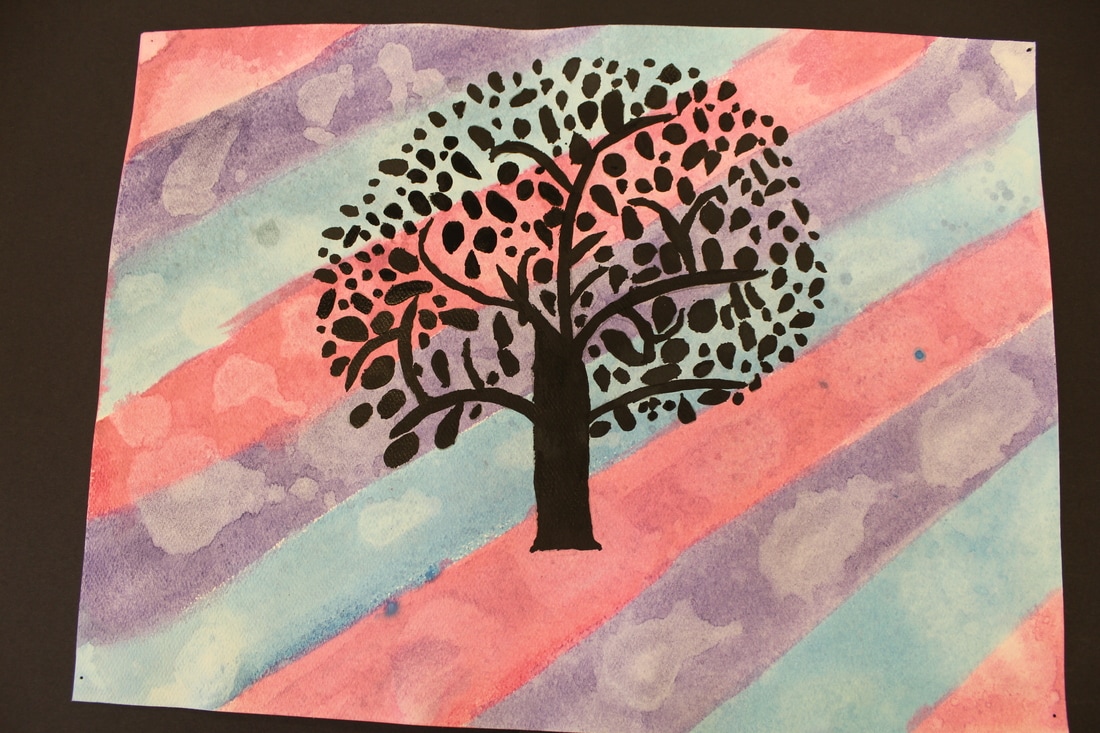
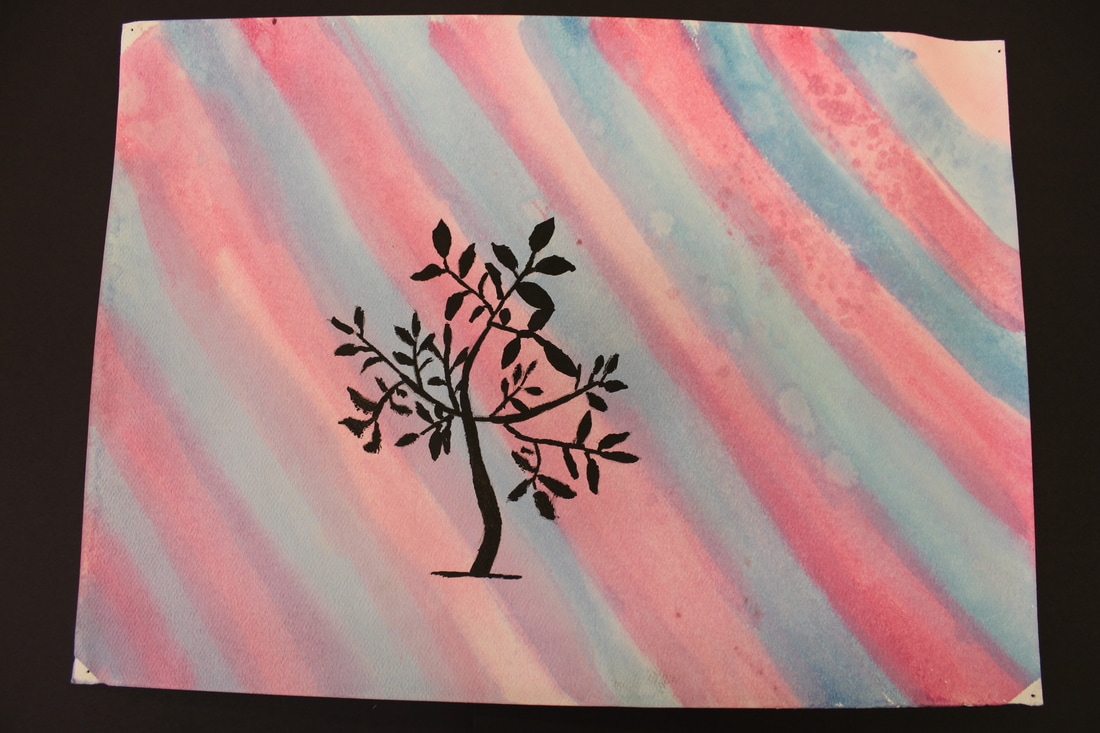
Watercolor Tree Silhouettes
For this project students learn what happens when rubbing alcohol interacts with watercolor! It makes stunning tie-dye effects! We start out painting sections of our paper with watercolor. While the watercolor is wet, you spray it with rubbing alcohol and water and the color spreads! Then once the background is dry we use black ink (Sumi) to paint a silhouette of a tree. It creates a really cool effect that makes the tree pop!


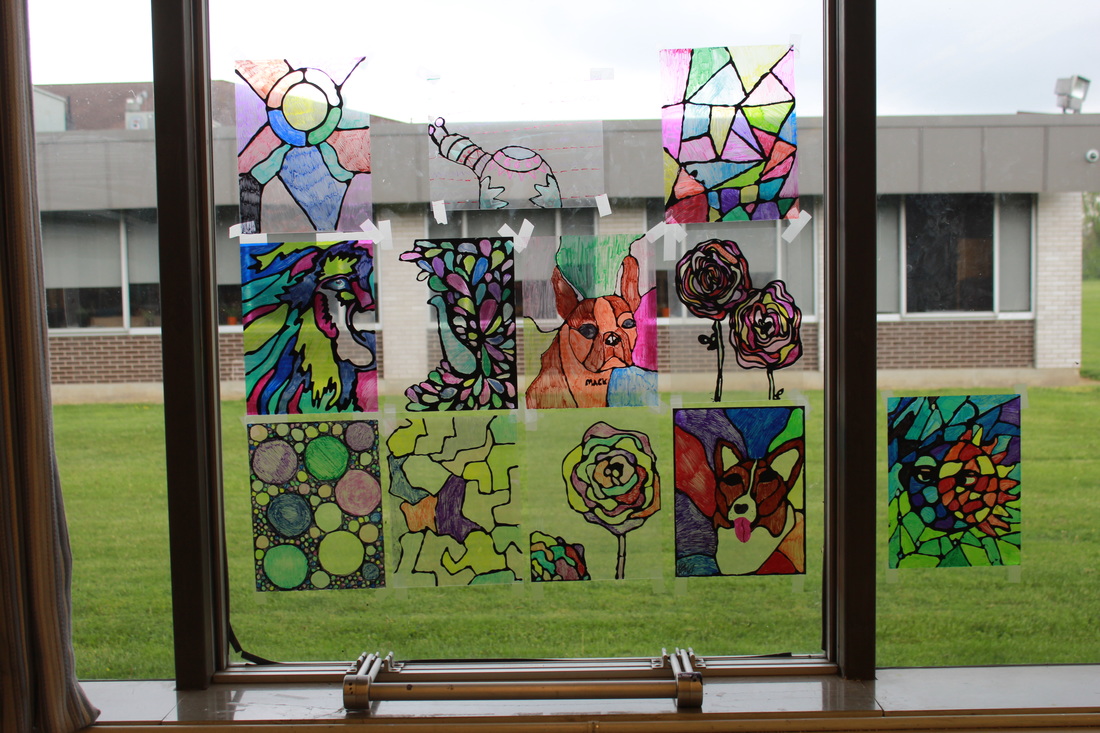
"stained glass"
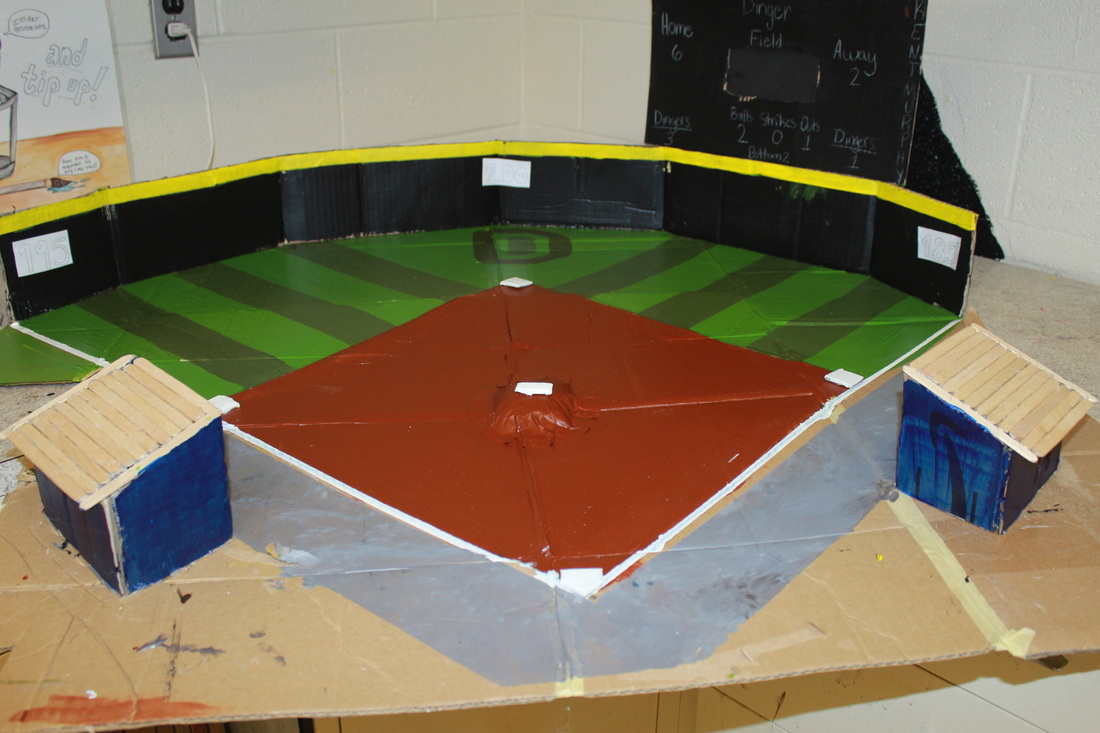
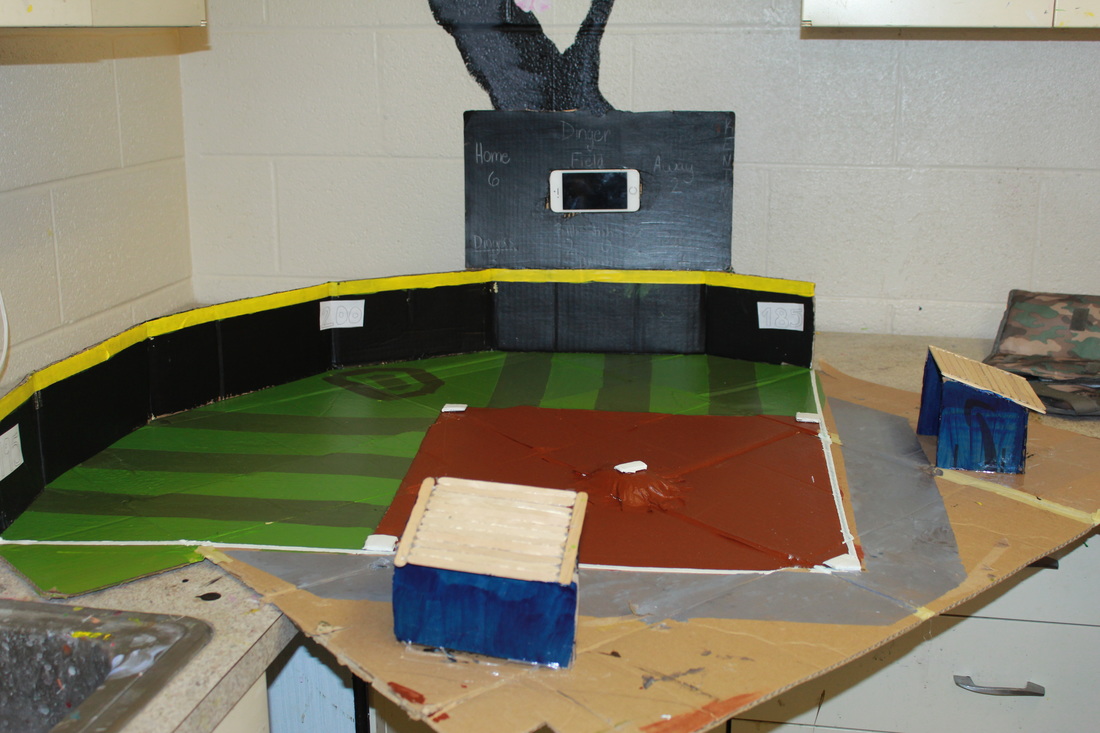
3D structures
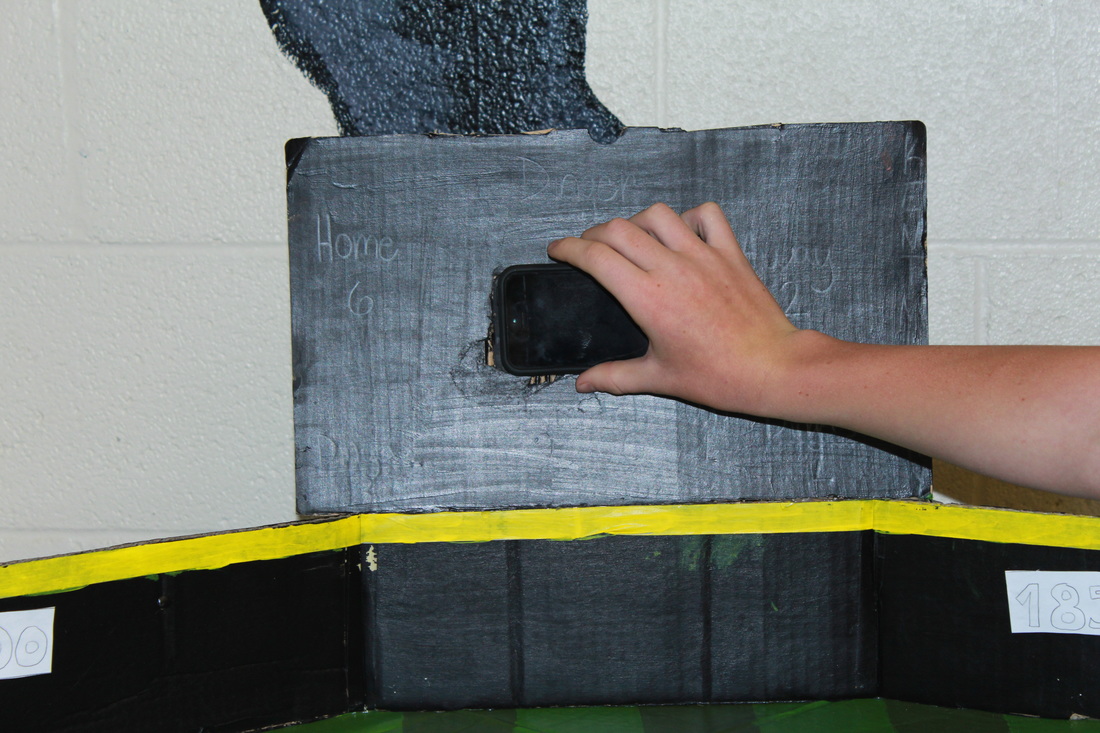
This year we had a group of students that were highly interested in building and the 3D aspects of art. For their final project of the year students used all kinds of materials to make a 3D baseball field. They carefully cut cardboard to make the field and the fences. They built dugouts with Popsicle stick roofs, and even made a scoreboard that fits your phone so they could have a real life score projected. They then carefully painted the stripes of the grass field, the baseball diamond and all the other parts! Great job!
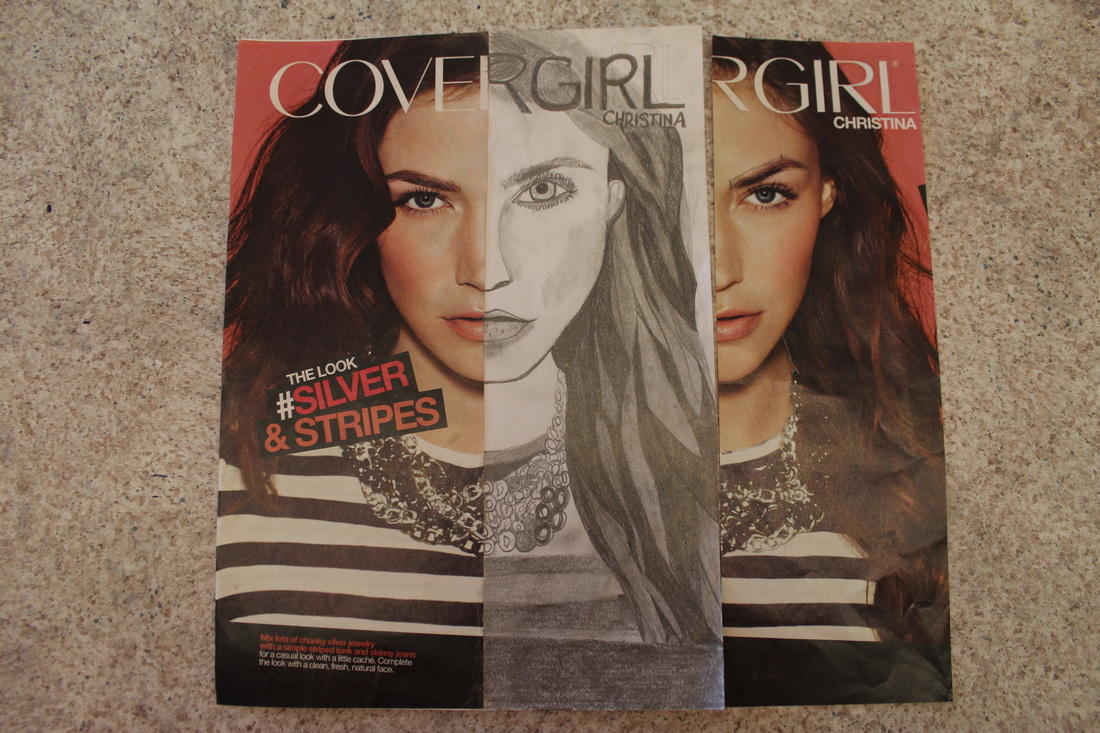
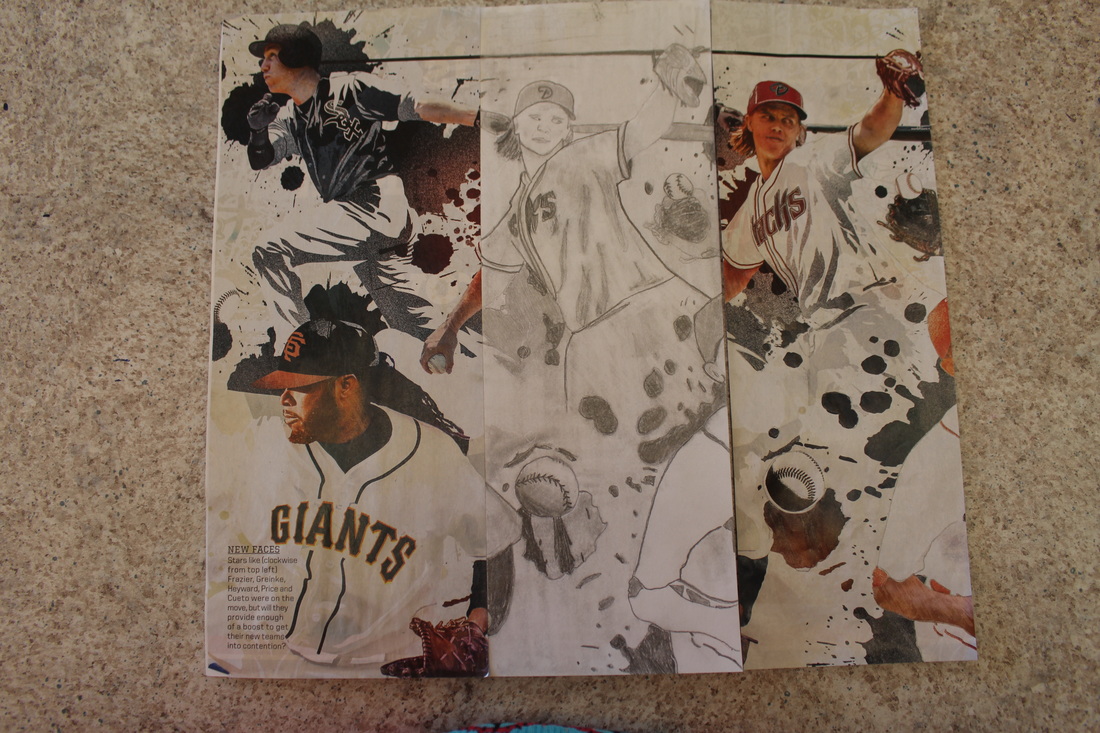
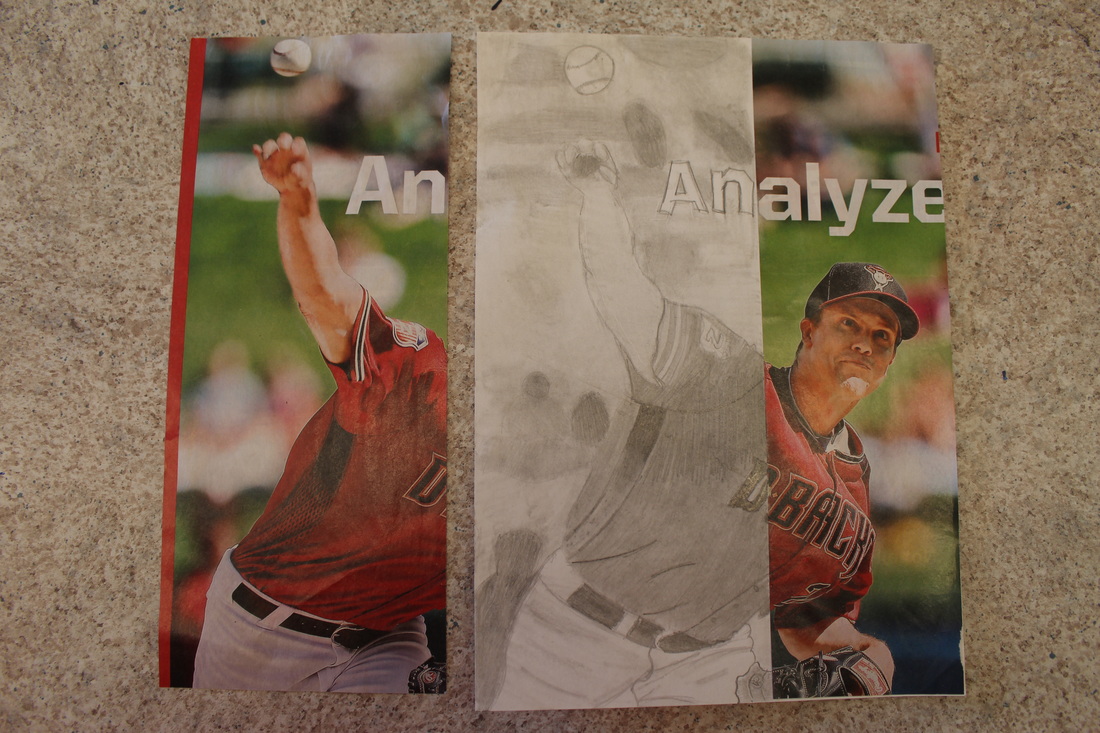
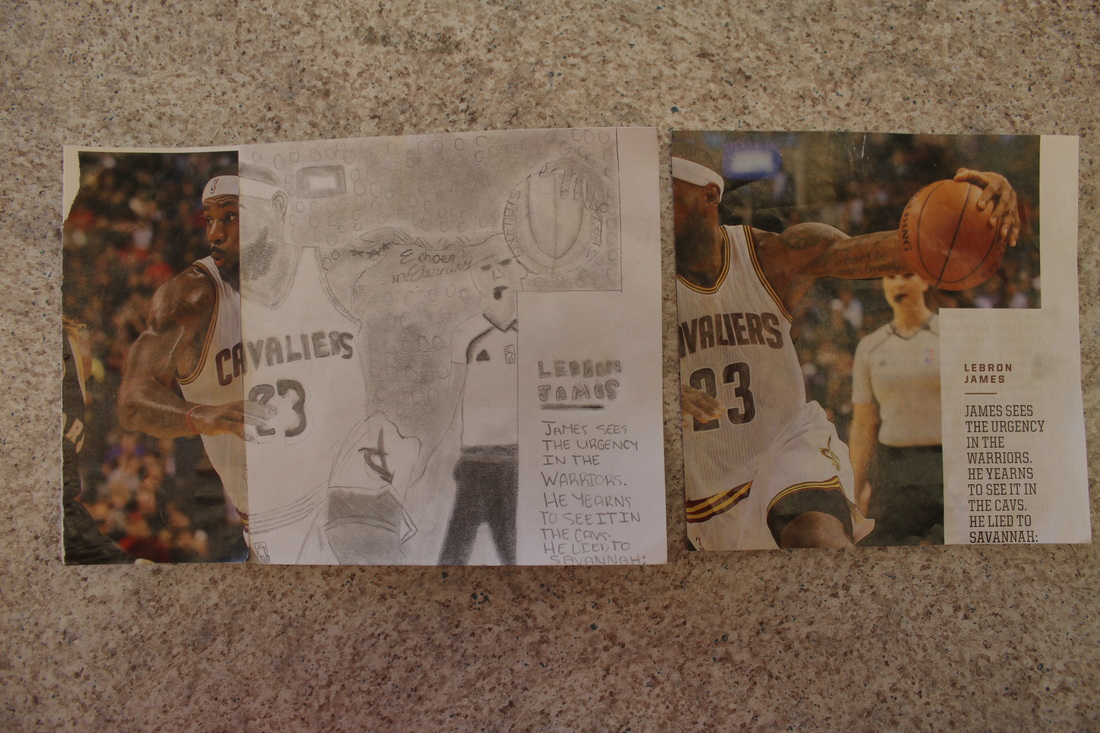
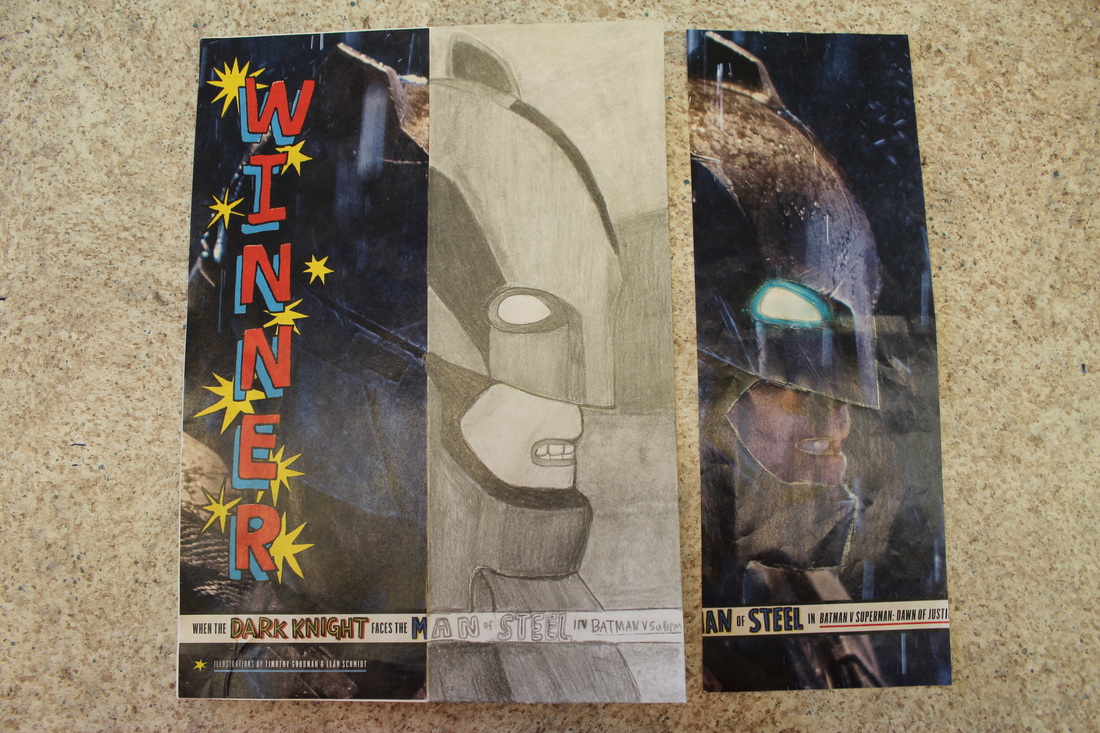
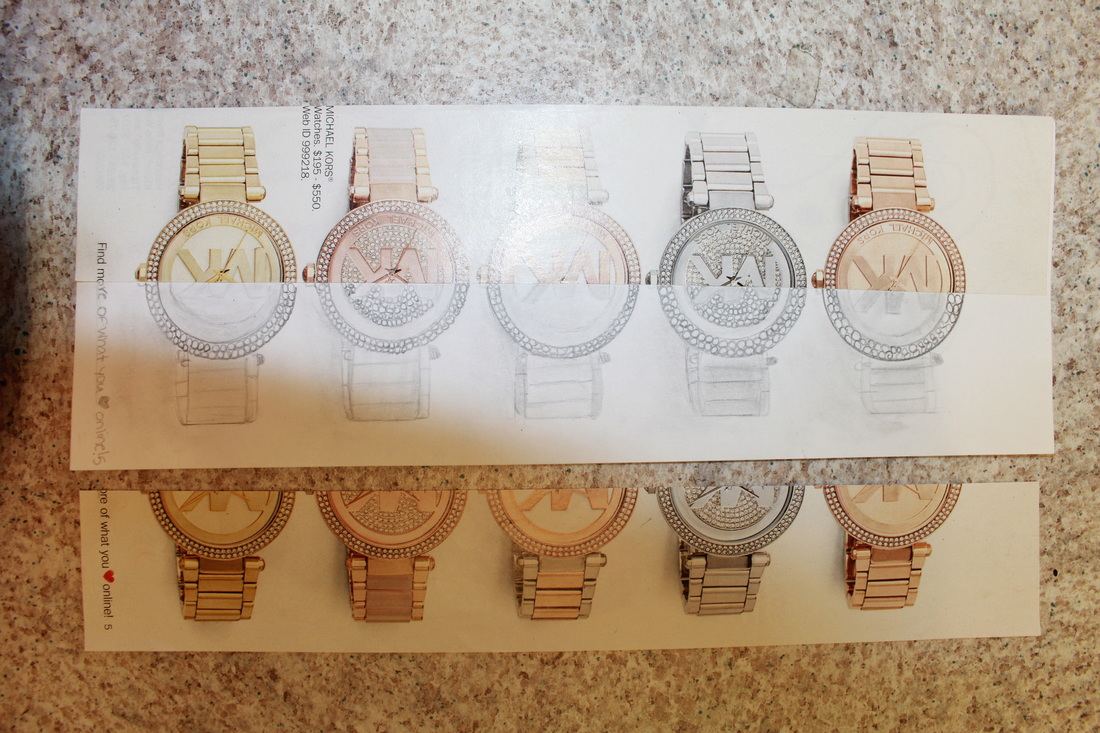
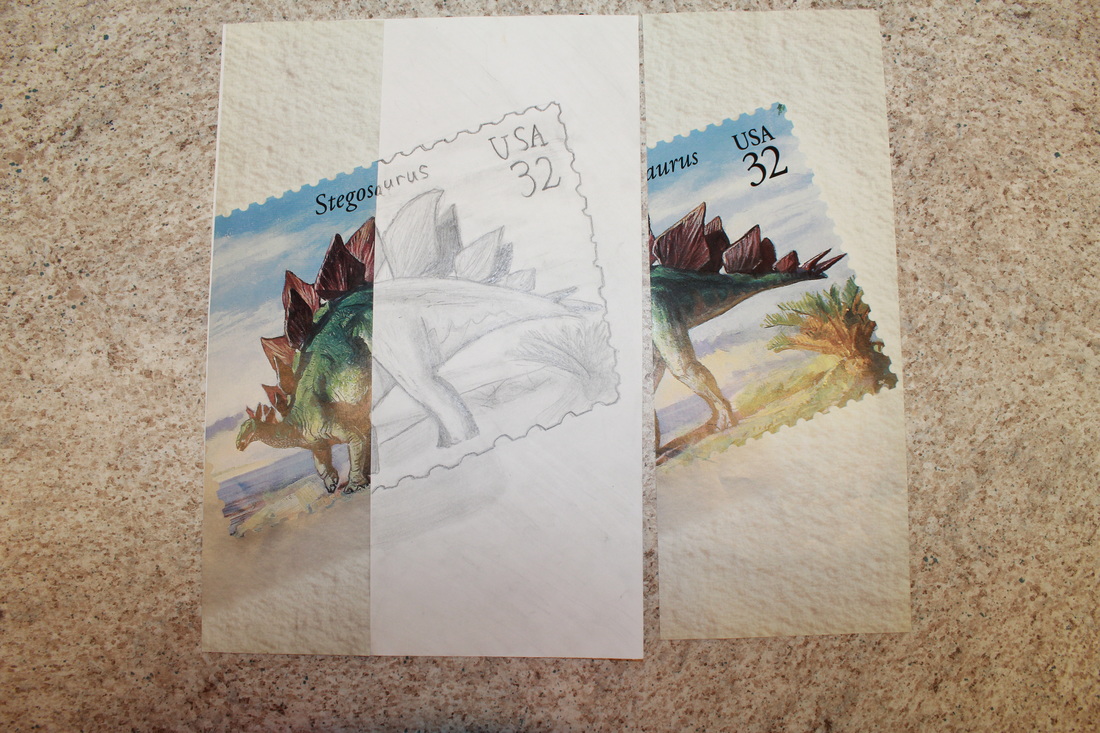
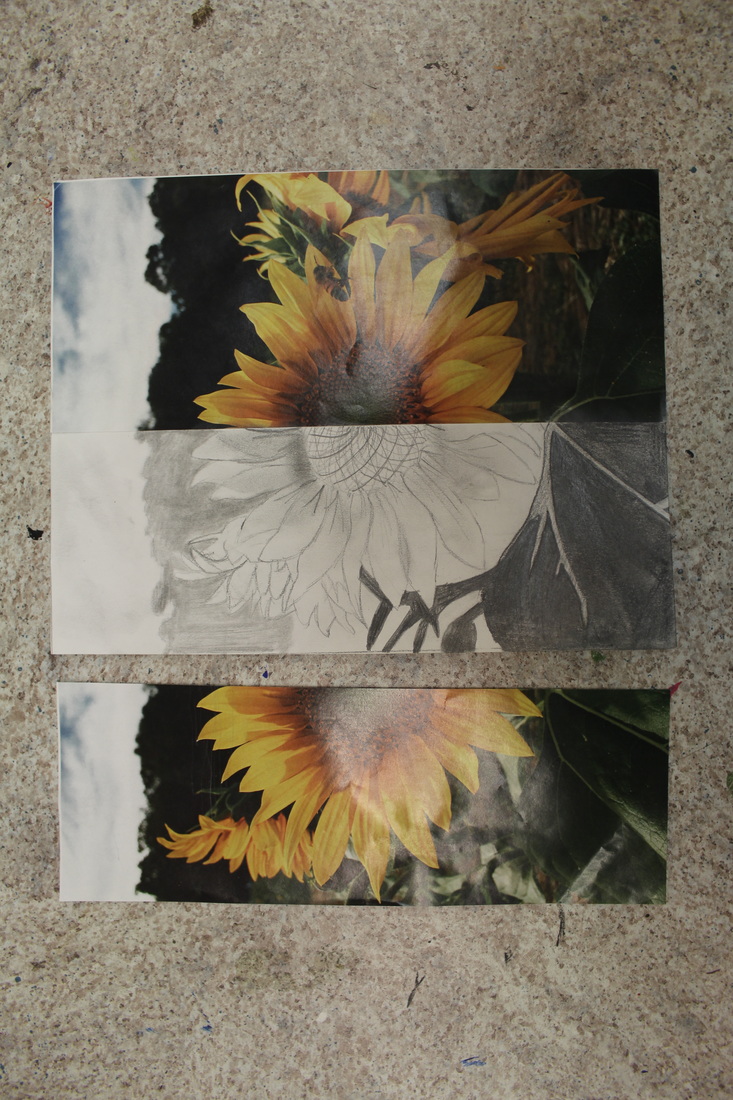
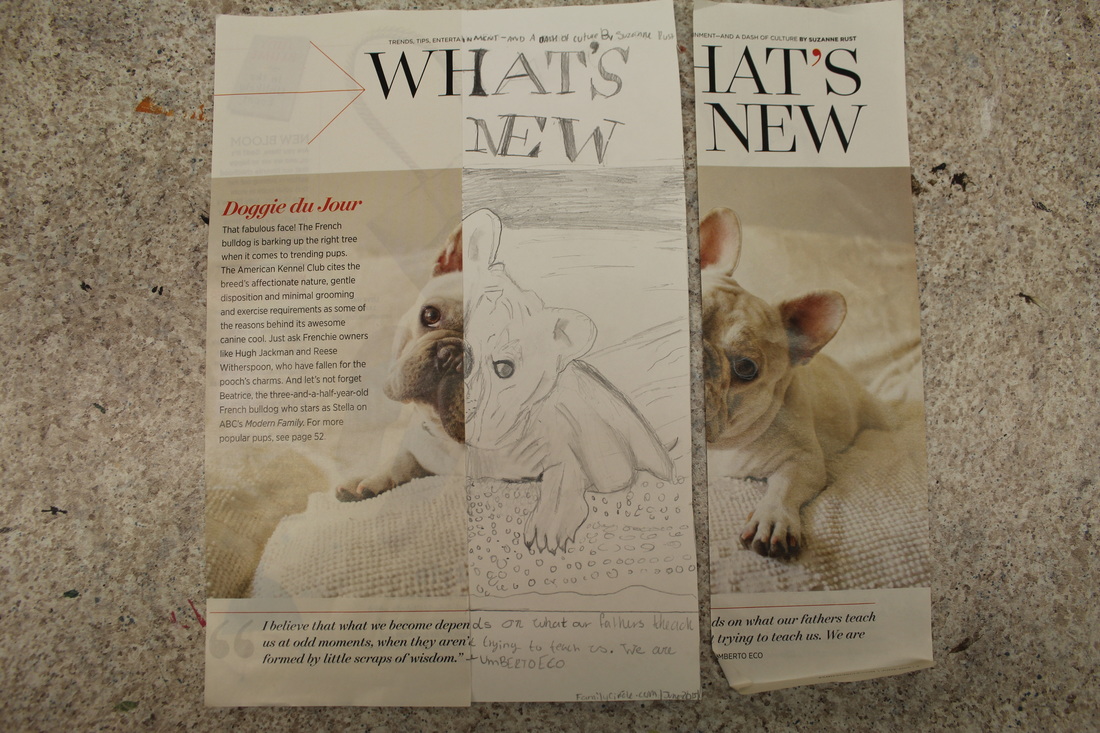
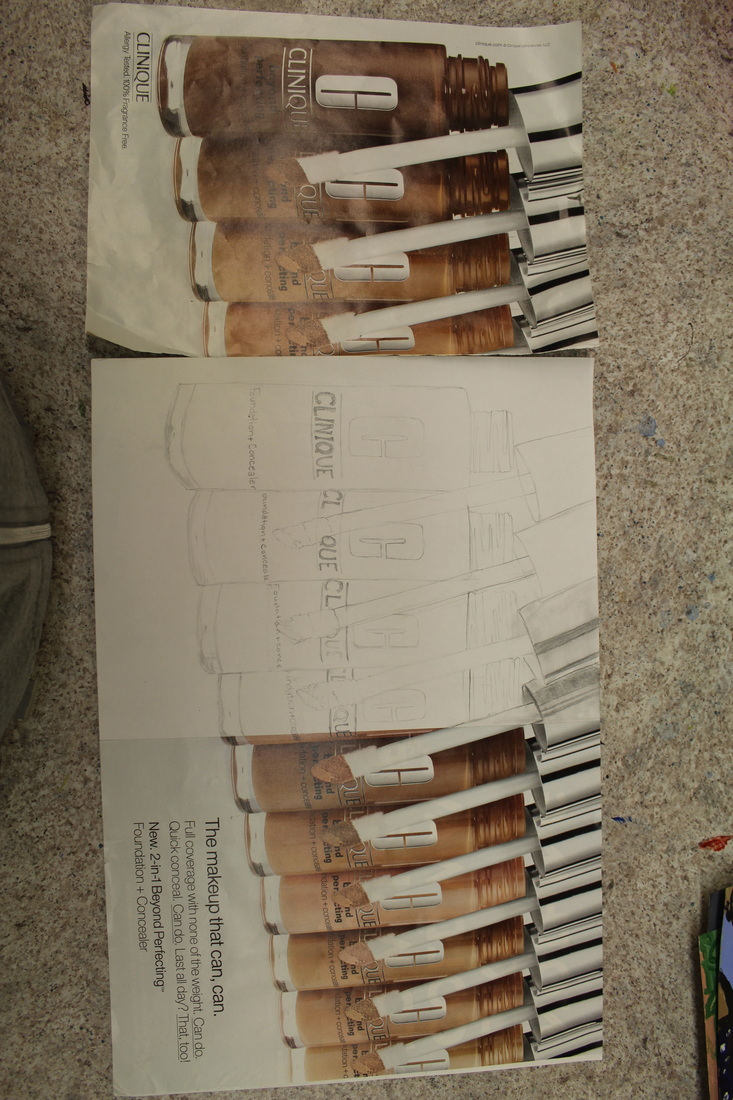
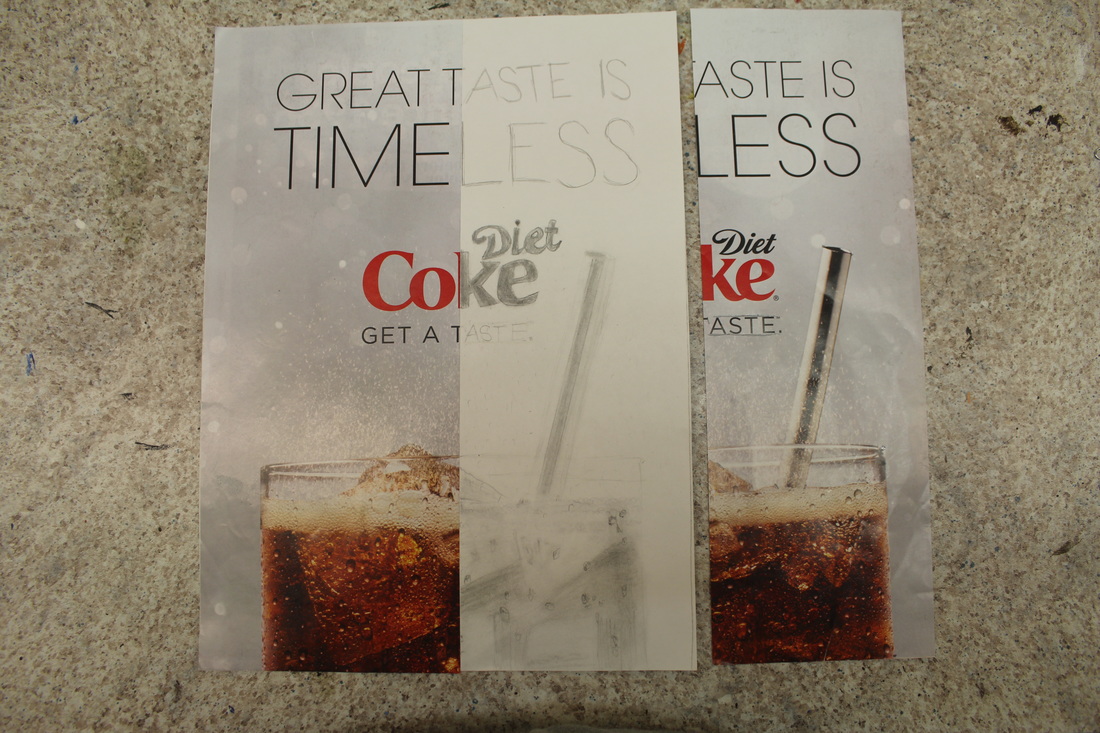
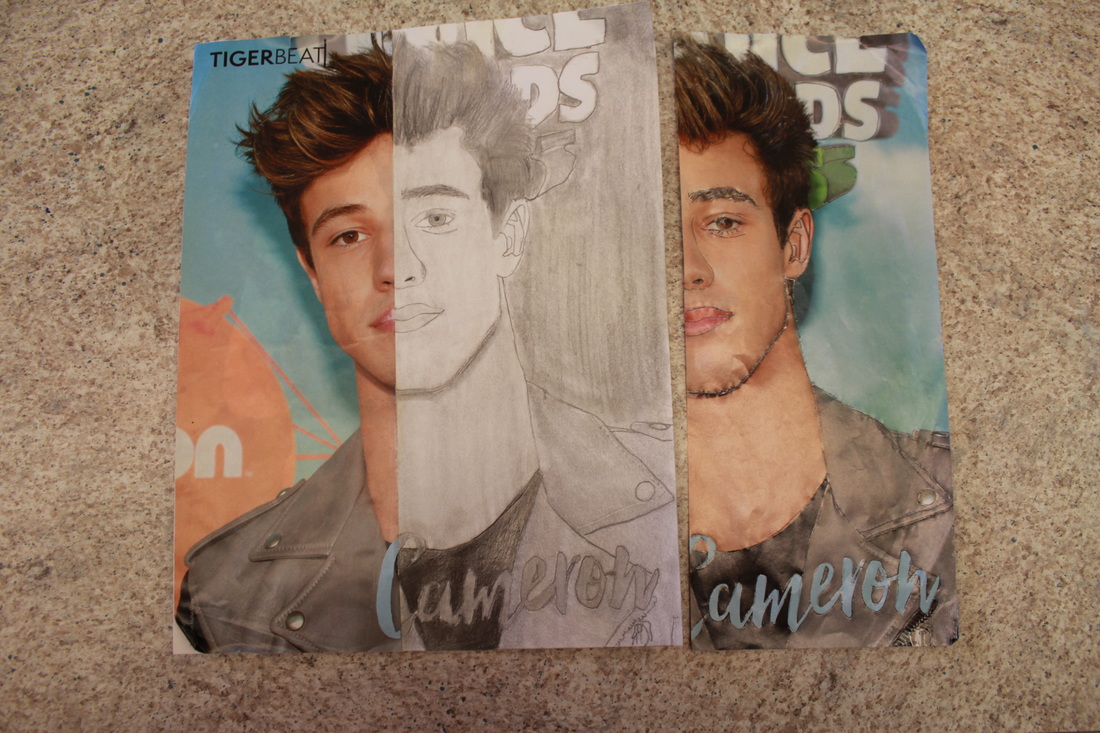
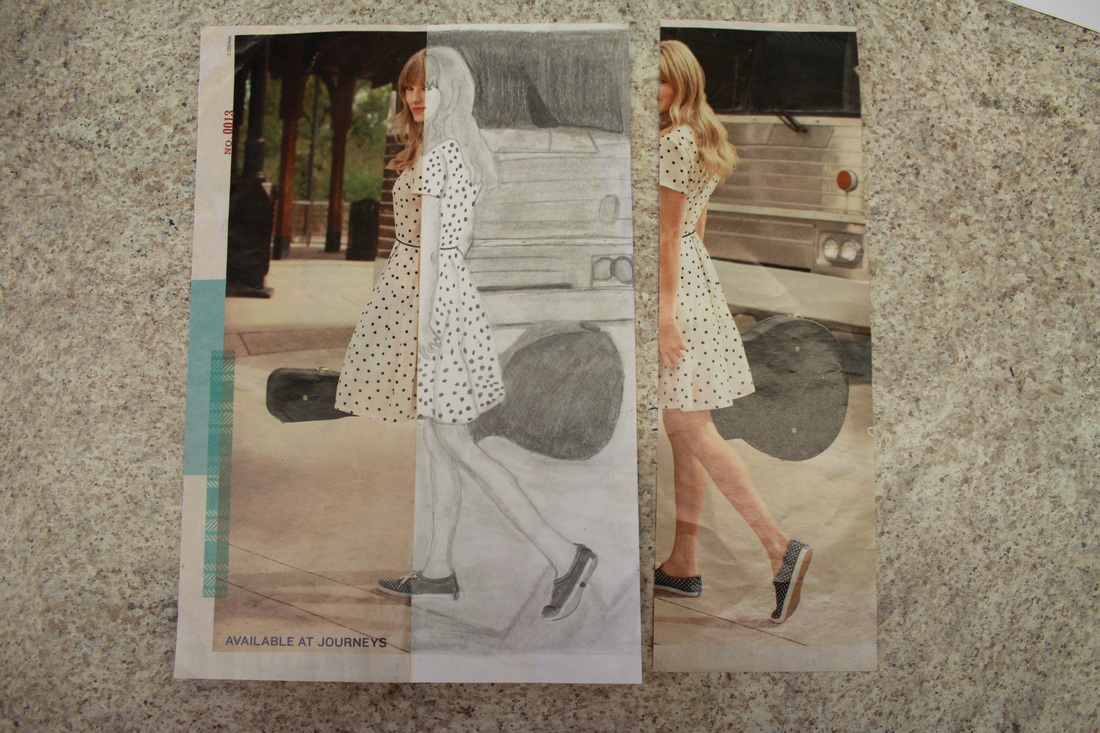
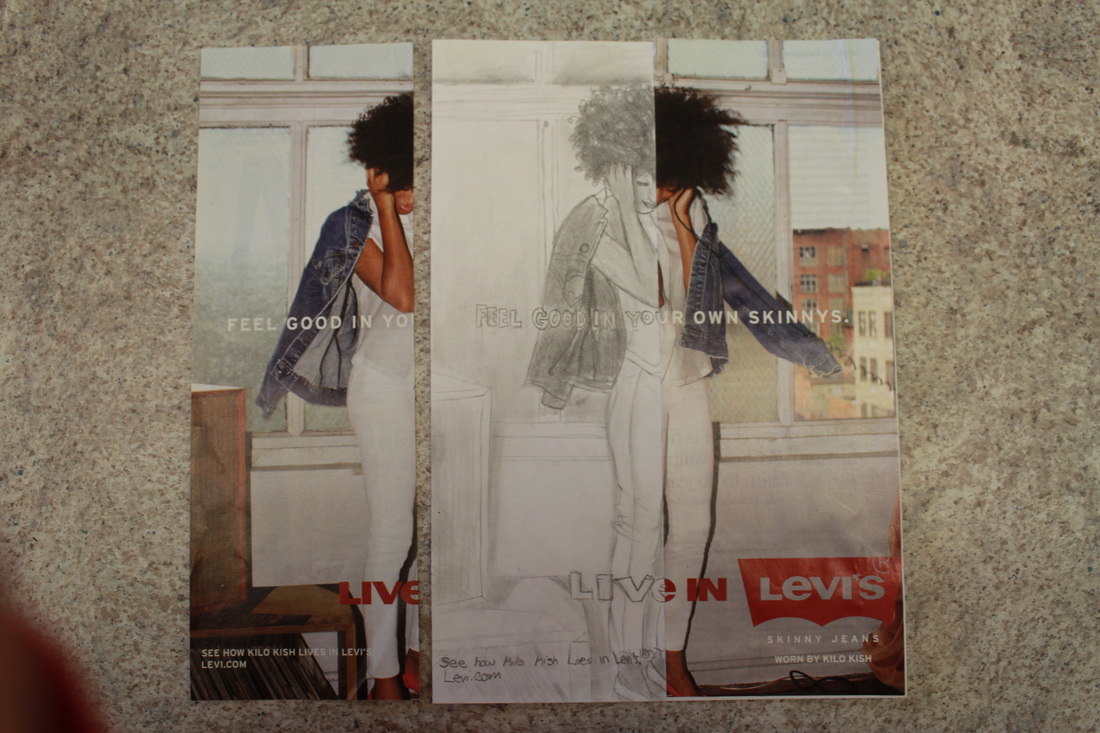
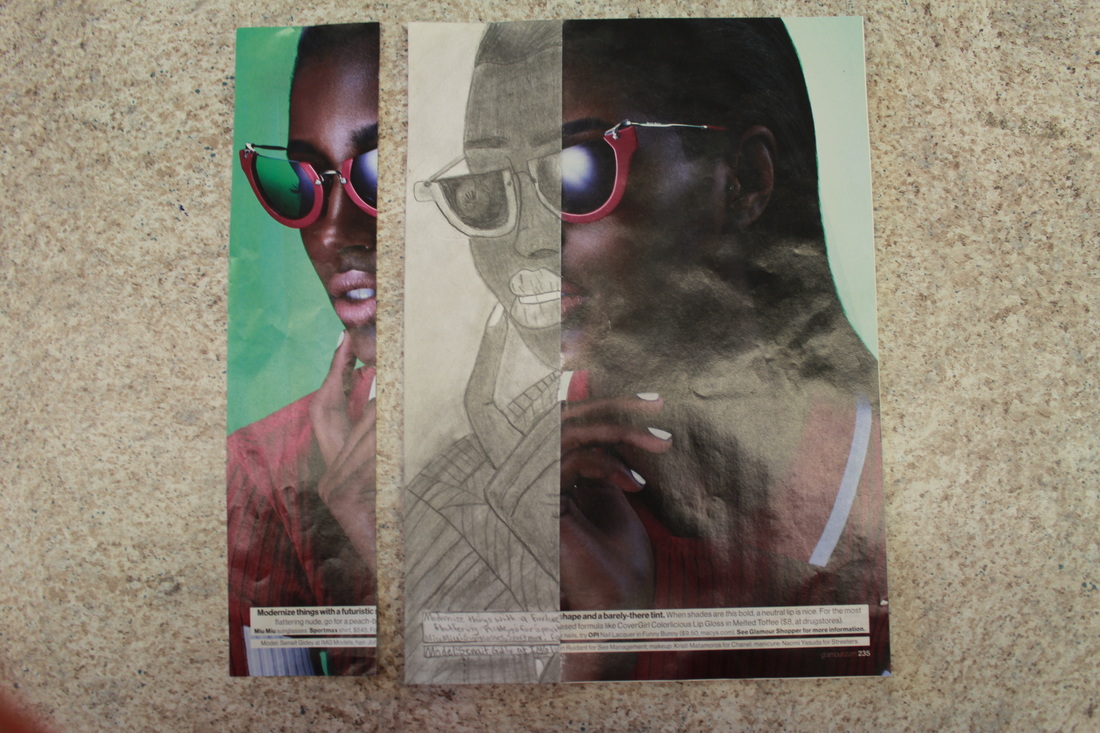
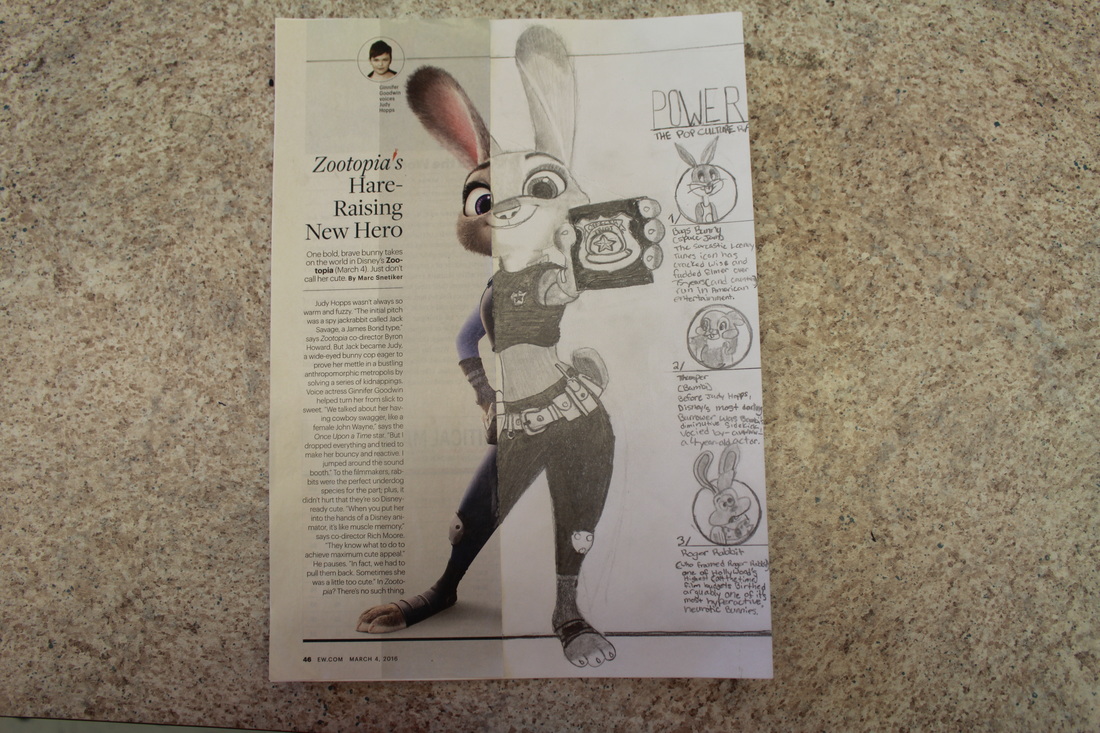
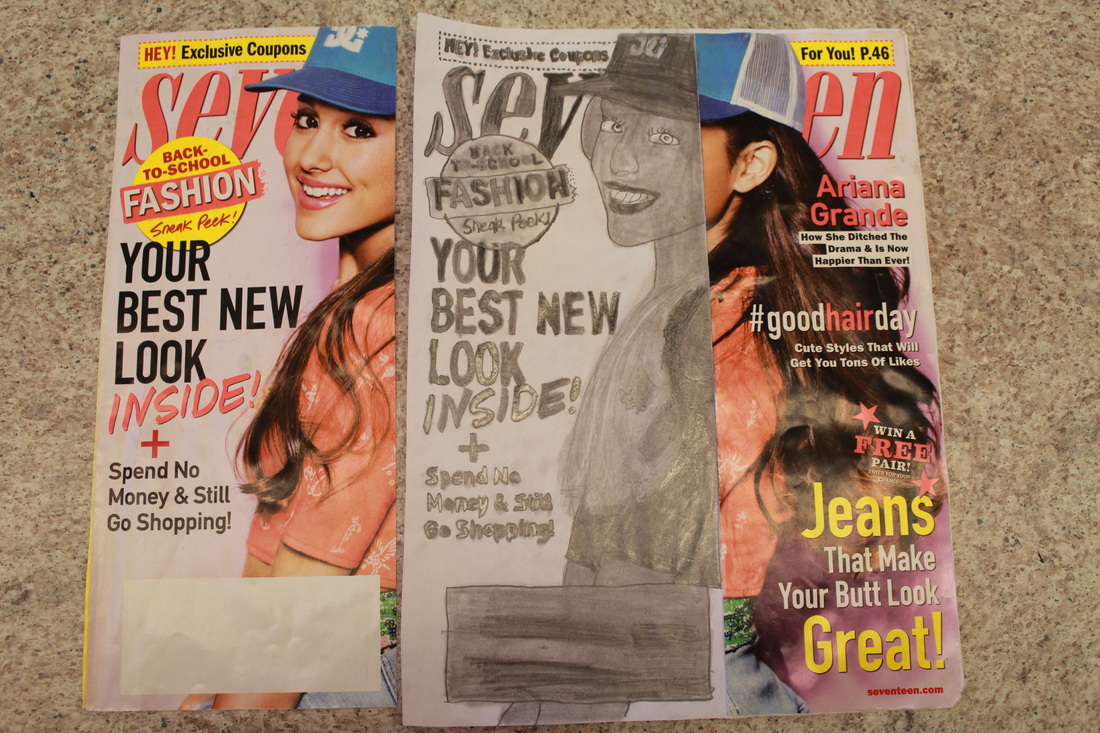
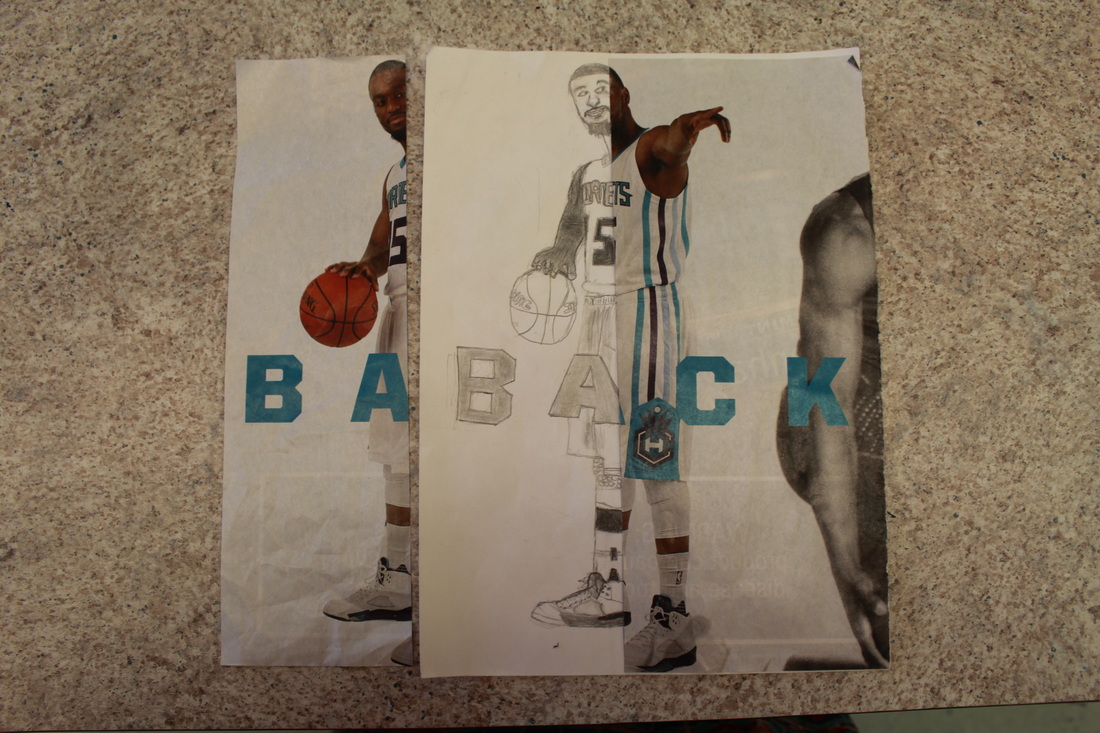
Magazine split drawing

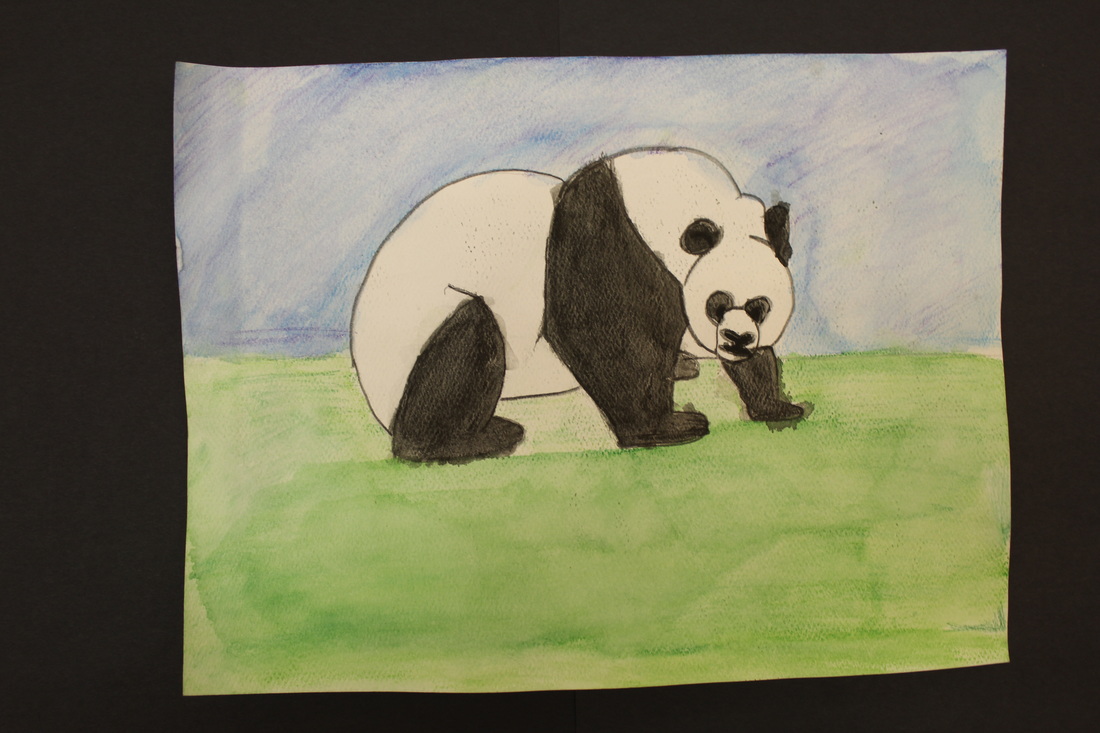
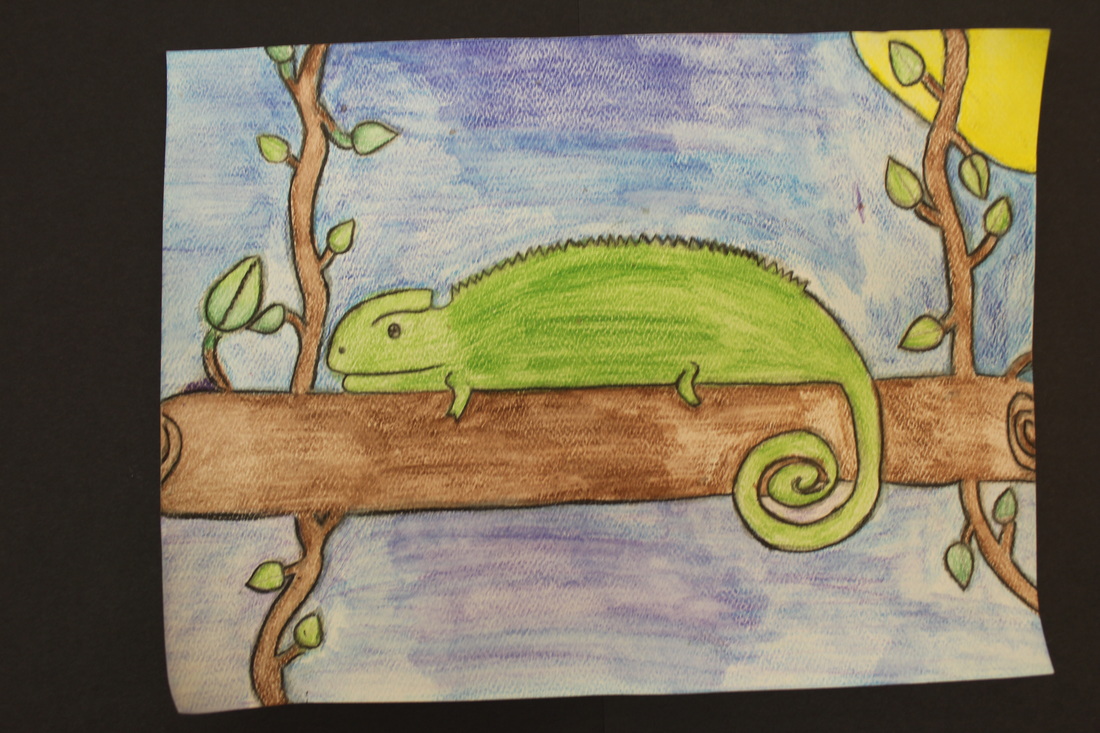
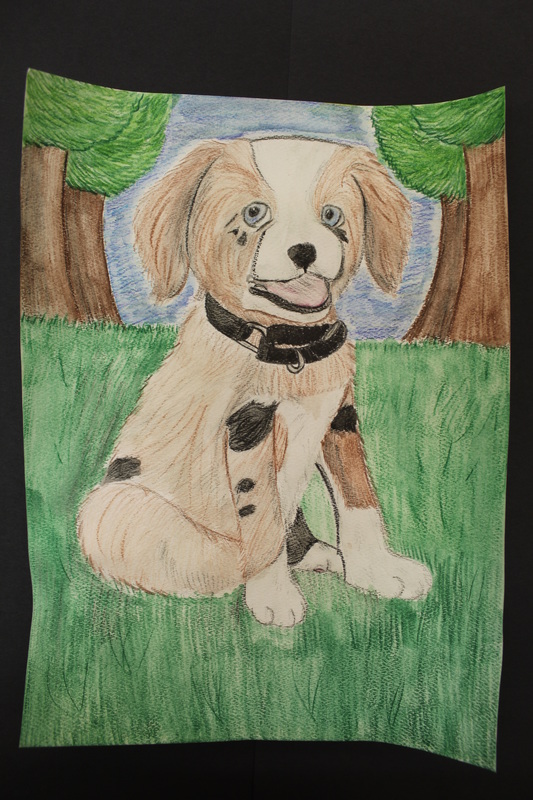
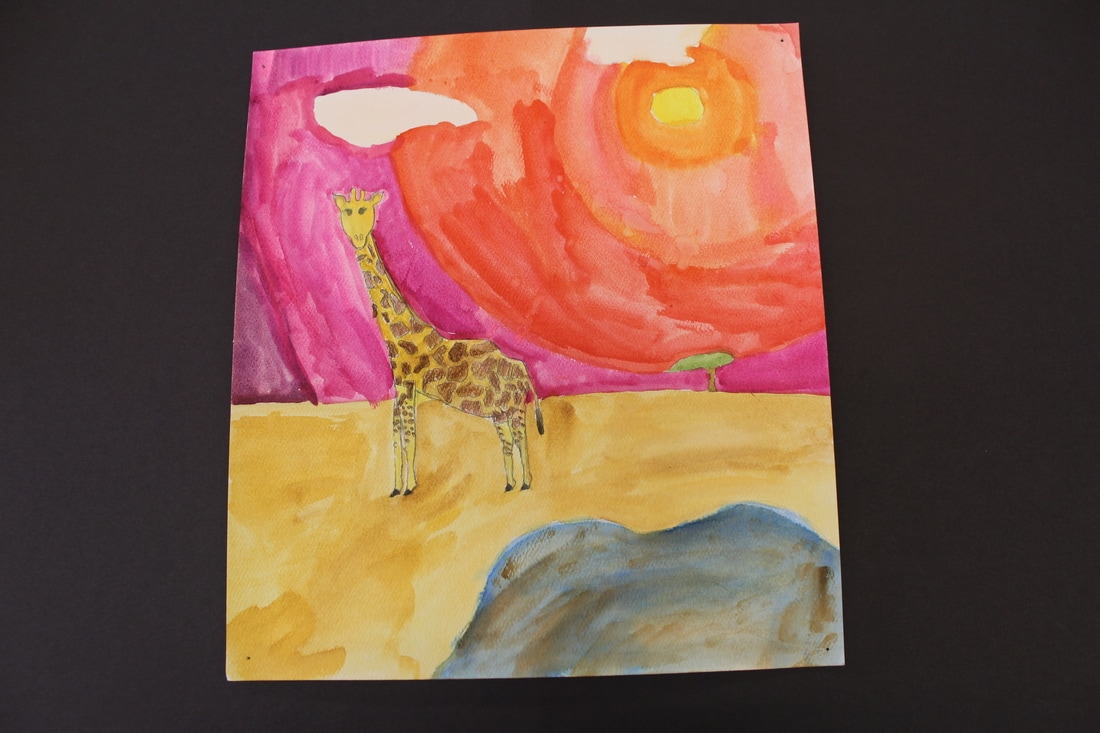
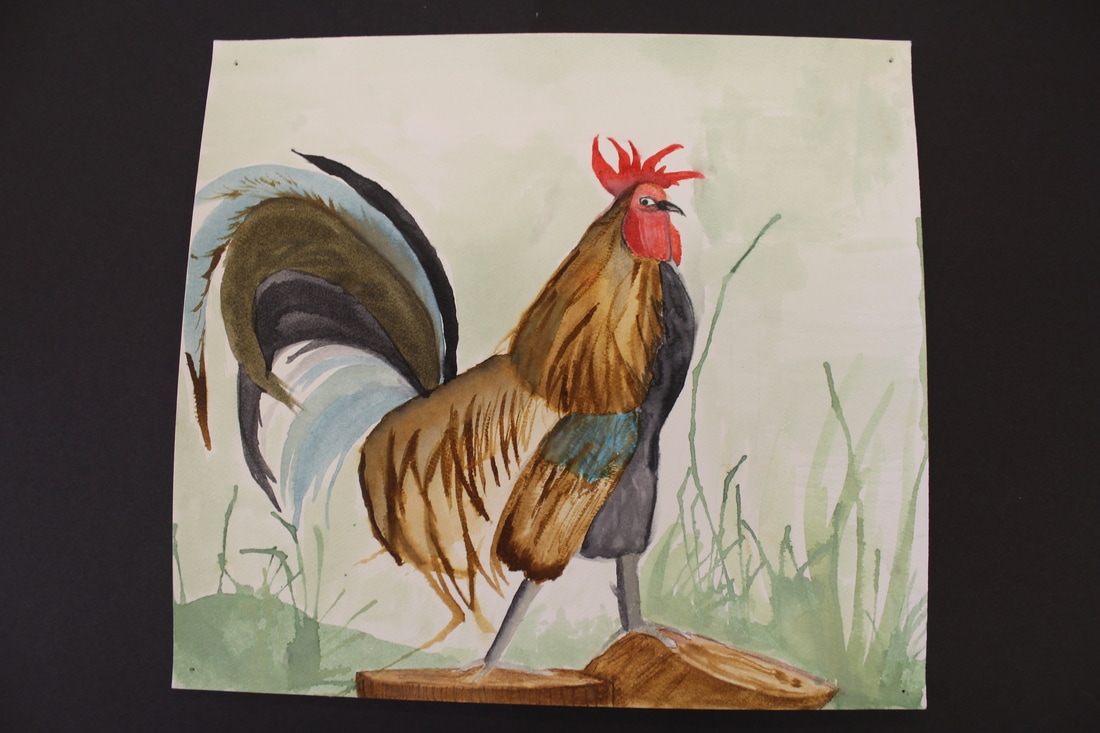
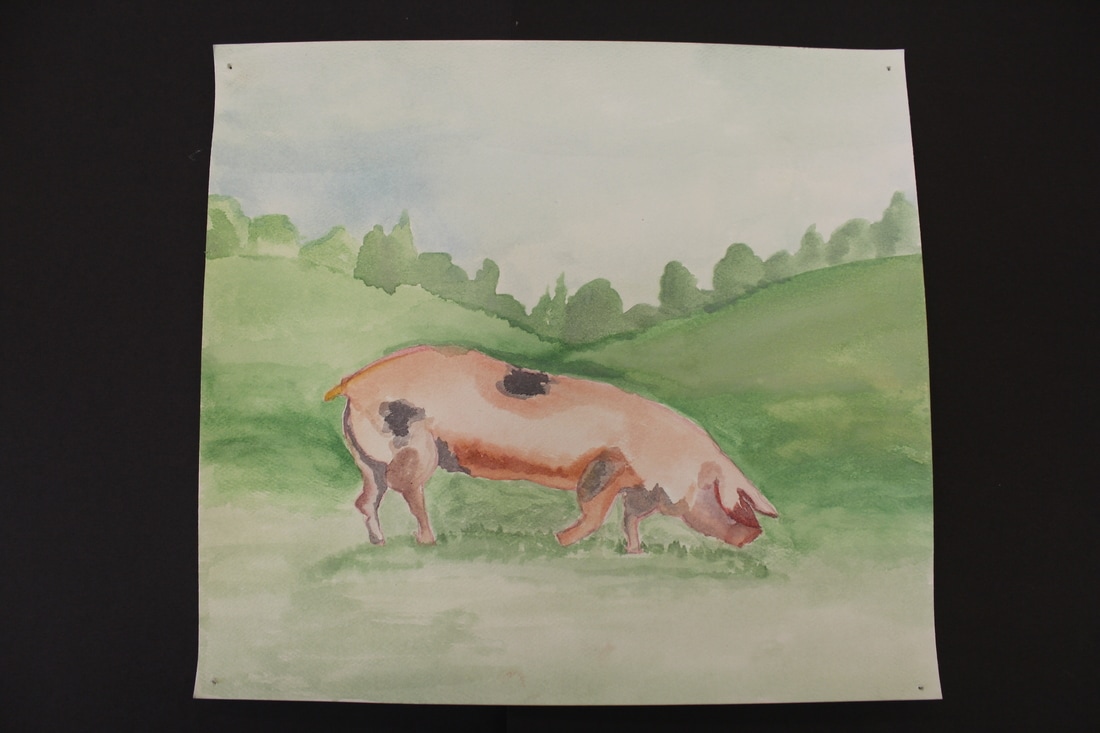
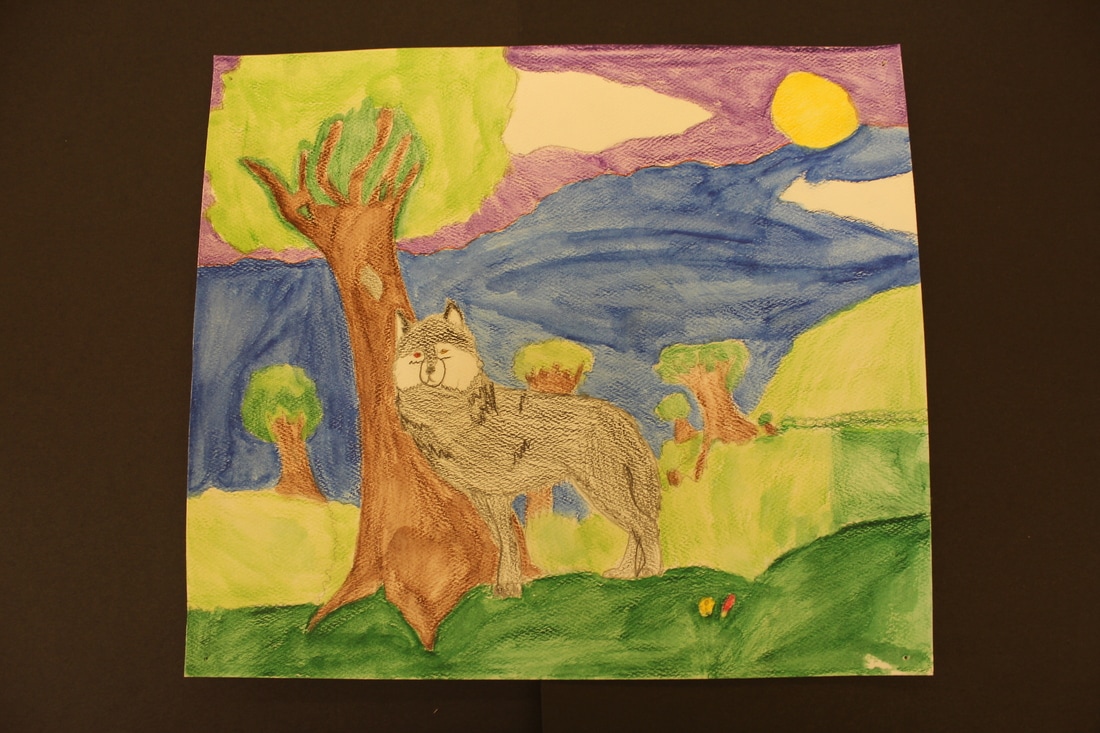
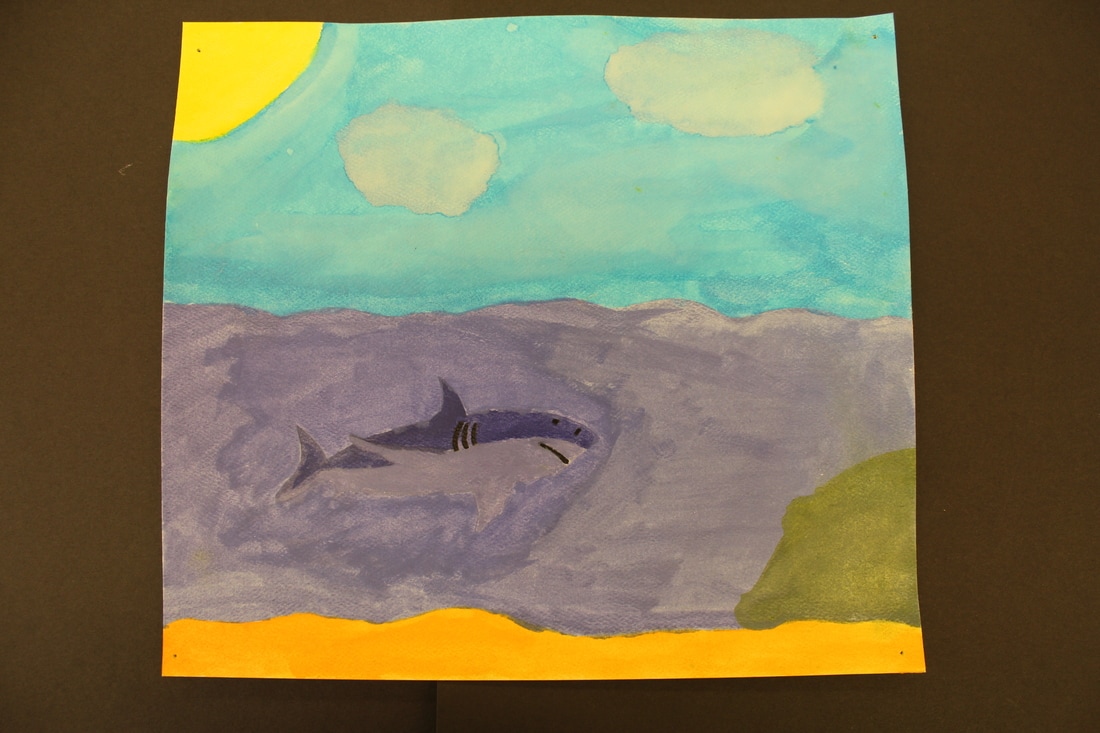
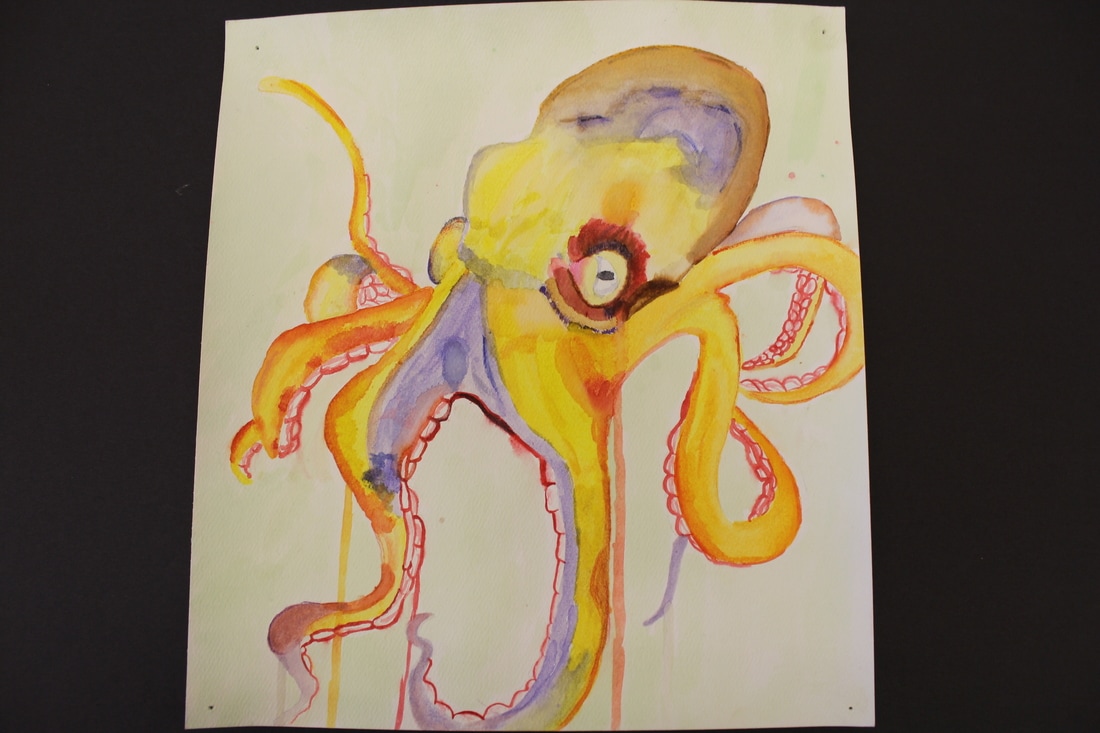
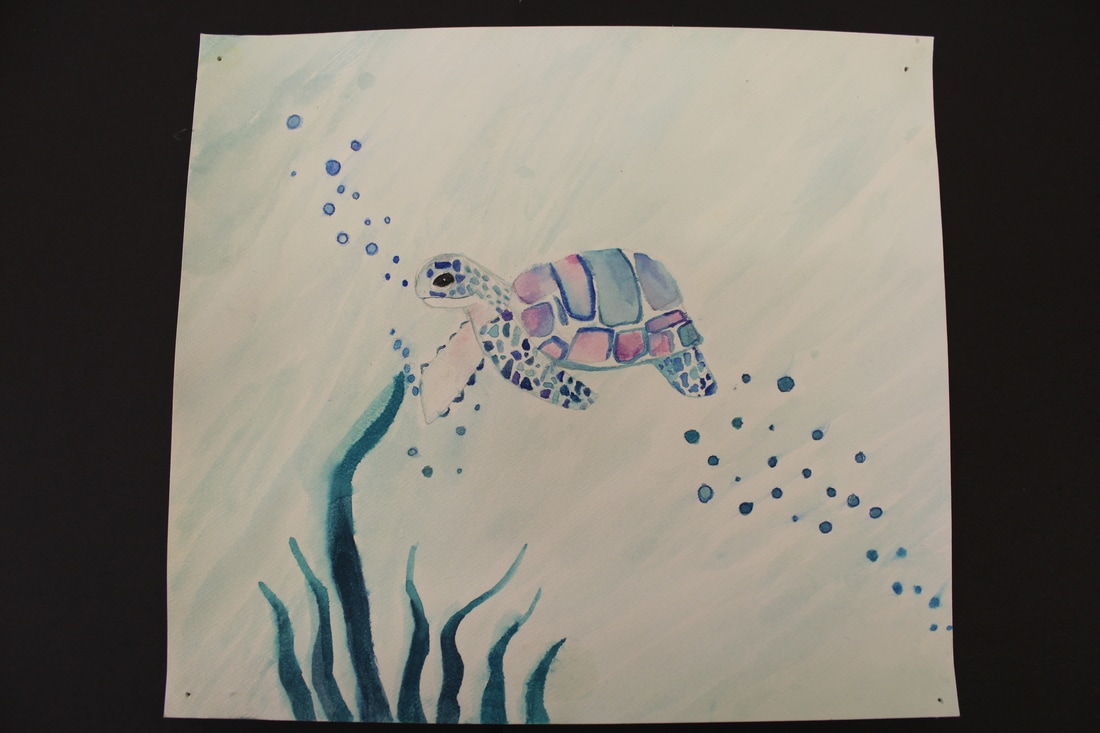
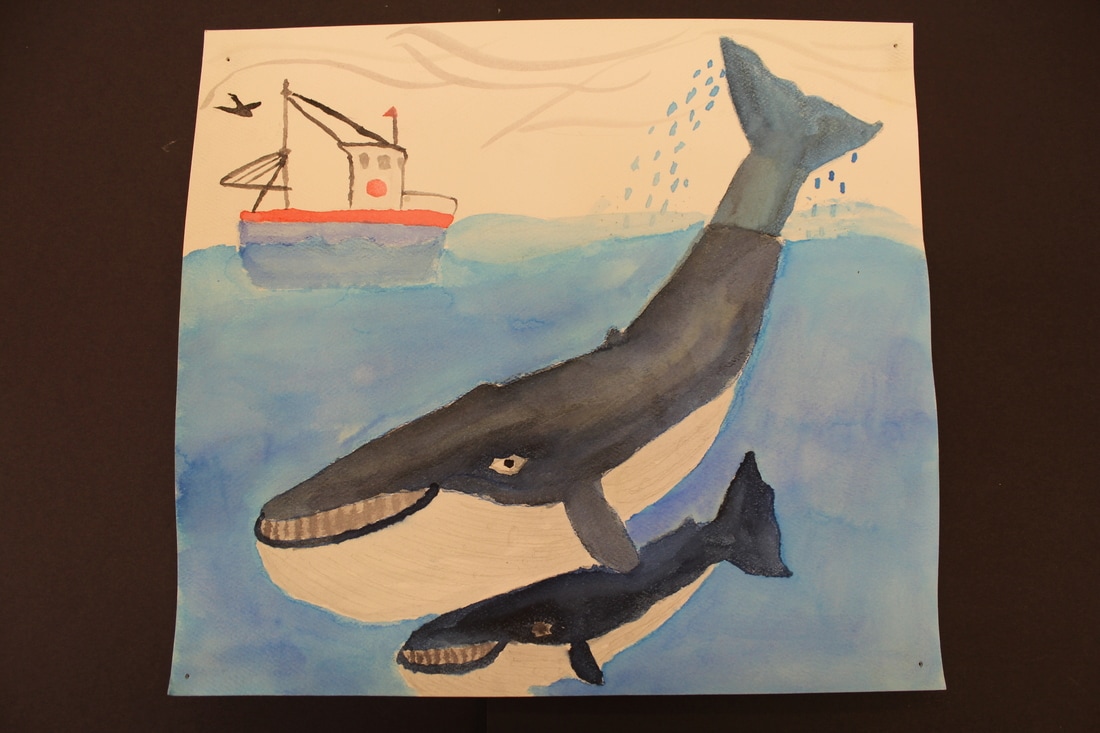
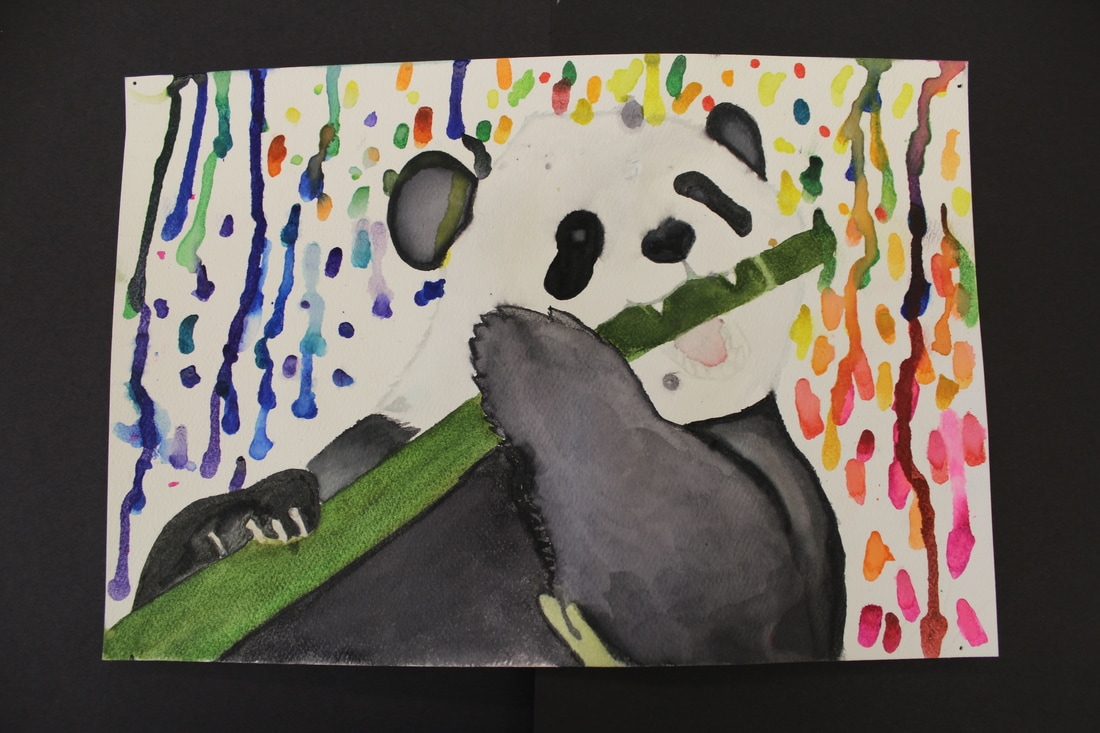
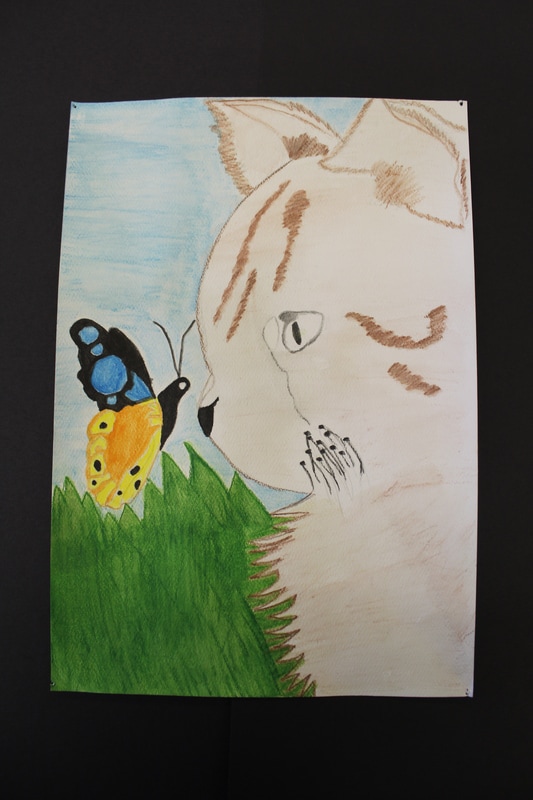
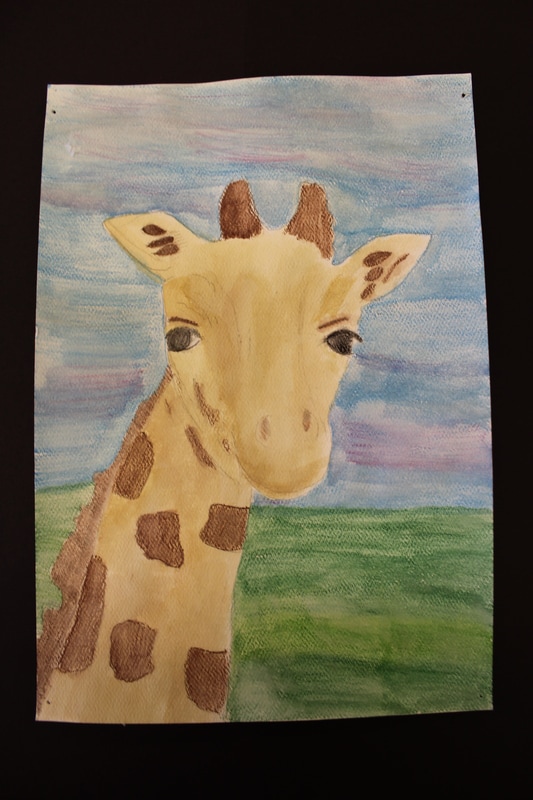
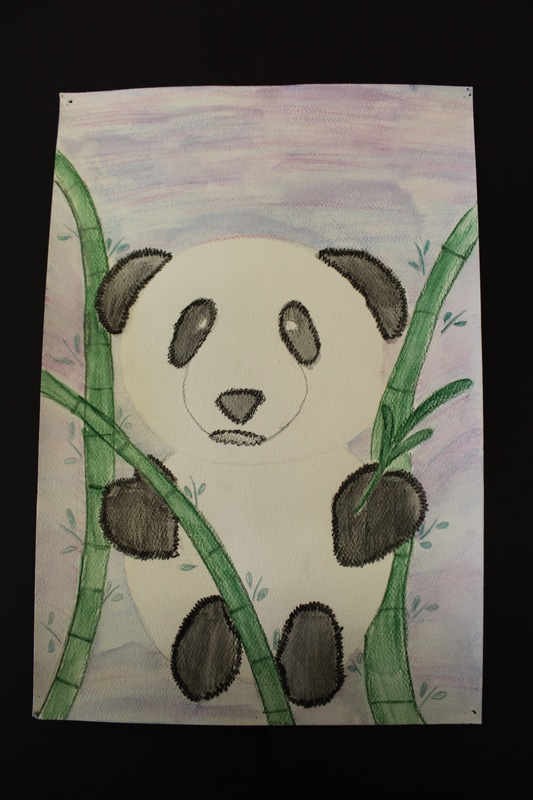
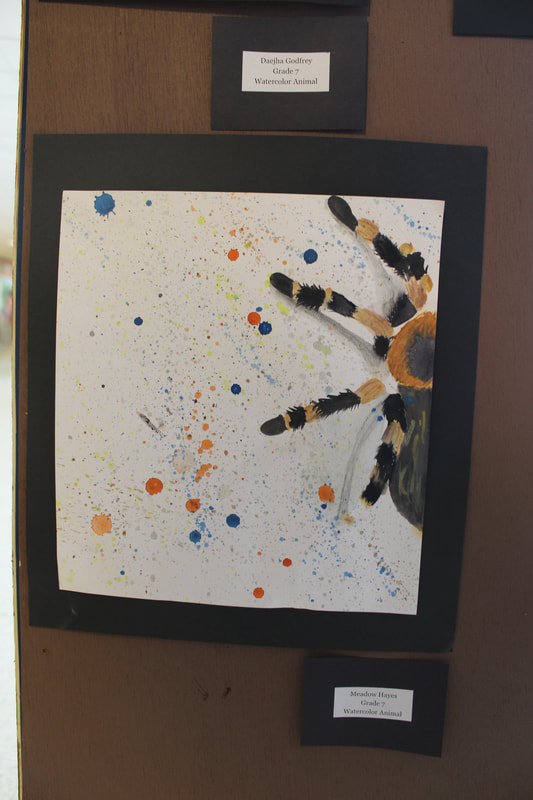
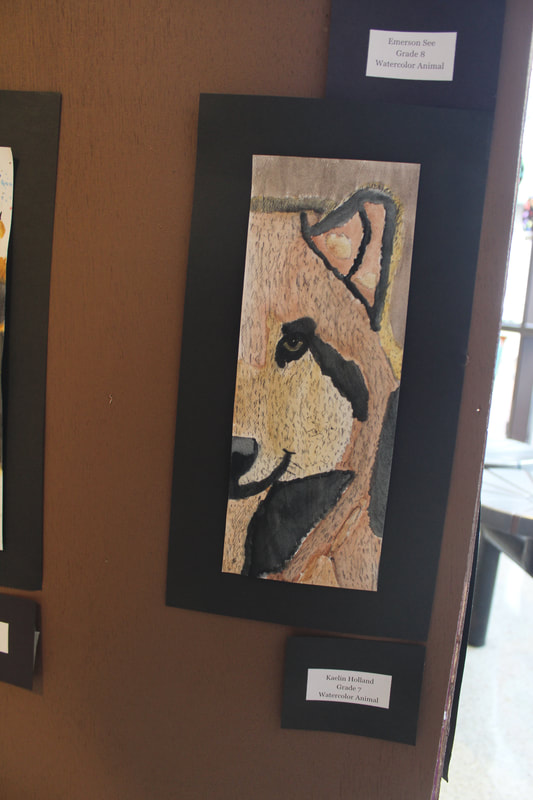
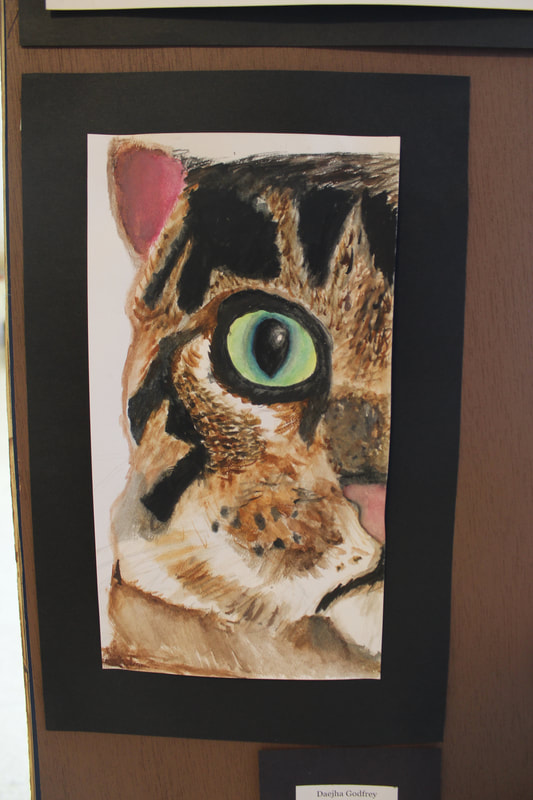
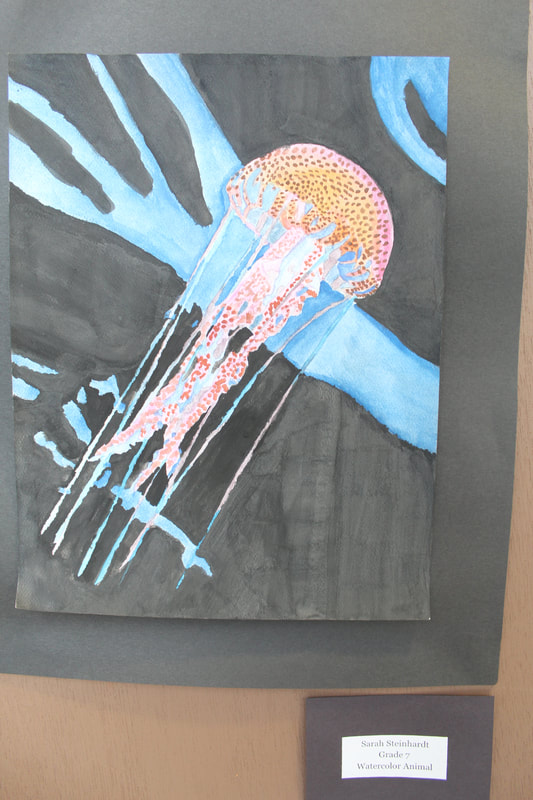
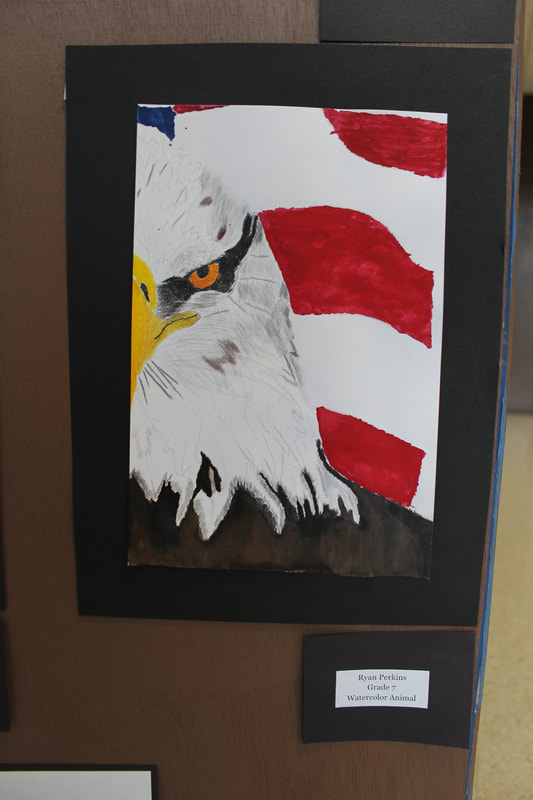
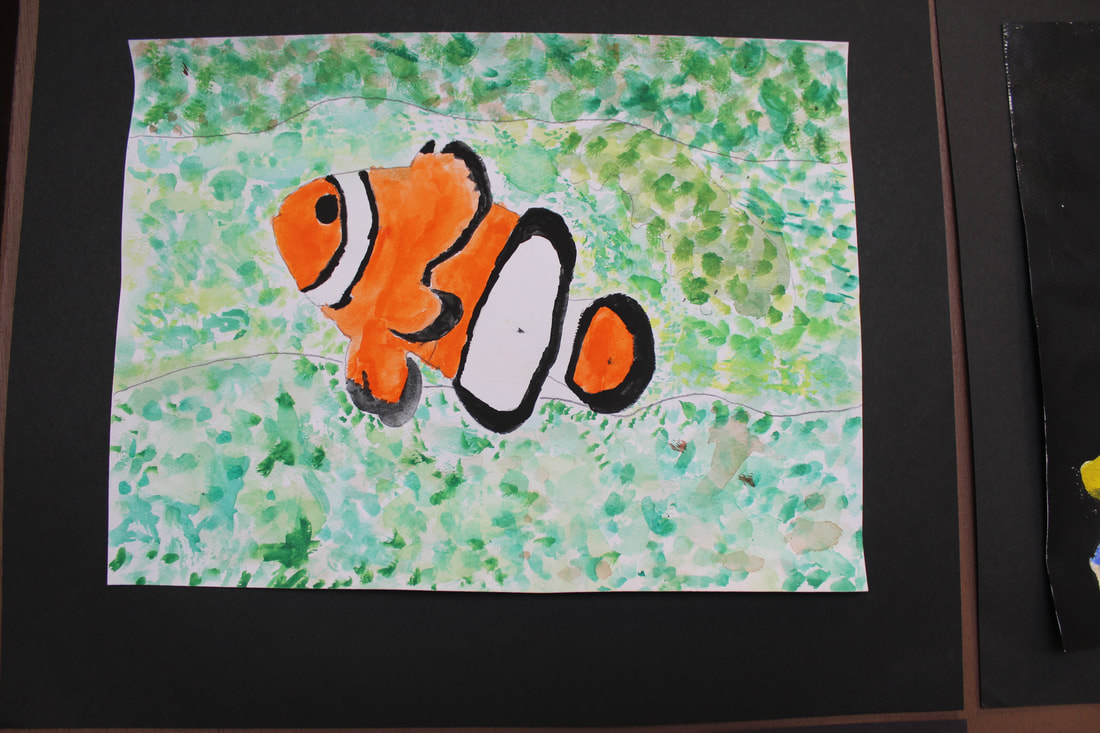
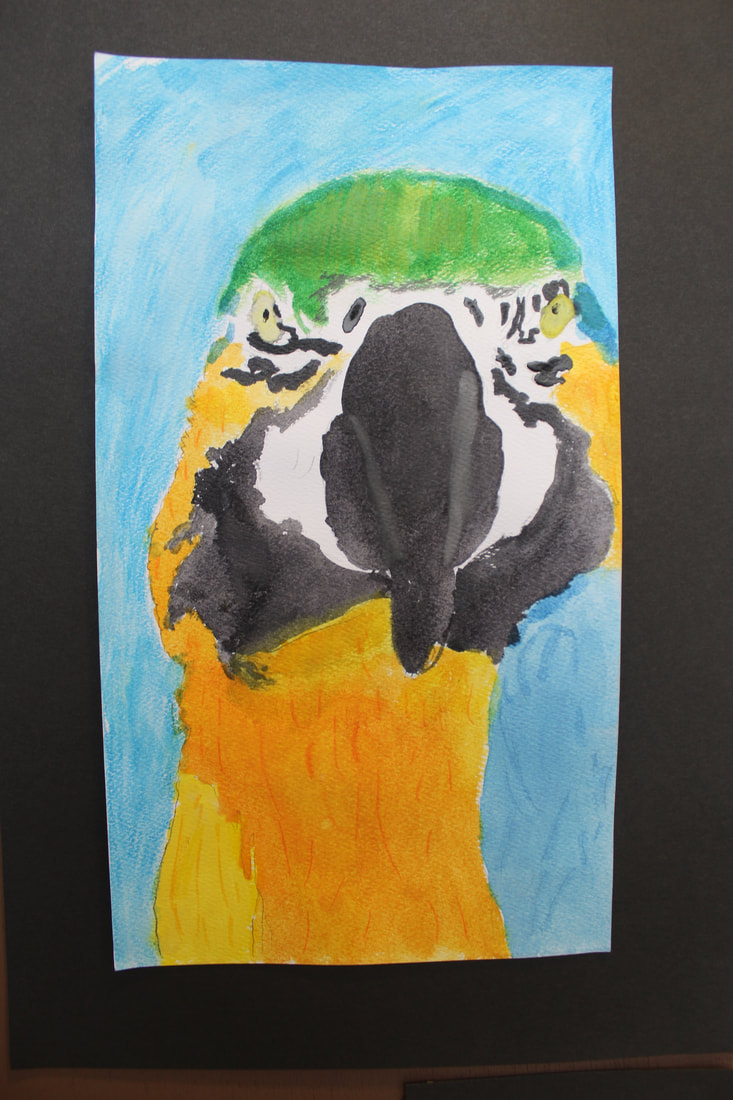
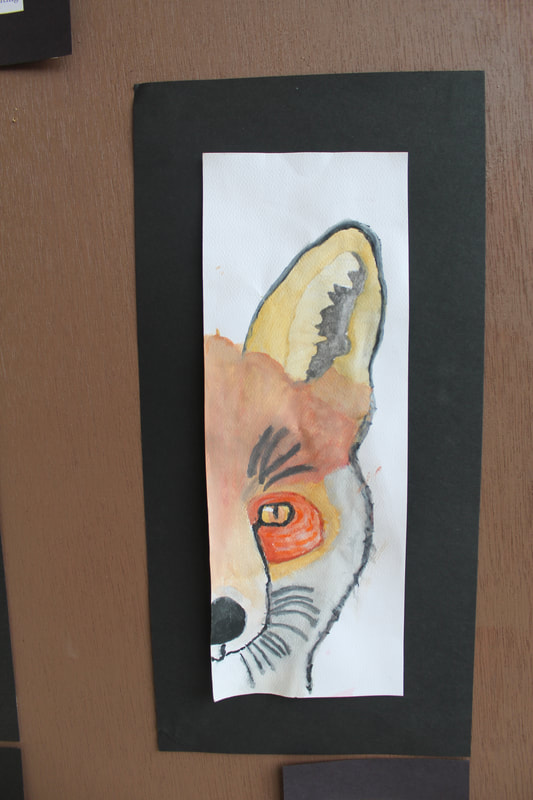
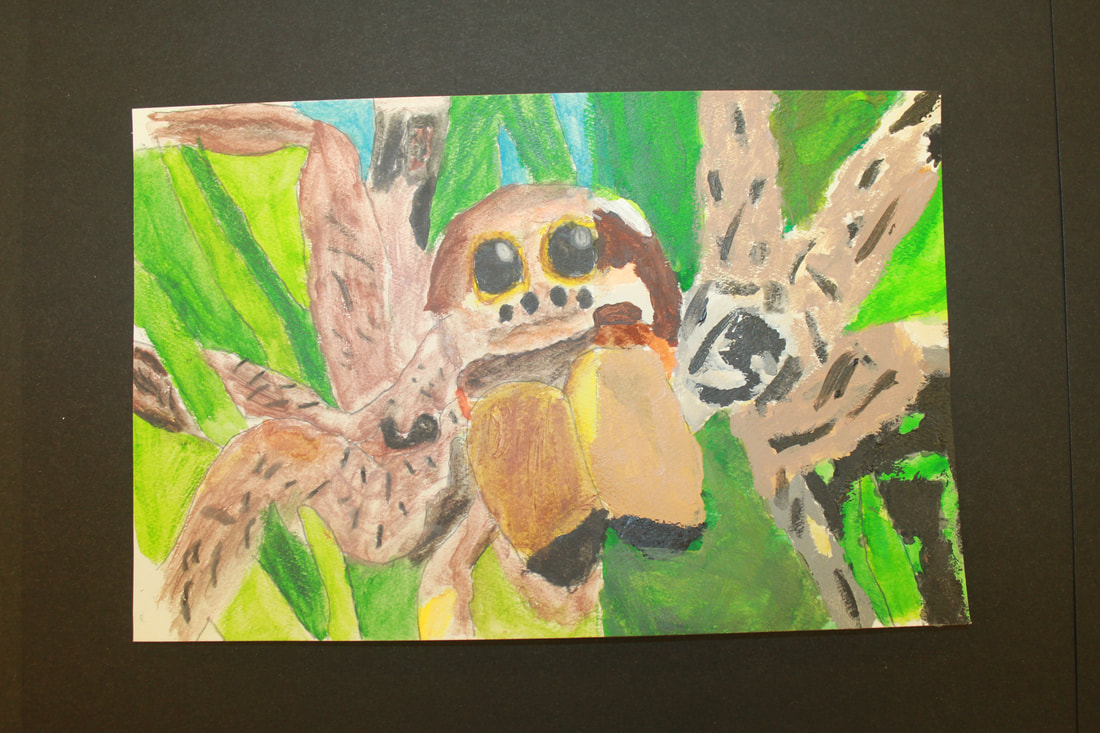
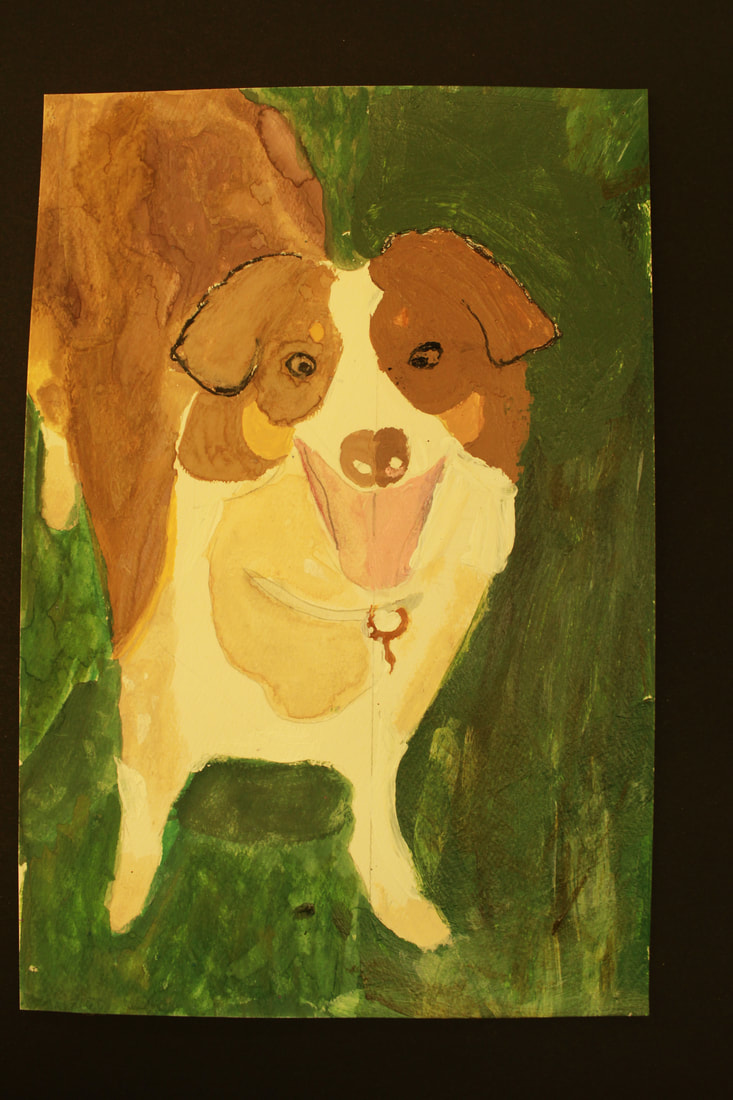
Watercolor animals
For this project students choose an animal as inspiration for a watercolor painting project. We study color mixing techniques and also study how to create texture in our artworks (one of the elements of art that are a part of the fine Art Standards of Ohio for the students to learn)
Students then draw their animal as realistically as they can. We use images for reference or look up step by step drawings to help us. Afterwards we learn about watercolor paint trays and watercolor pencils and begin to add colors to our paintings. The most important thing to learn about watercolors is you must let them dry in between coats or everything will blend together! We work on layering, detail lines, and neatness.
Students then draw their animal as realistically as they can. We use images for reference or look up step by step drawings to help us. Afterwards we learn about watercolor paint trays and watercolor pencils and begin to add colors to our paintings. The most important thing to learn about watercolors is you must let them dry in between coats or everything will blend together! We work on layering, detail lines, and neatness.
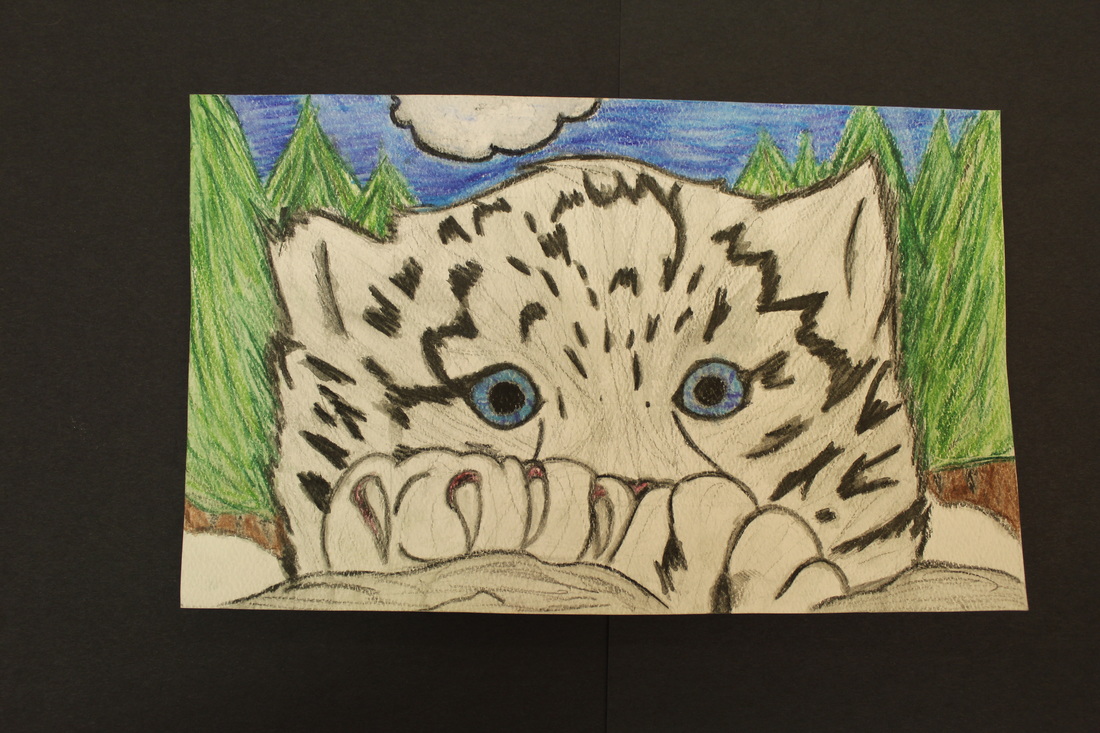
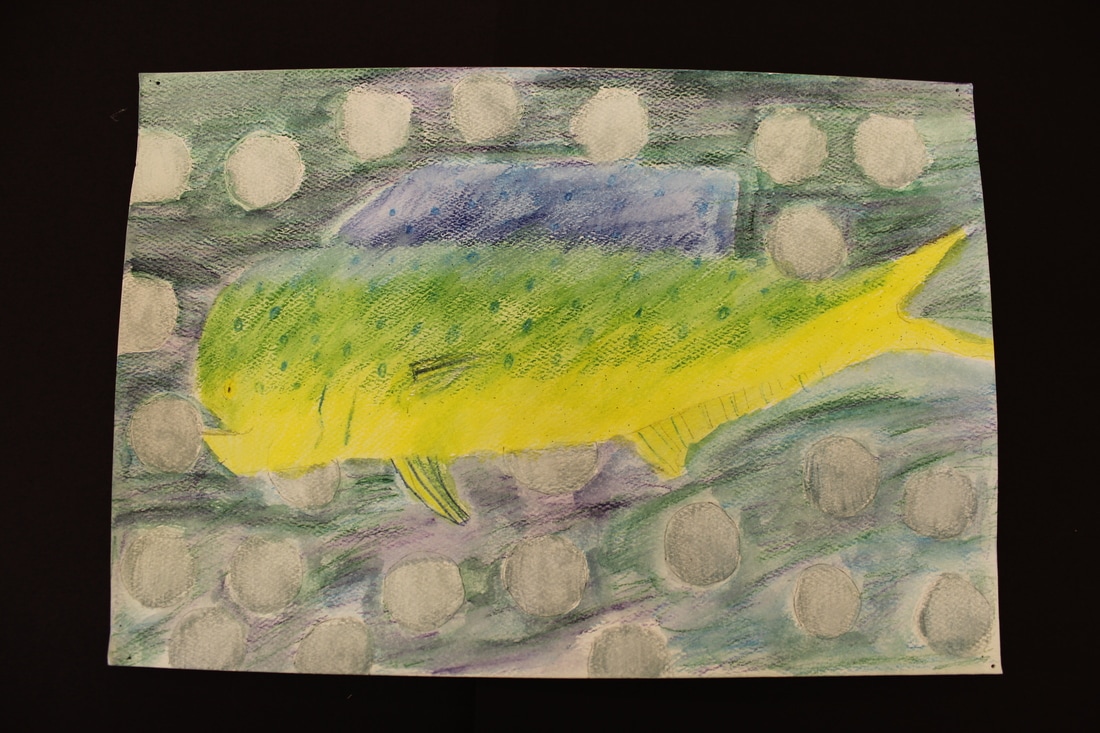
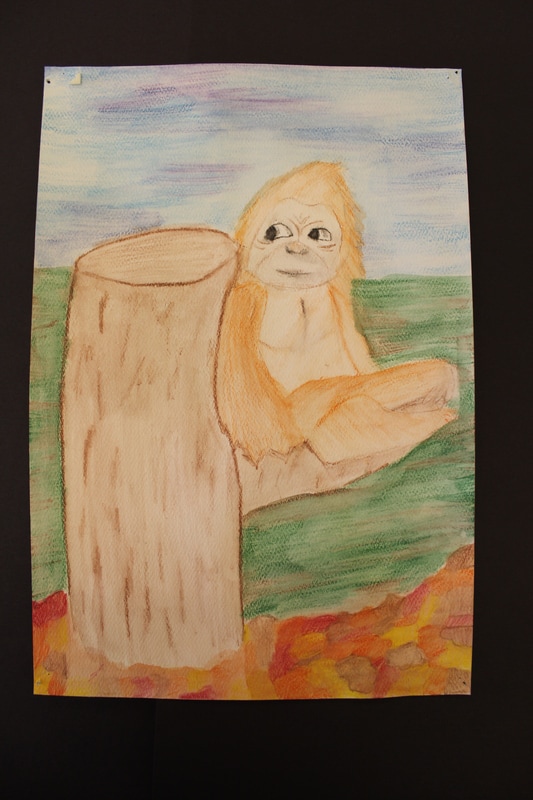
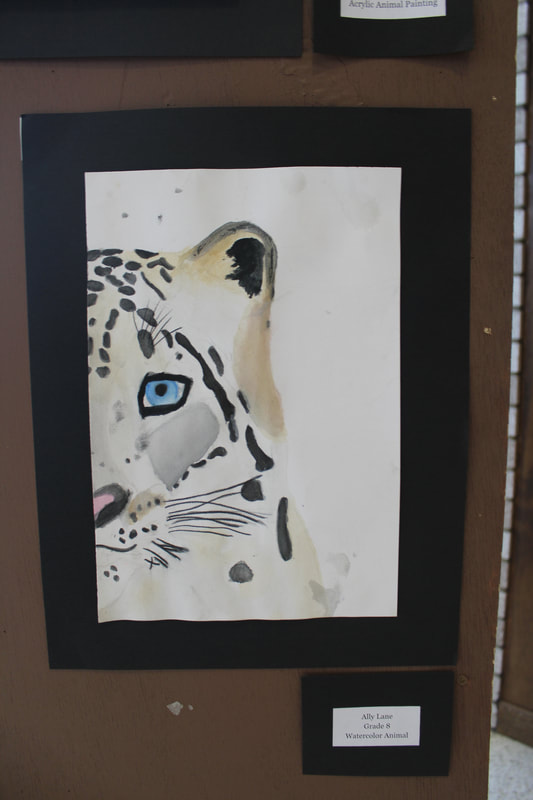
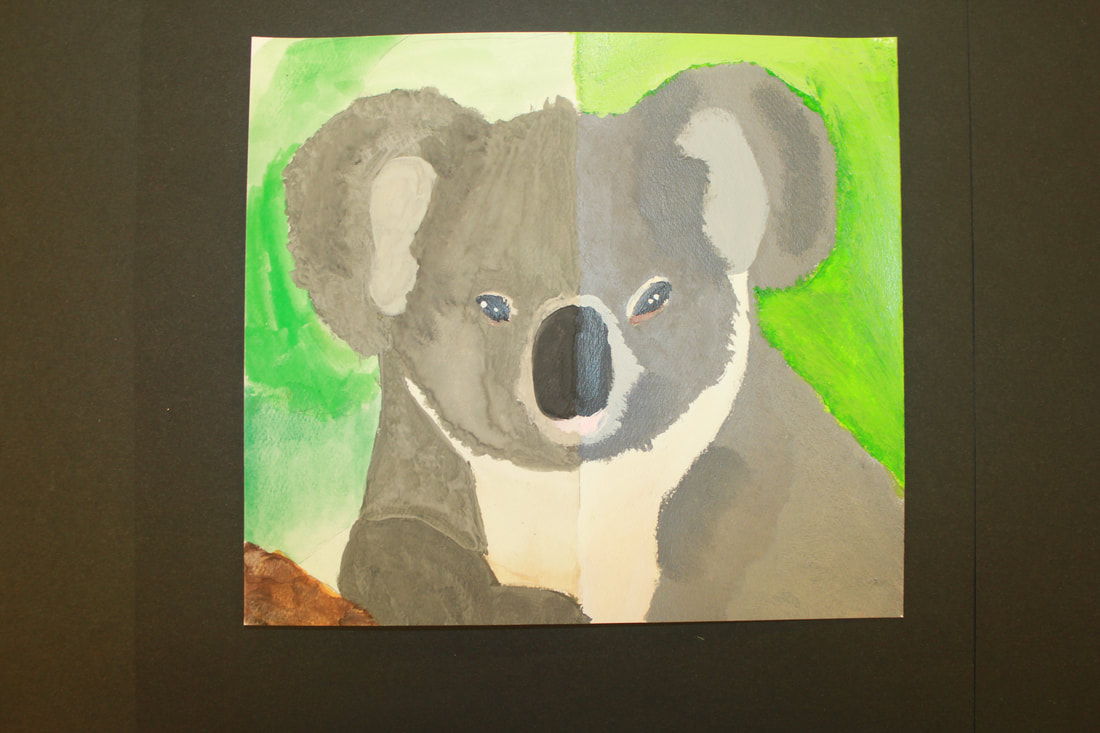
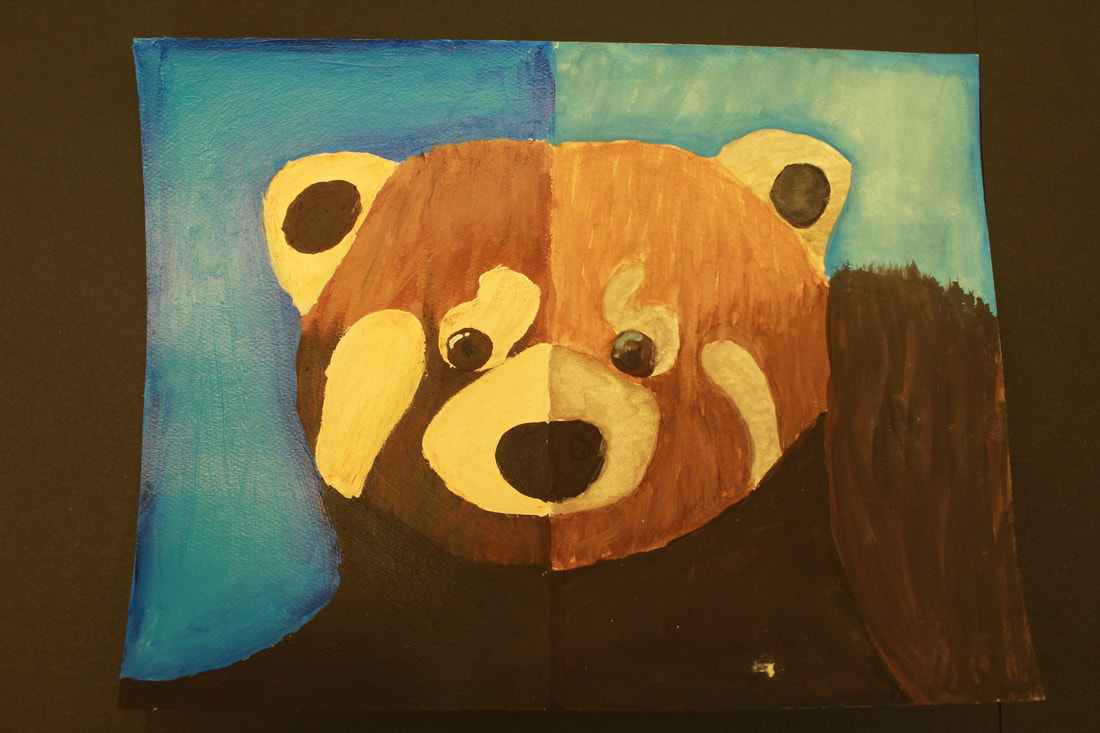
Watercolor and acrylic animals
In this two part project students draw half or all of a photo of an animal. We then add color with watercolor trays and watercolor pencils. The focus of this project is painting textures. How do we paint something to look like it has fur, or scales, or is rough or soft. Students learn about layering colors and mixing colors to get the true color of the animal. Afterwards, students do the same project with acrylic paints. Doing the project twice with a different medium allows the students to really compare and contrast the watercolor paints to the acrylic paints.
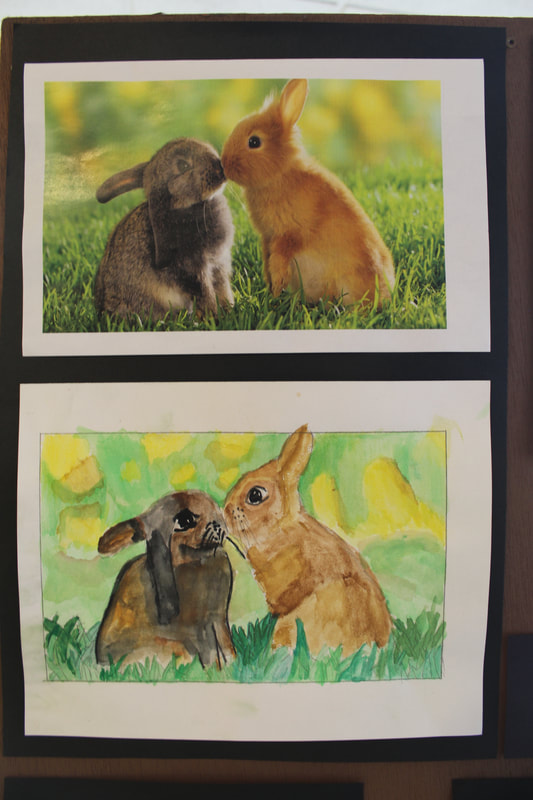

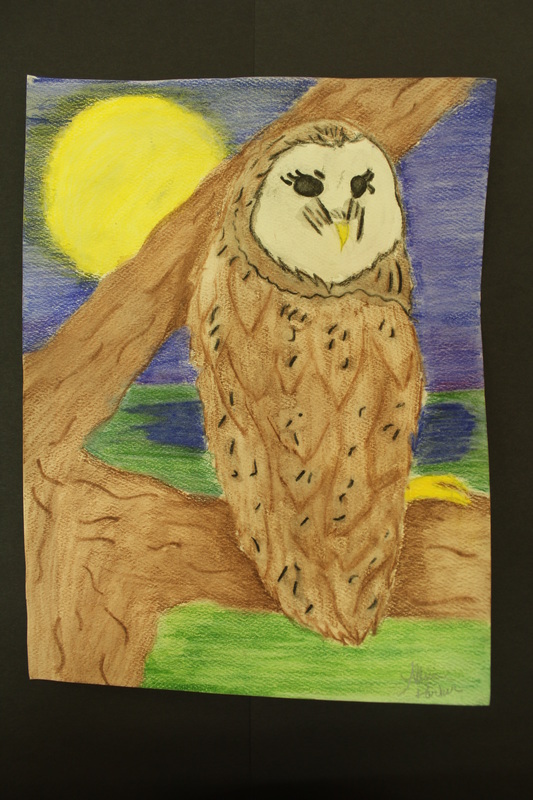
Watercolor Acrylic Animal Diptych
For this project students choose an animal photo for inspiration. Students first study watercolor. We practice mixing colors to match the colors their photograph of the animal. Then we study watercolor painting techniques like allowing colors to dry before painting another color close by so they don't bleed together. Students paint half of their final draft using watercolor. Then we study acrylic paints. Students learn about how they differ from watercolor paints. For example they aren't thinned with water, they are more opaque and will ruin your brush if not cleaned properly. Then students practice mixing colors to match the colors in their photograph of the animal again. This time also trying to match the watercolor side. It teaches students a lot about the properties of watercolor and acrylic paints and beginning painting.

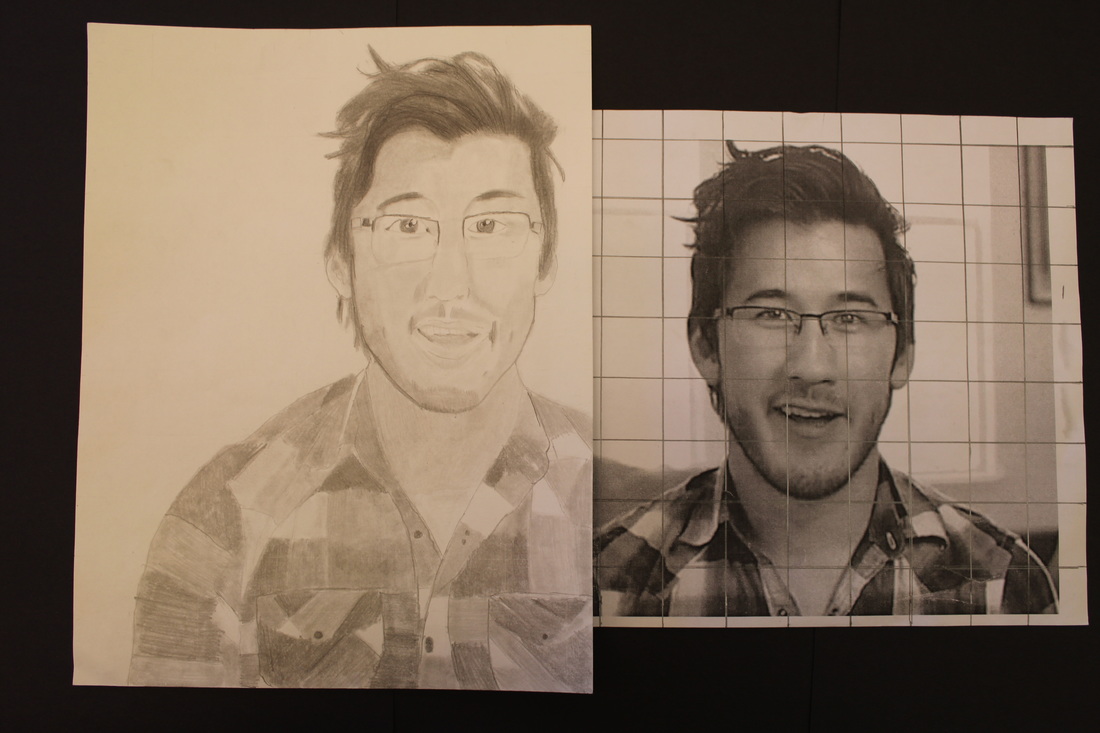
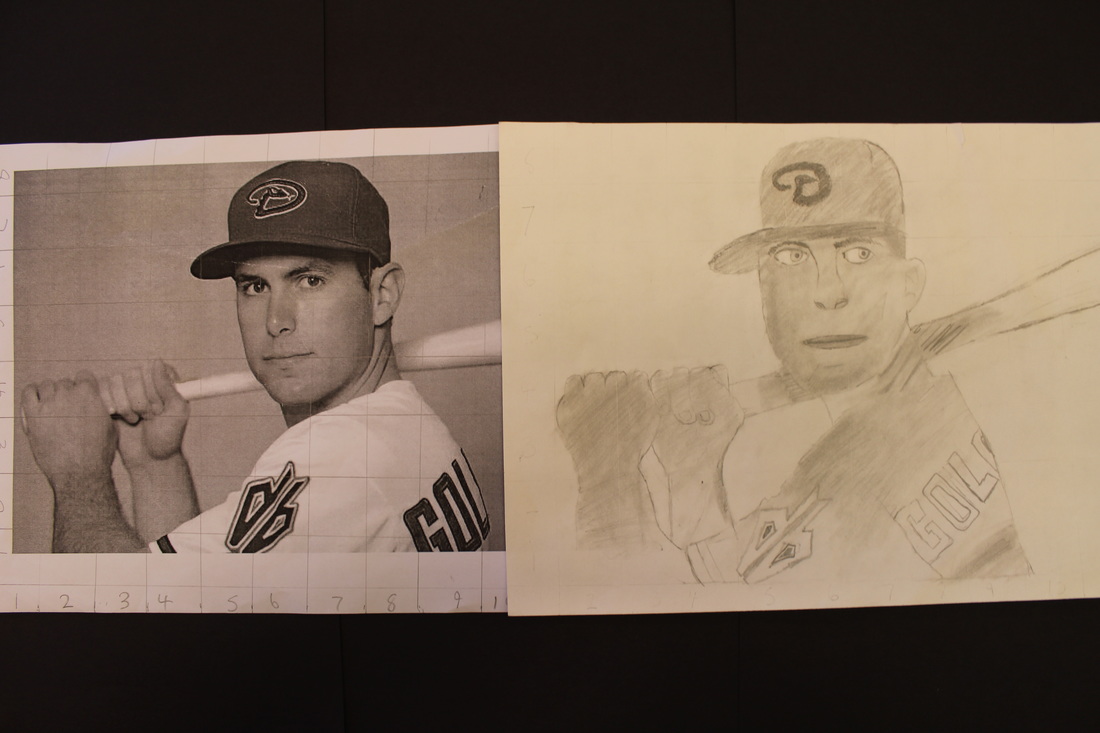
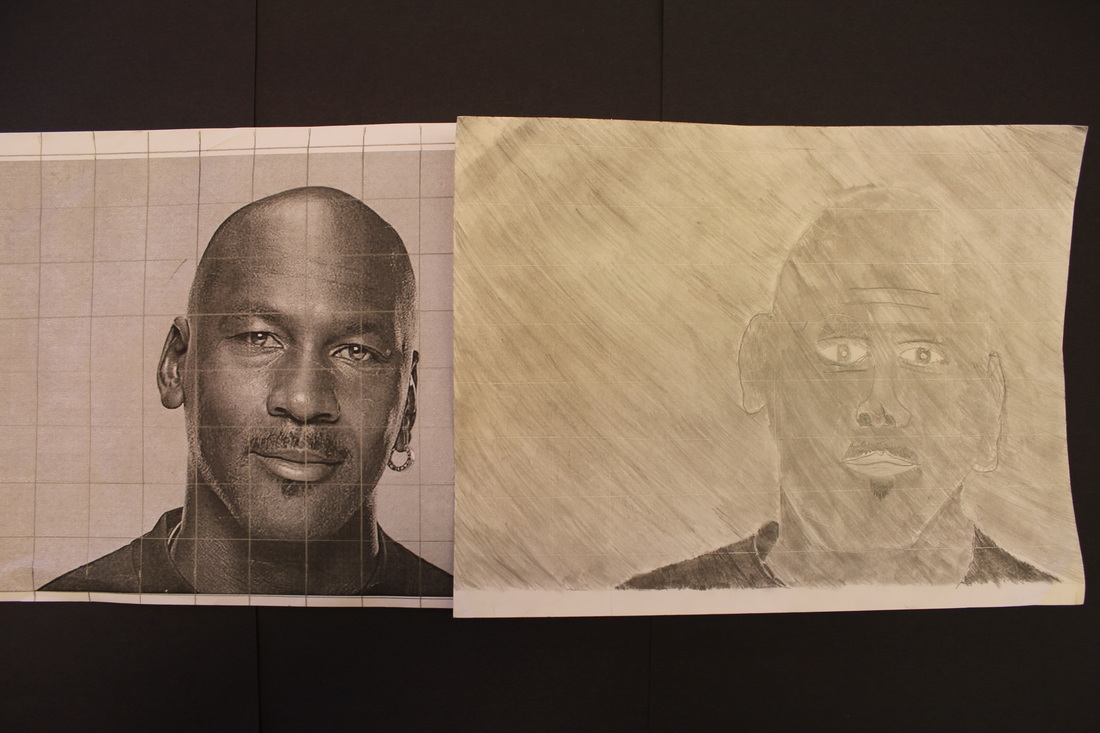
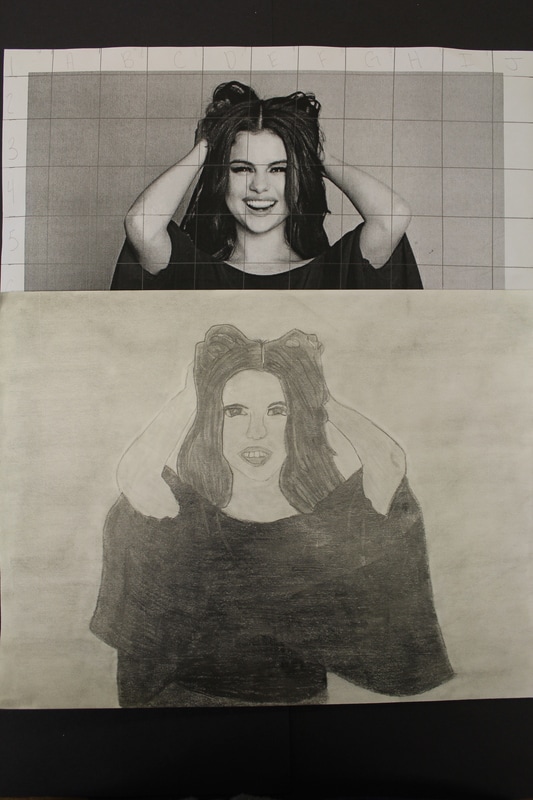
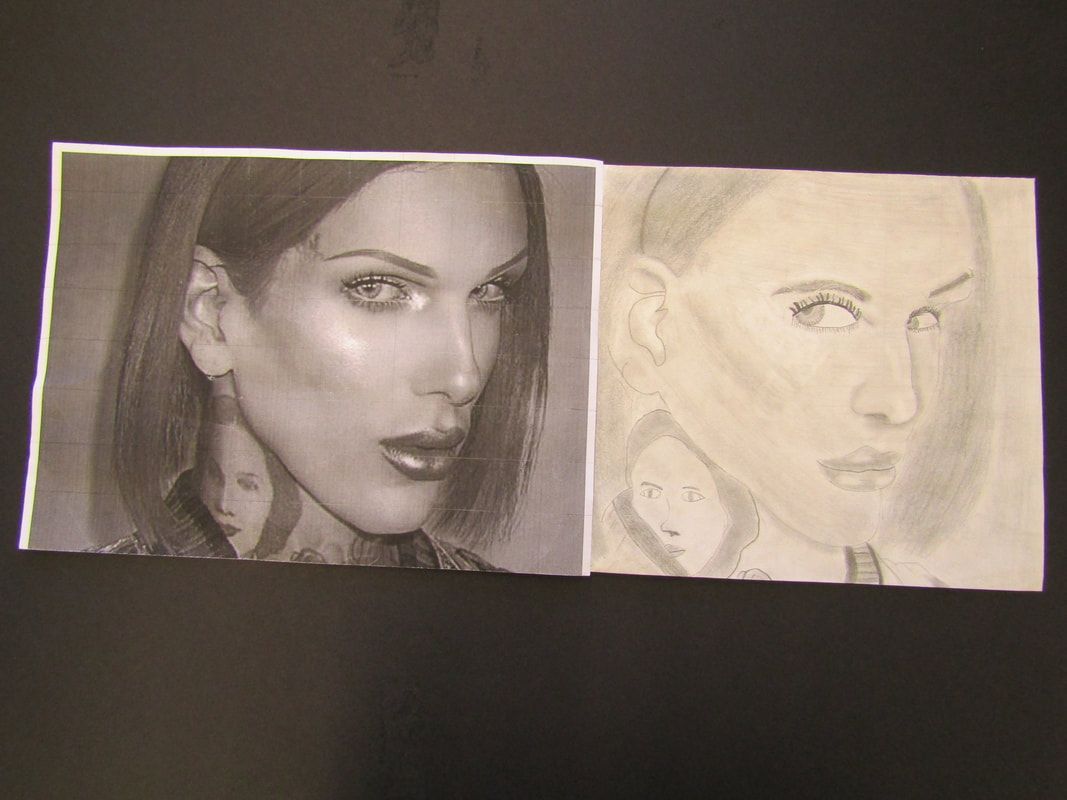
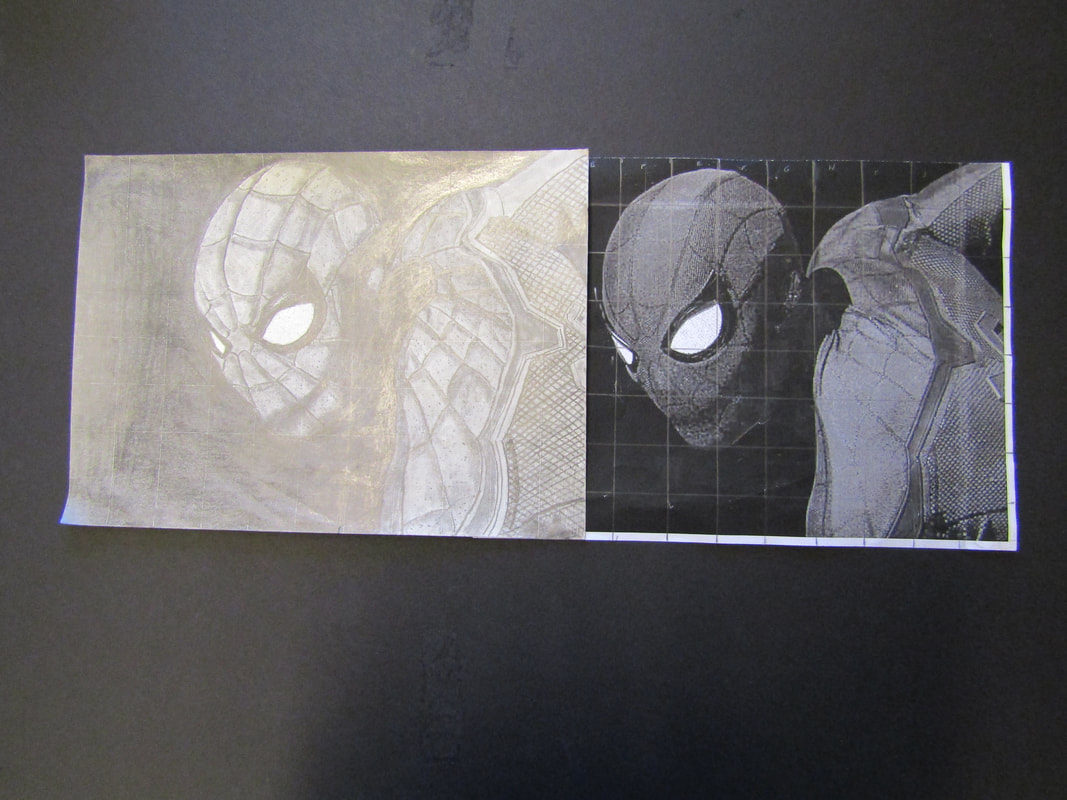
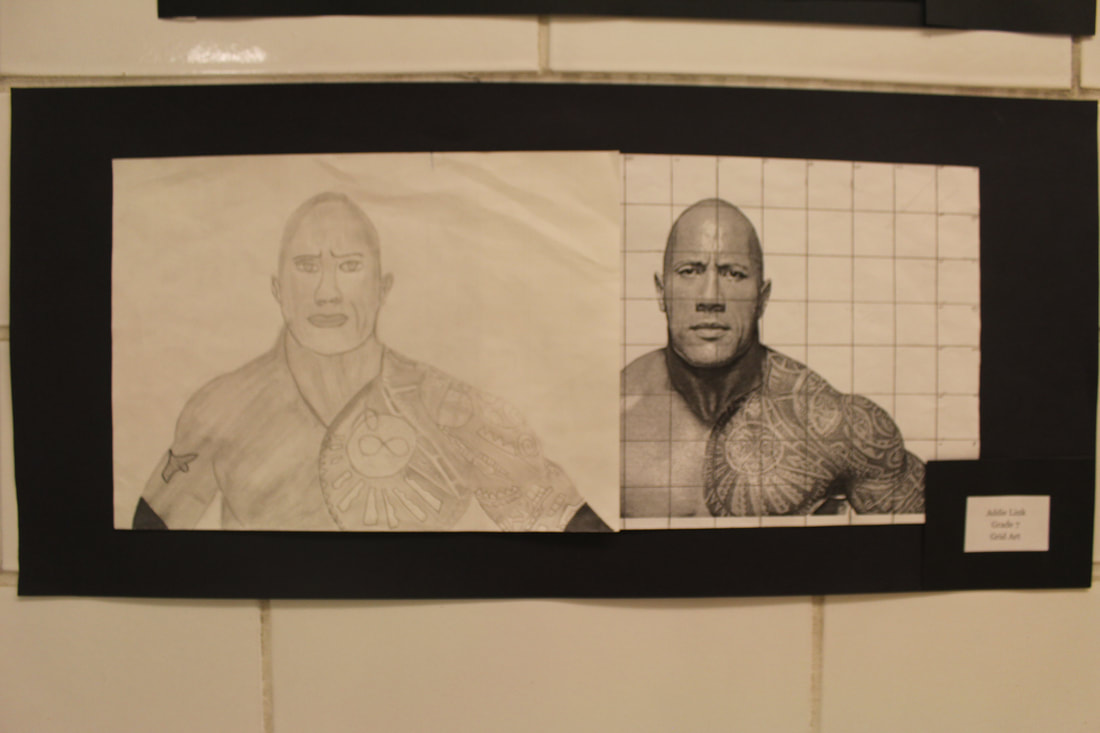
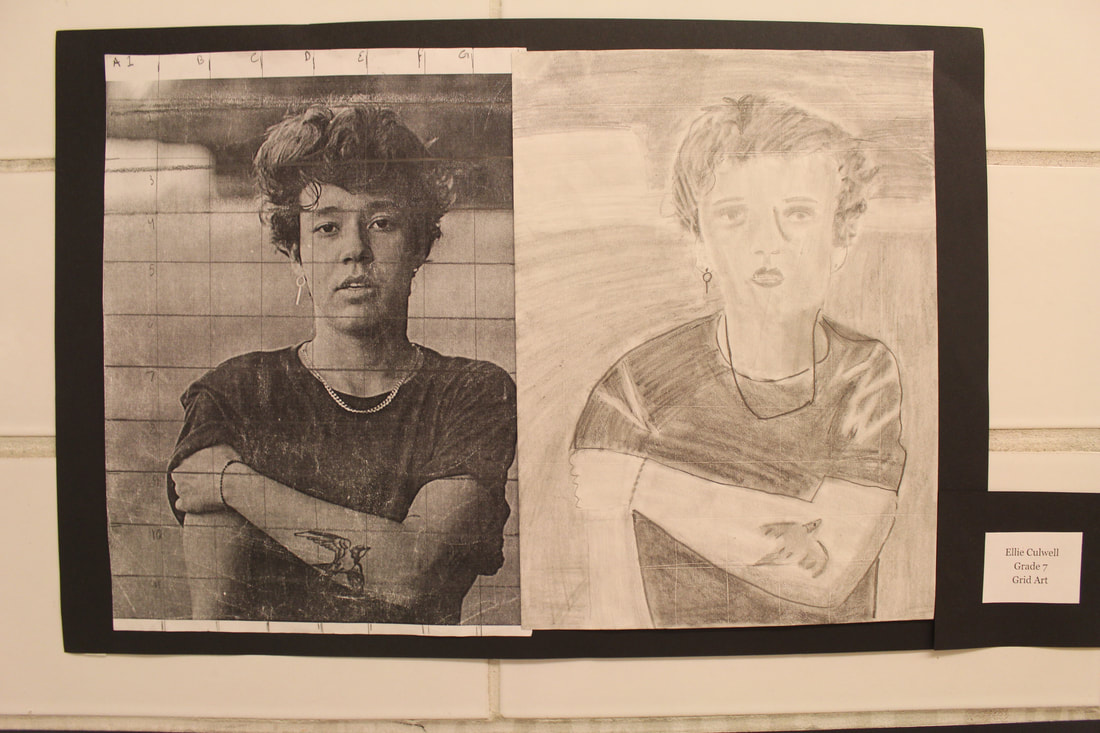
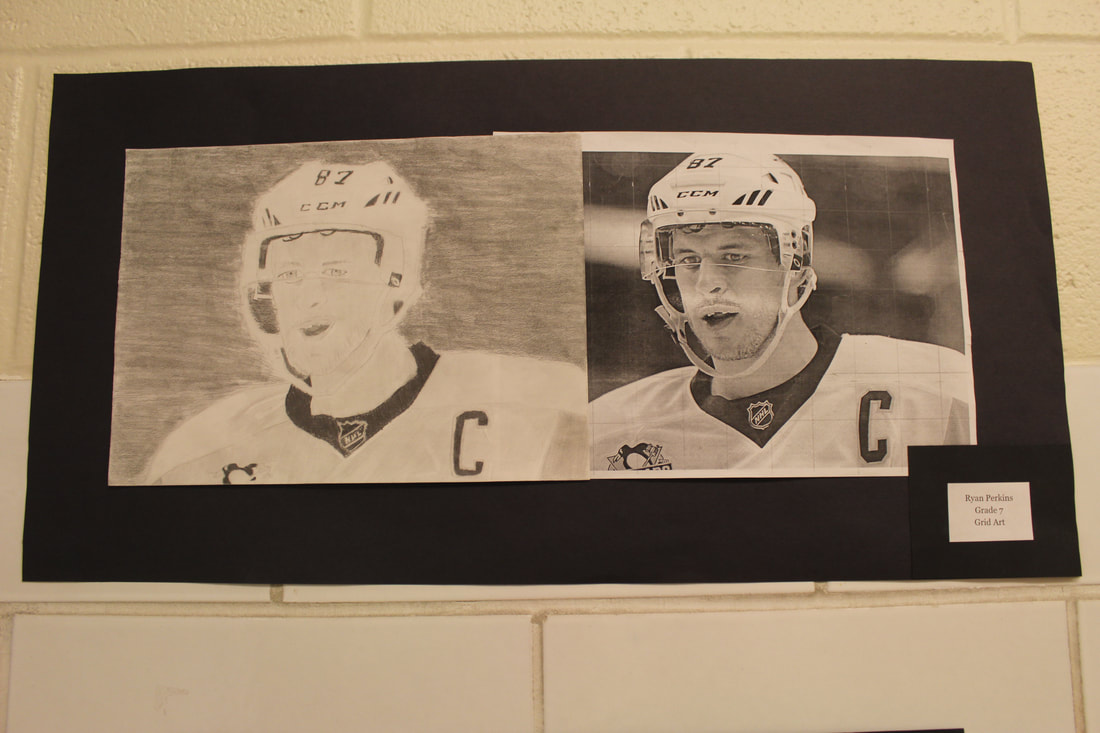
Grid Art
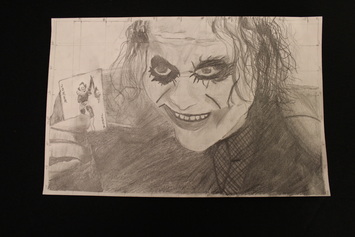
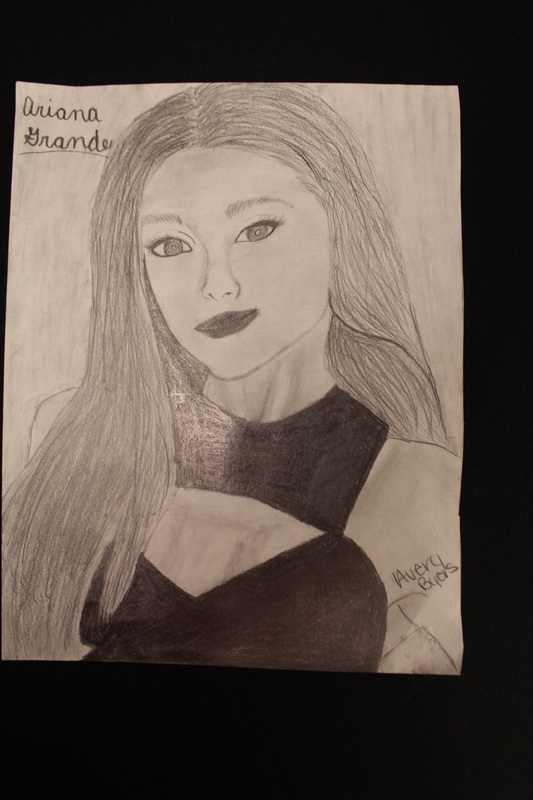
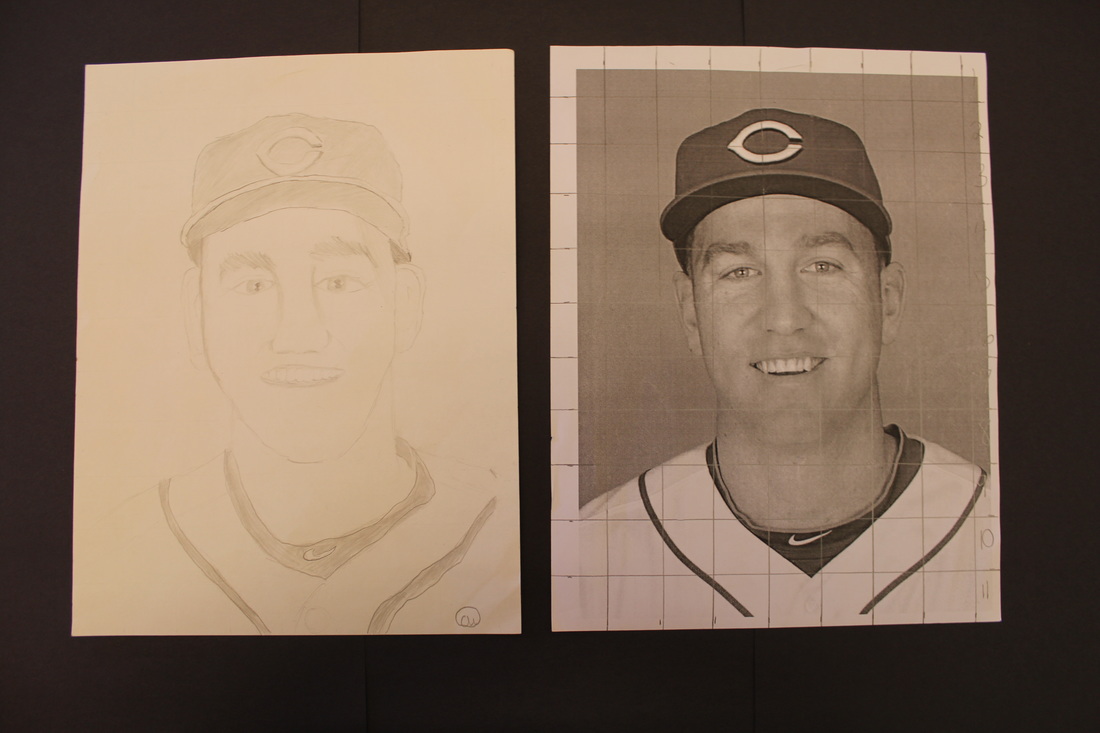
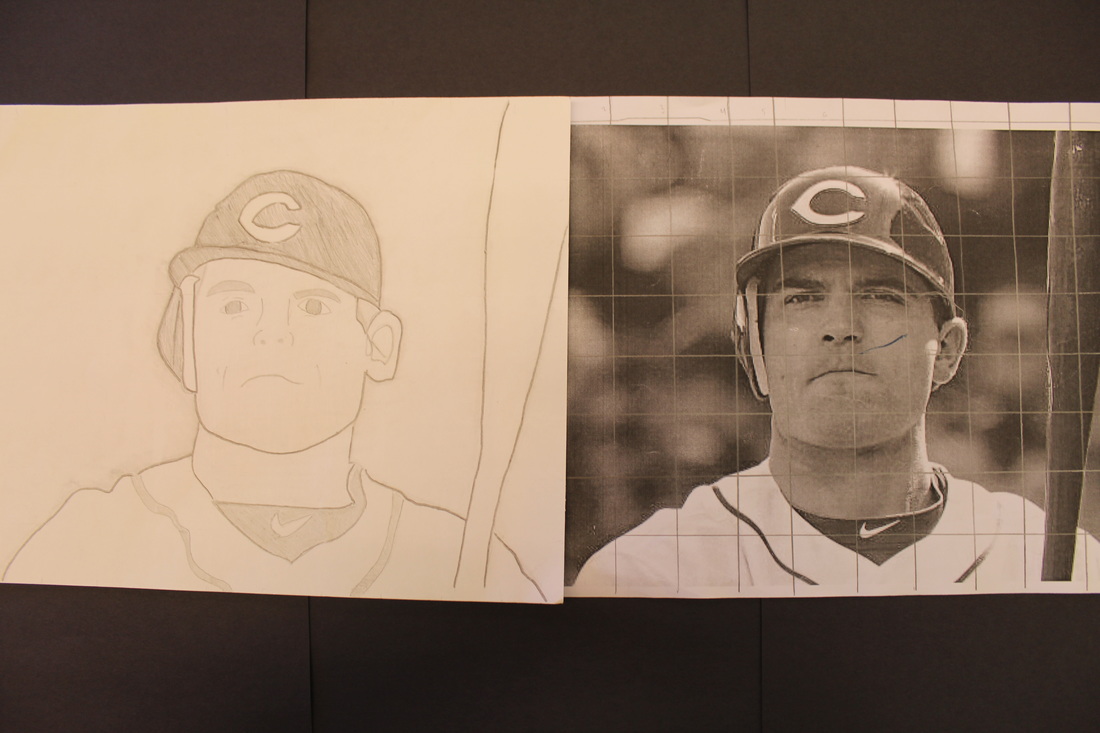
In this 7th grade project students choose a celebrity photo as inspiration for a pencil drawing. The first step we make is to measure out 1 inch boxes on our photo and also on our final paper. Then you draw the shapes box by box in a grid format to help focus on proportion and size. From there students erase the grid guidelines and add in shading with the shading pencils. We use our prior knowledge of shading from the self-portrait project to help us shade this project and create realism.