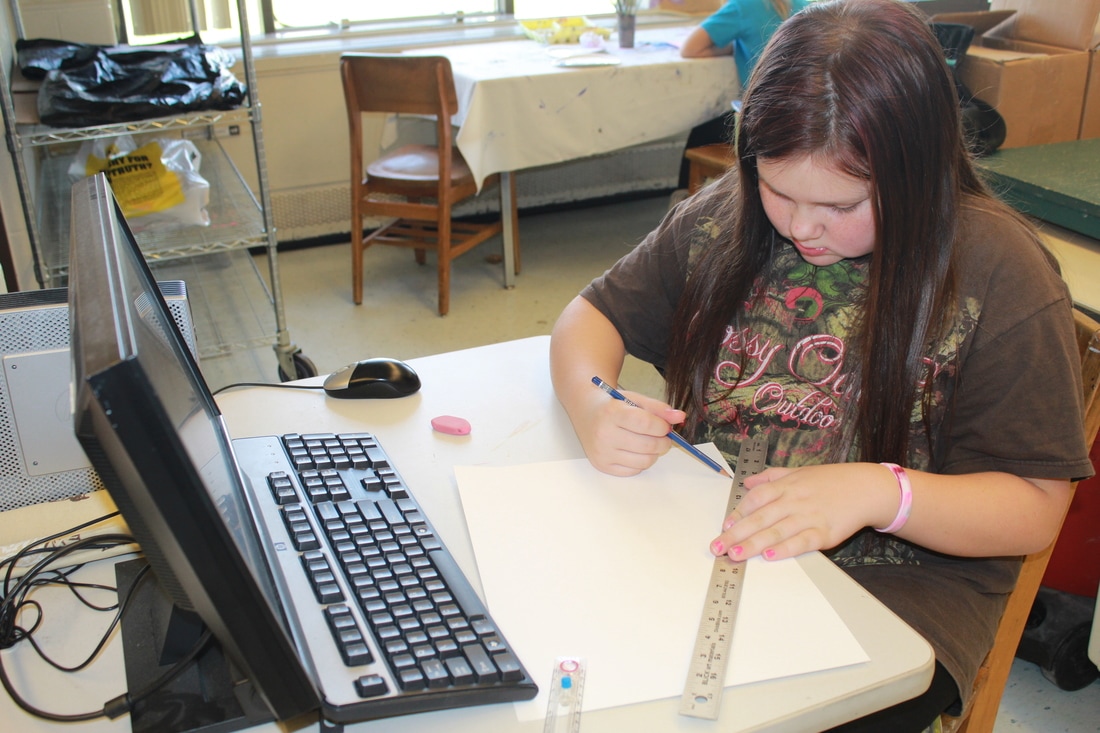
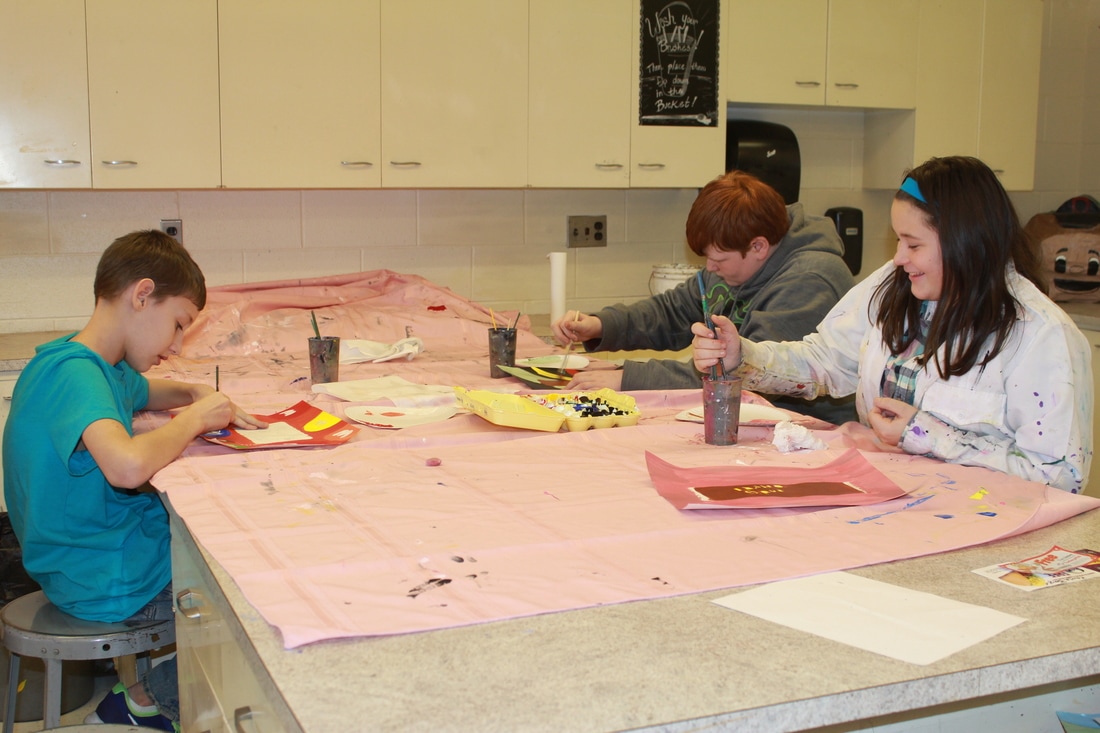
SuperHeroes
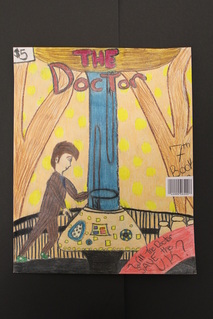
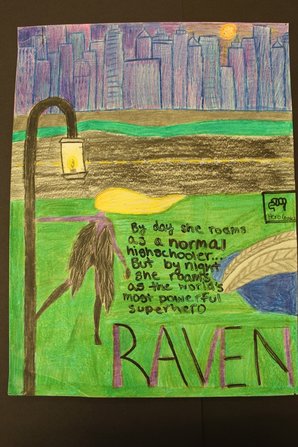
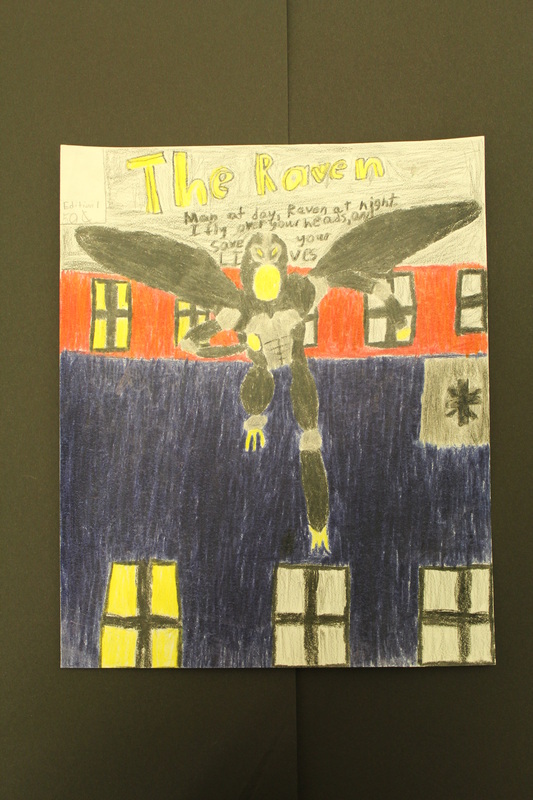
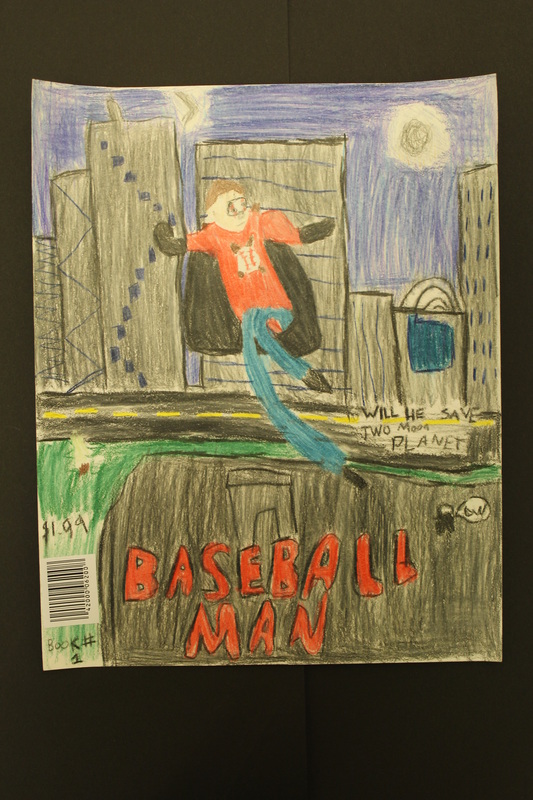
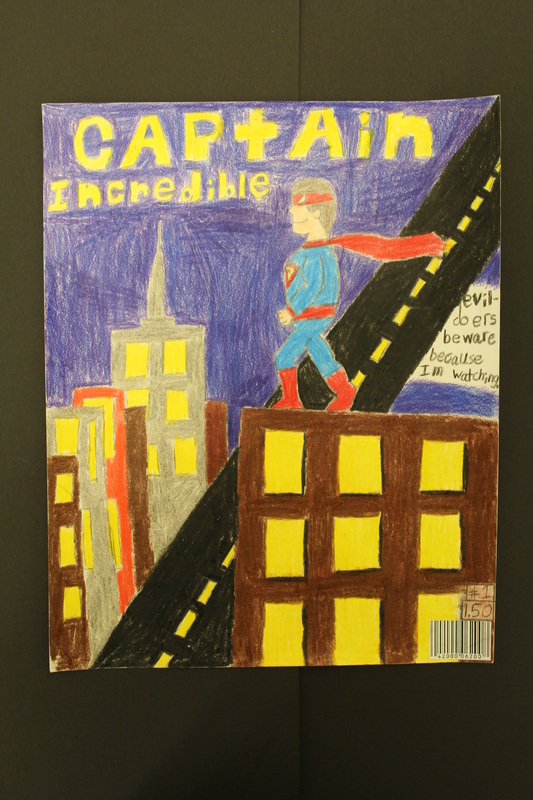
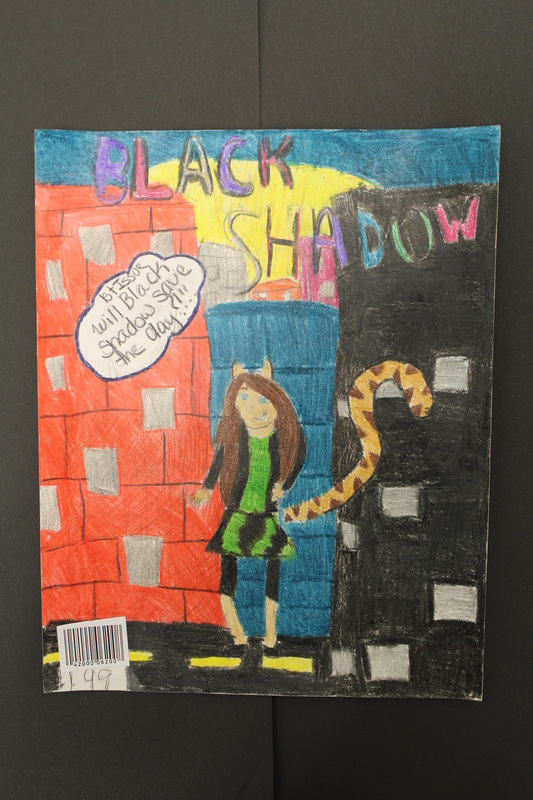
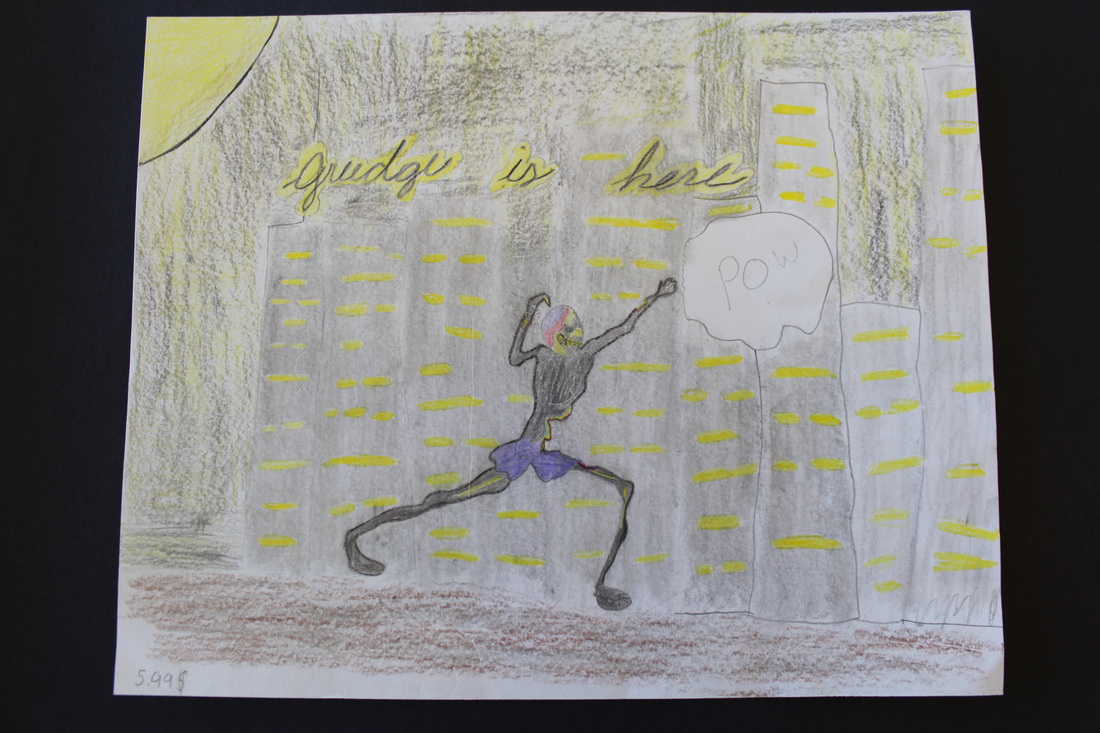
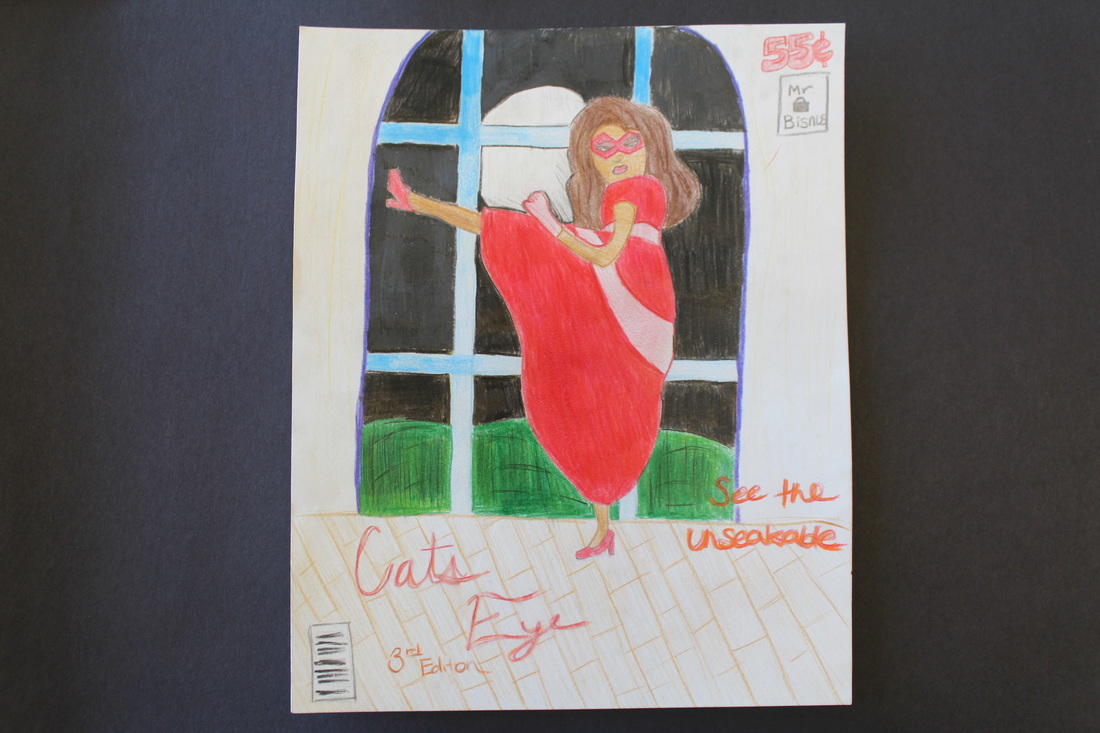
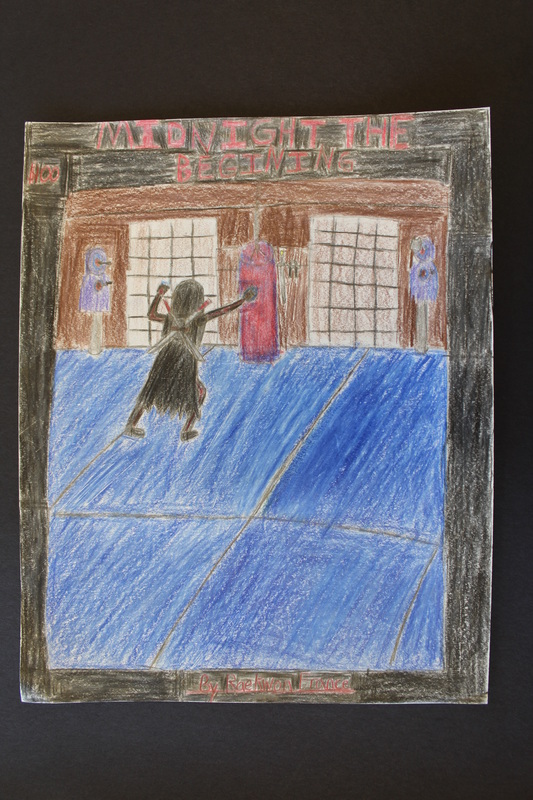
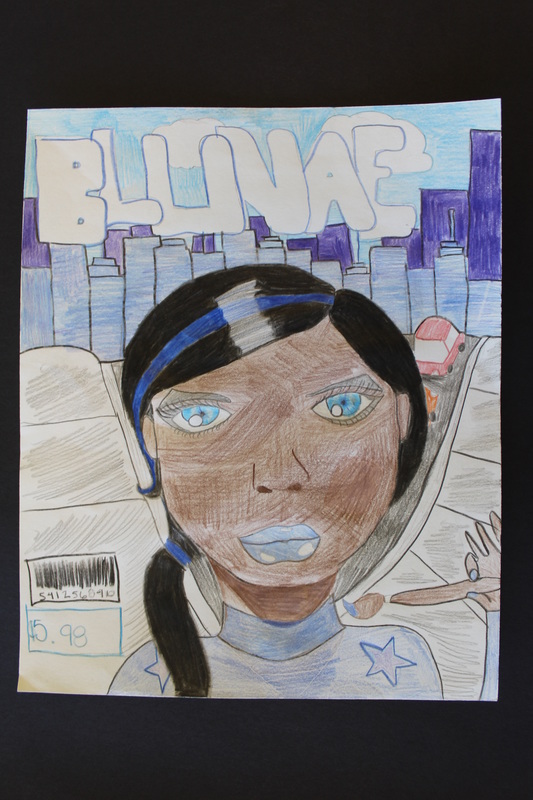
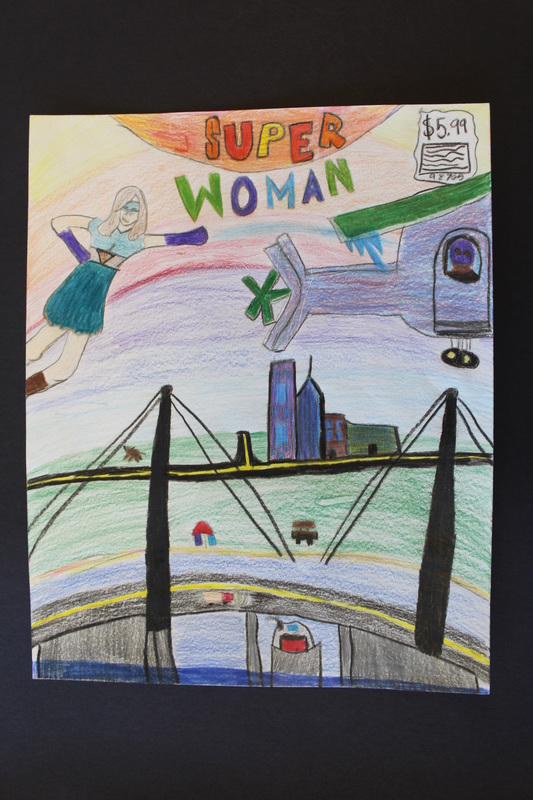
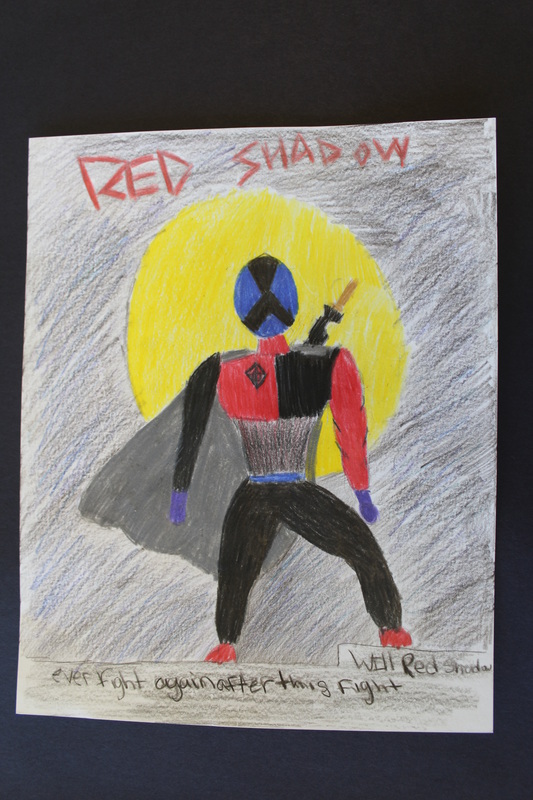
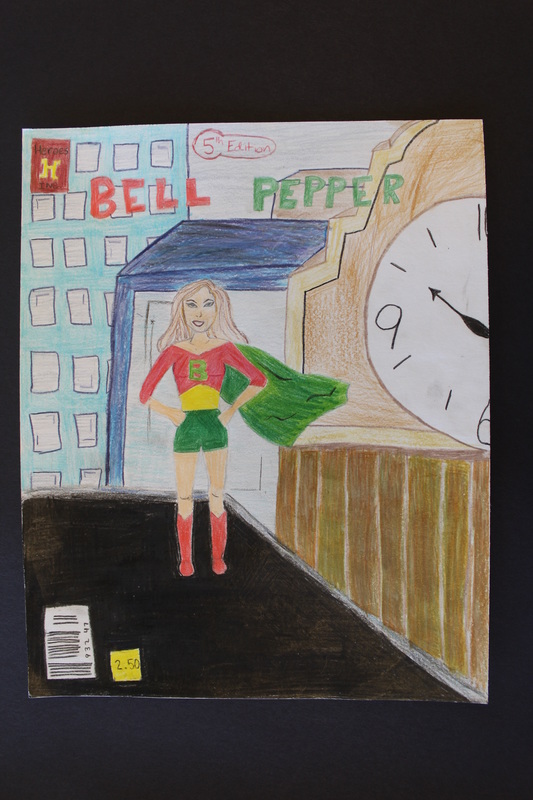
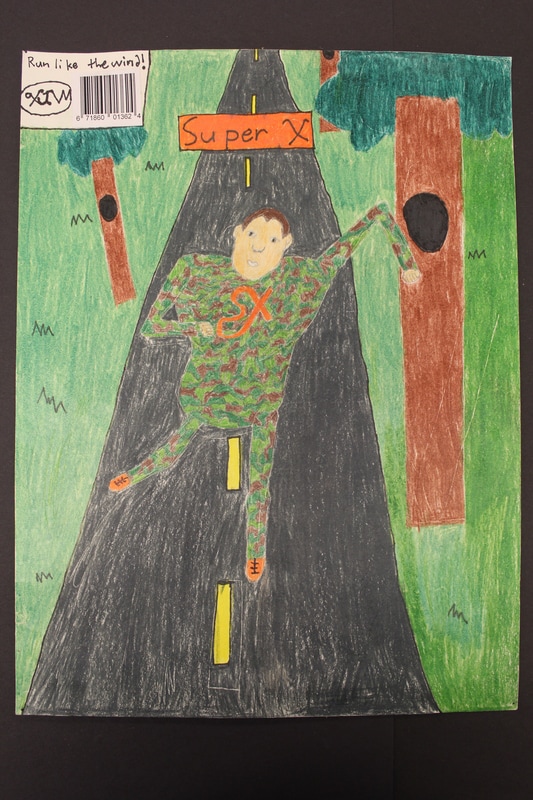
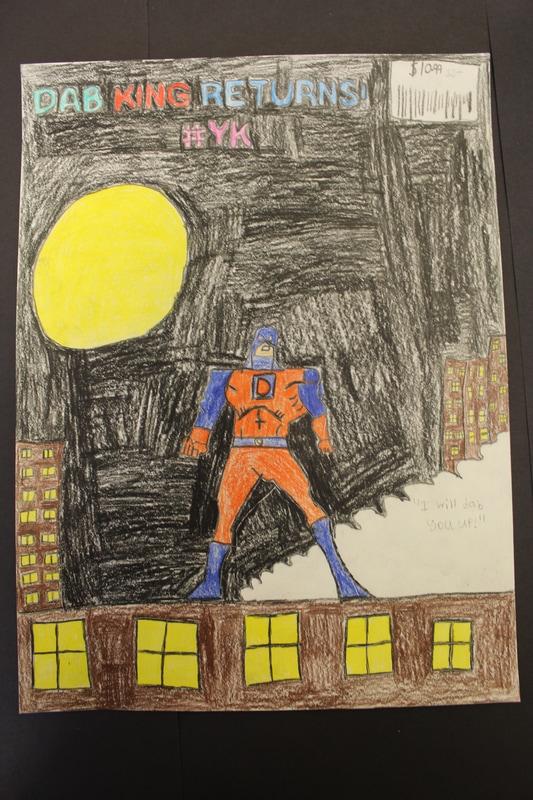
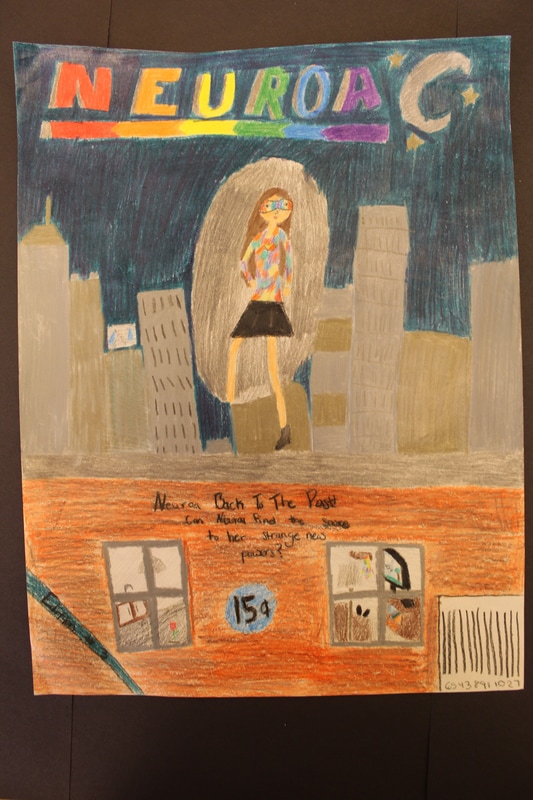
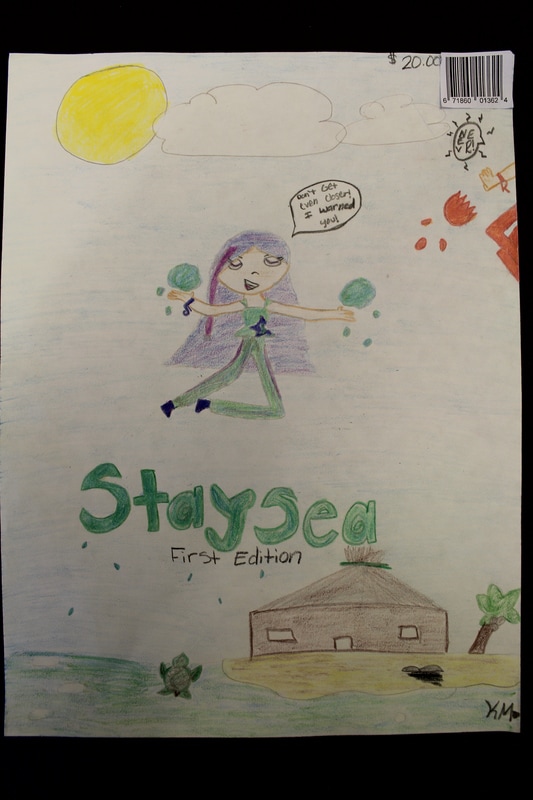
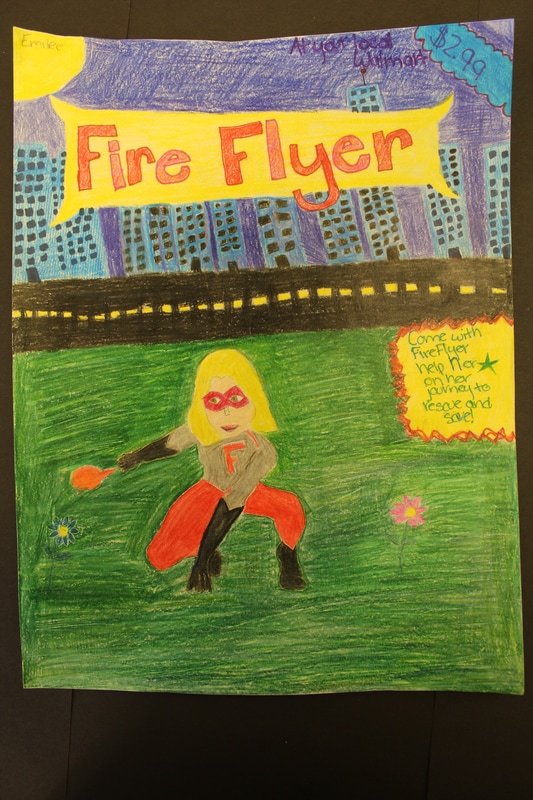
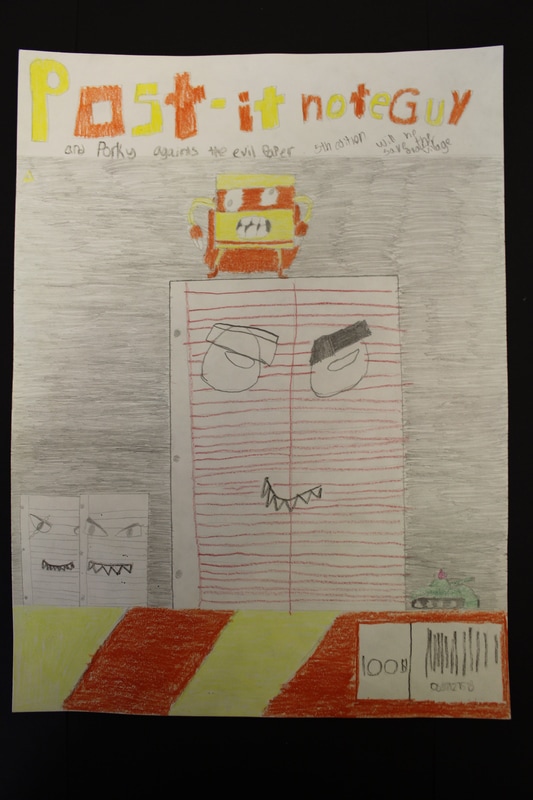
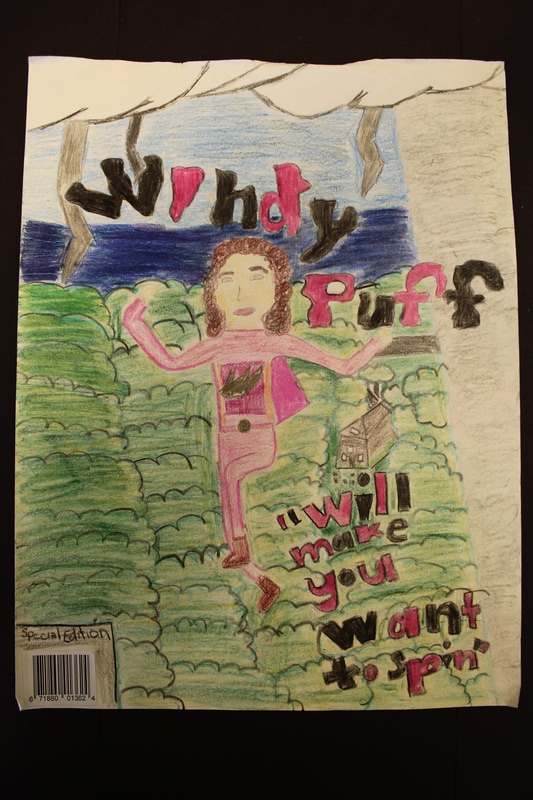
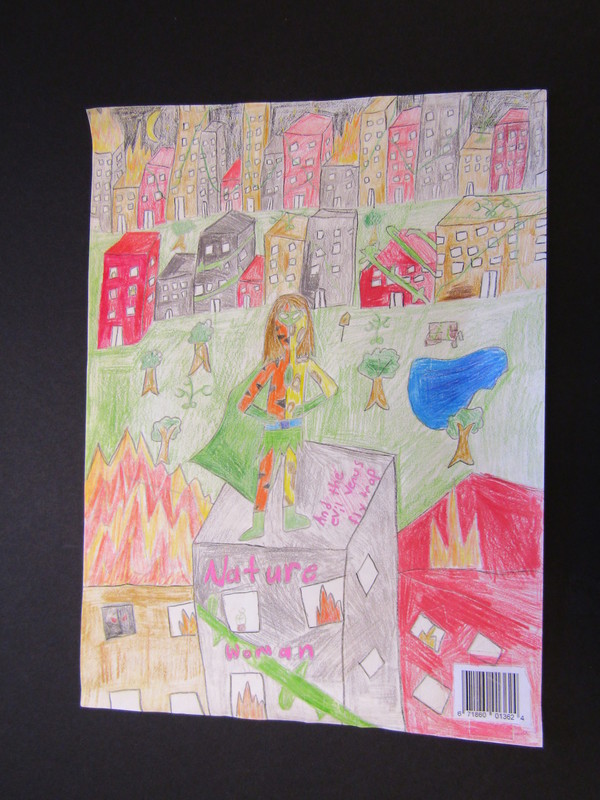
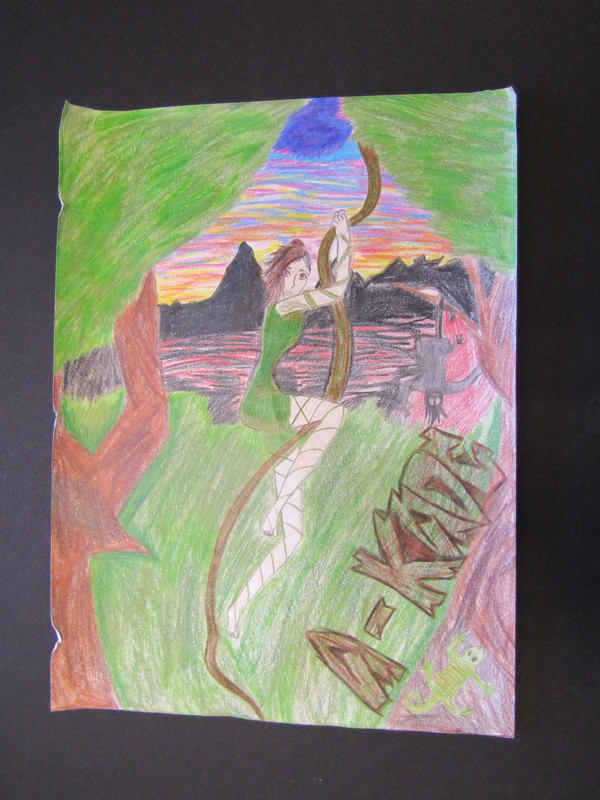
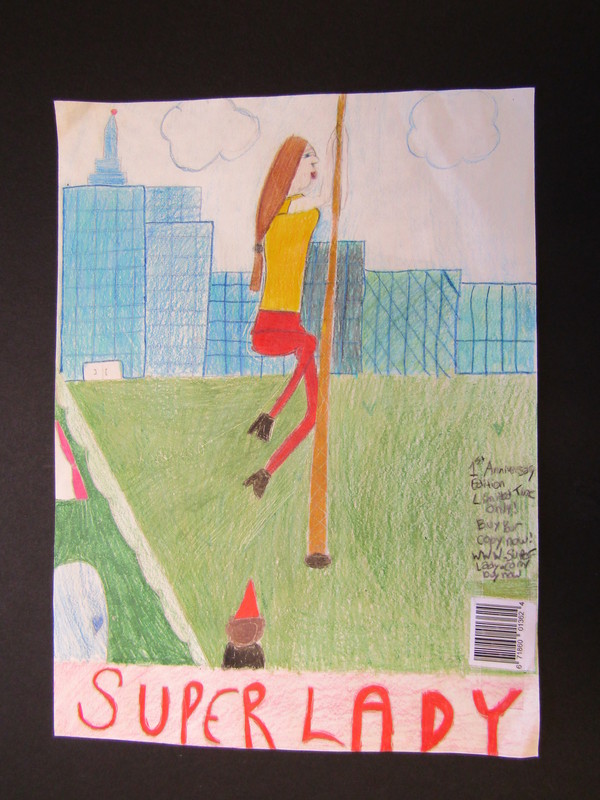
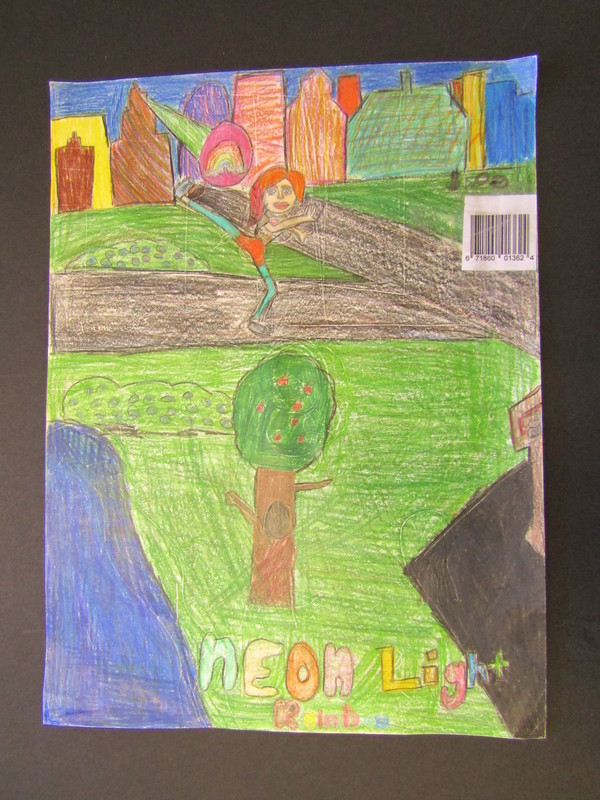
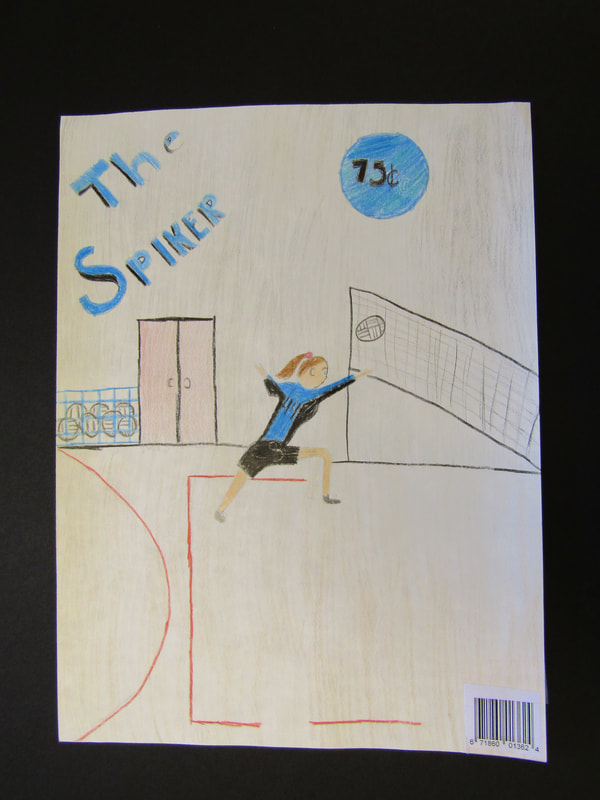
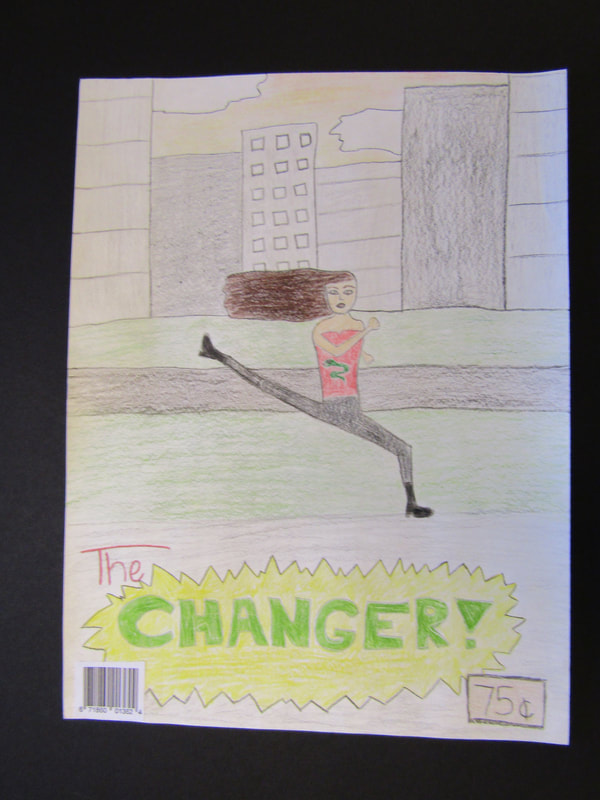
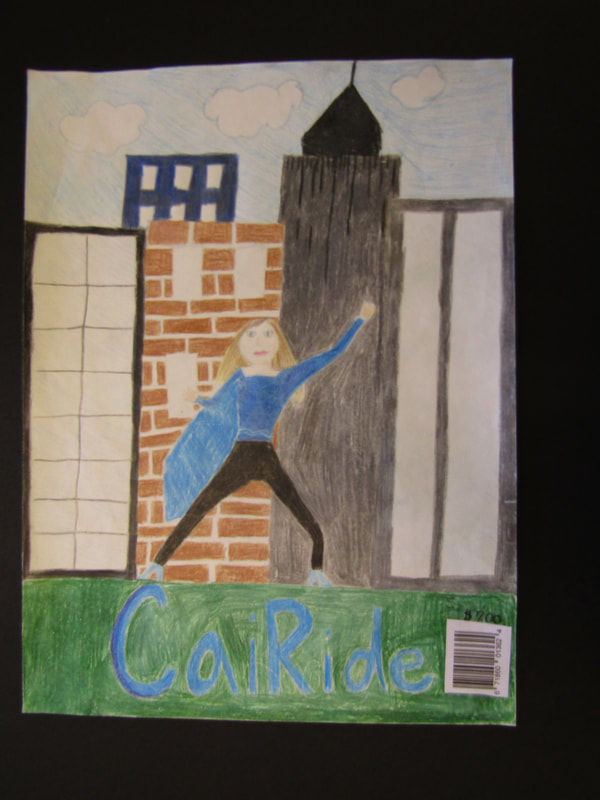
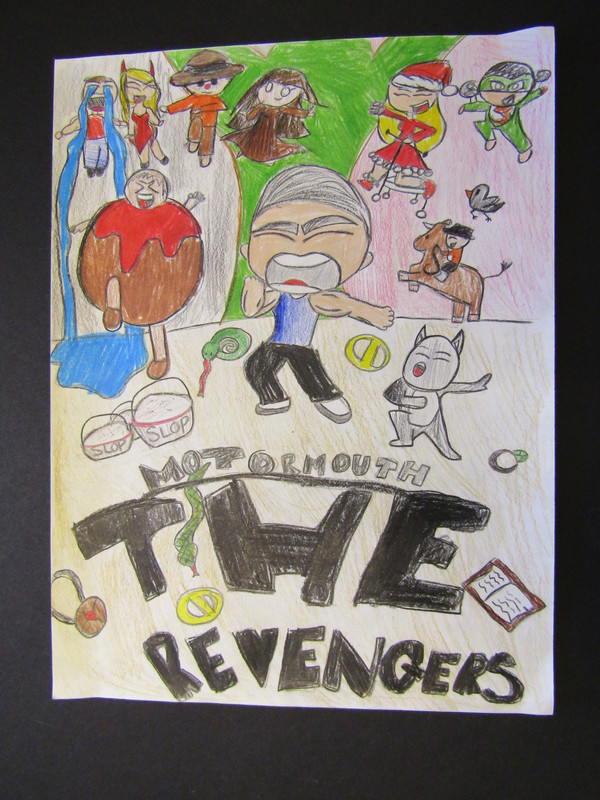
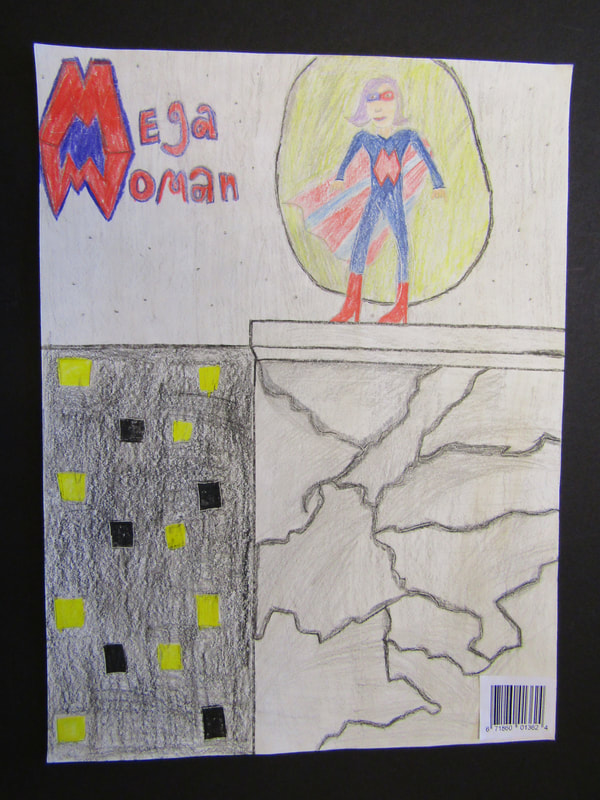
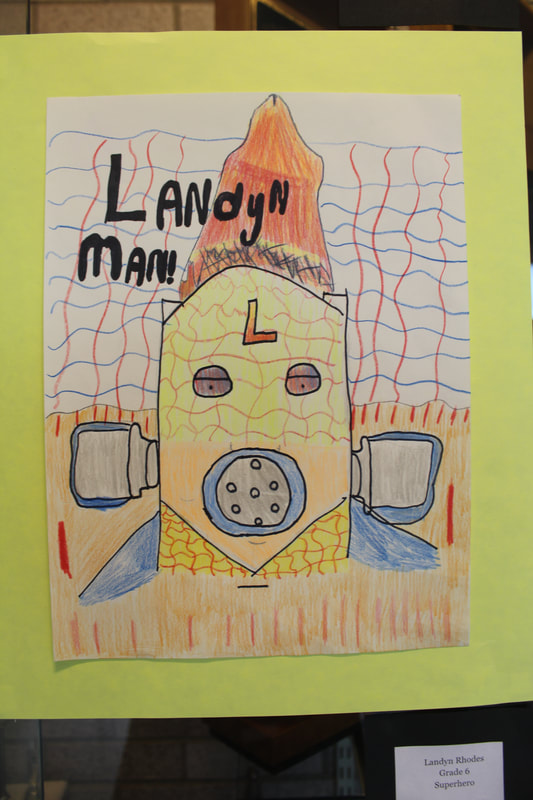
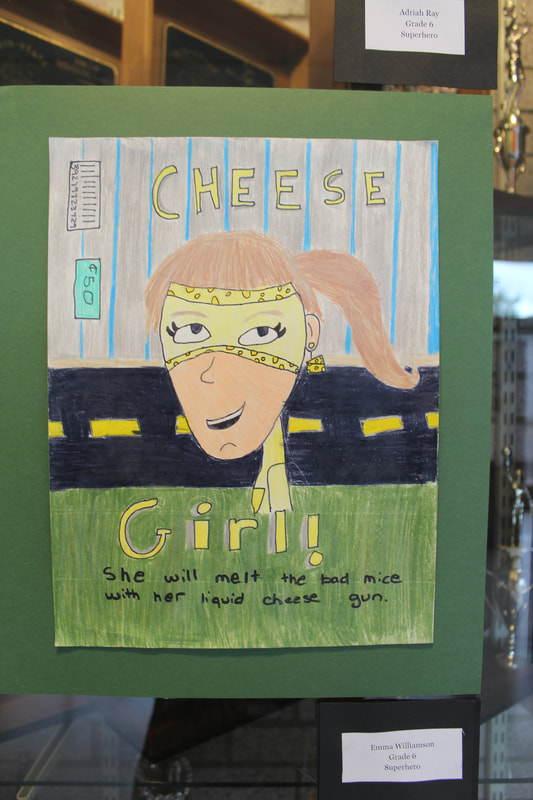
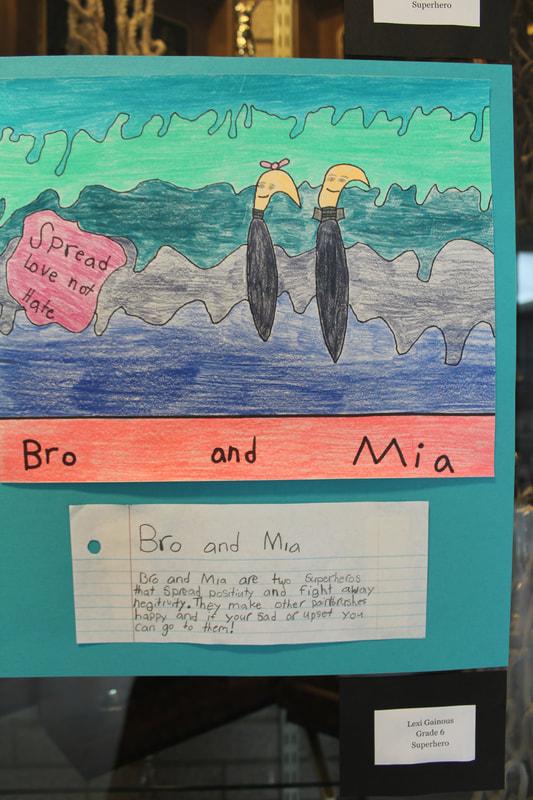
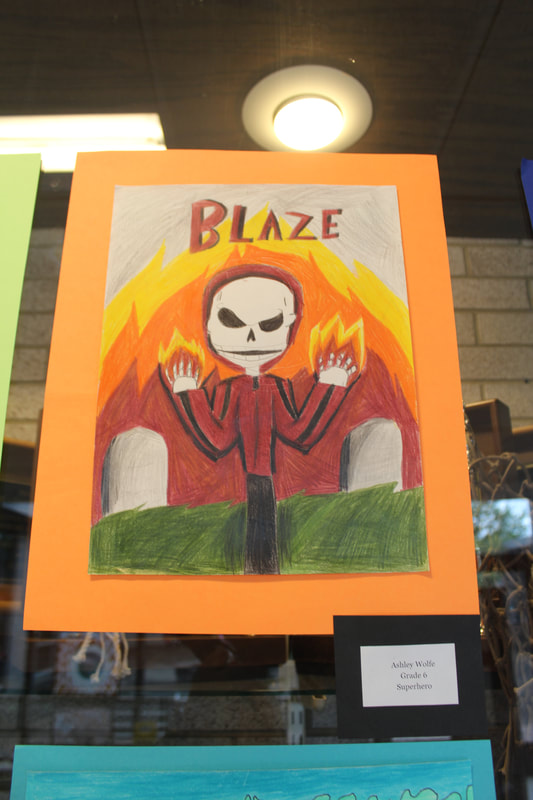
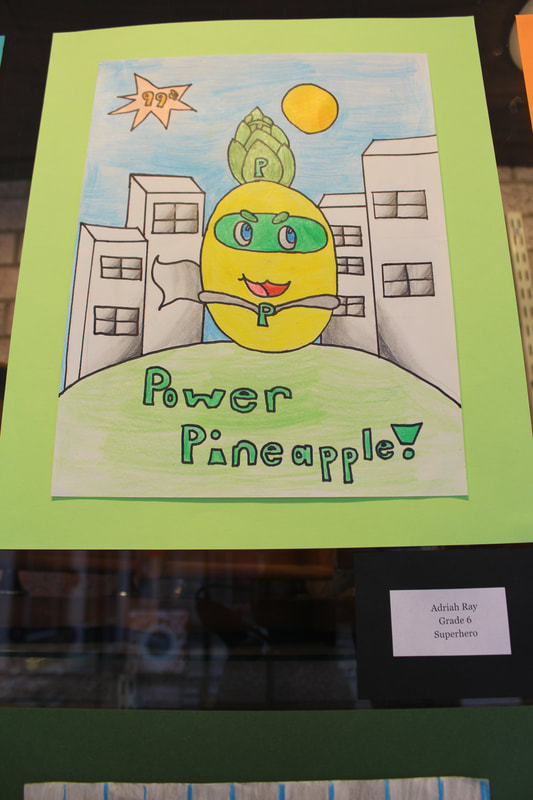
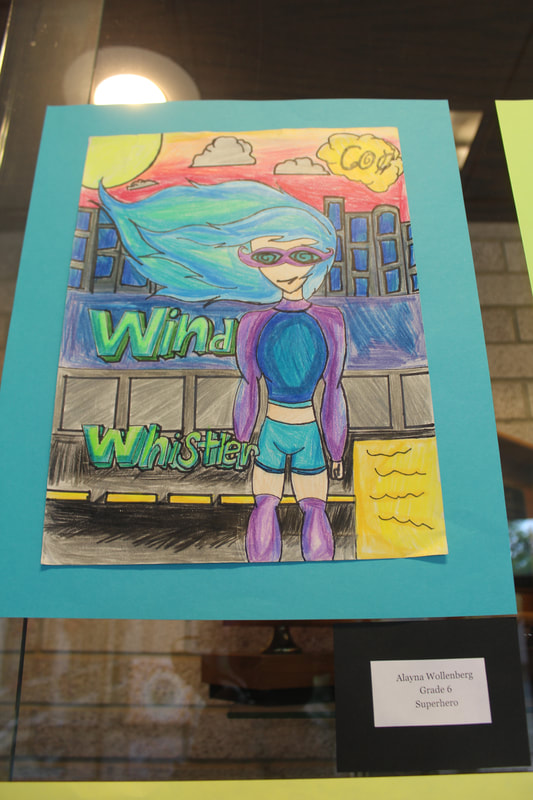
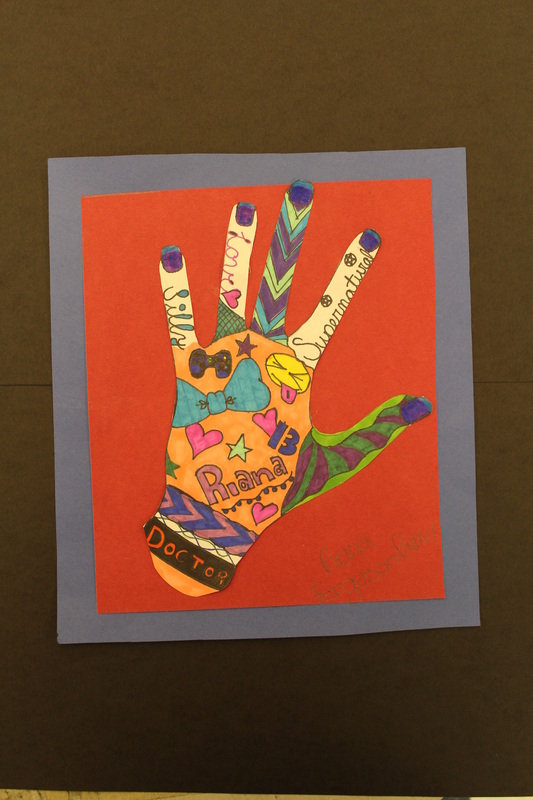
For all of the Super hero units students first learn about drawing a figure in an action pose. That is then adapted for each of the three projects you see below. We spent a day doing step by step gesture (quick, sketchy drawings) of a super hero in action, we brainstormed about super heroes that we know of, and then set out to design ourselves as super heroes. In this superhero project students design a comic book cover and a superhero to star in the comic. The hero you see pictured left is by Riana, a 6th grade student, who loves the TV show "Doctor Who" which inspired her super hero comic book cover. Below you will see several other examples of 6th grade super hero cover designs. During this unit students also learned how to color with colored pencils in a way that brought out the full intensity of the color and also allowed them to blend colors to create cool effects. This is one of my favorite units to teach because the creativity and talent always amazes me! Great job 6th Grade!
|
|


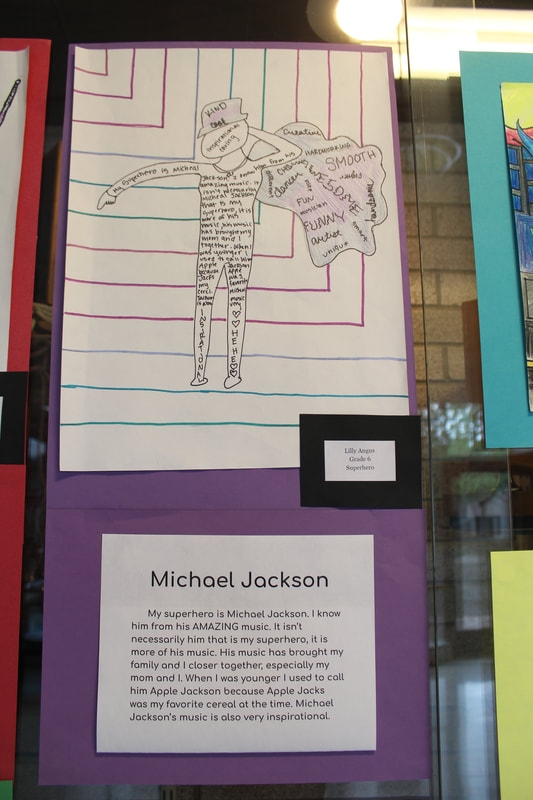
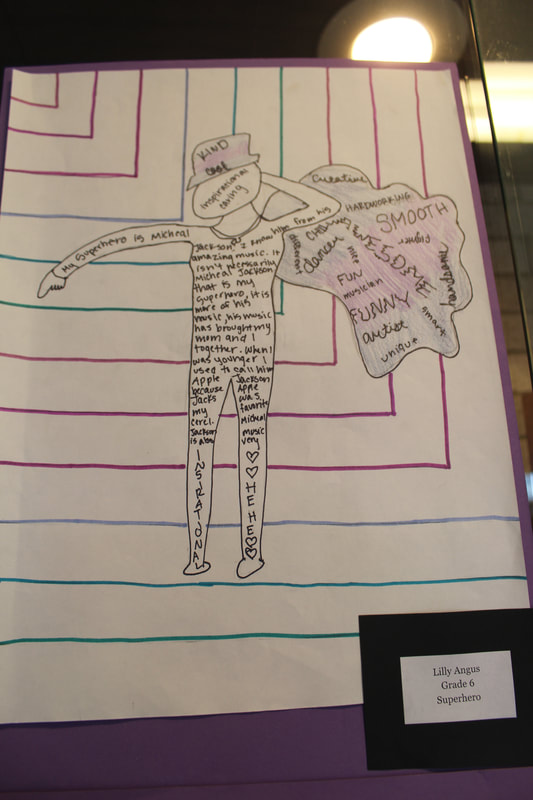
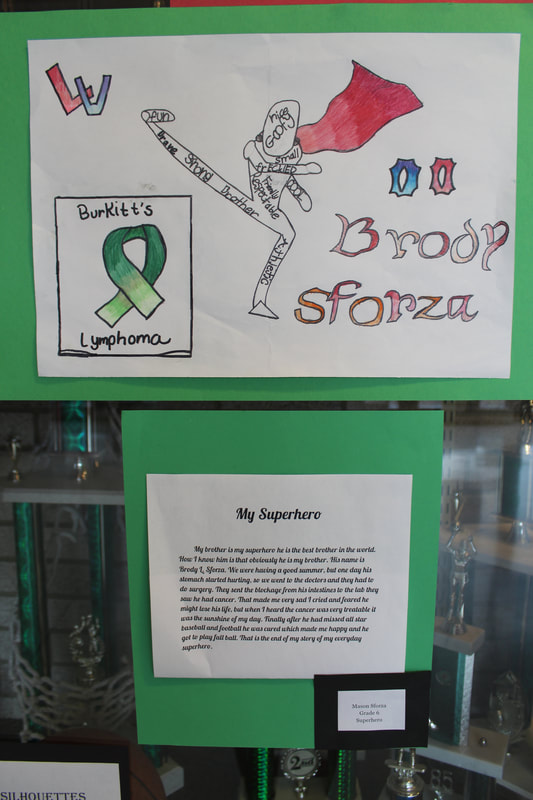
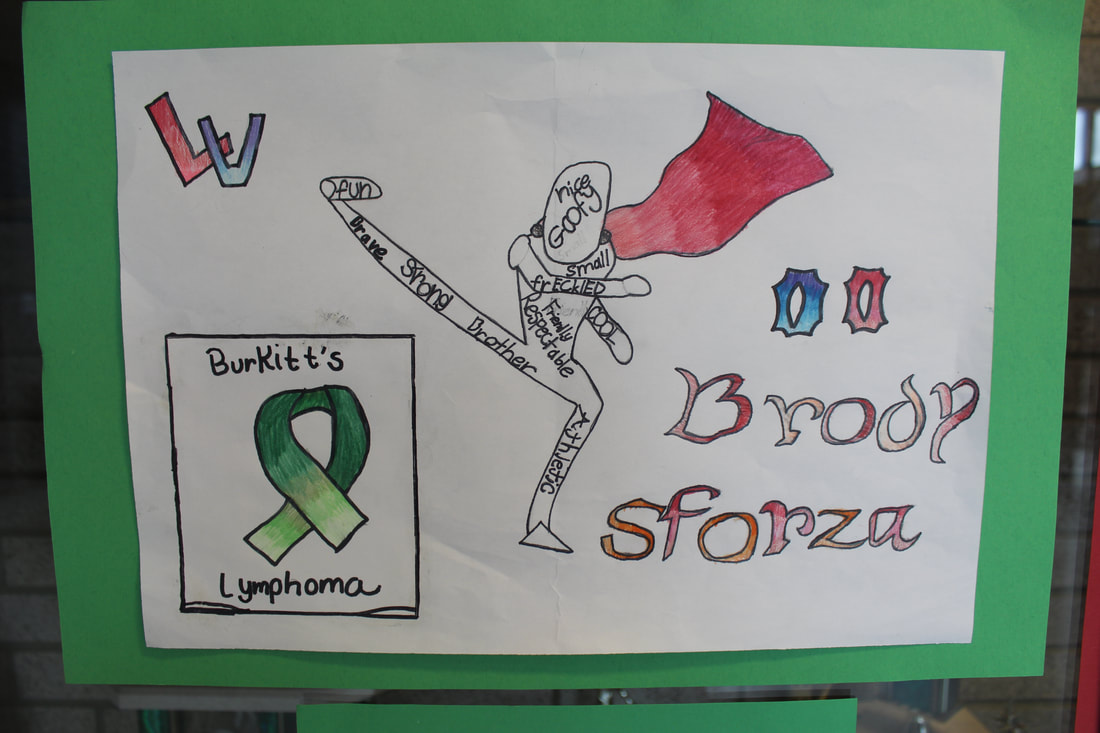
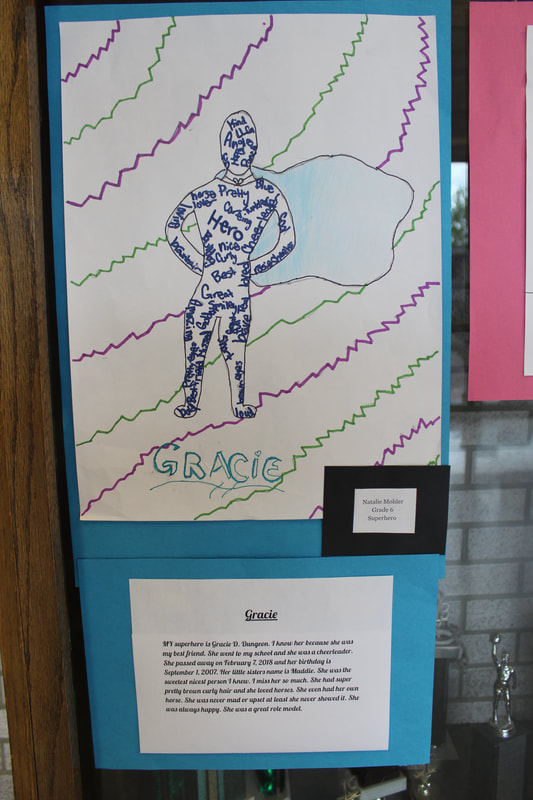
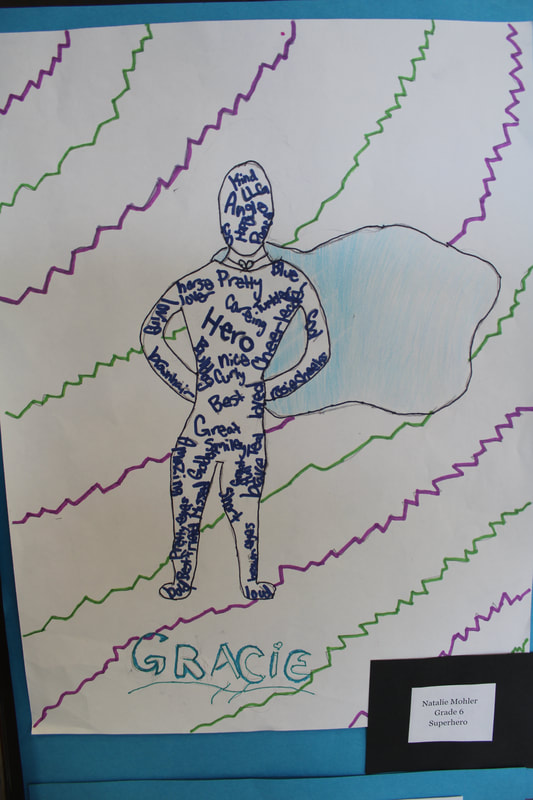
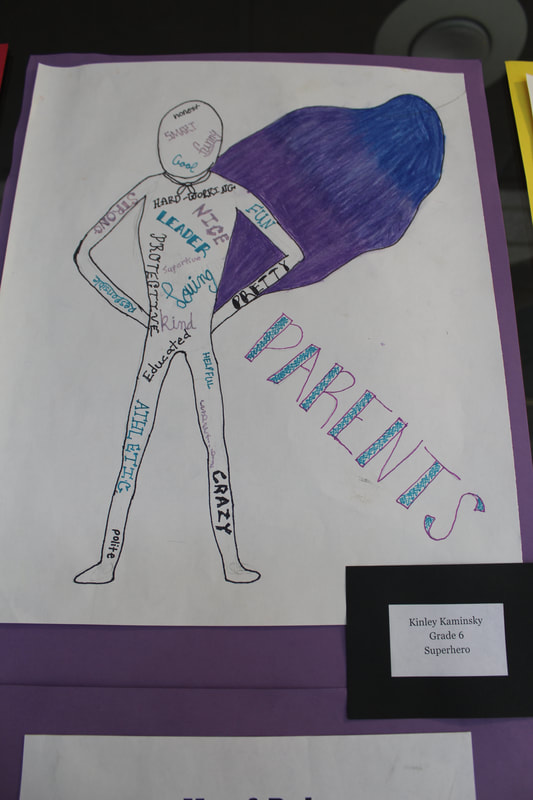
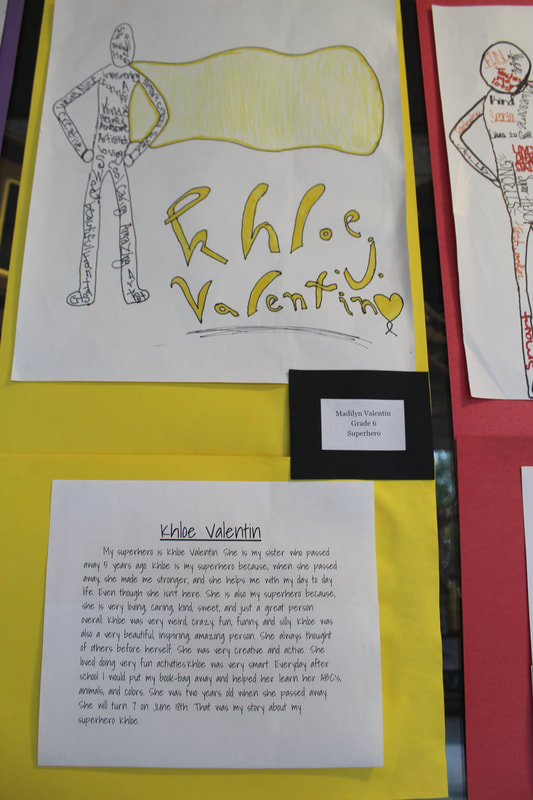
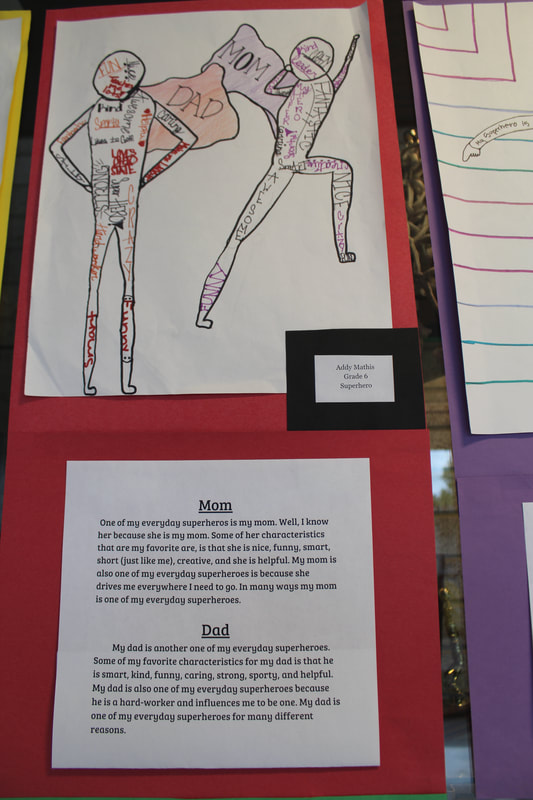
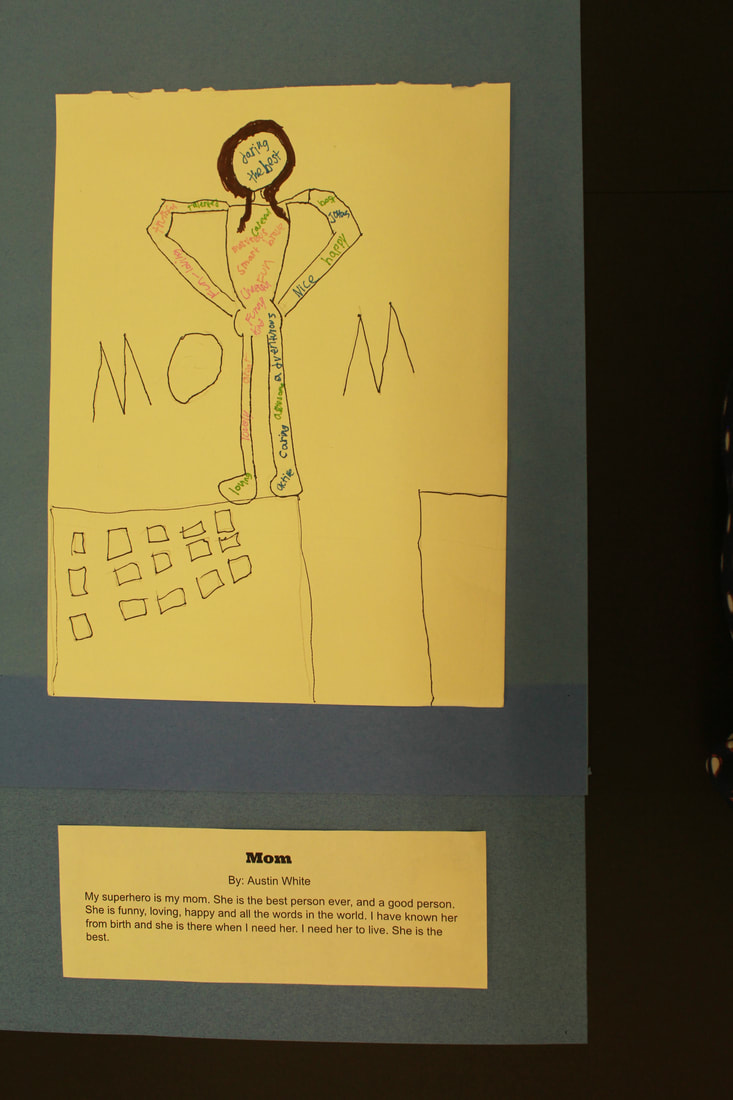
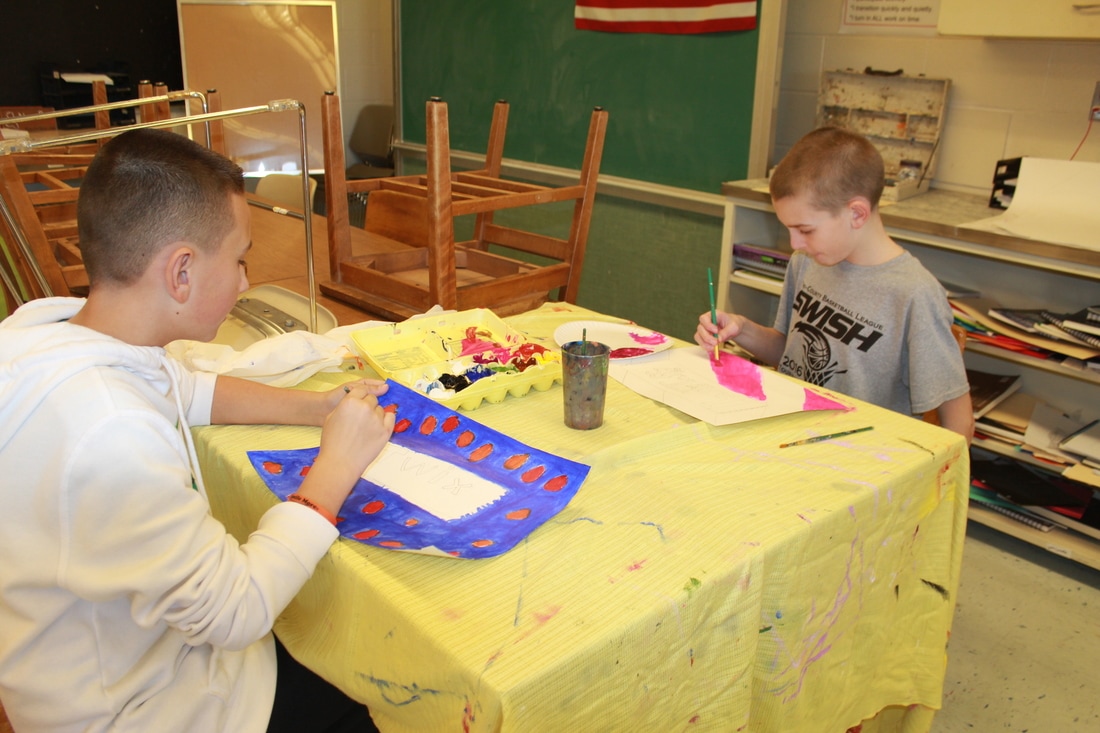
Superhero-My Everyday superhero project
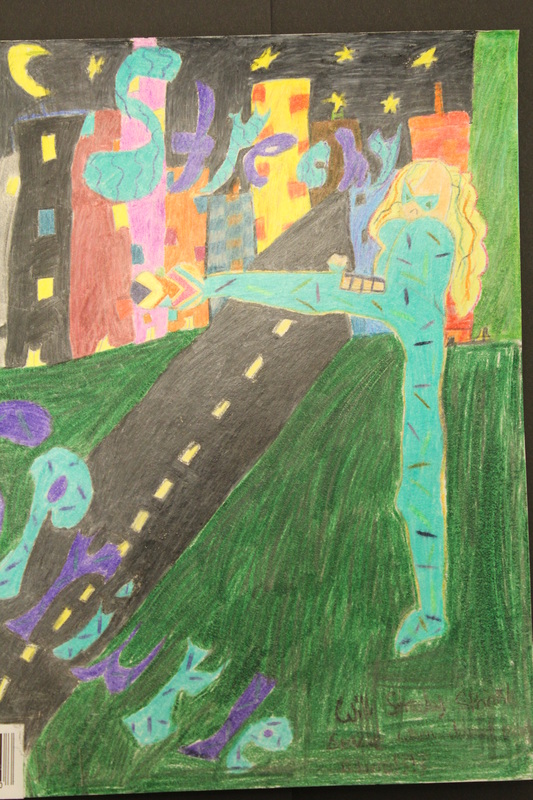
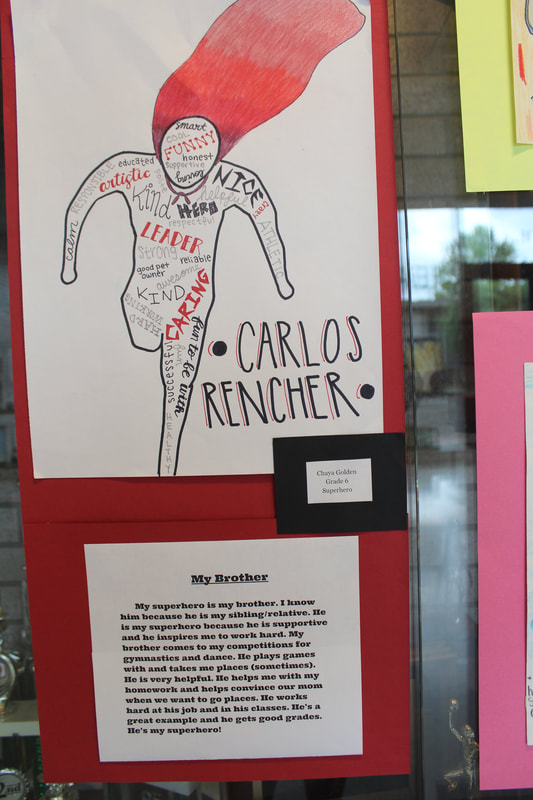
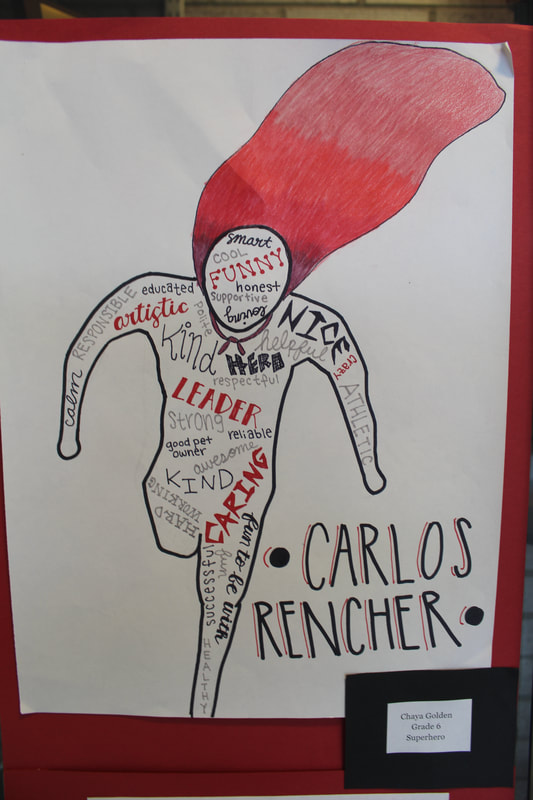
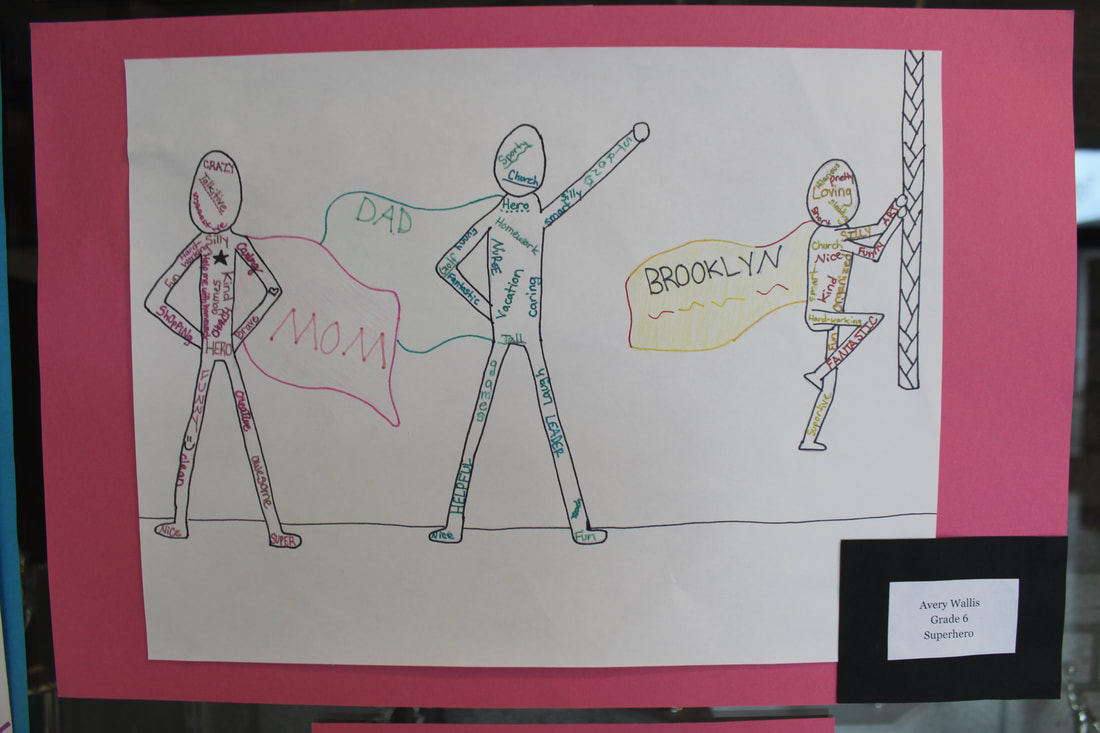
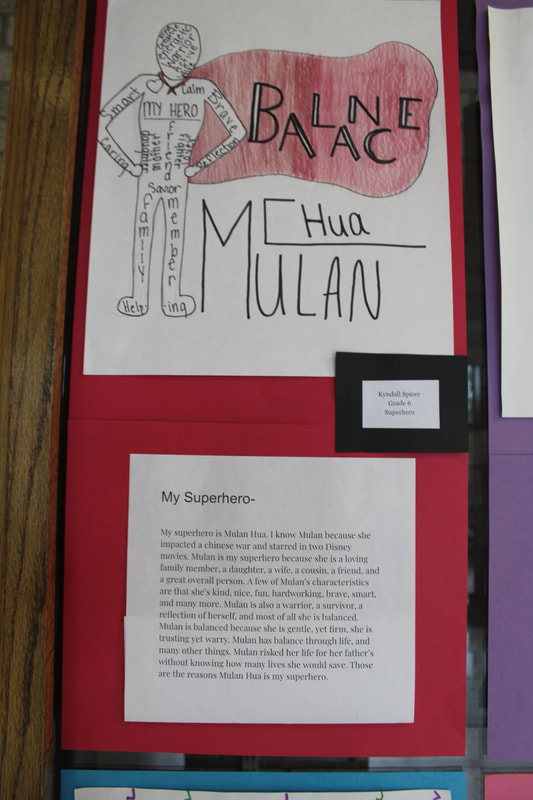
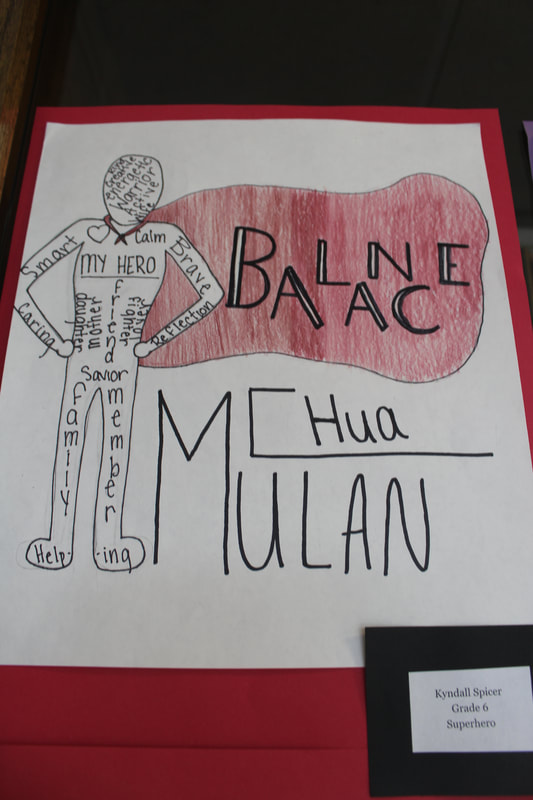
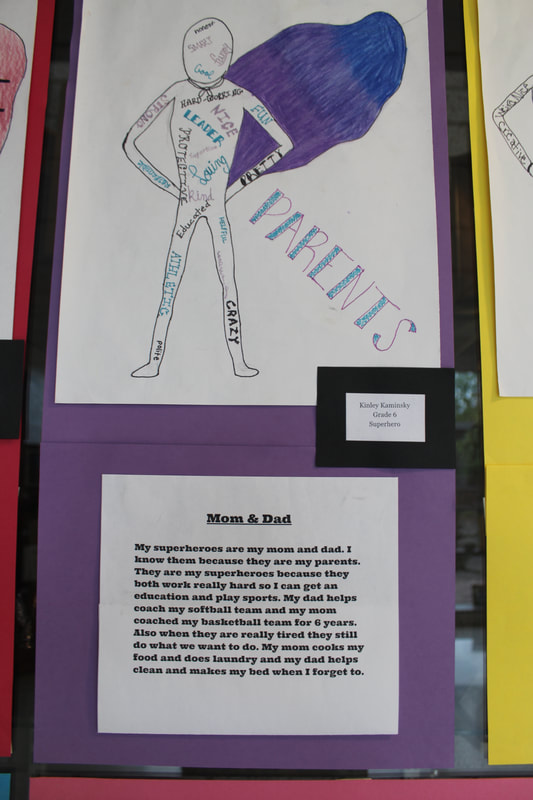
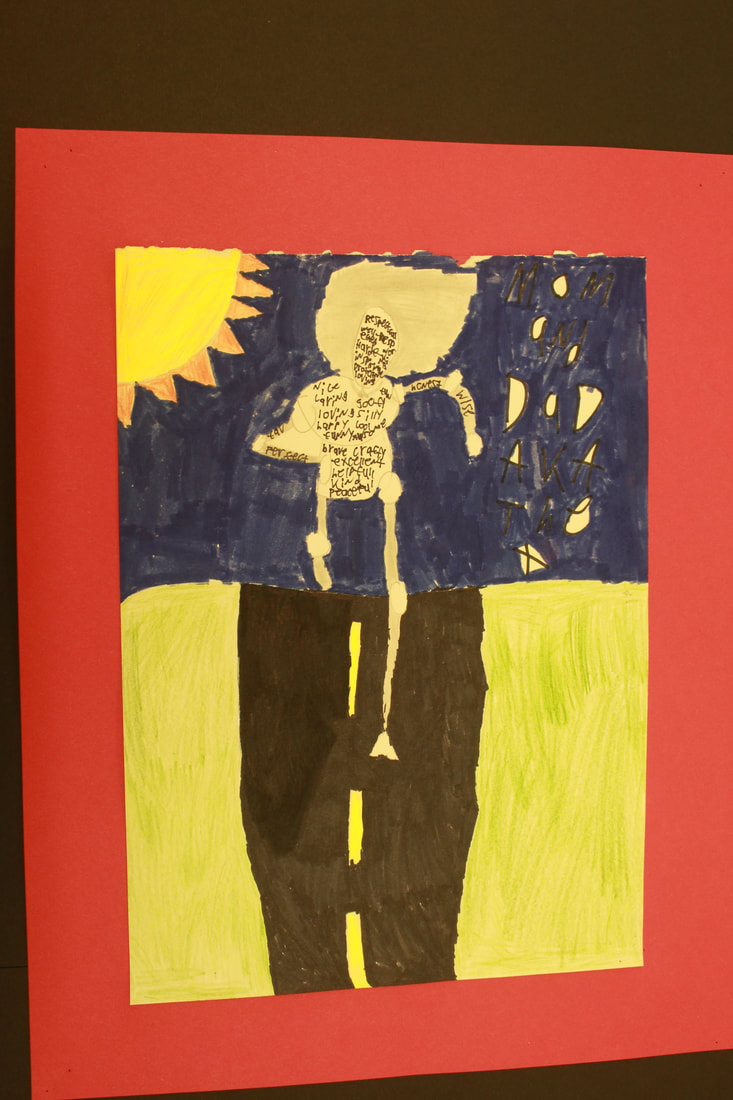
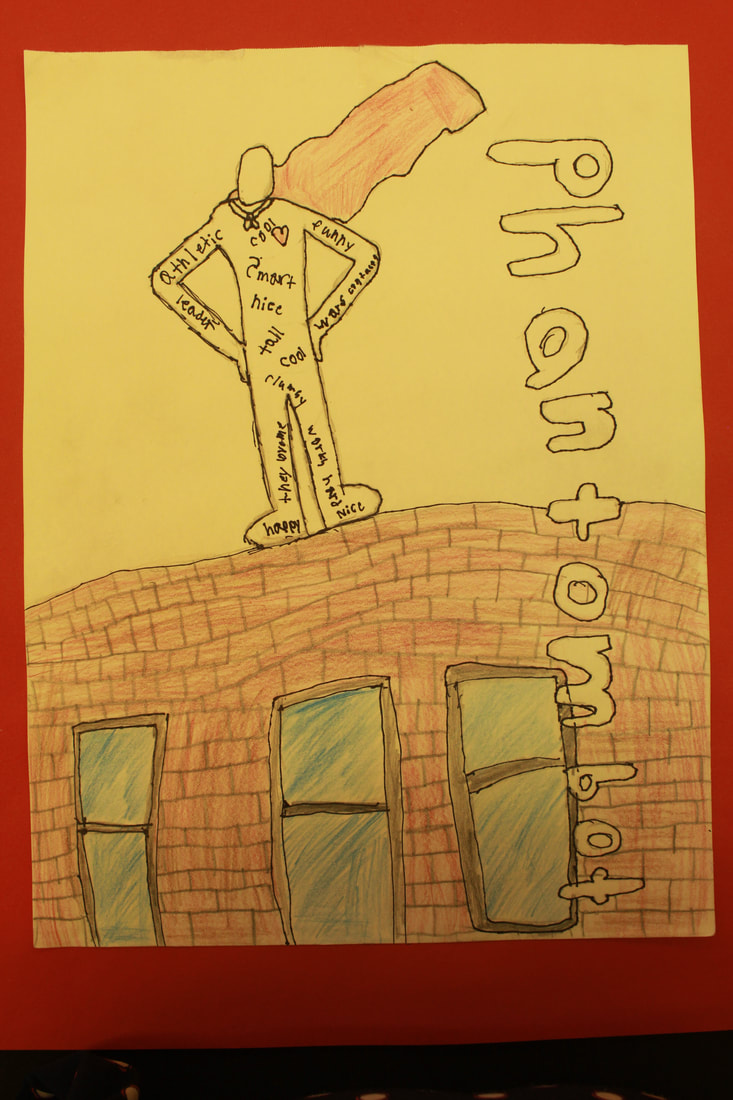
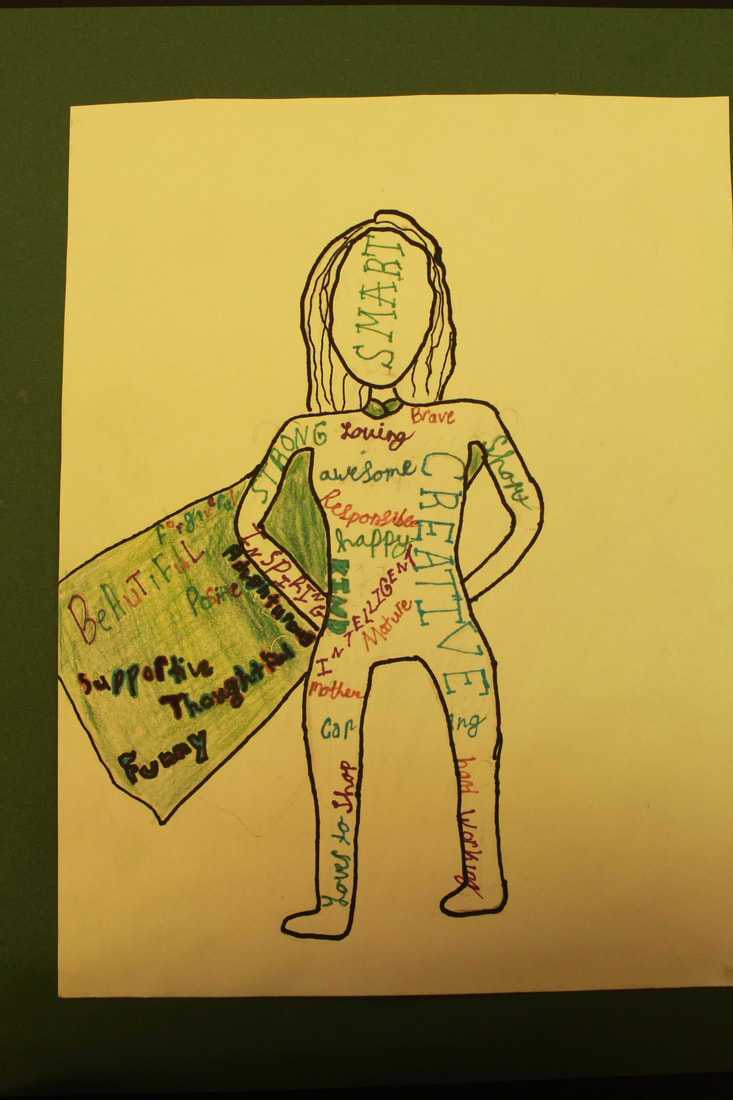
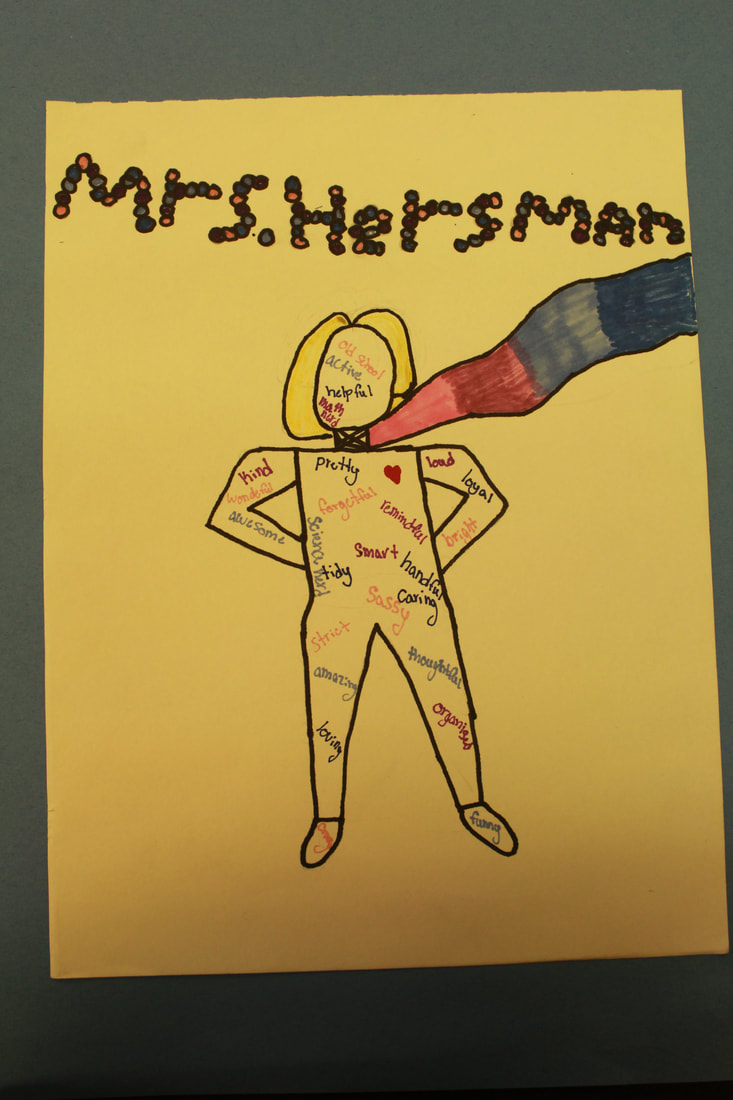
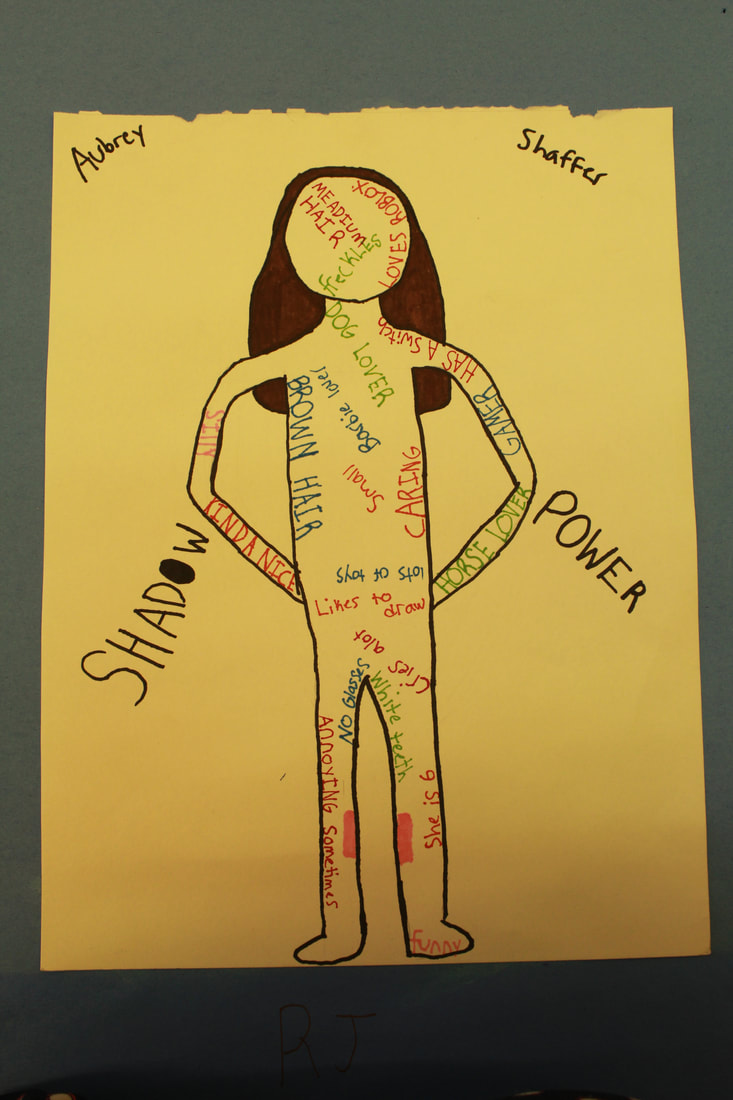
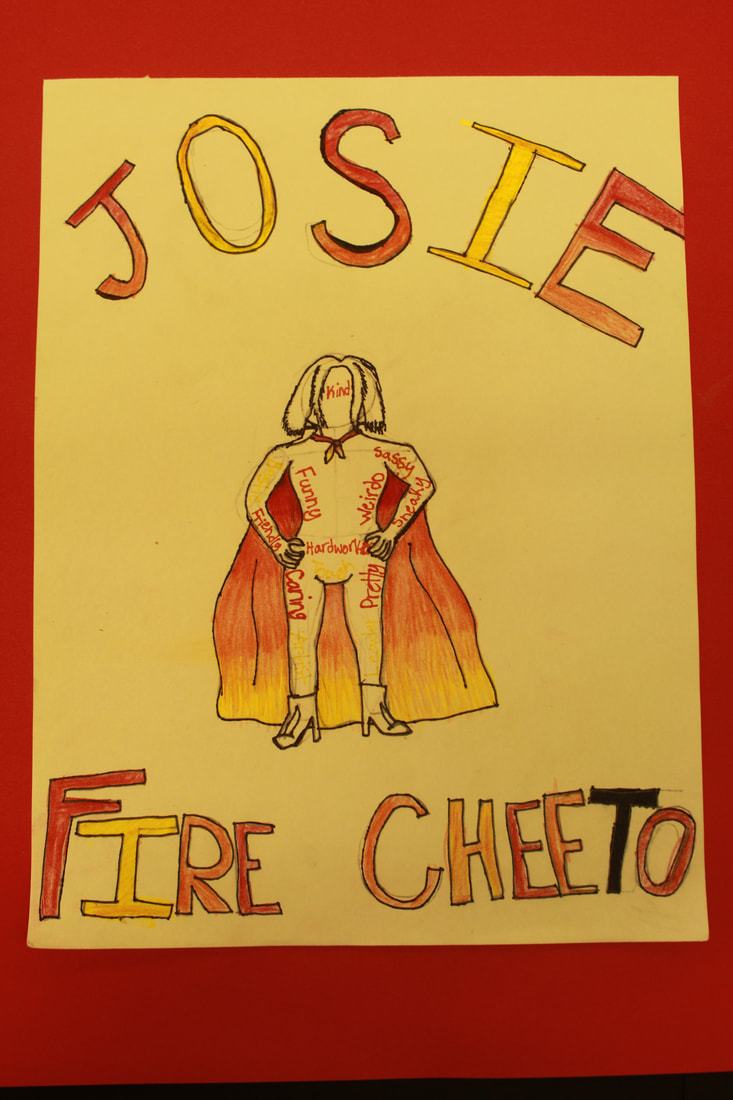
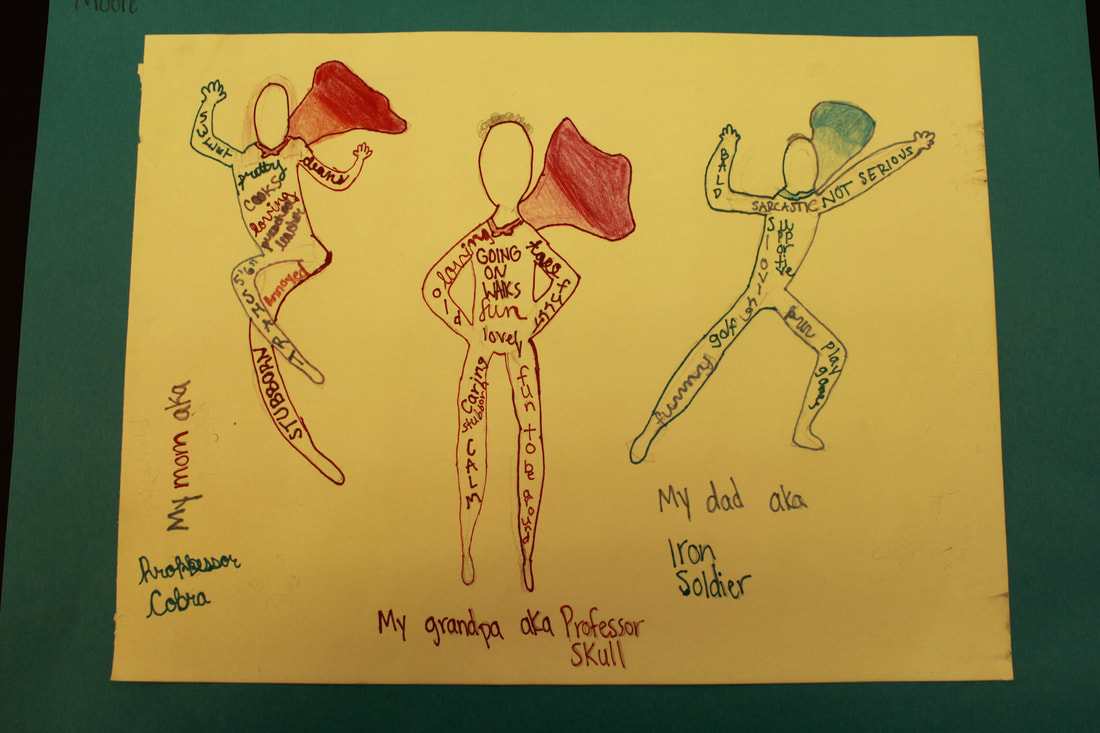
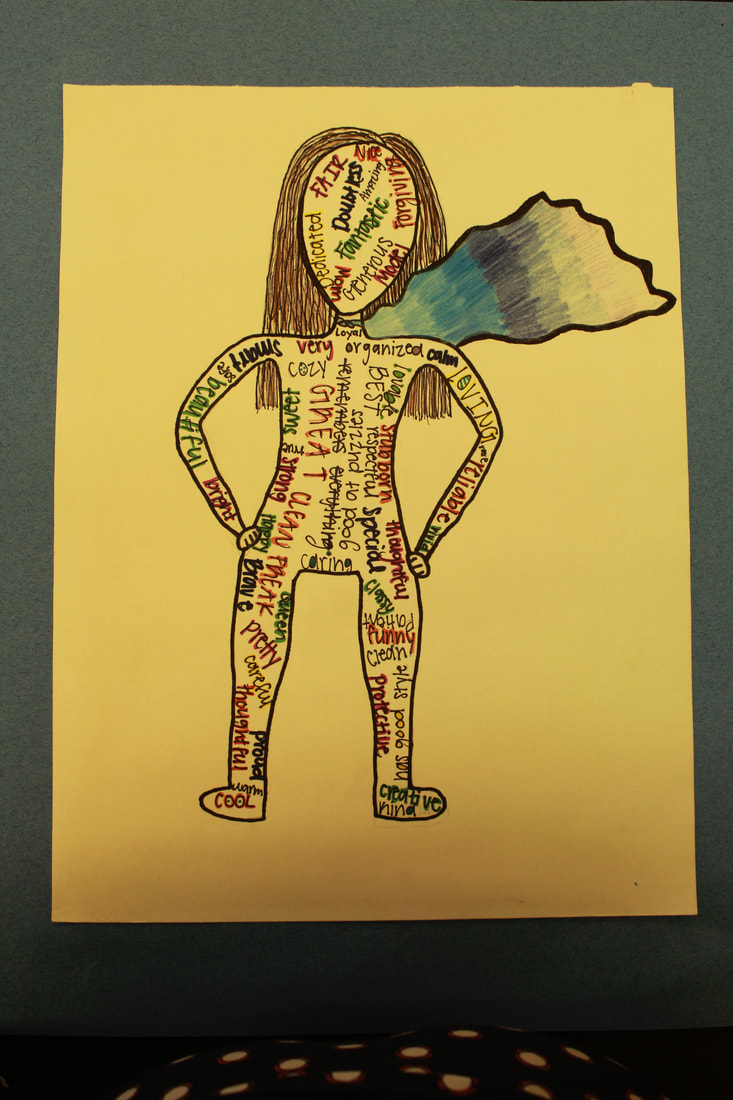
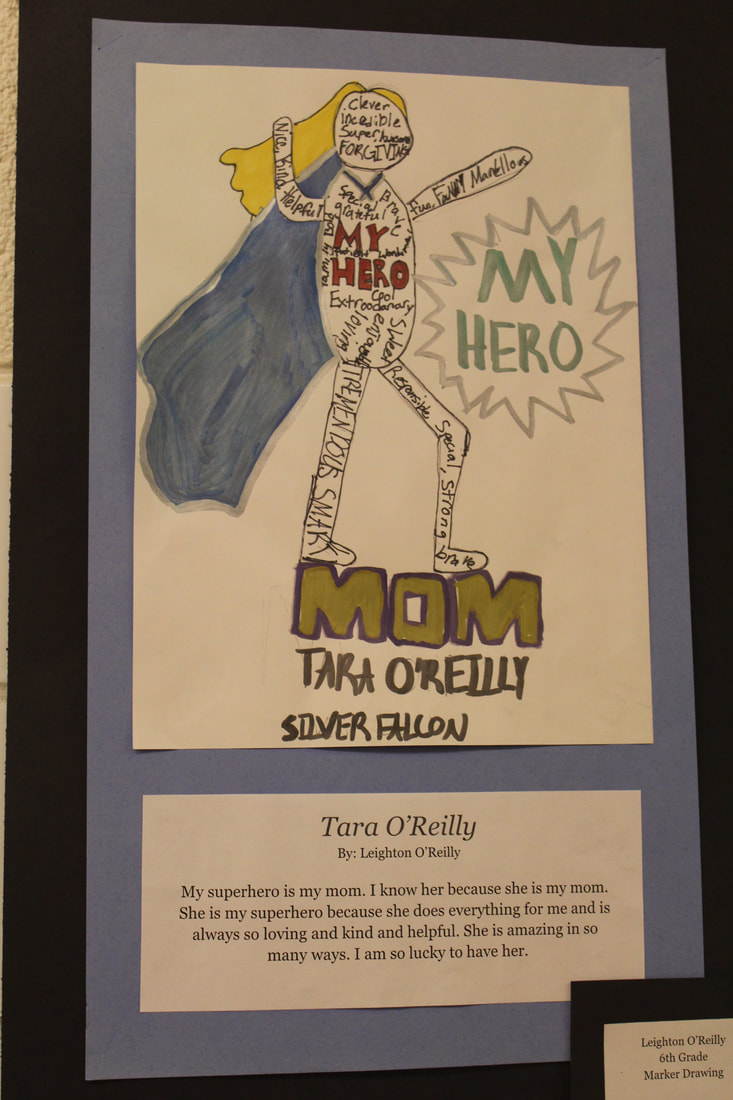
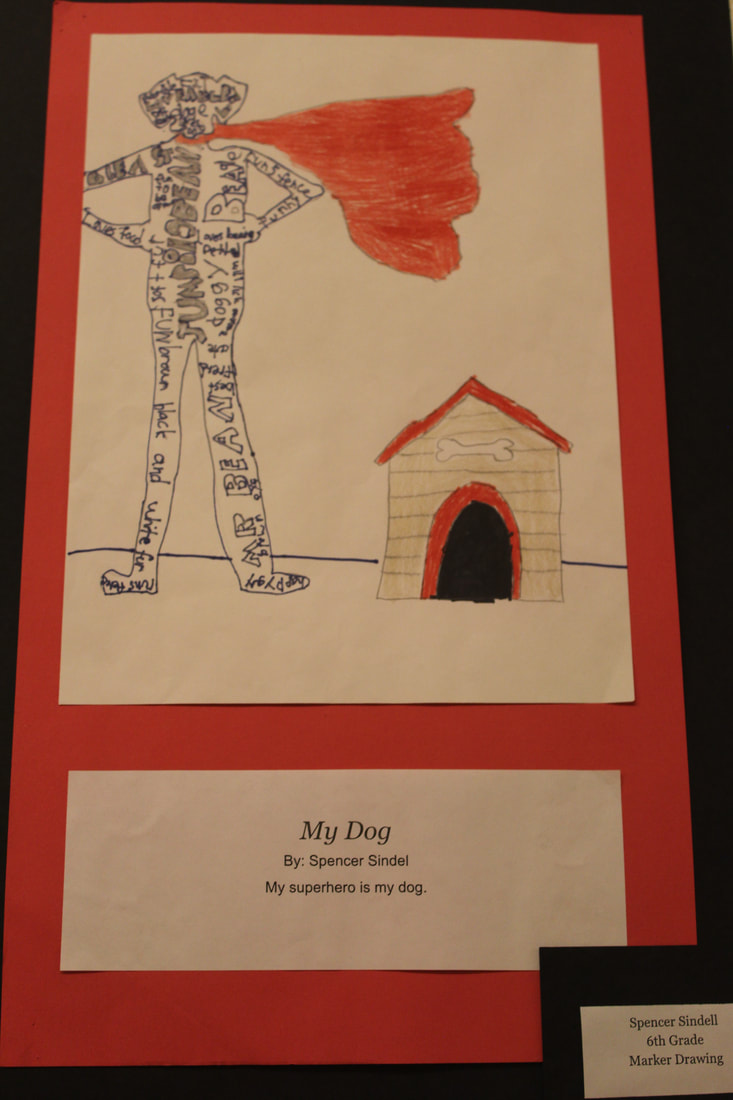
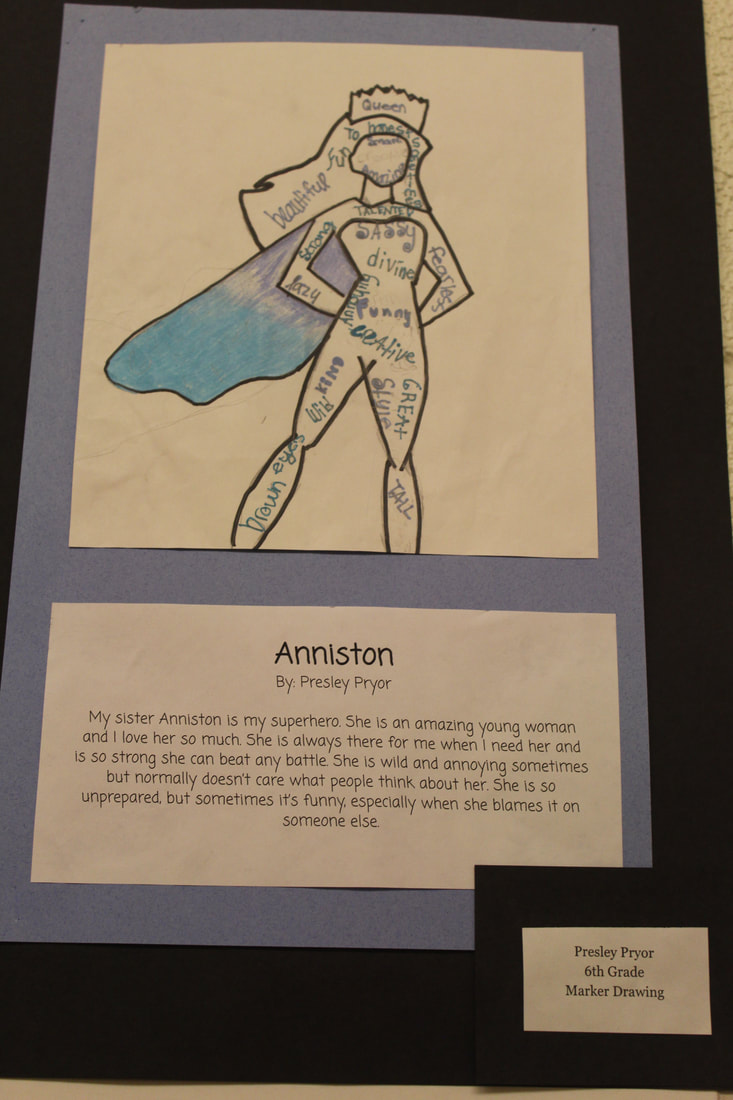
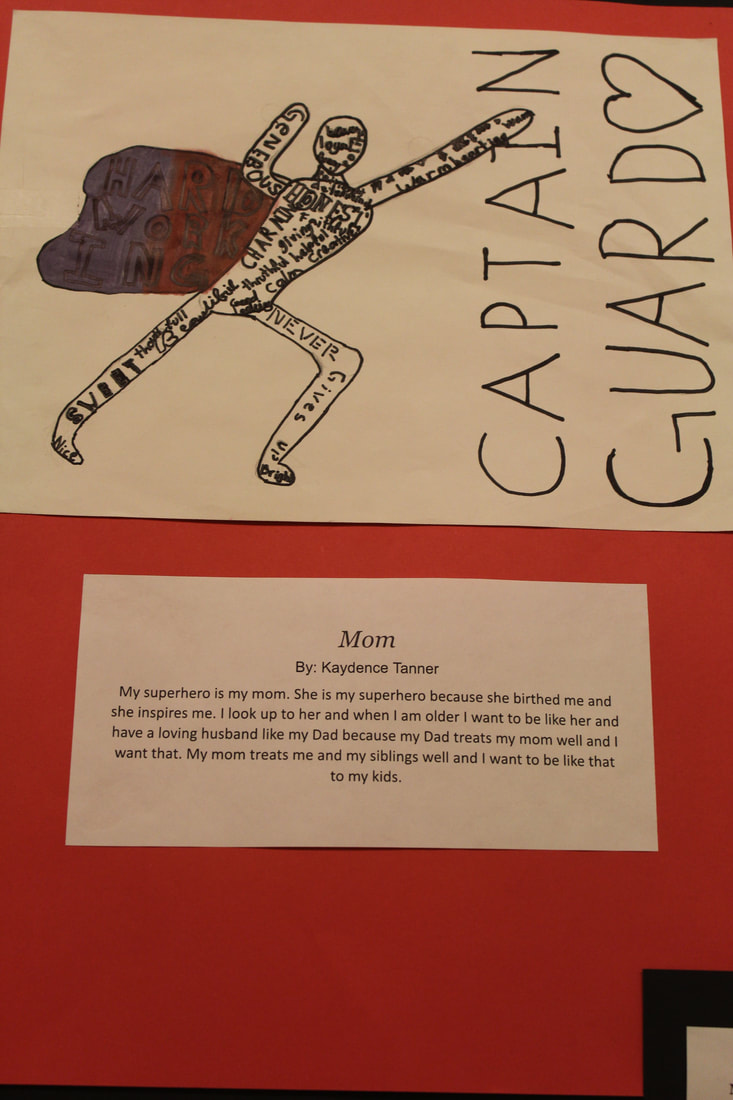
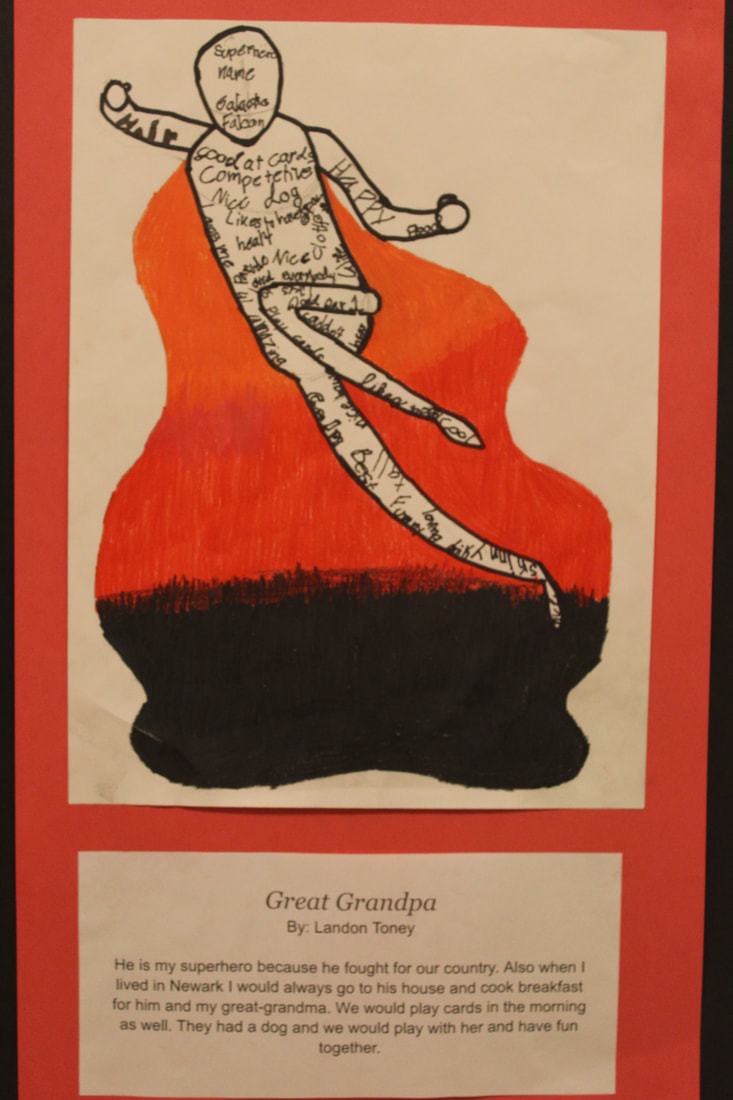
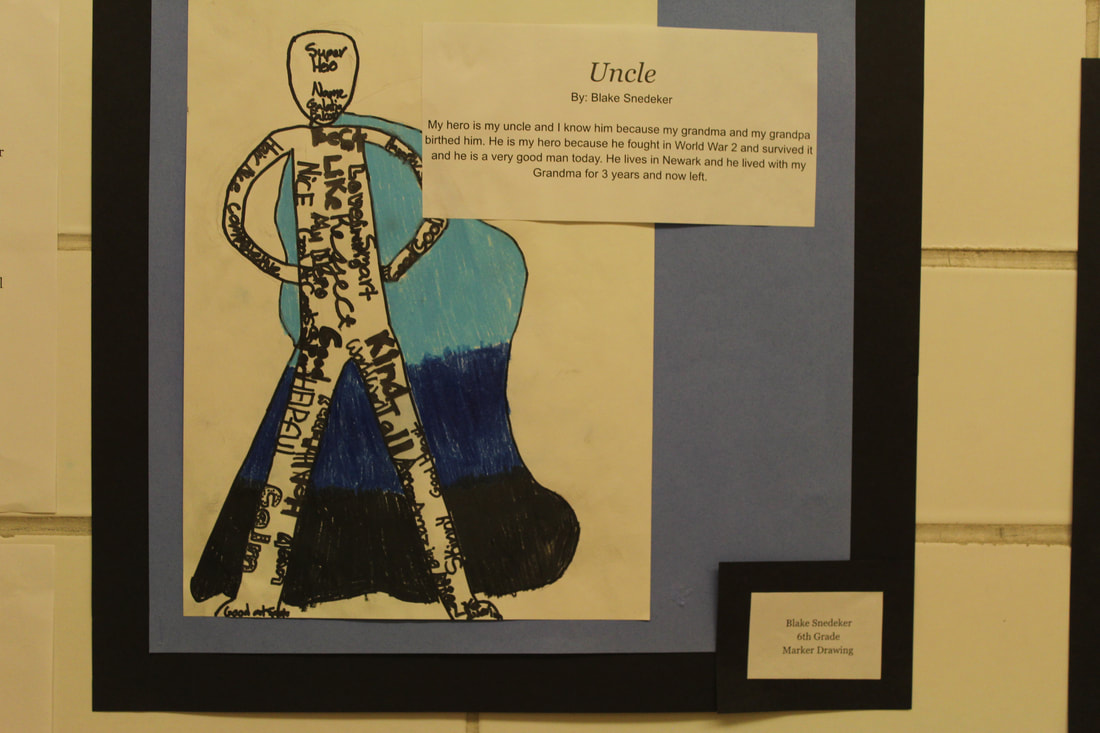
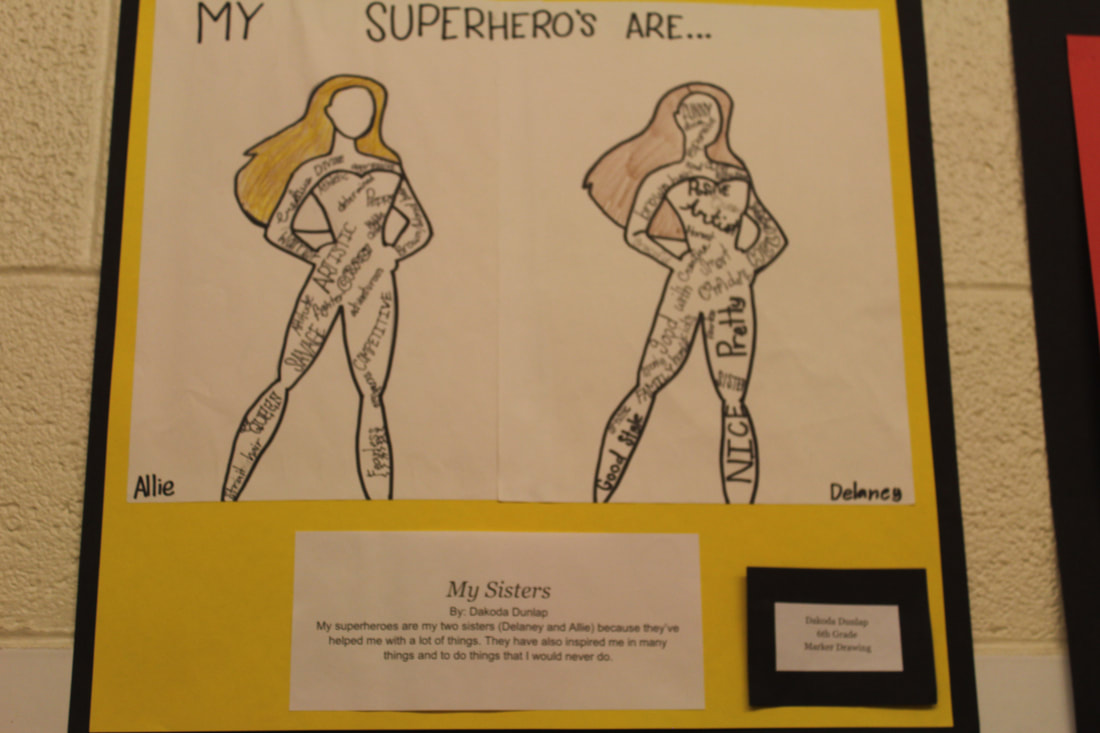
This superhero project uses the same figure drawing/gesture drawing lessons as above but it is used as a silhouette instead of a realistic body. Inside the silhouette students fill the figure with descriptive words describing their everyday superhero. The person they use for inspiration is someone real that is a superhero in real life to them. Many students chose their family members and others chose a famous celebrity. In all cases the person designed to be a superhero is a hero to the student. We also used the colored pencil techniques from above to help us add a colorful cape. As you can see we also studied calligraphy fonts for this superhero project to add interest to our words. Take a look at some of the stories behind the everyday superheroes. They are amazing and inspiring.


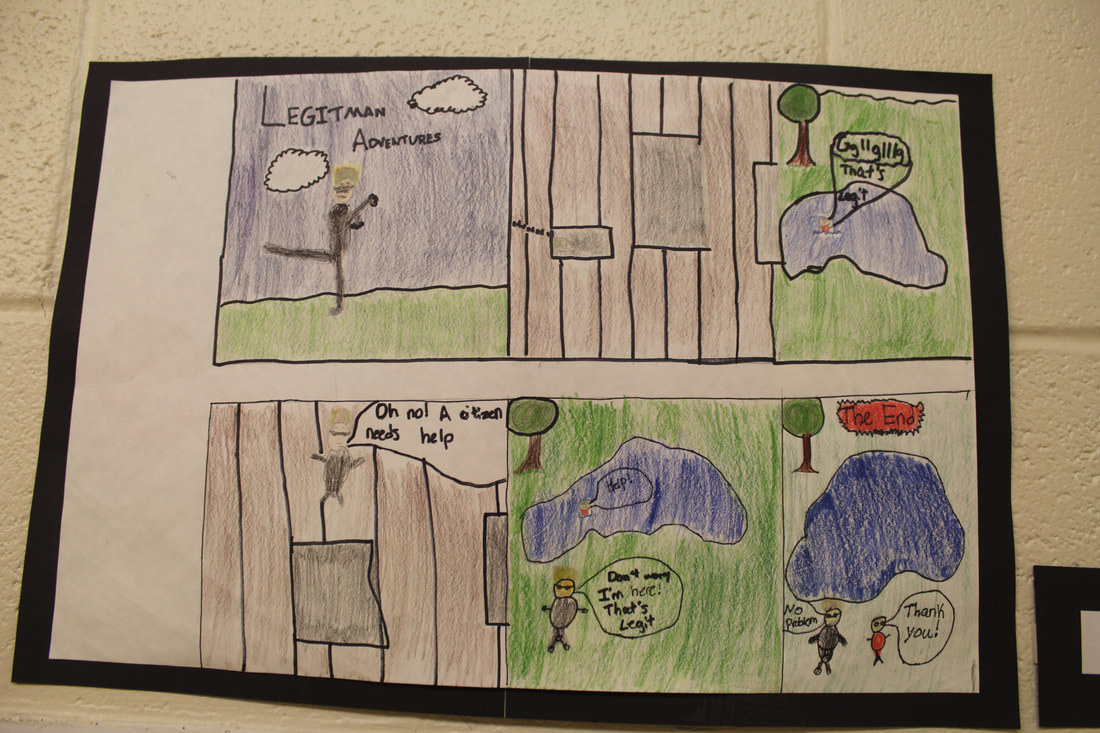
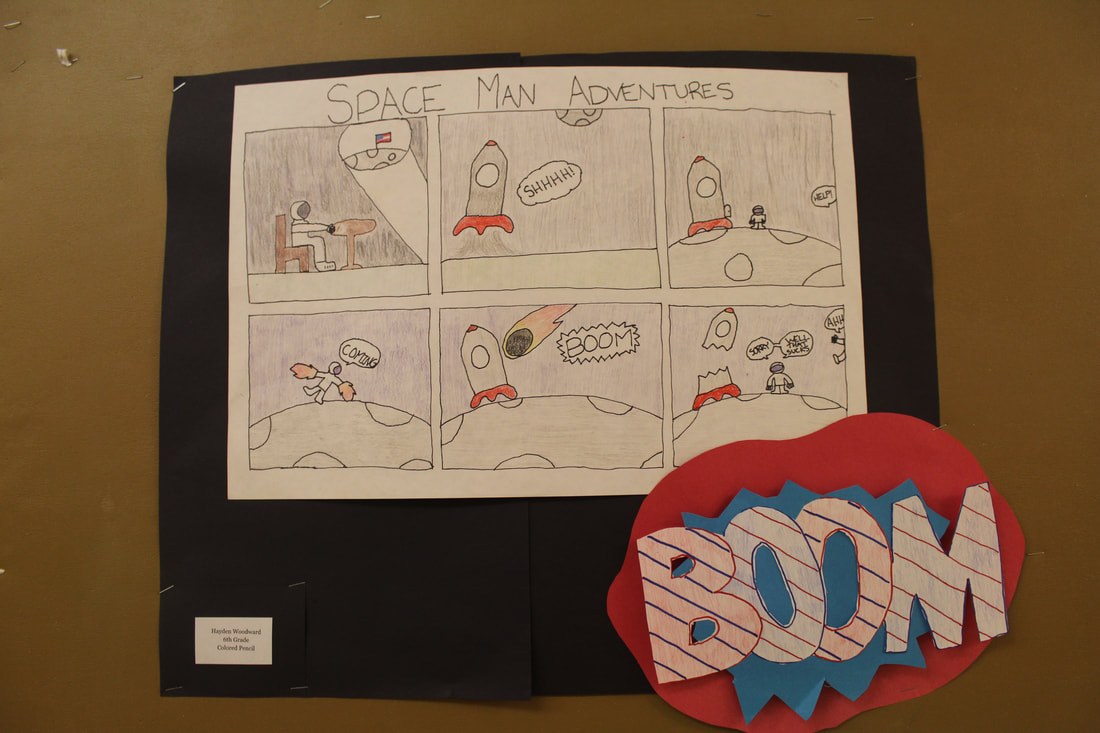
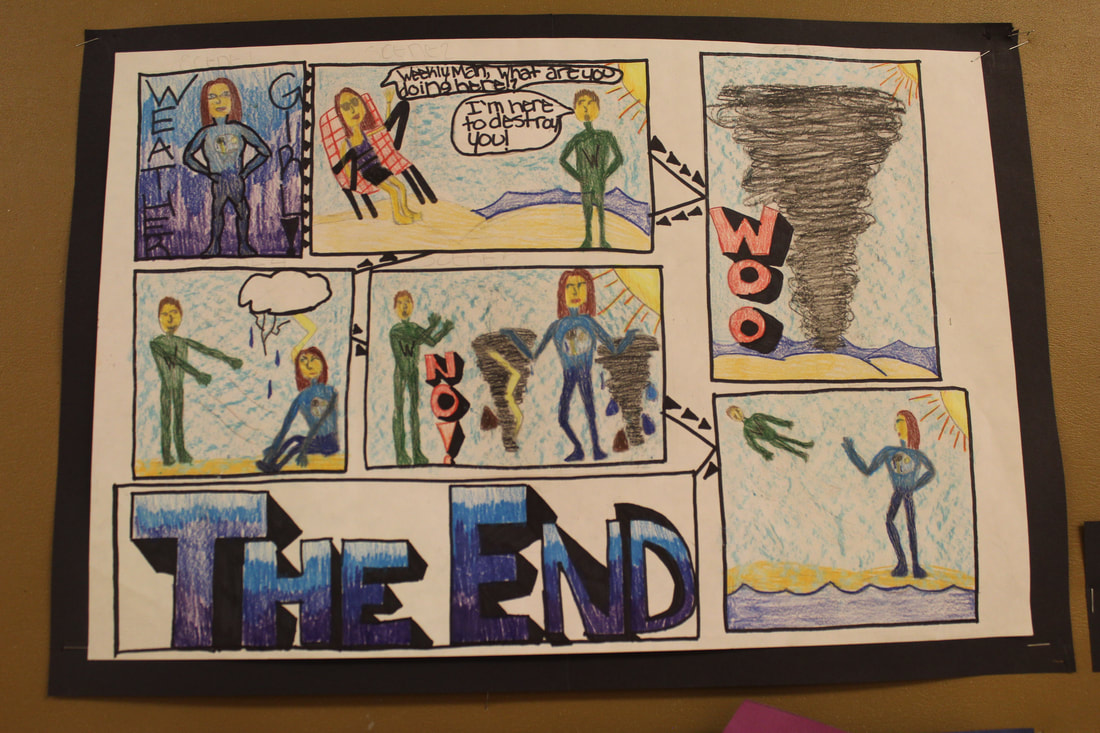
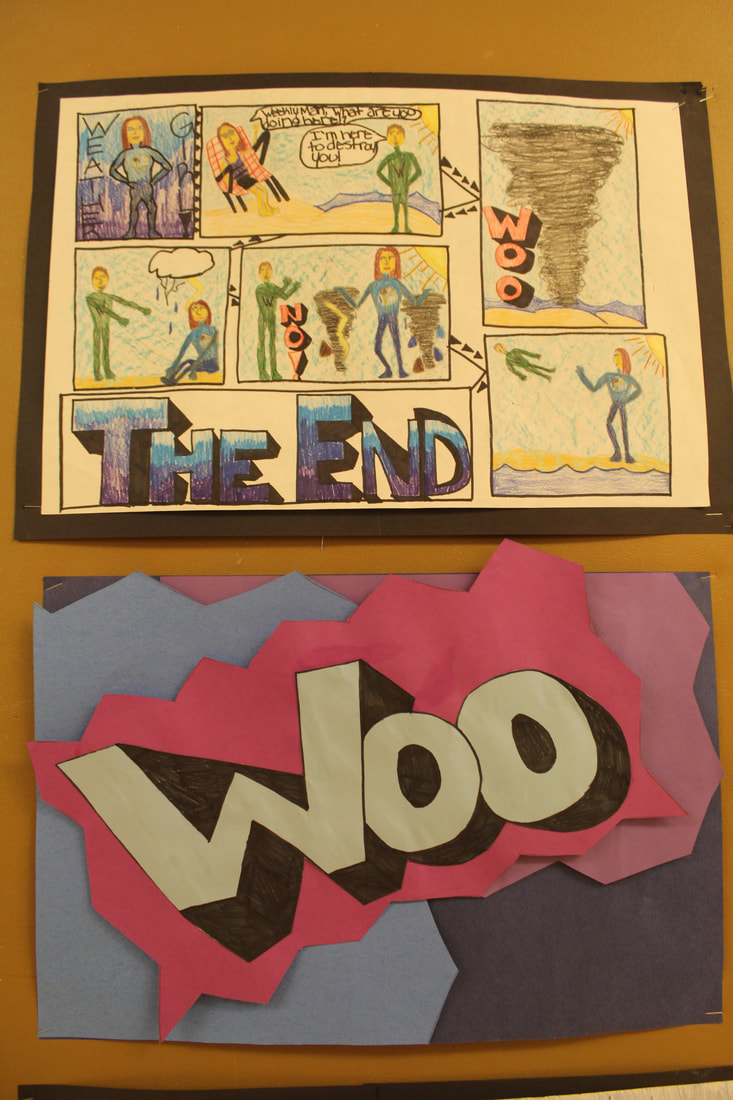
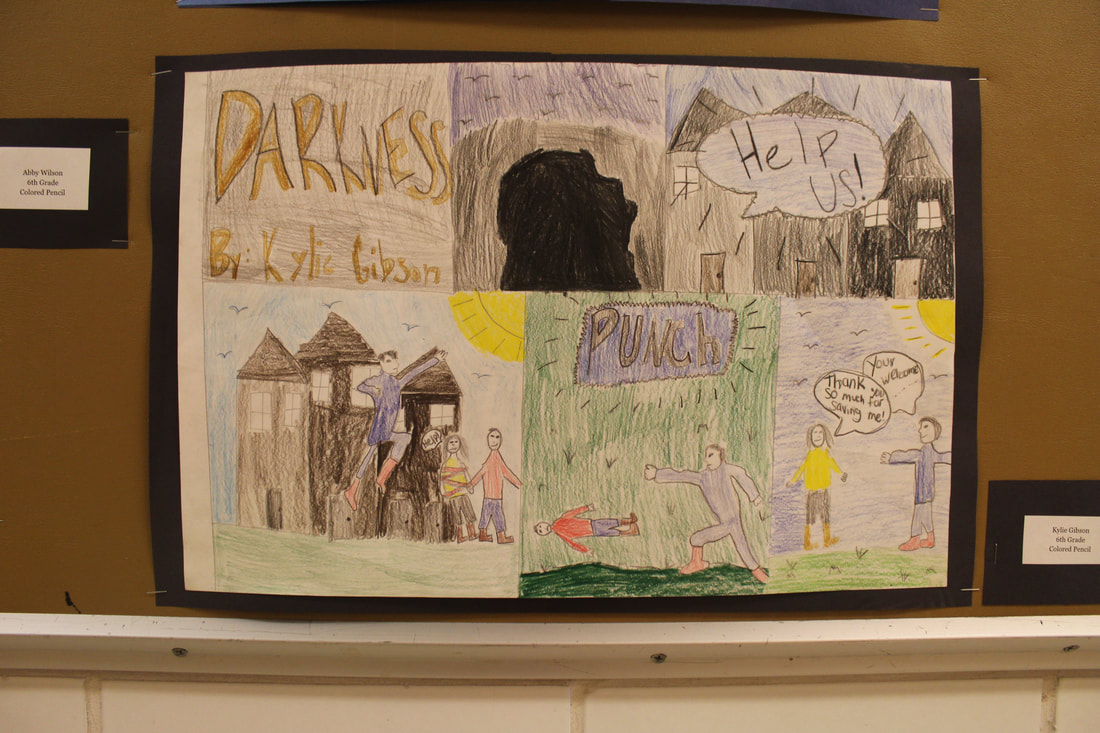
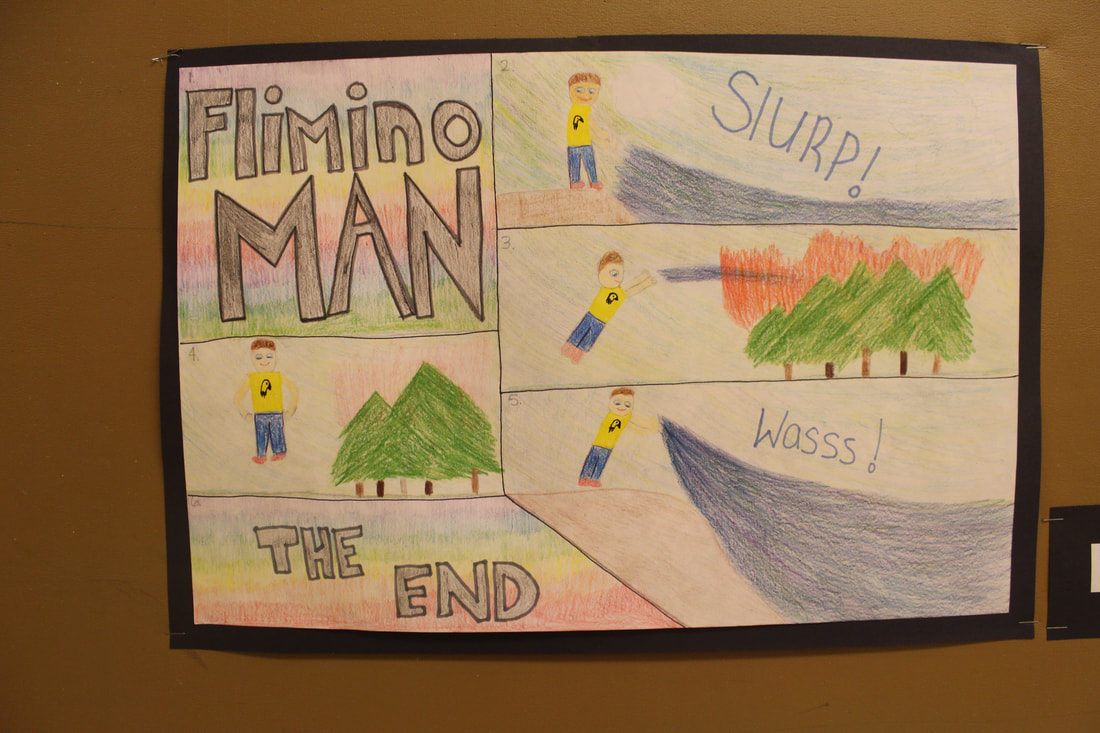
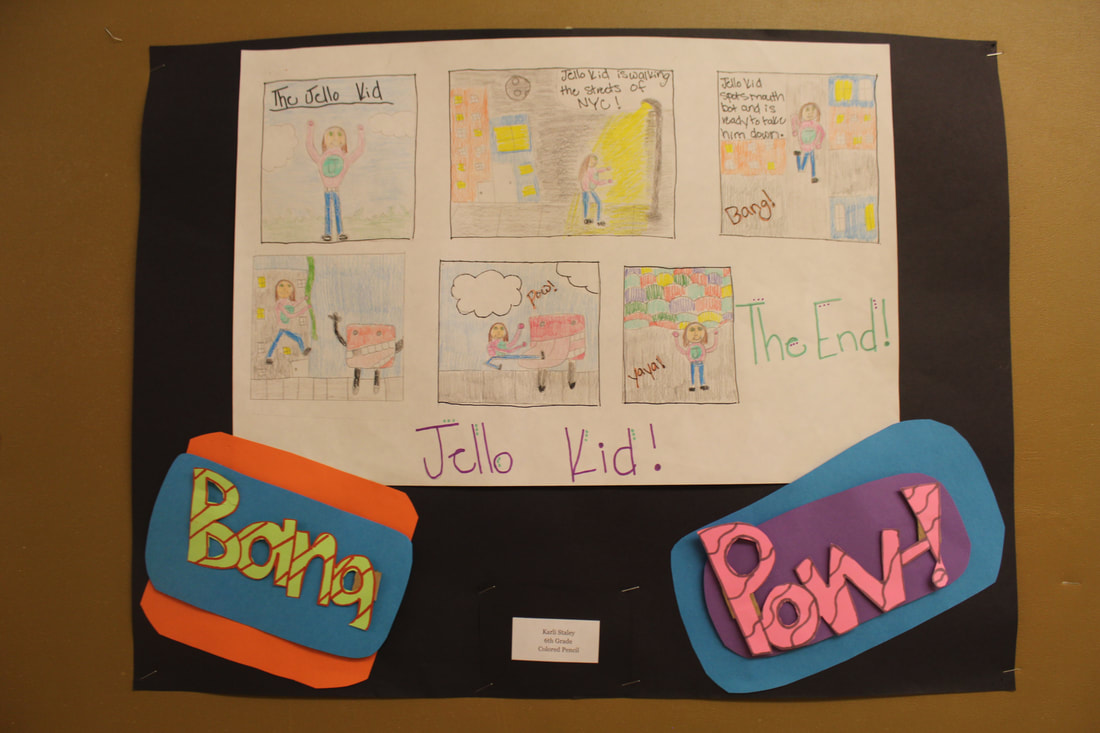
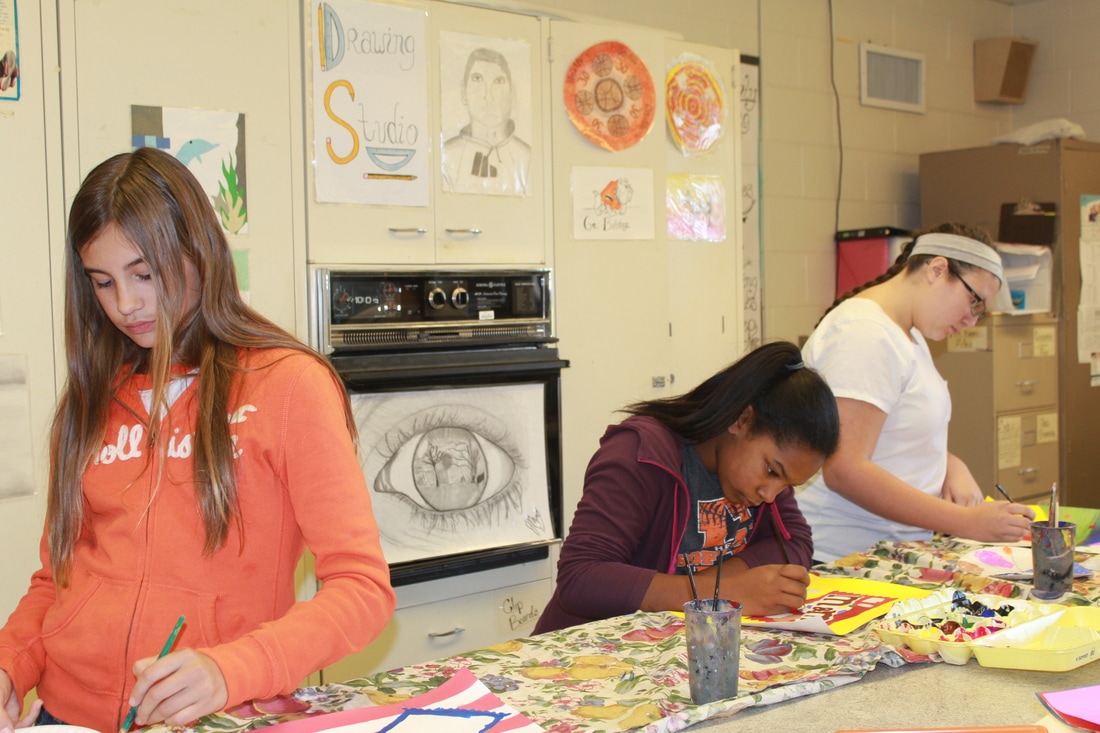
Superhero comic book strips

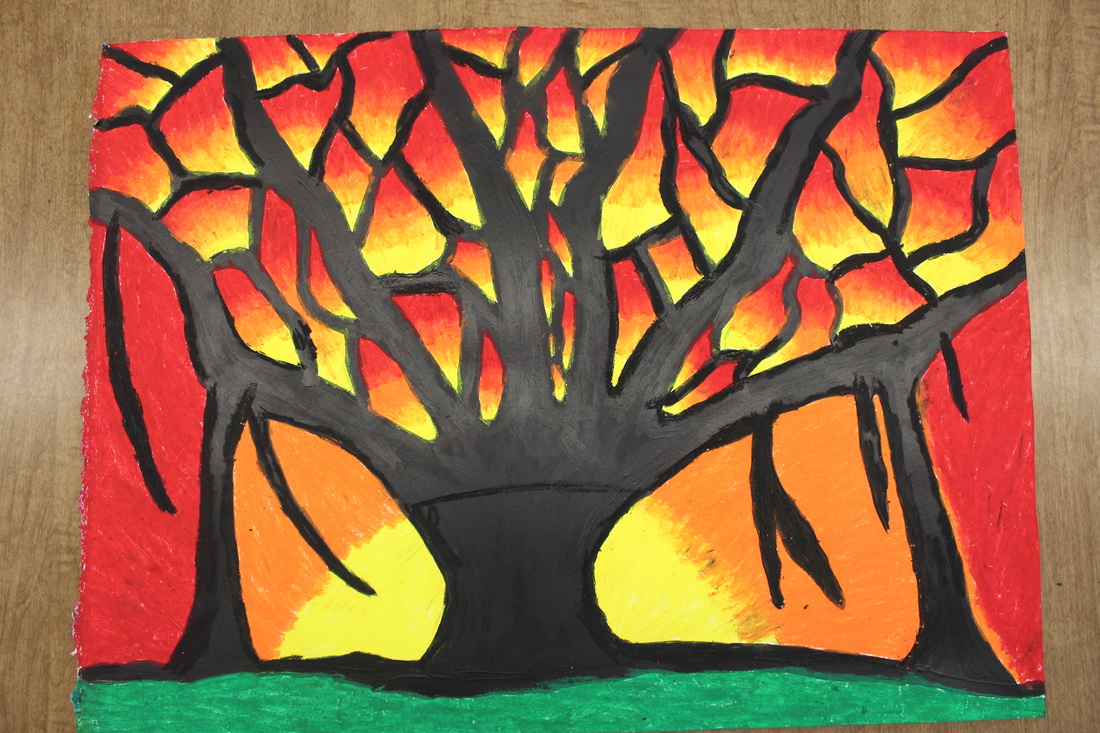
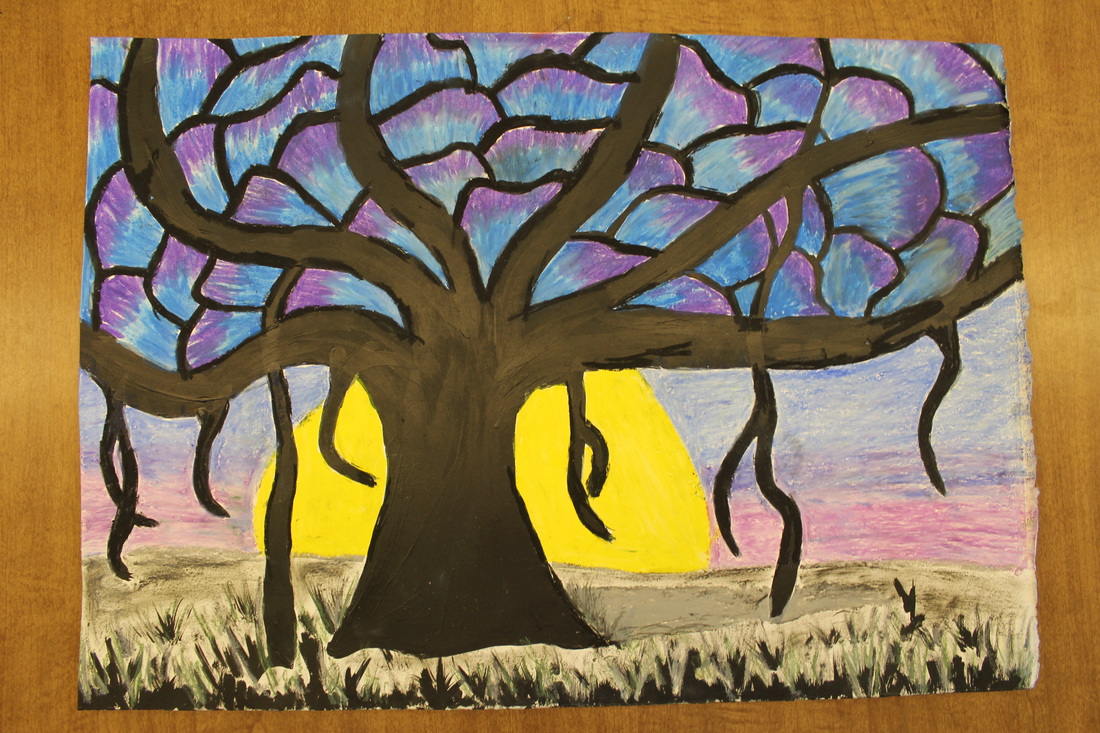
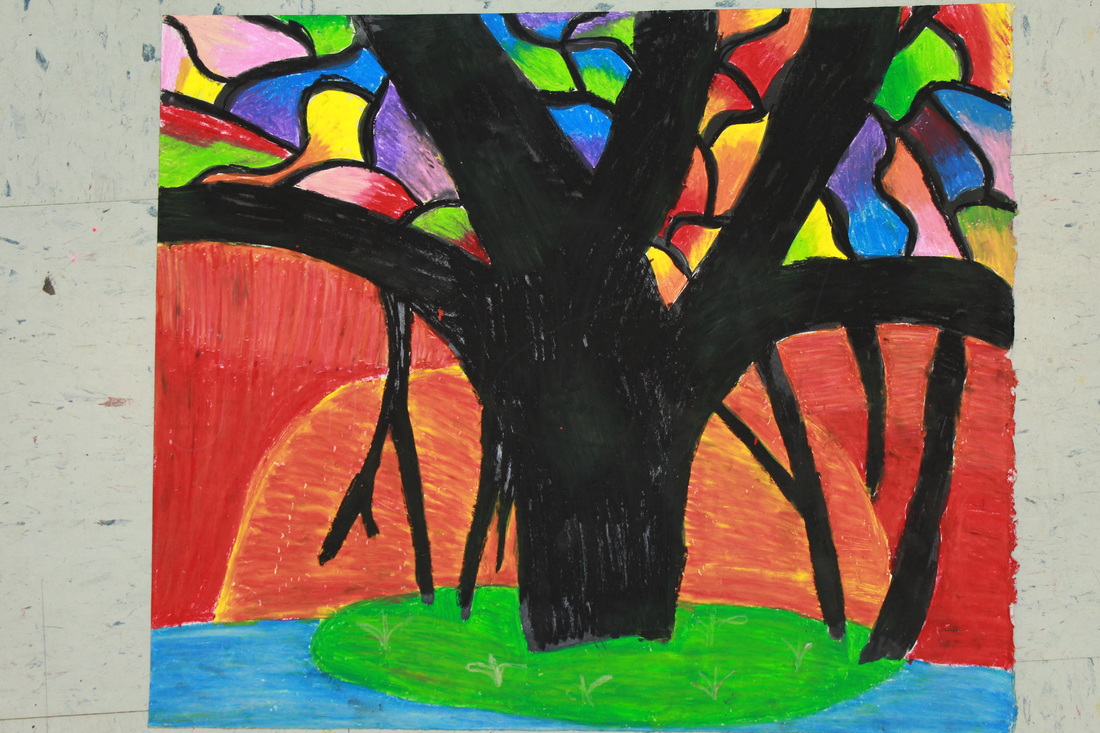
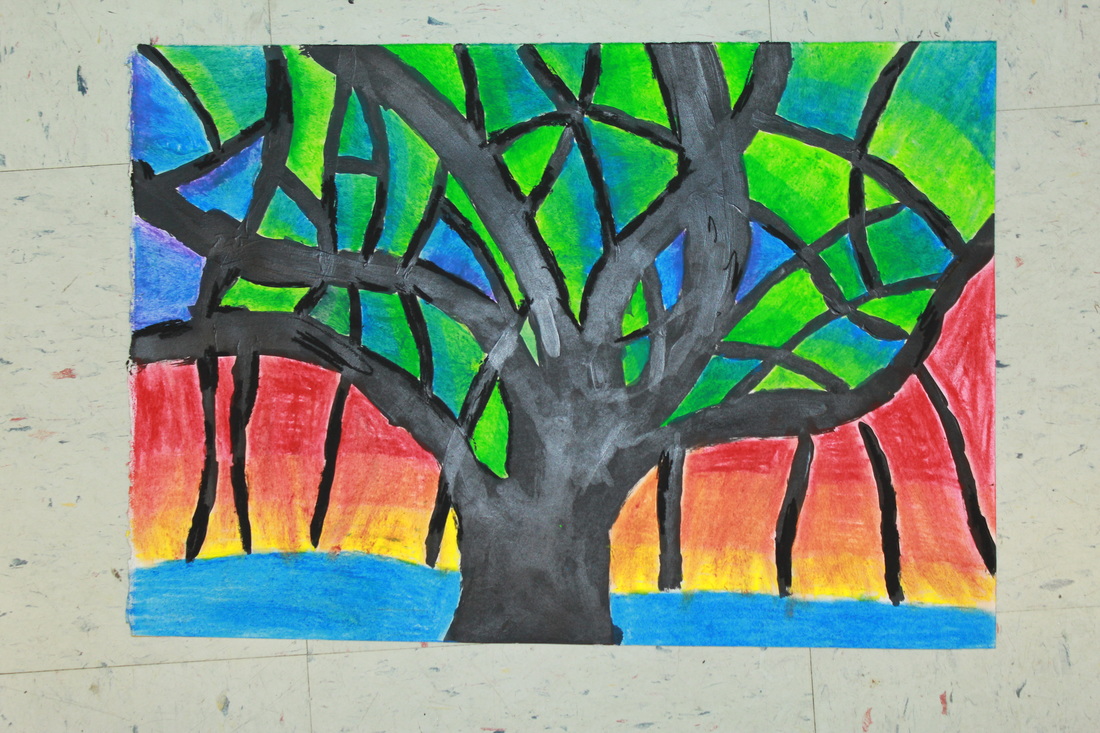
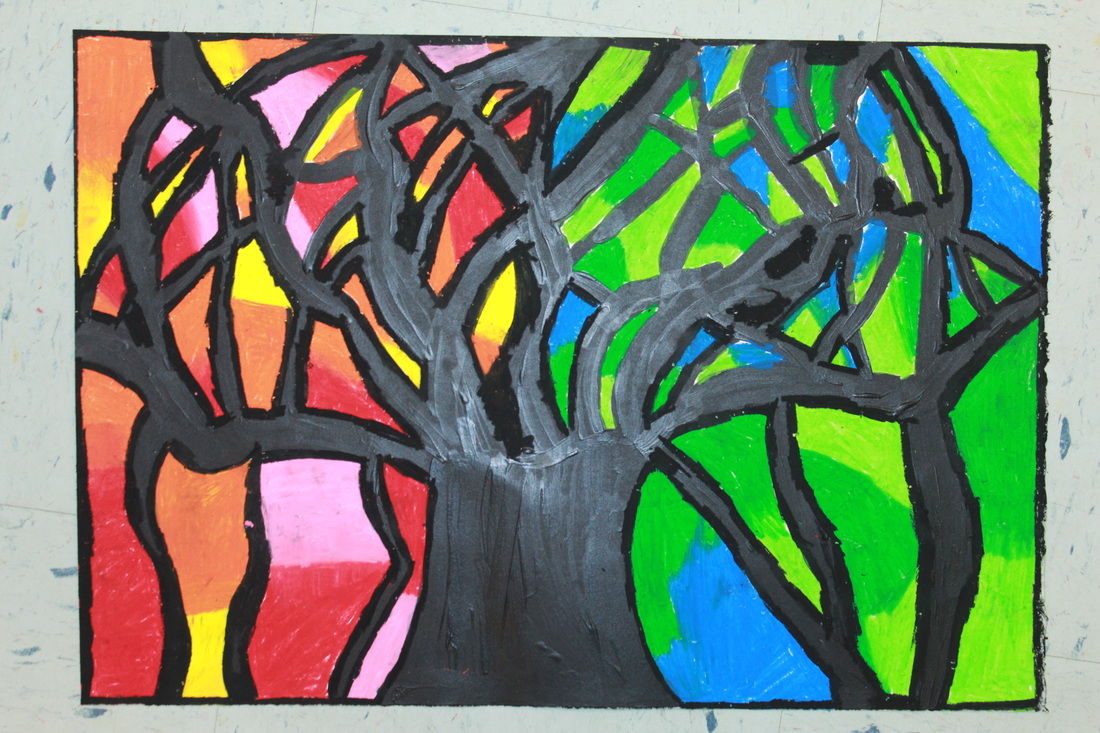
6th Grade Students hard at work on their banyan trees
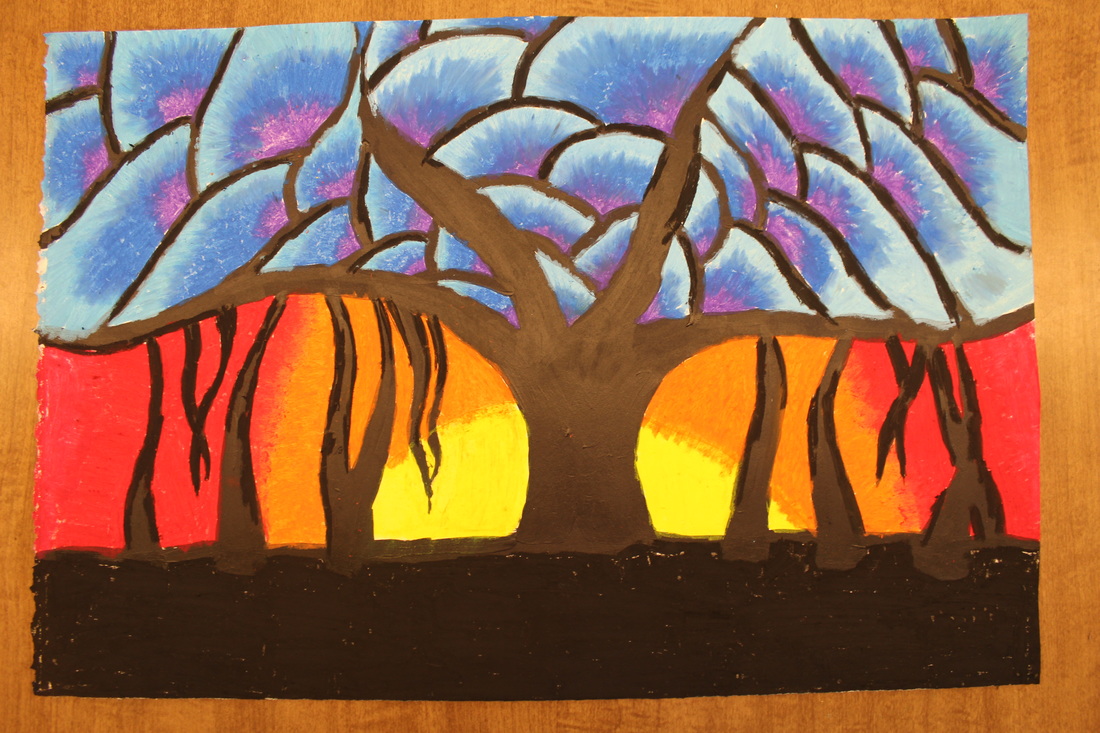
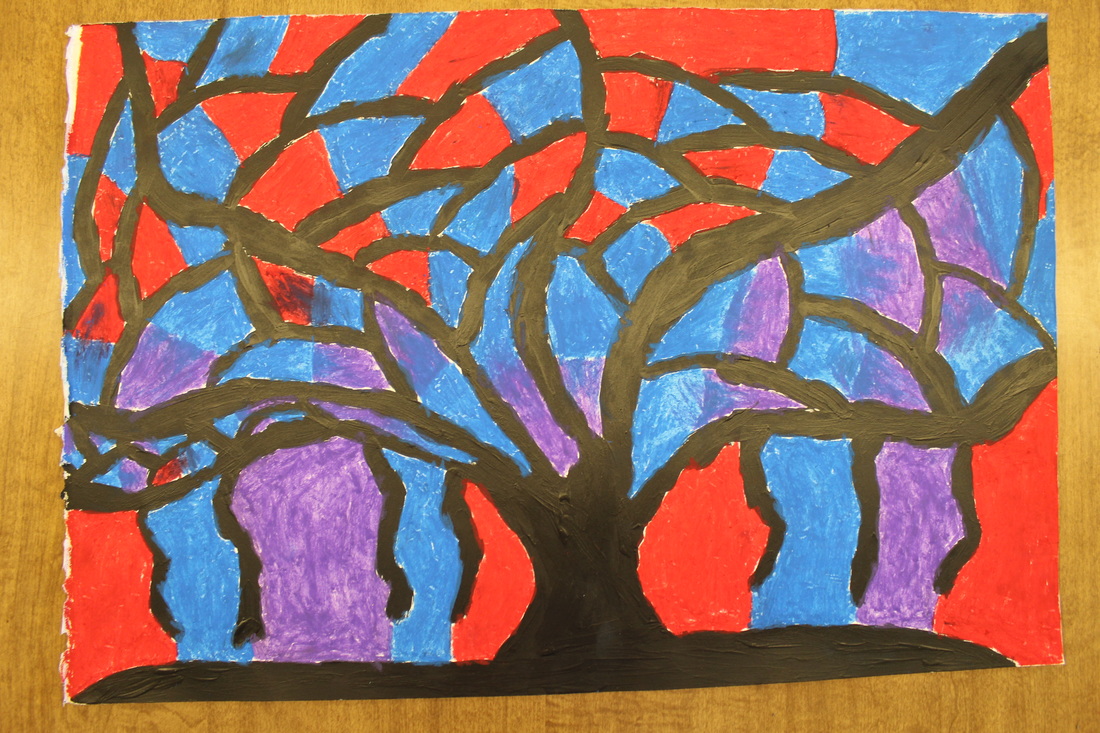
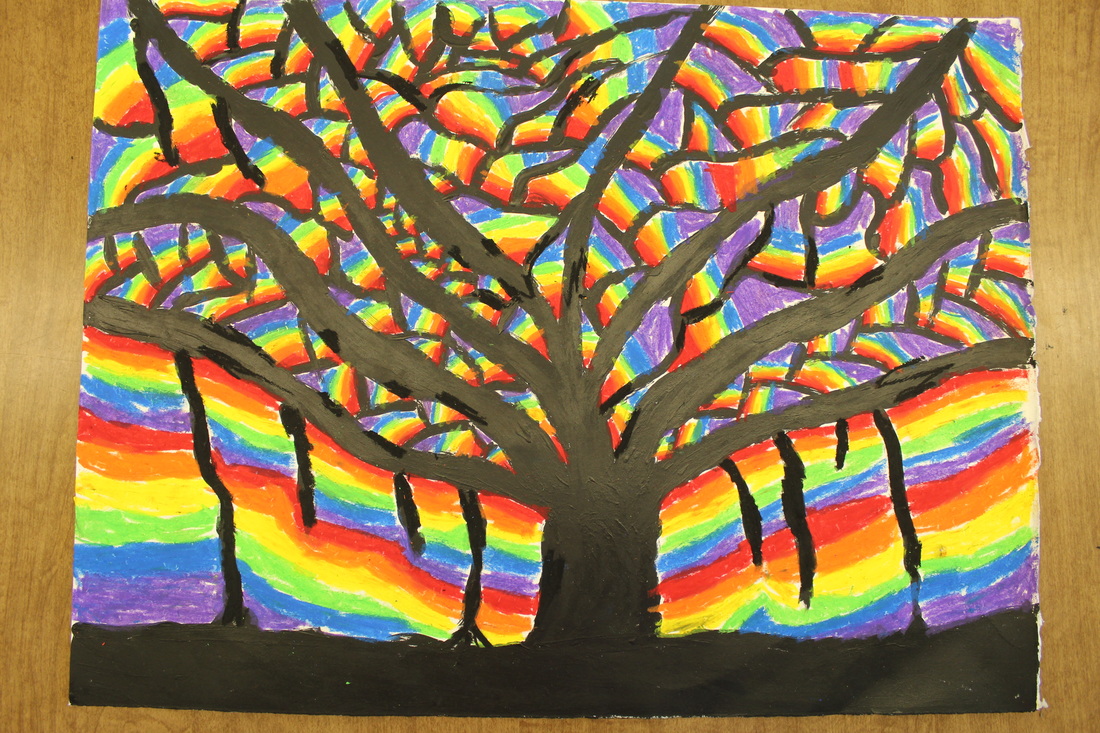
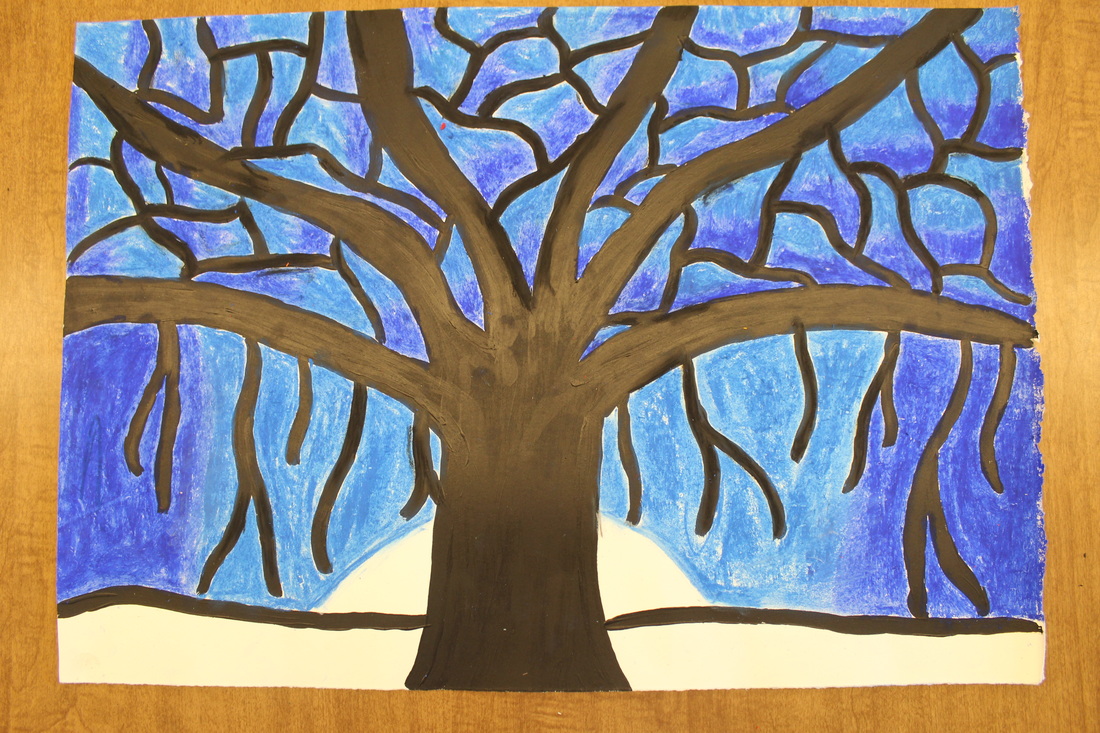
Kandinsky Inspired Landscapes


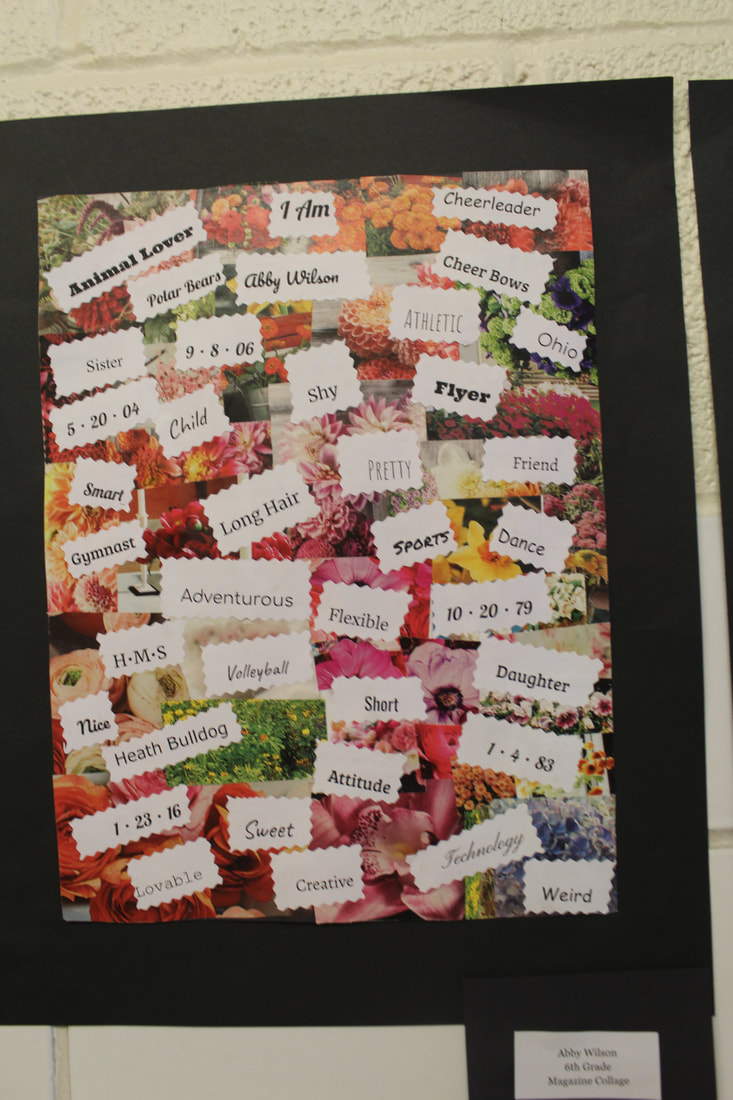
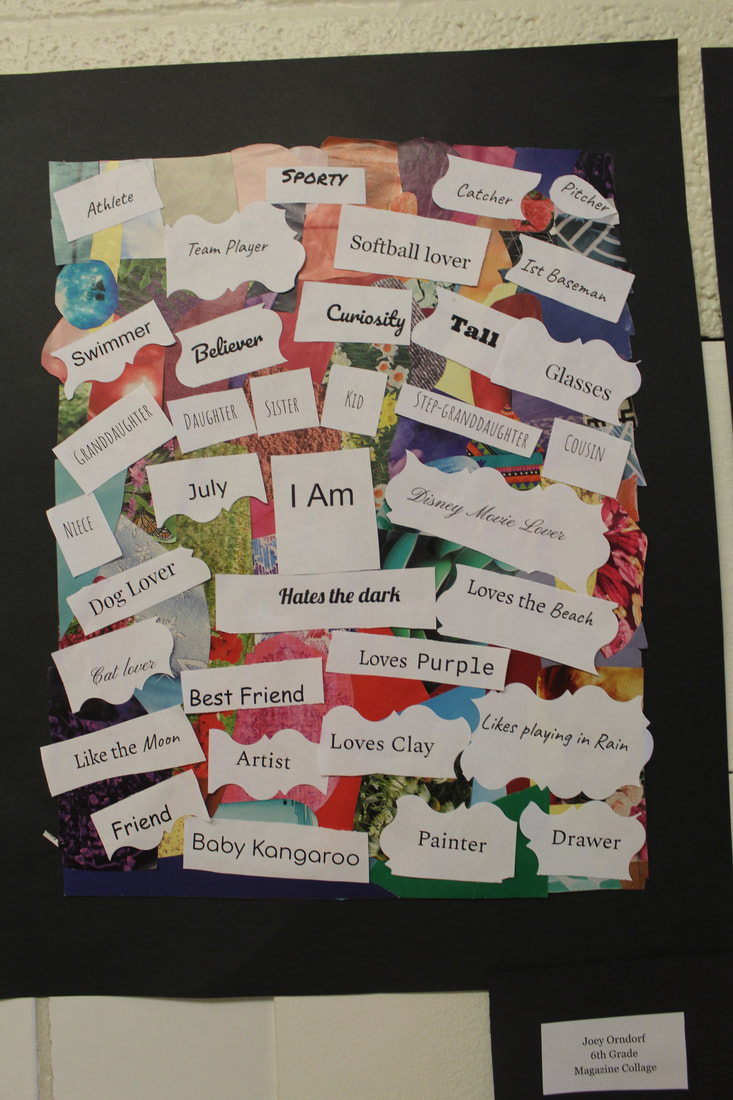
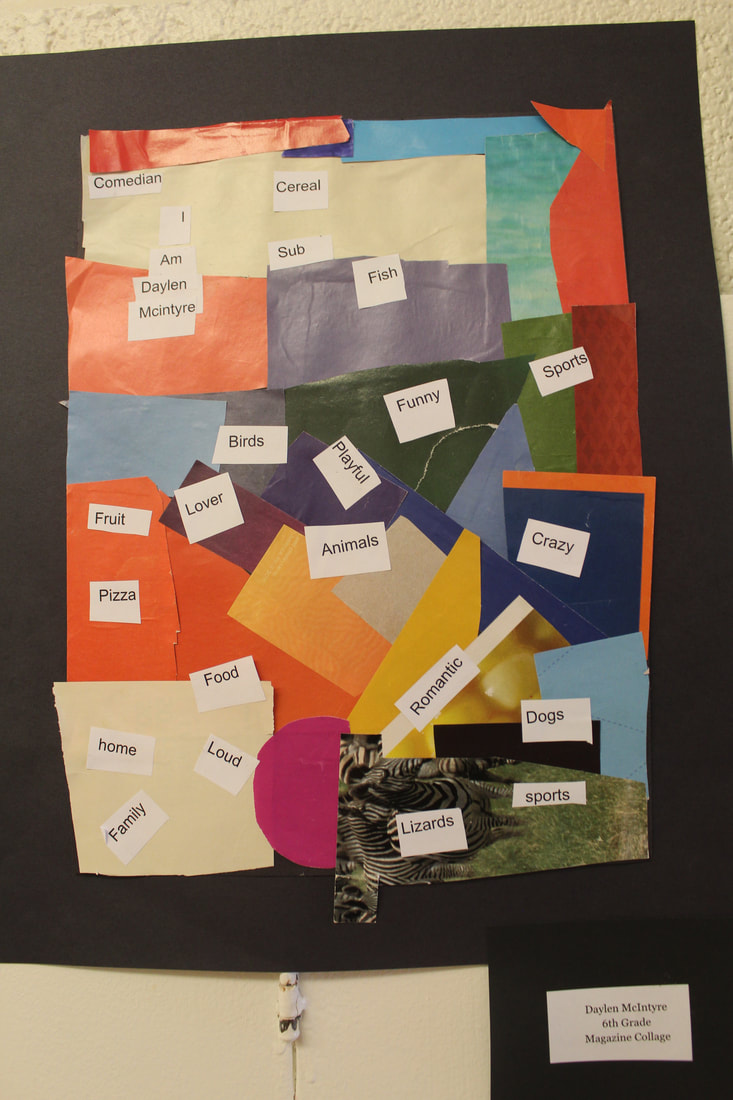
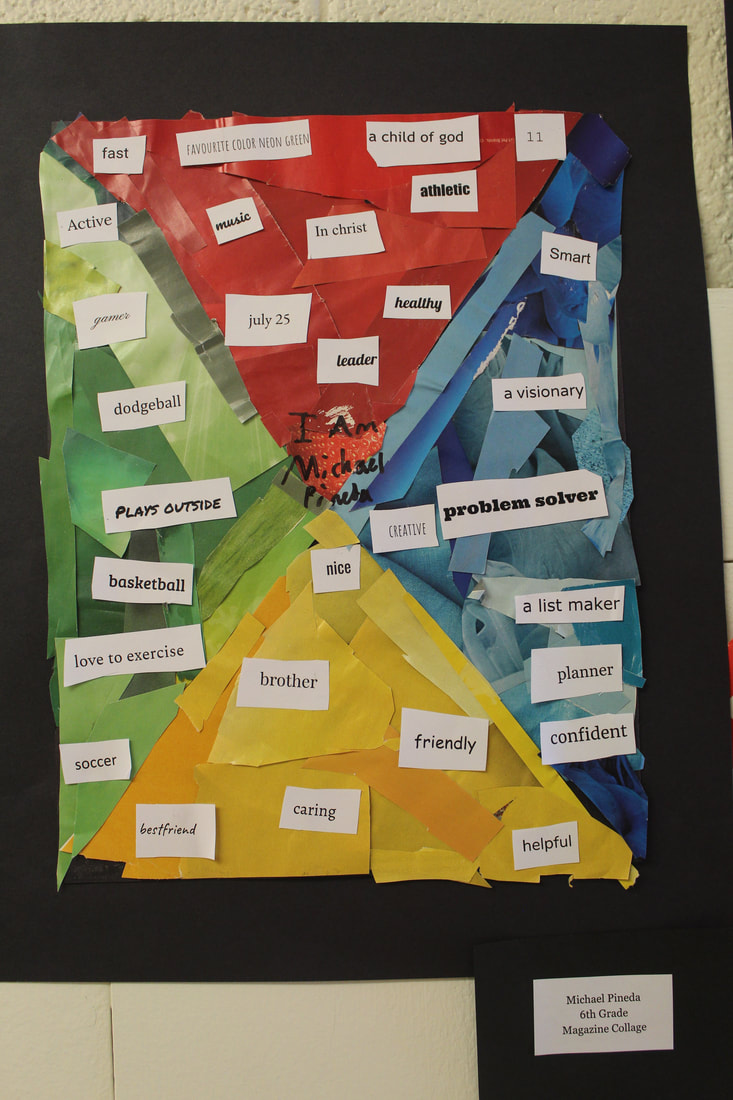
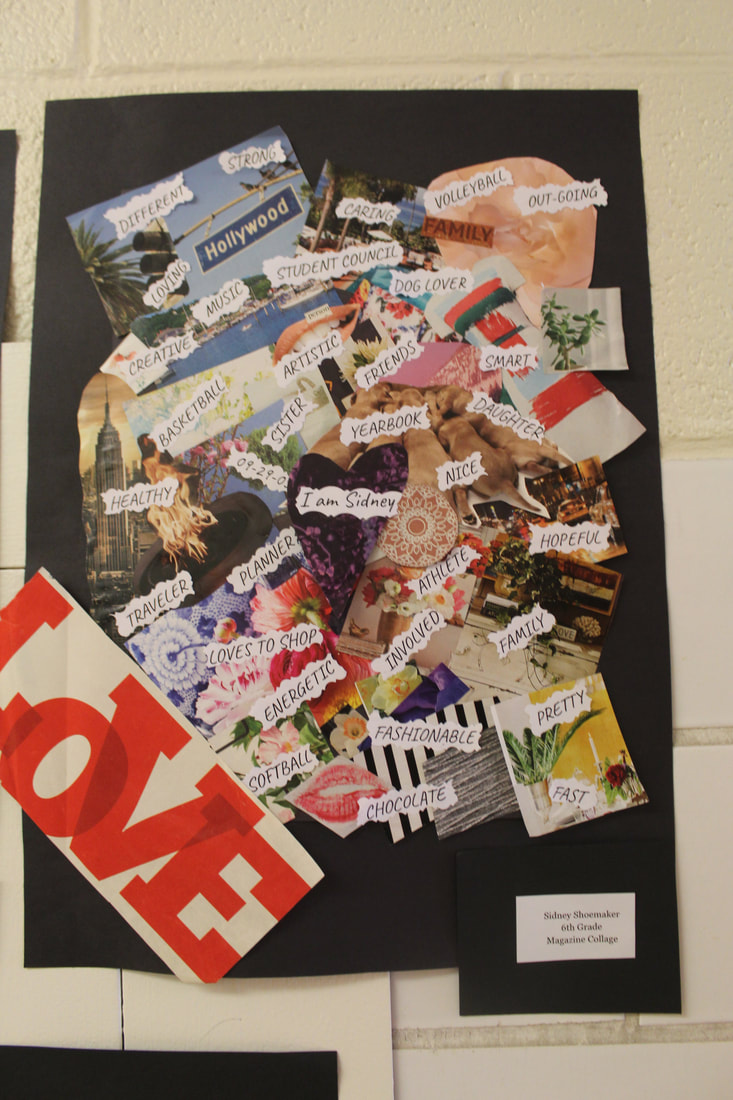
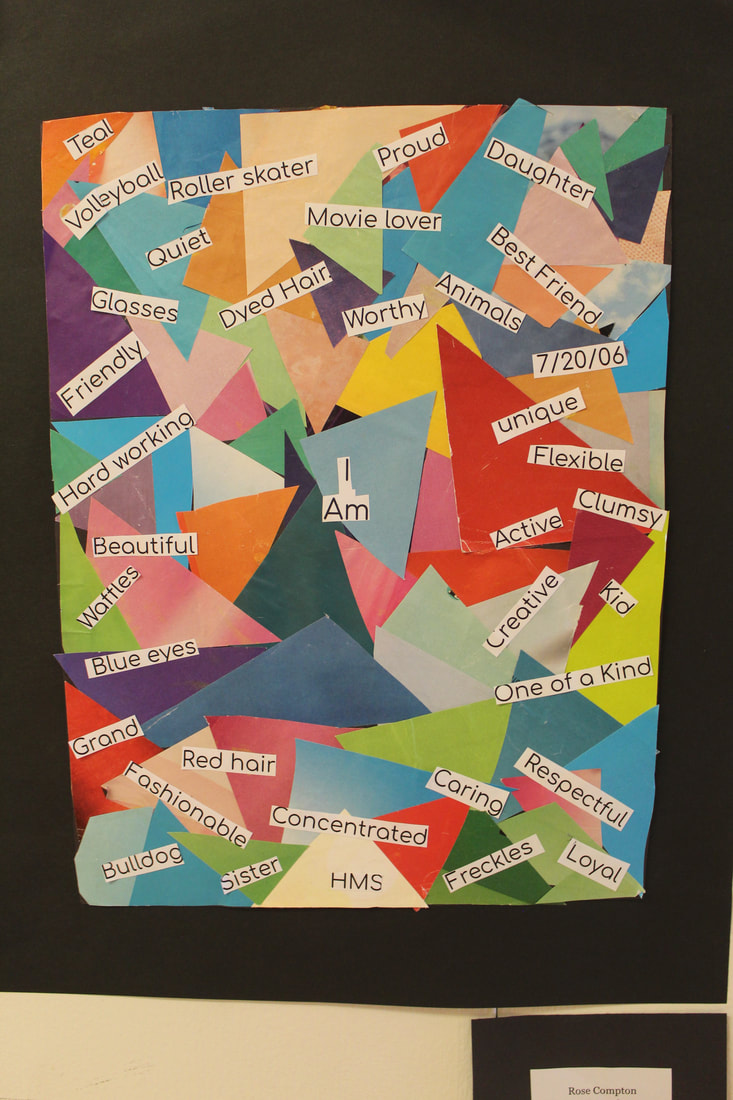
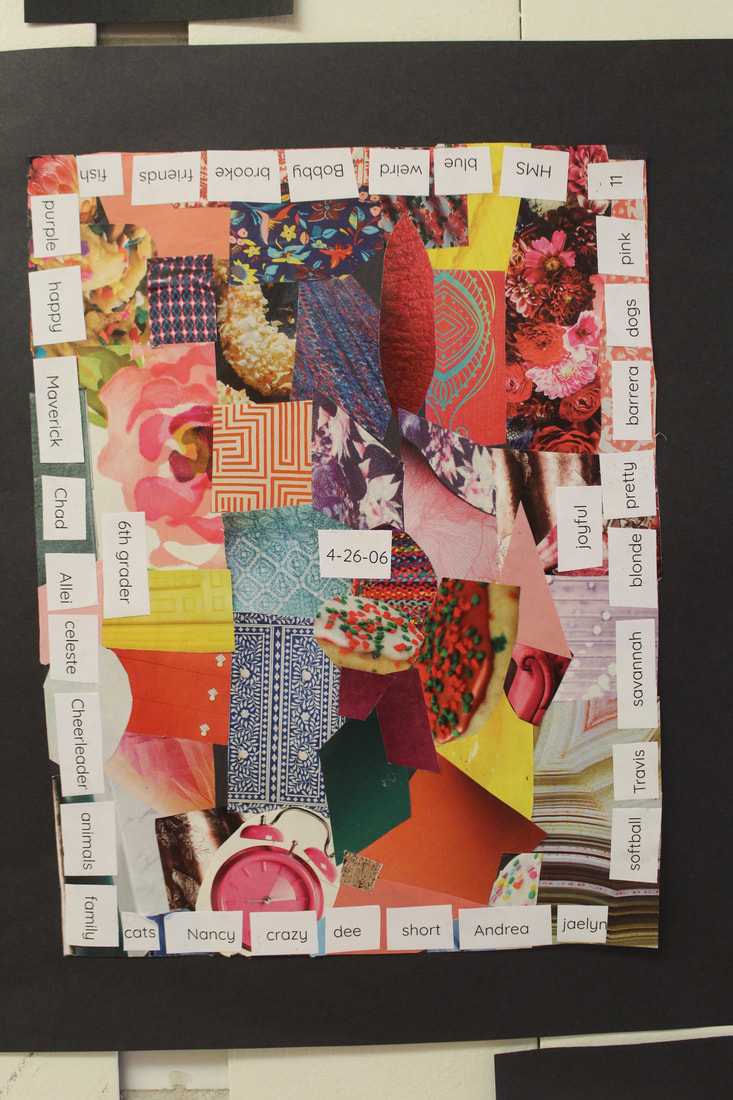
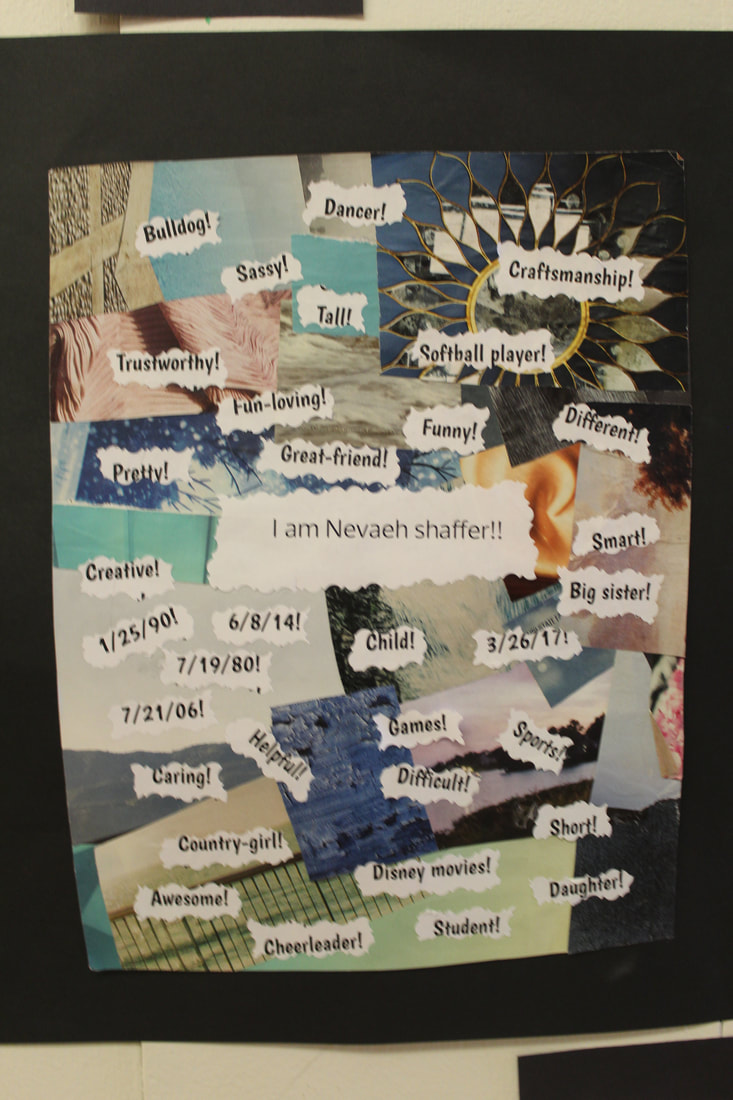
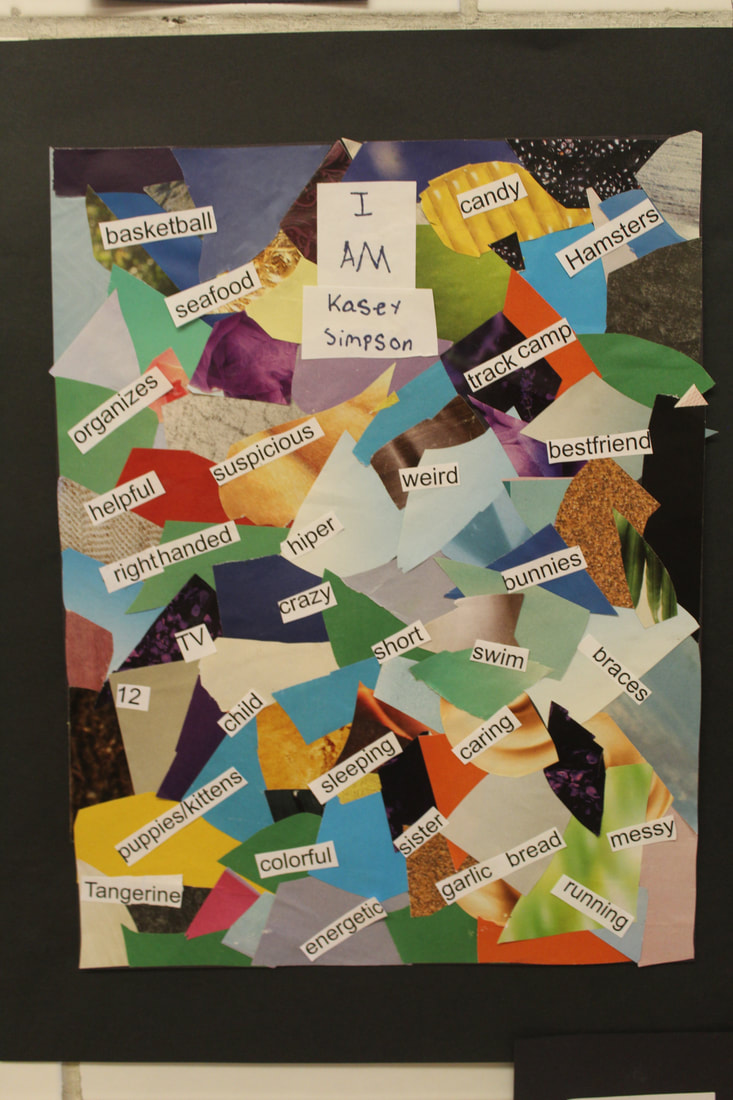
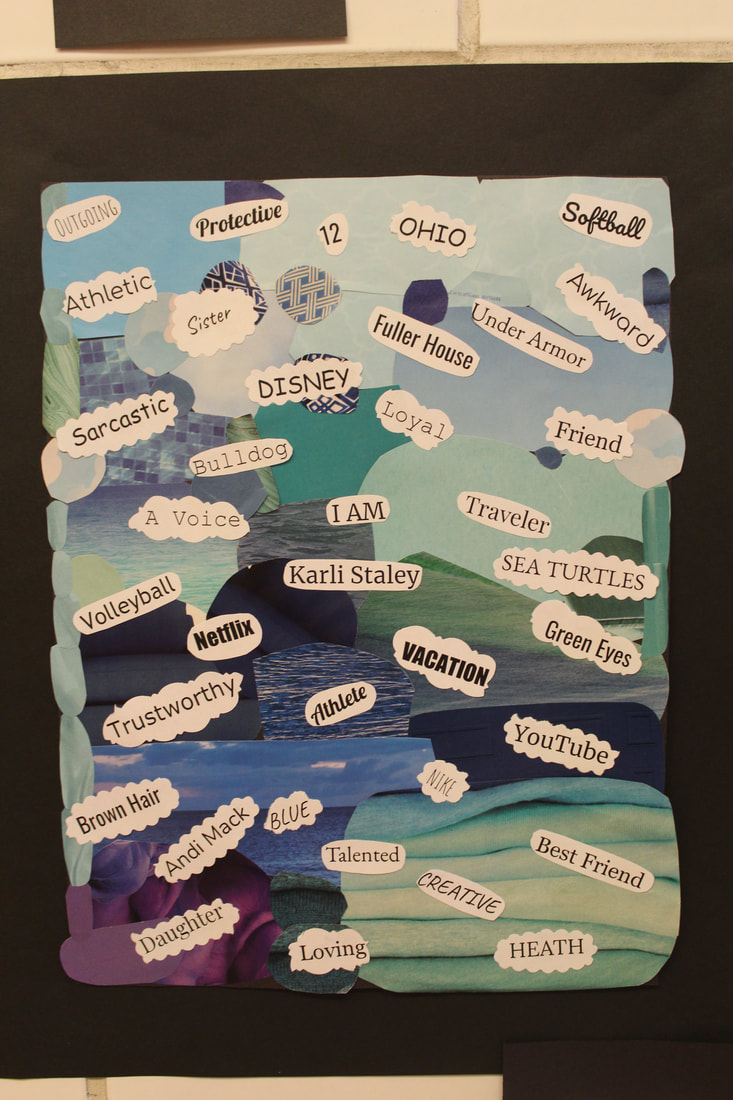
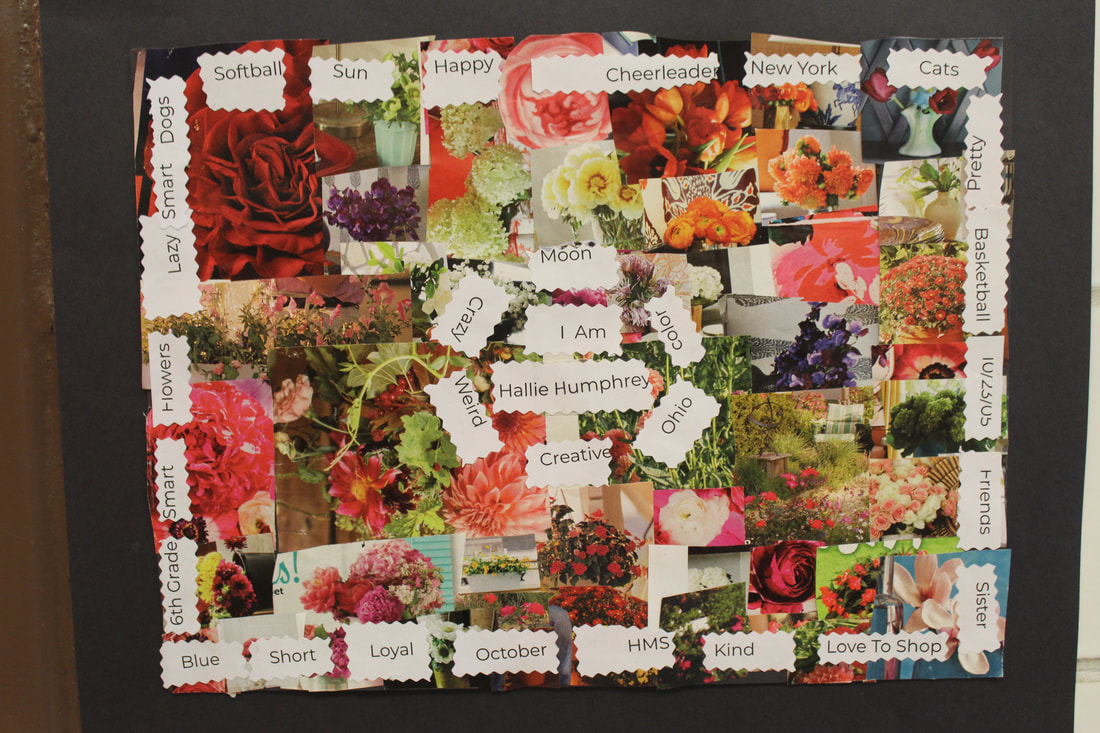
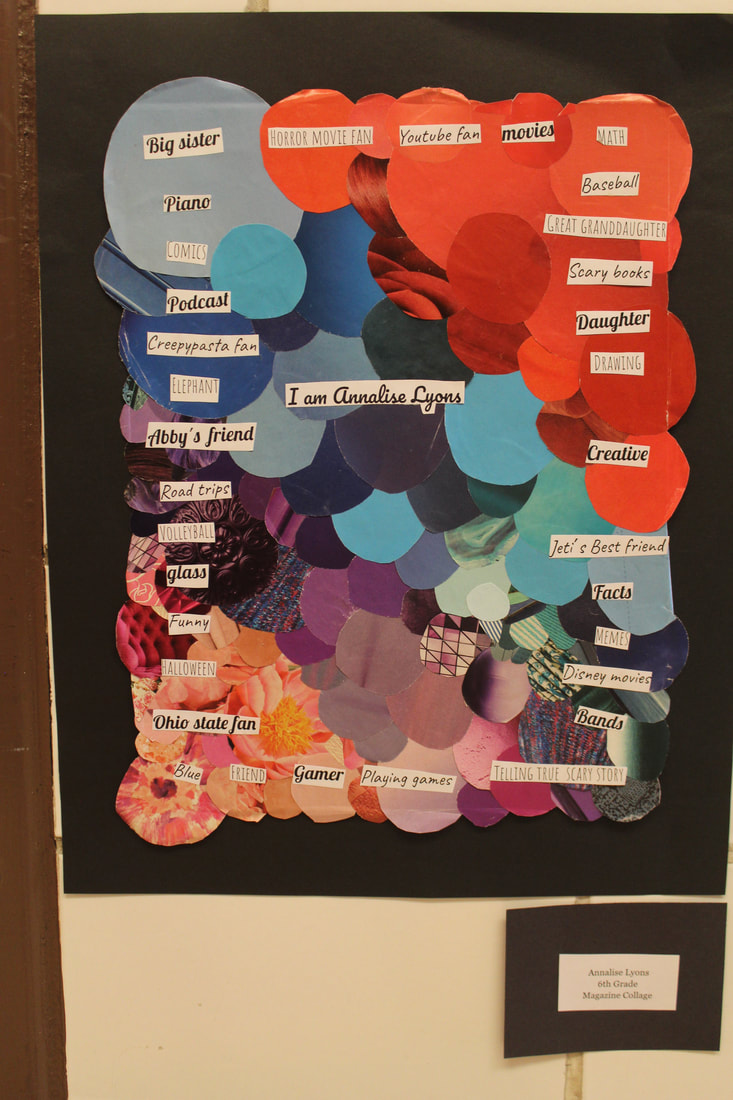
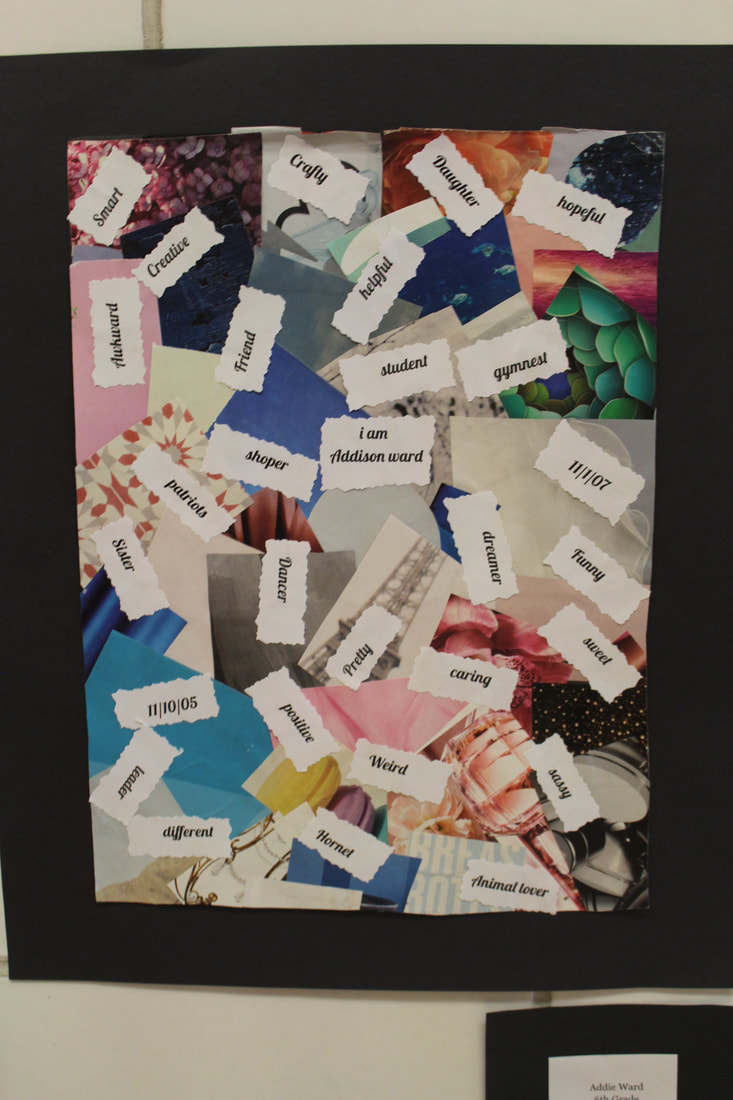
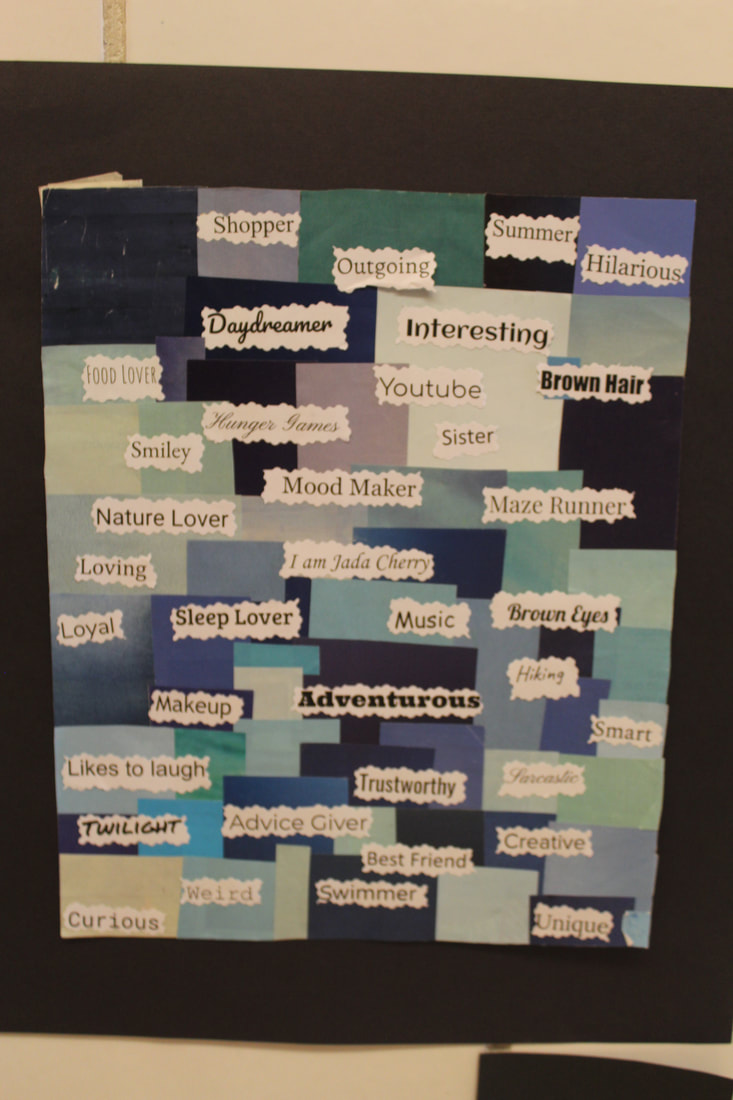
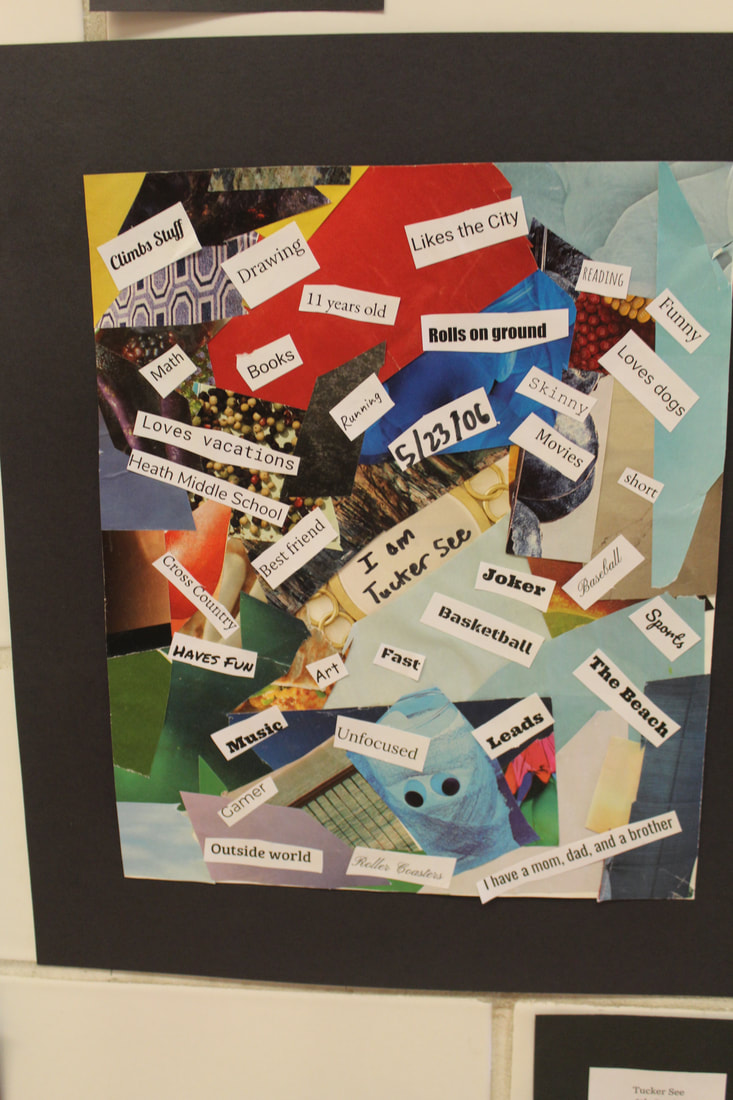
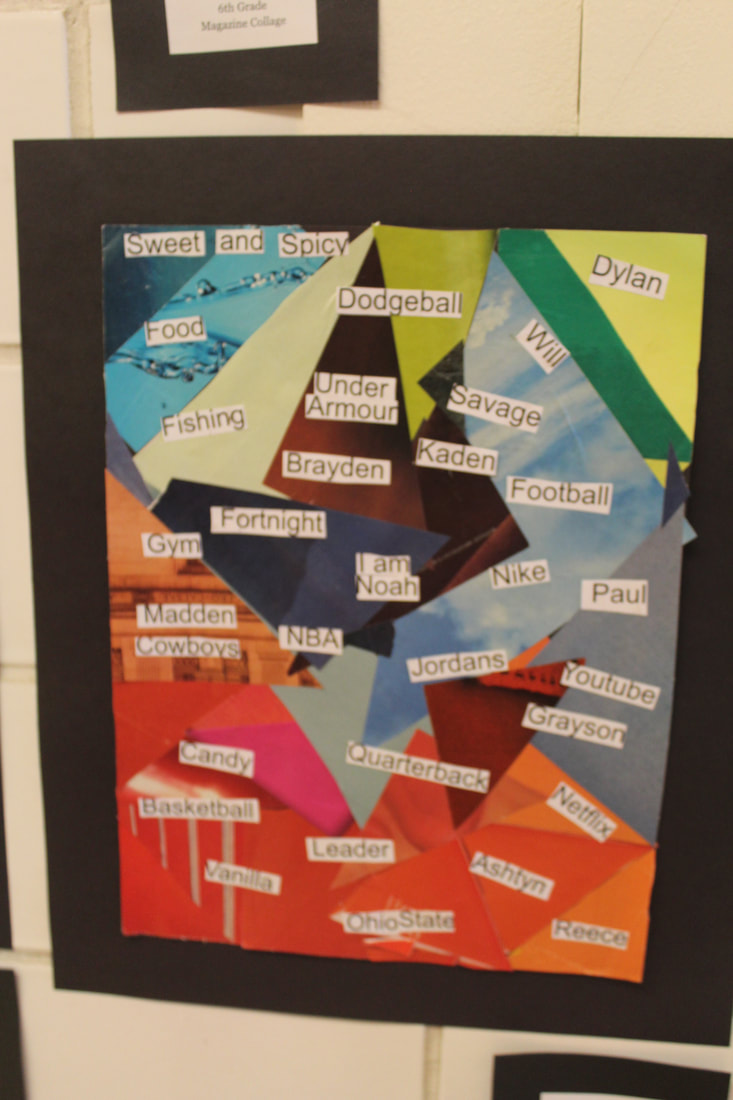
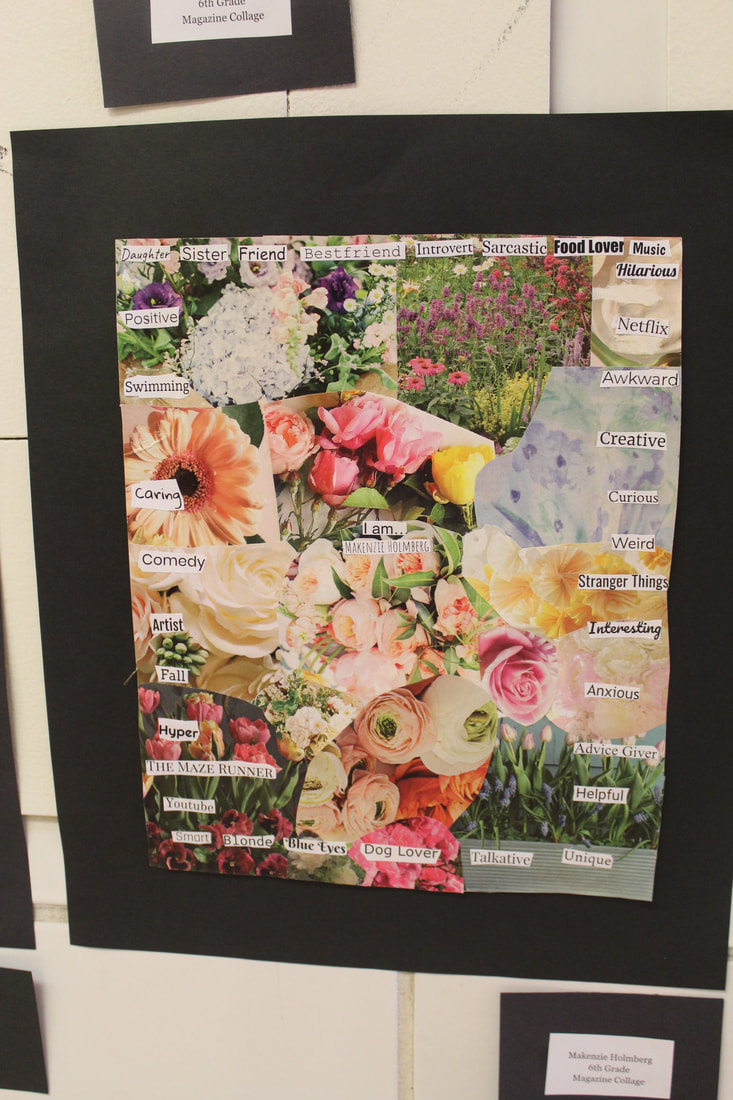
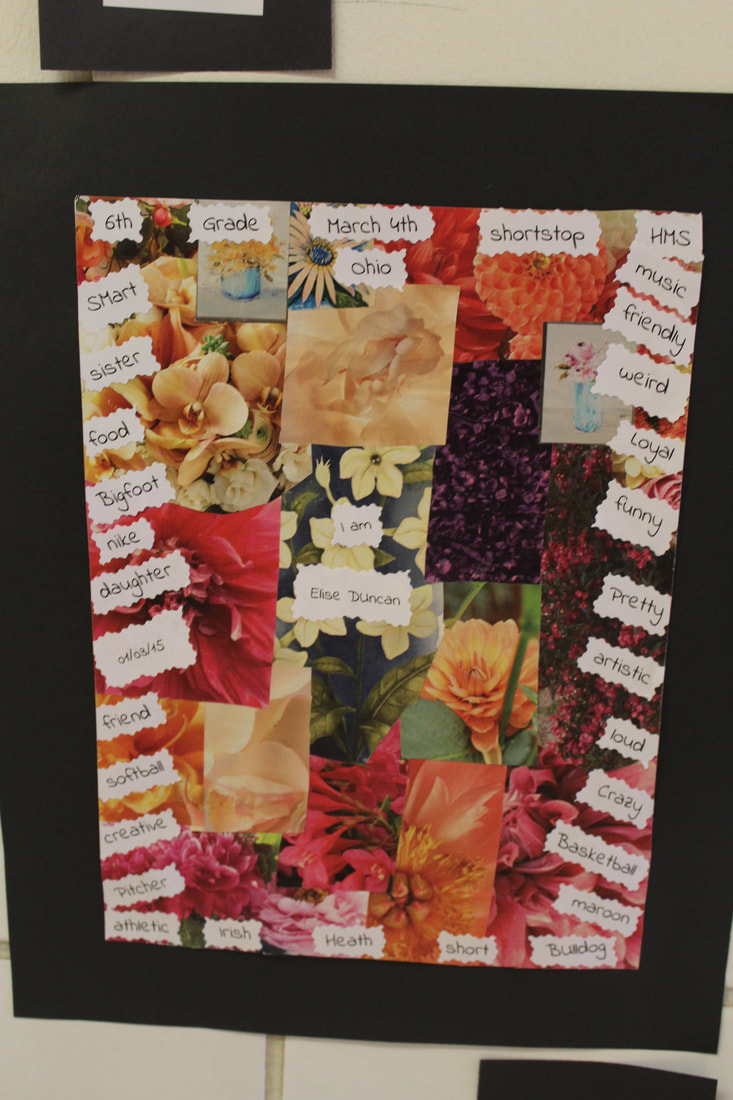
Collage self-portraits

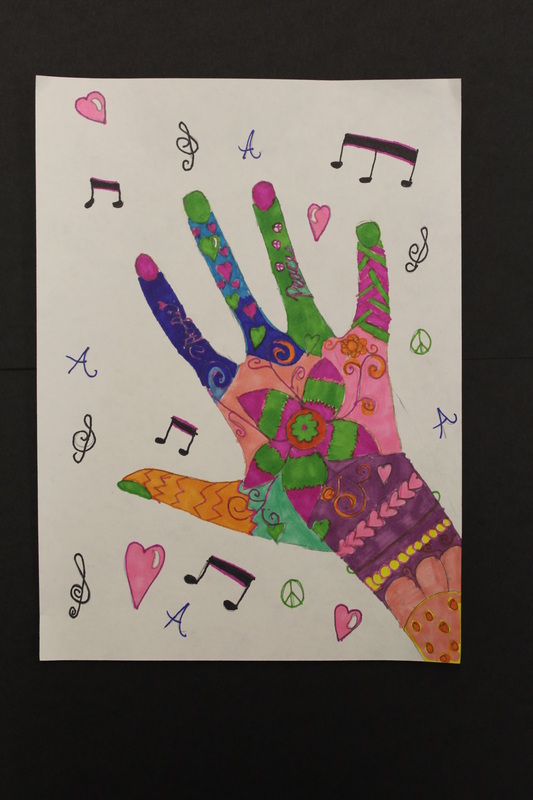
"Life in My hands"
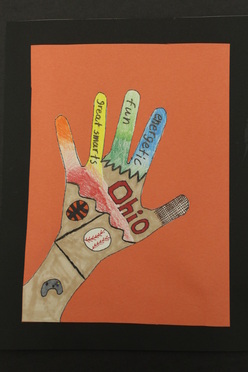
For this project students learned about the 7 Elements of Art and focused on three main elements: Color, Texture, and Line. For this project students traced their hand, and filled up their hand with pictures, words, and symbols that represented themselves. They also had to use several types of lines, color and also create textures! It was a good way to learn something about each student. As you can see in the picture to the left, Noah, a 6th Grade Student, loves video games (represented by the video game controller), sports (represented by the baseball and basketball drawings), he is fun, energetic, and has "great smarts" and also is from OHIO!
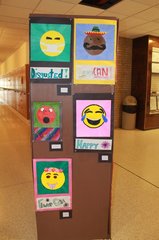
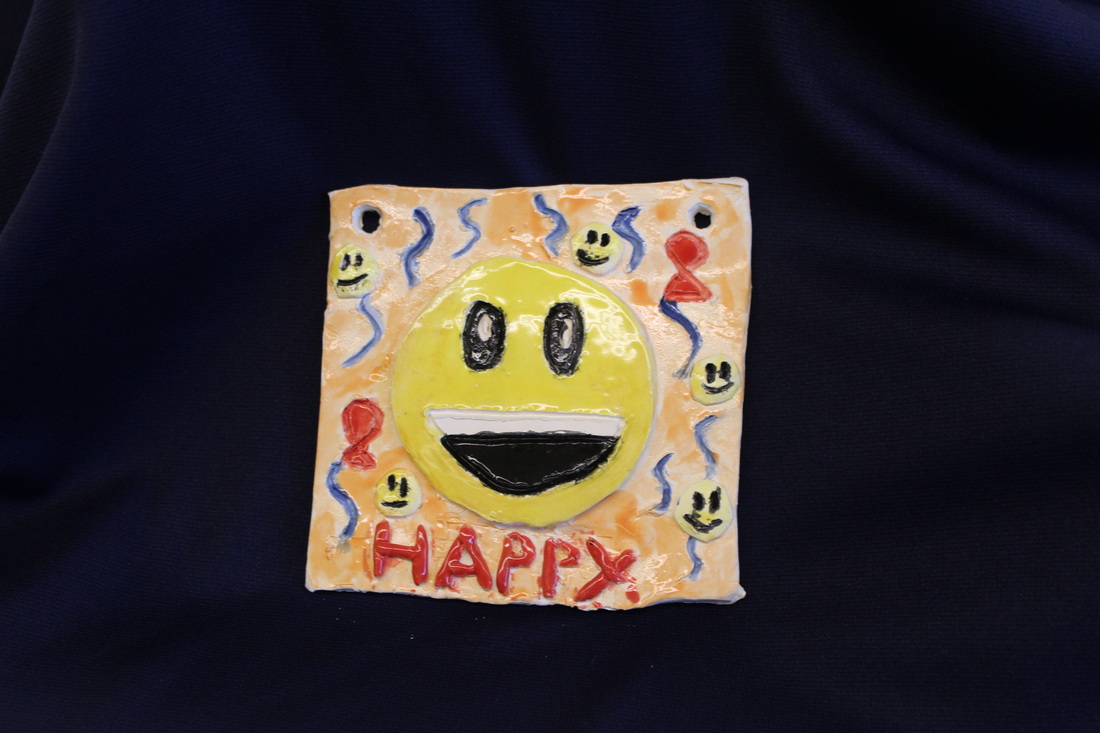
Emoji Paintings
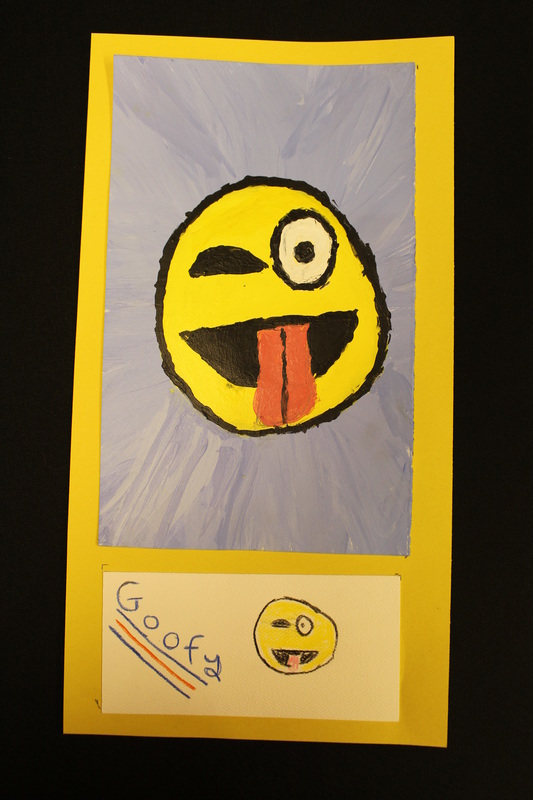 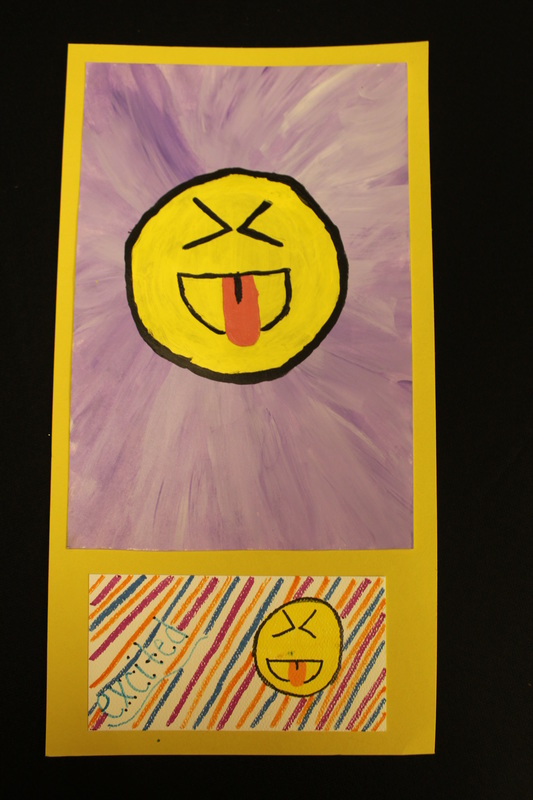  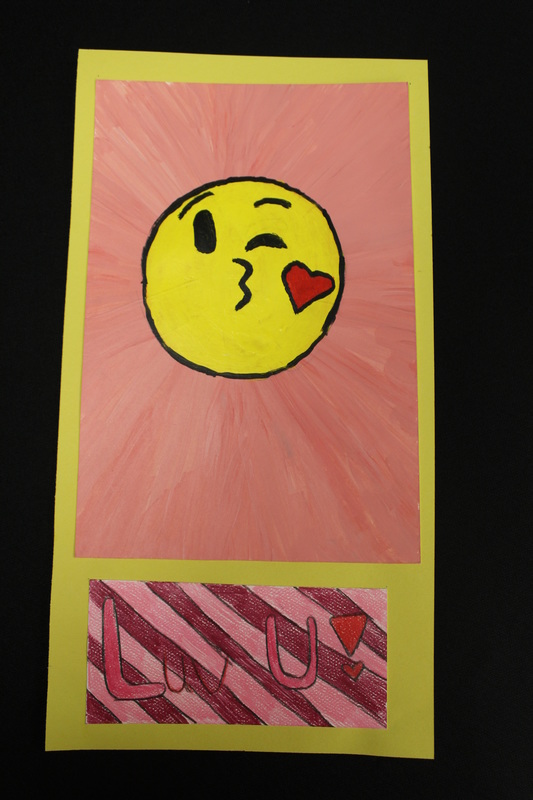 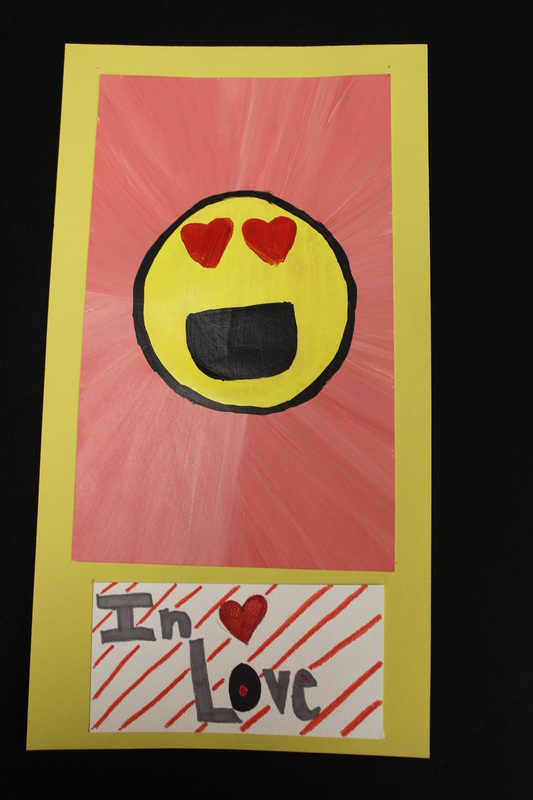 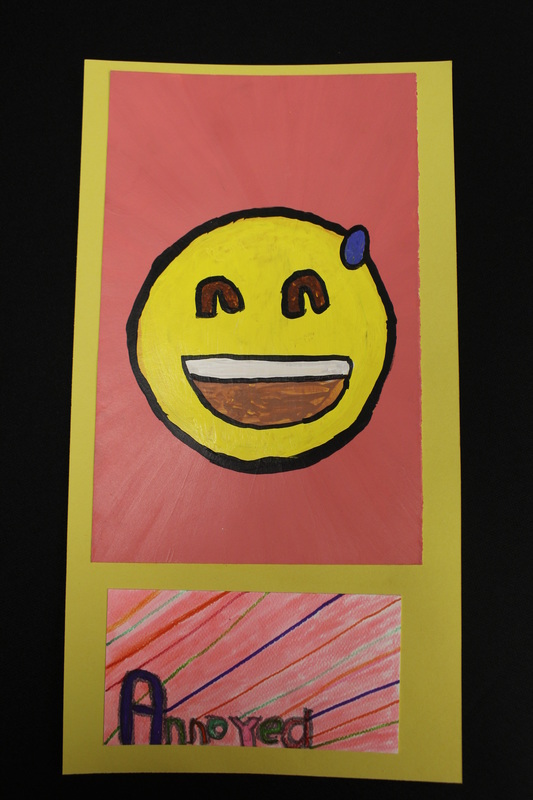 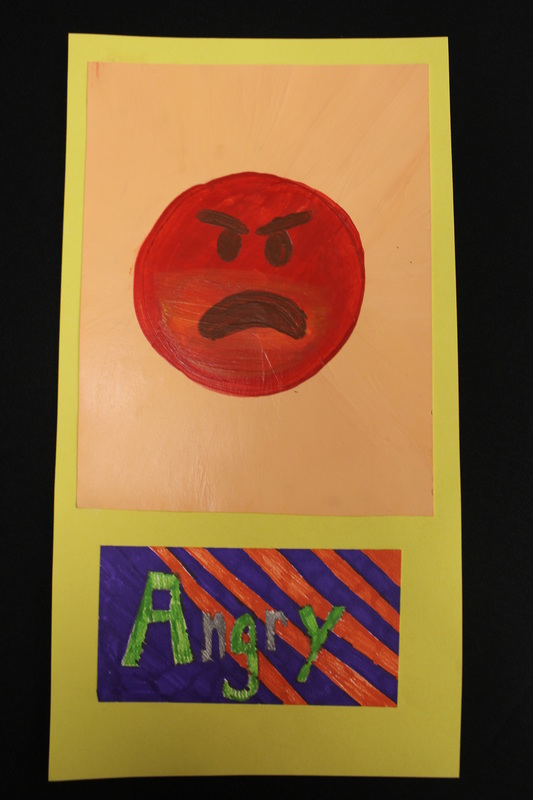 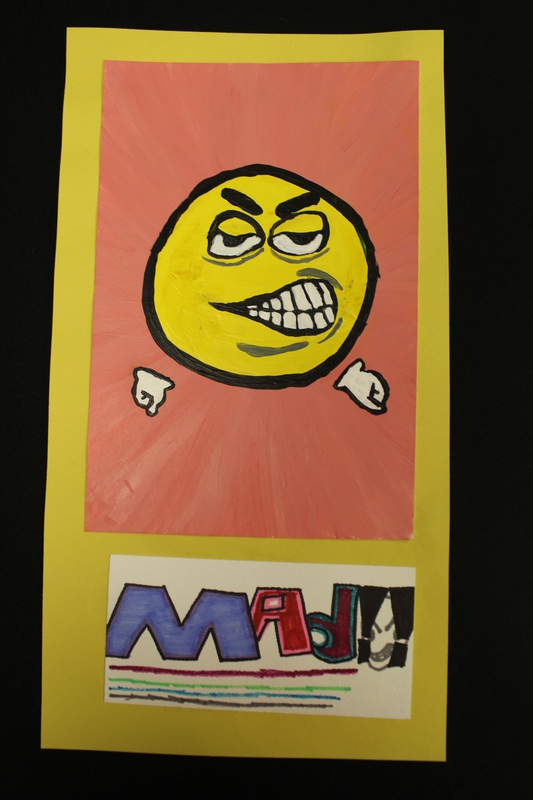 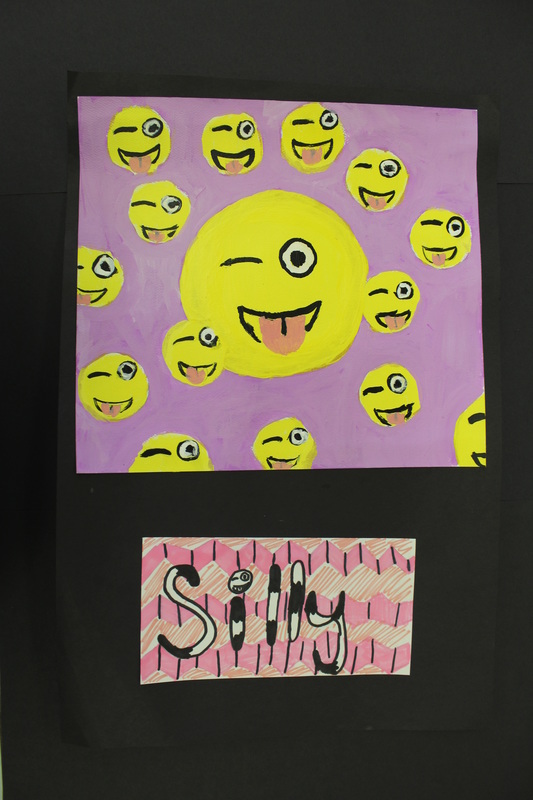 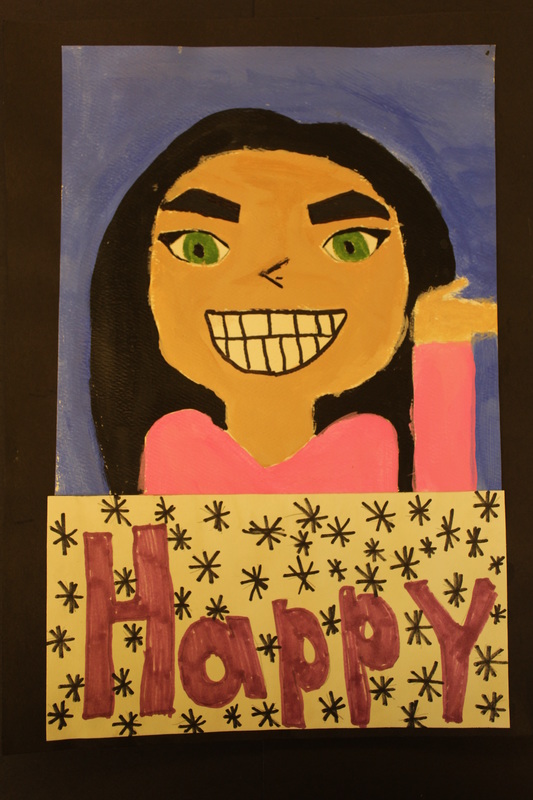 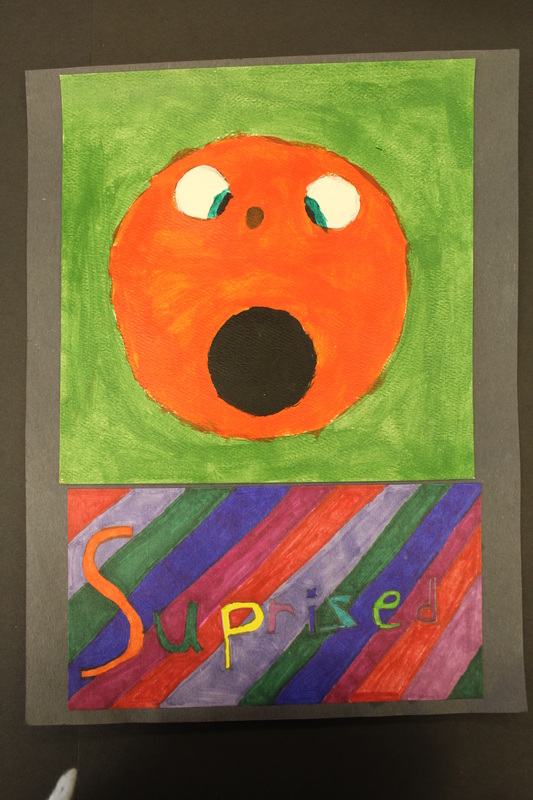 |
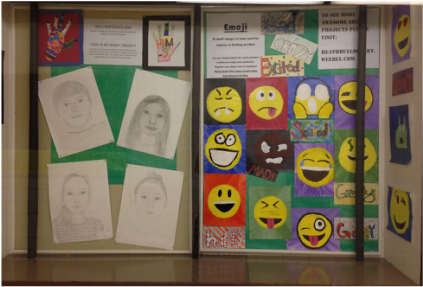
Emoji (or emoticon), if you didn't know is a very popular symbol system used to communicate emotions among many, especially middle school students! For this project each student selected an emoji and created a painting. We first chose the emoji we were going to draw and did a rough sketch. After we learned the painting basics, how to mix colors, painting thick enough coats so you don't see the color underneath, painting a straight line and also the basics of acrylic paint clean up/brush care. Students then started their backgrounds for their paintings, mixing 2-3 colors and streaking it in the background to create a tie dye effect. Then on top they painted the base of the emoji, which in most cases was a yellow circle, and we practiced "having the gift of gab" when our paint dried so we could paint another coat. Students quickly learned that yellow paint has a high transparency level so it needs multiple coats, or you could cheat and mix a little white with the paint to make it more opaque. Then the faces were drawn and painted and we had emoji emotions come to life! If students finished early they created a word tag that had the emotion word that the emoji was expressing to hang next to their painting. What an awesome job these students did! The emojis then were put on display in the hallway display case as you see pictured left.
|
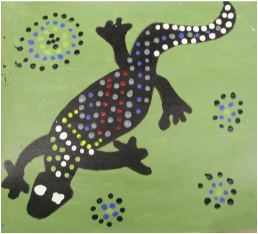
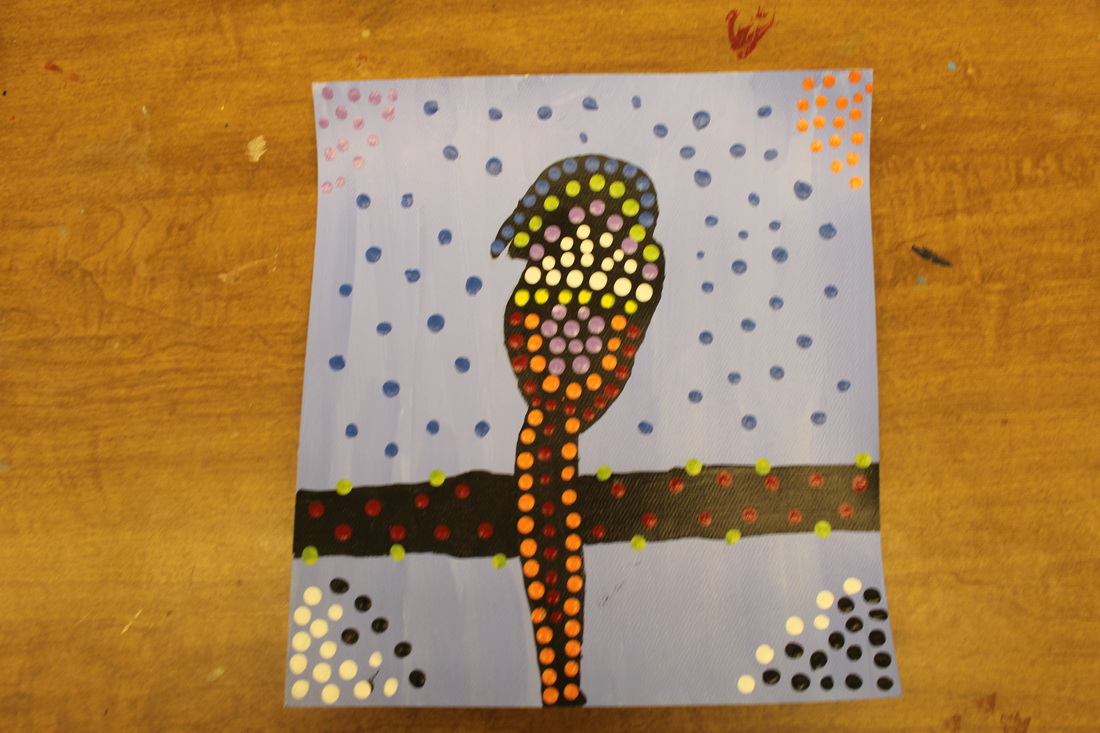
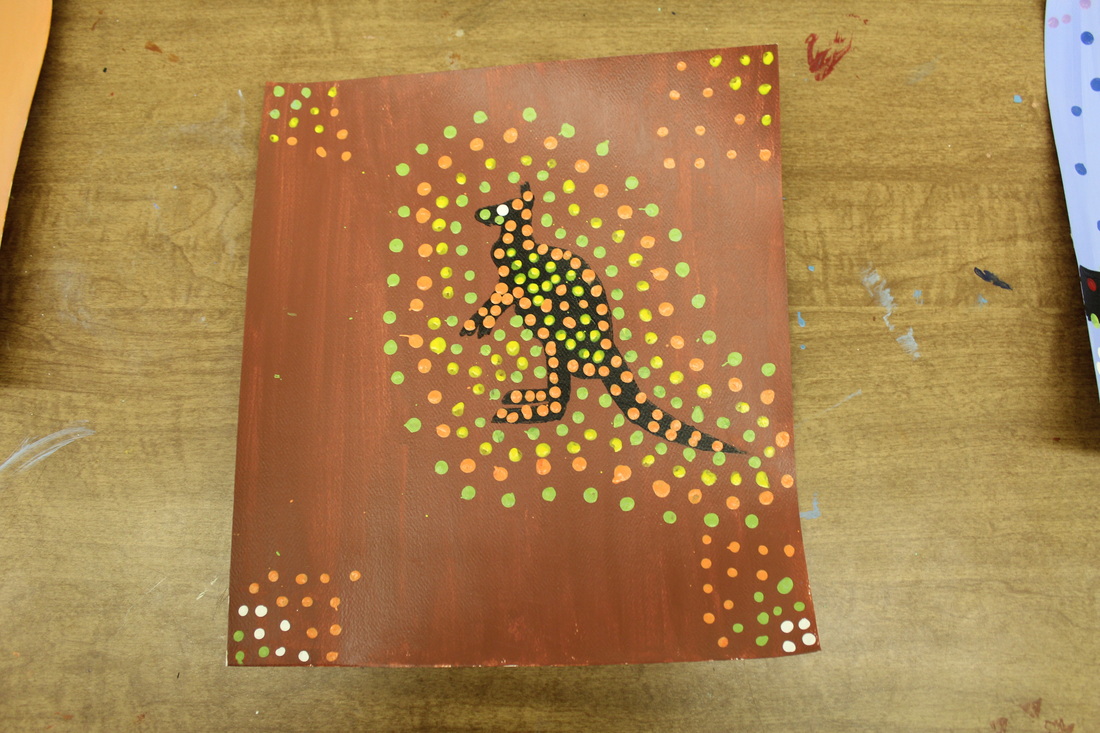
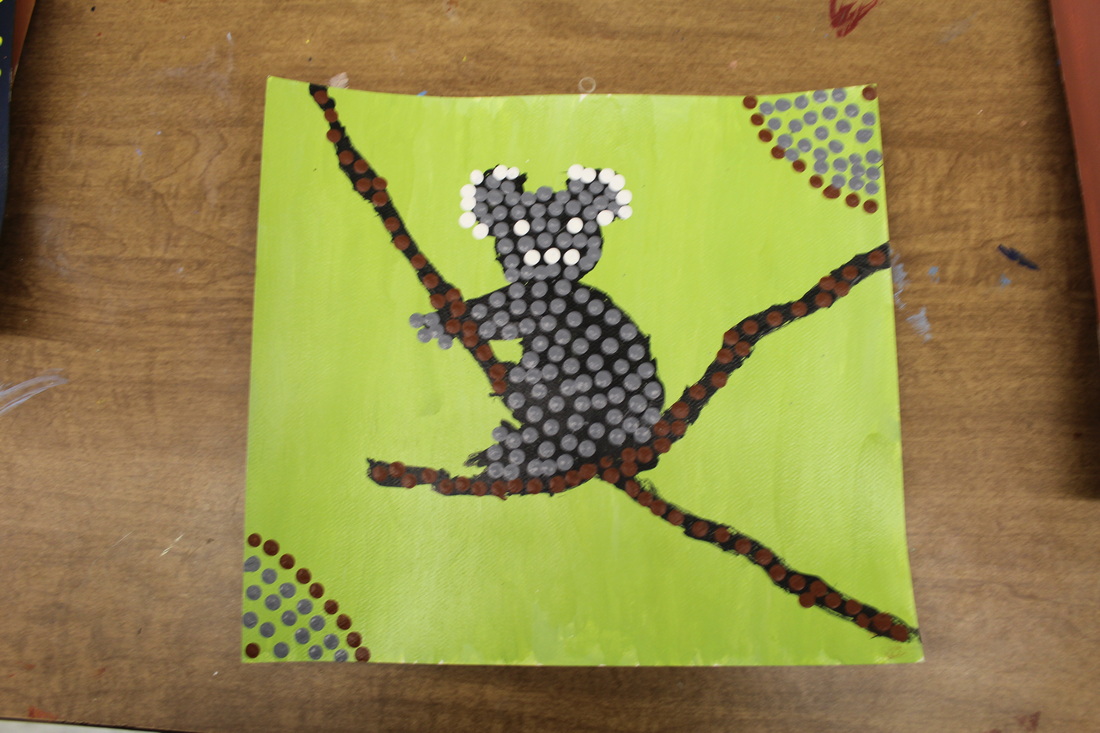
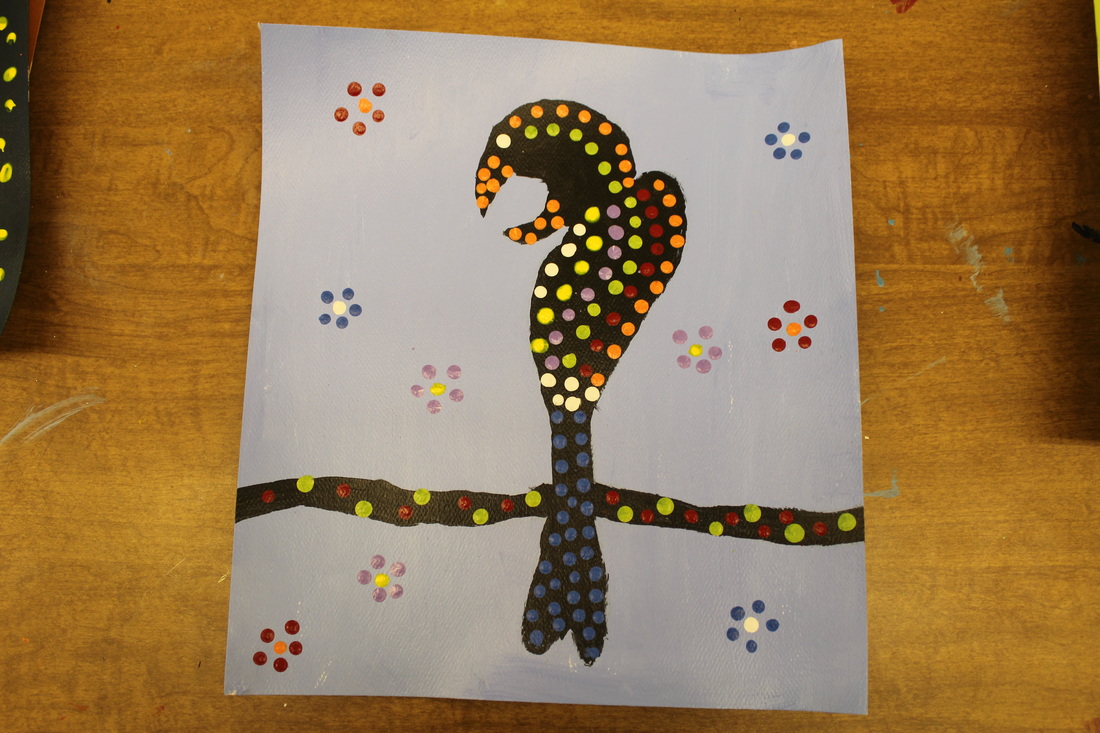
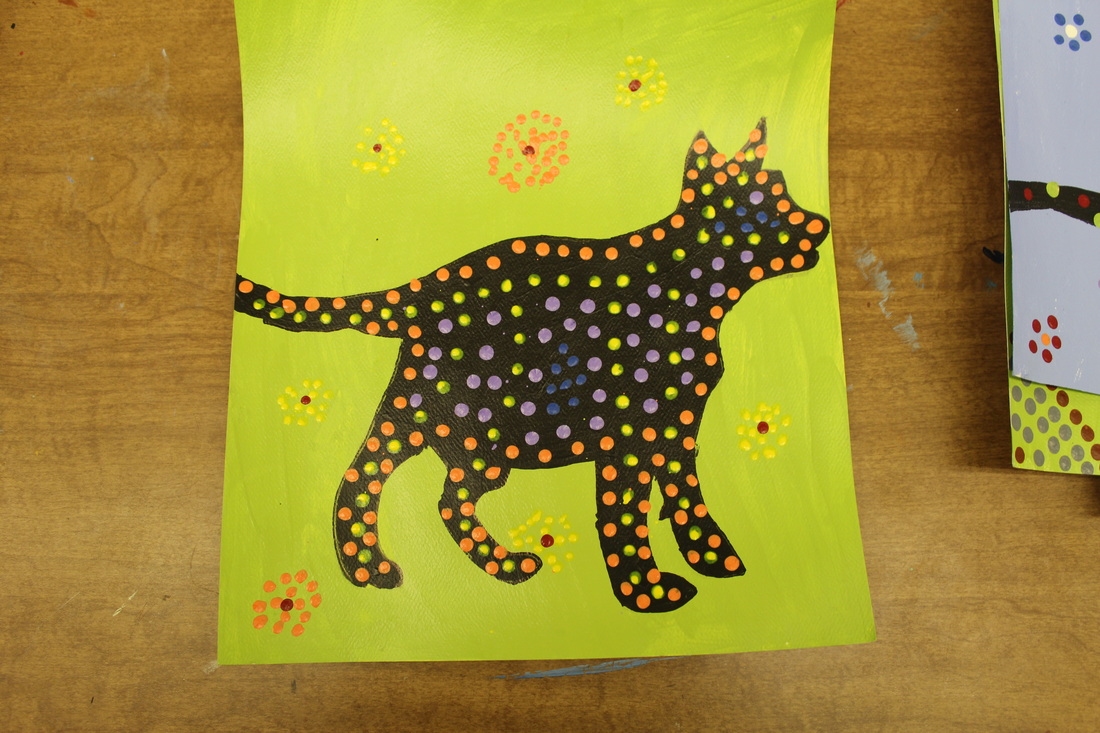
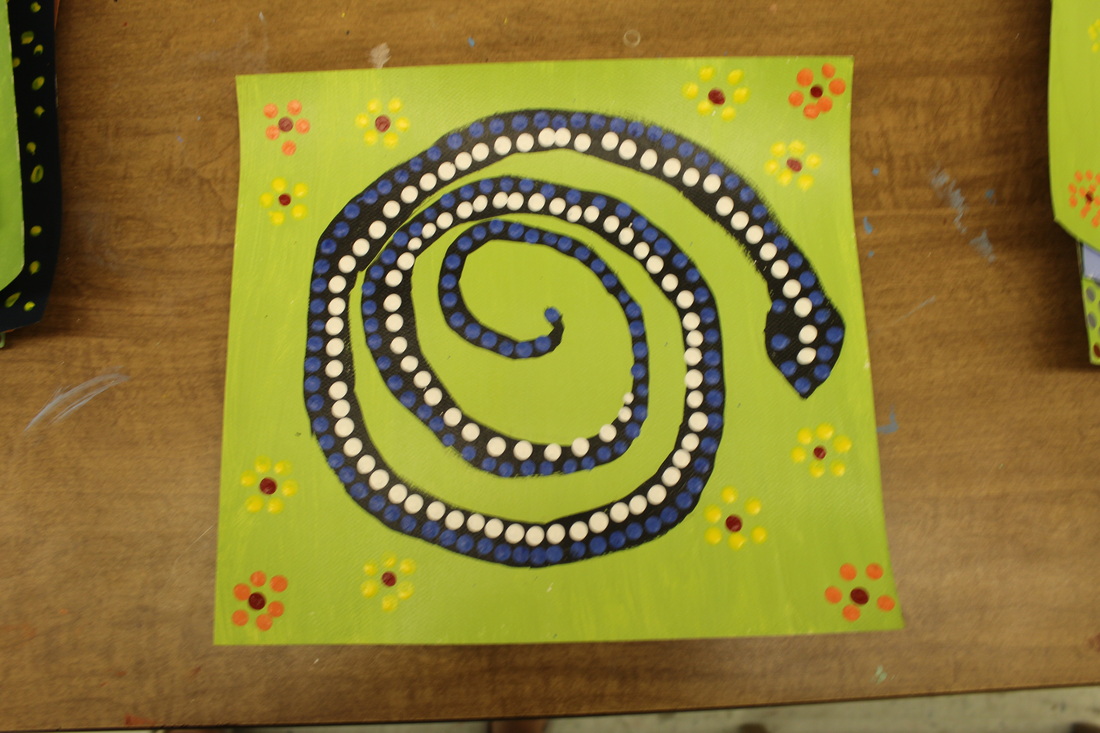
Project four: Aboriginal dot paintings
|
To continue our 6th grade painting unit, students learned about the aboriginal painting technique practiced in Australia. This technique is a painting style where the images are created totally out of dots! In order to start this painting students created a background out of a couple colors mixed together, similar to the emoji painting backgrounds. Then while they patiently waited for that to dry students practiced drawing Australian animal silhouettes that they would use as inspiration for their dot paintings. We watched videos of traditional aboriginal men and women artists created the dot paintings and were amazed at their talent. Then students began to create their very own dot painted animals. Students used the end of an old paint brush to create the dots.
|
Alien city
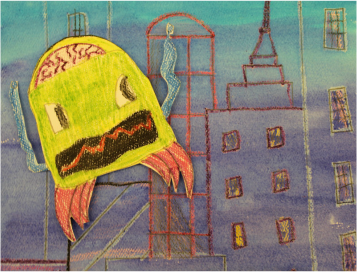
For this project students learned about water color resist techniques. First we designed a city scape with pencil, then we traced over all our lines with crayons, making sure to leave blank areas for the watercolor later. Then we carefully painted watercolors over top of the crayon and the crayon resisted the watercolor so the crayon showed through! Then we made pop up aliens to stick on top! How cool!!?

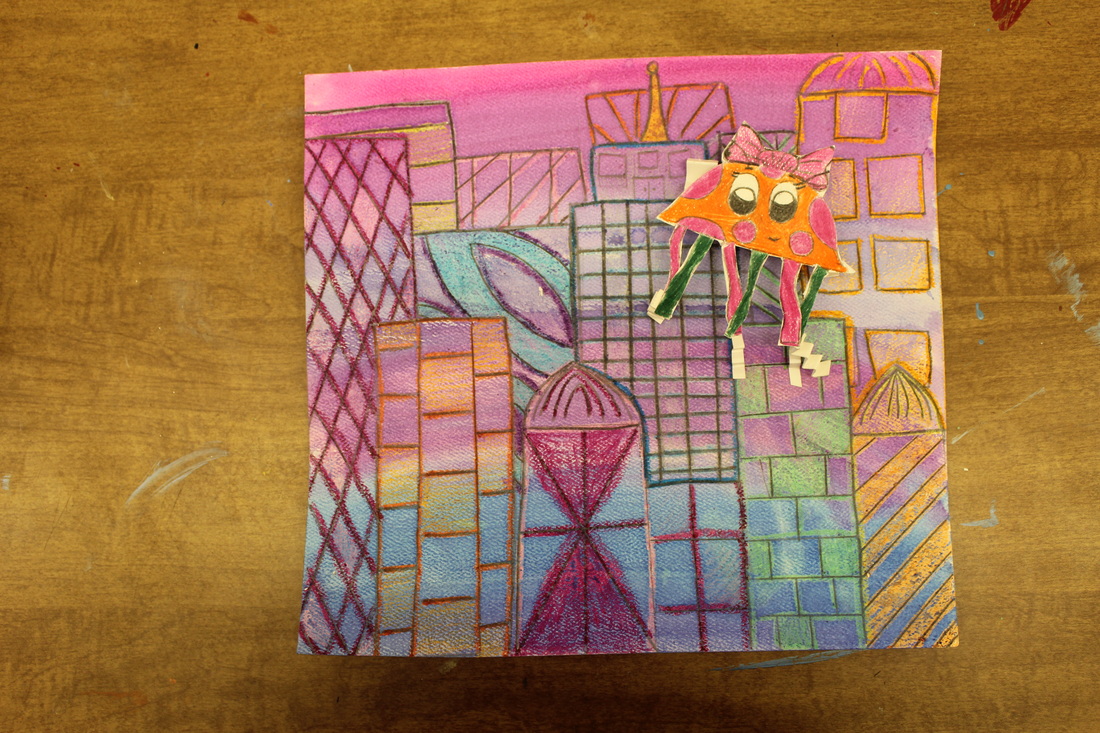


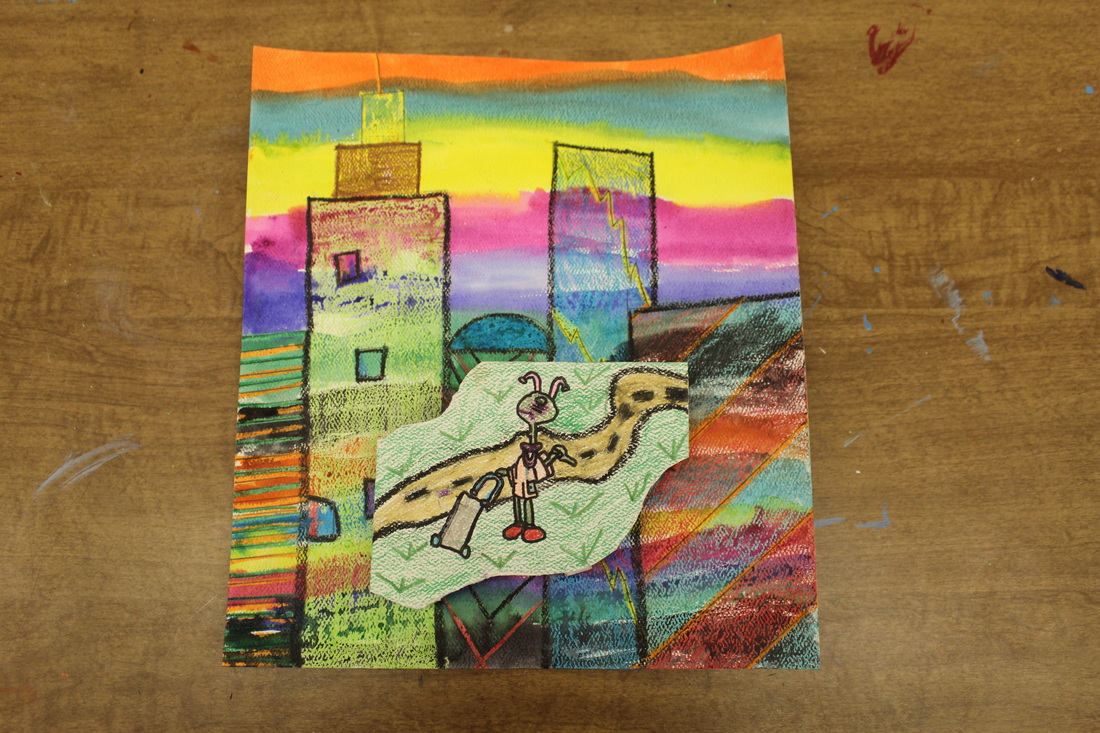
We also do a variation on this project where the students don't necessarily make aliens, but add a pop up. This year several students designed pop ups that just made a detail on their building pop out for visual interest. Still we do the watercolor resist, and we found a crayon sharpener which made it helpful!
|
|
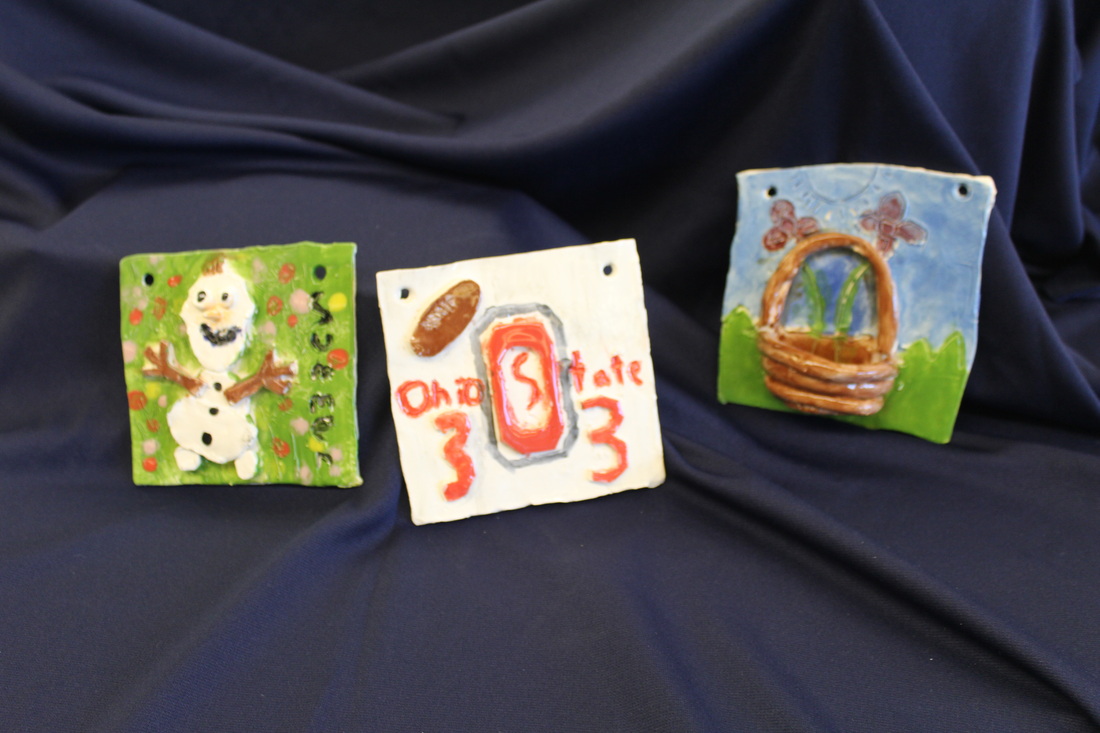
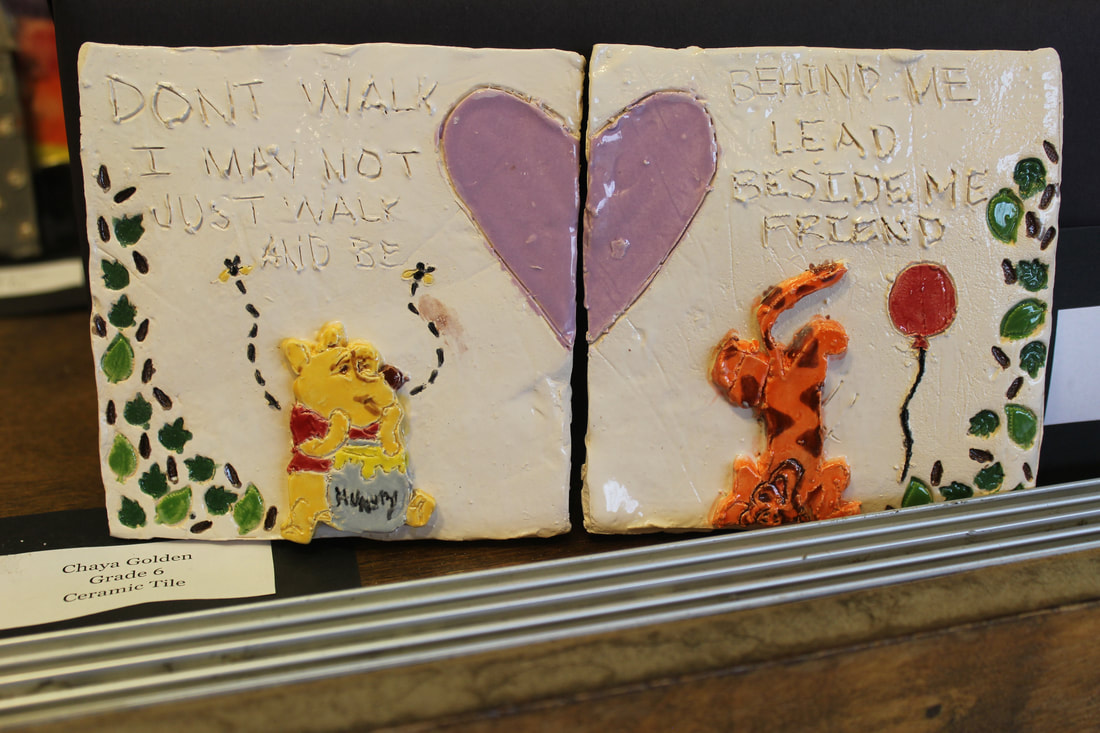
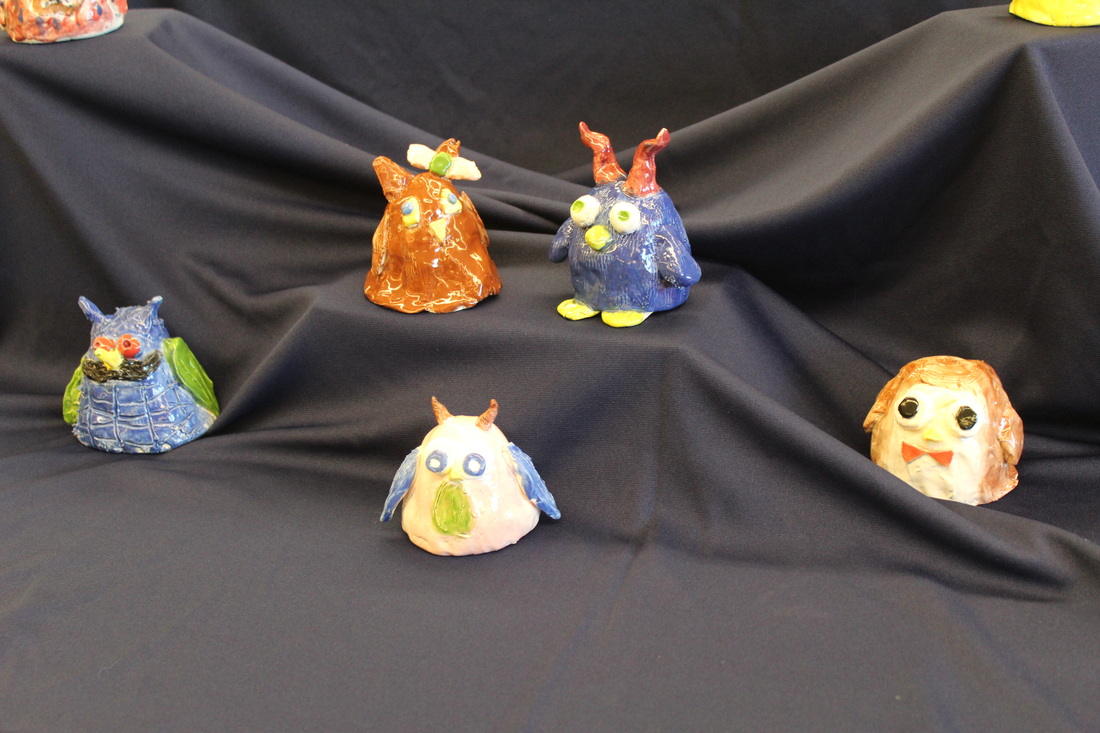
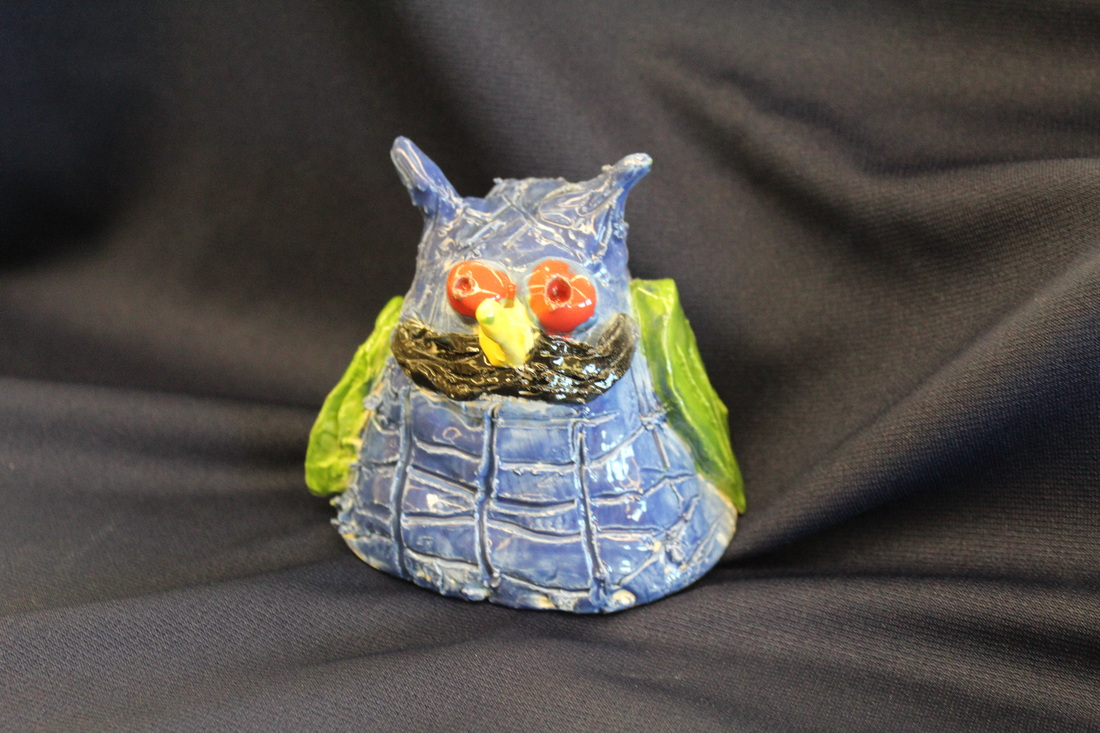
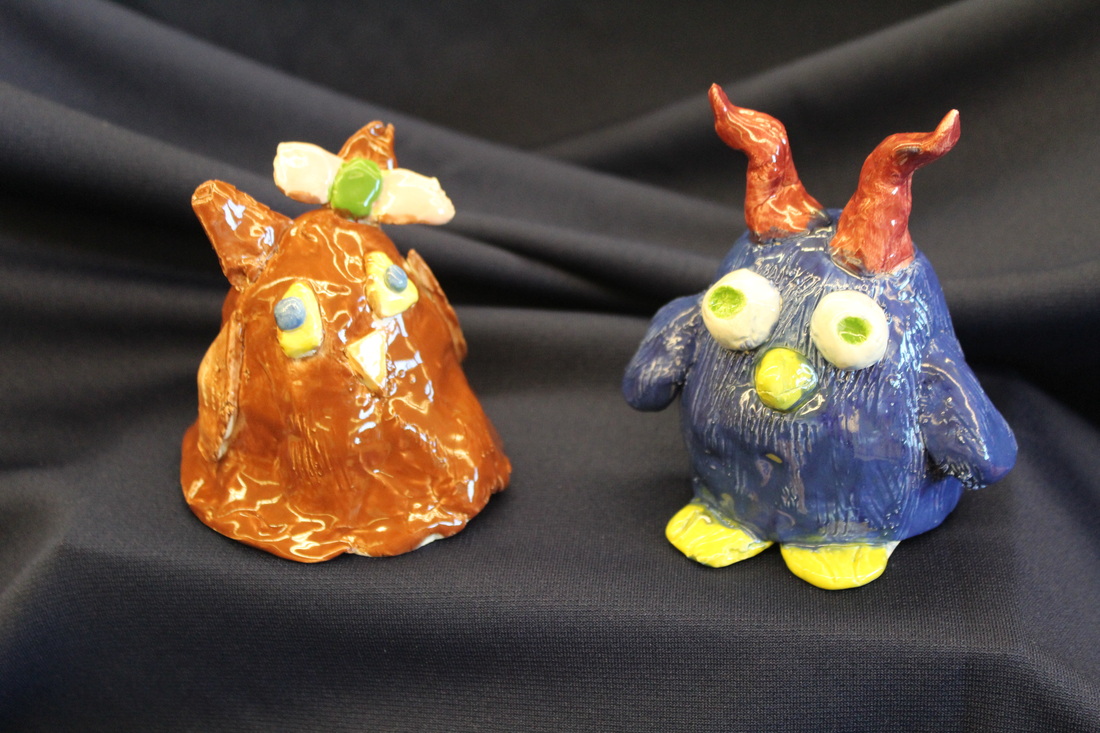
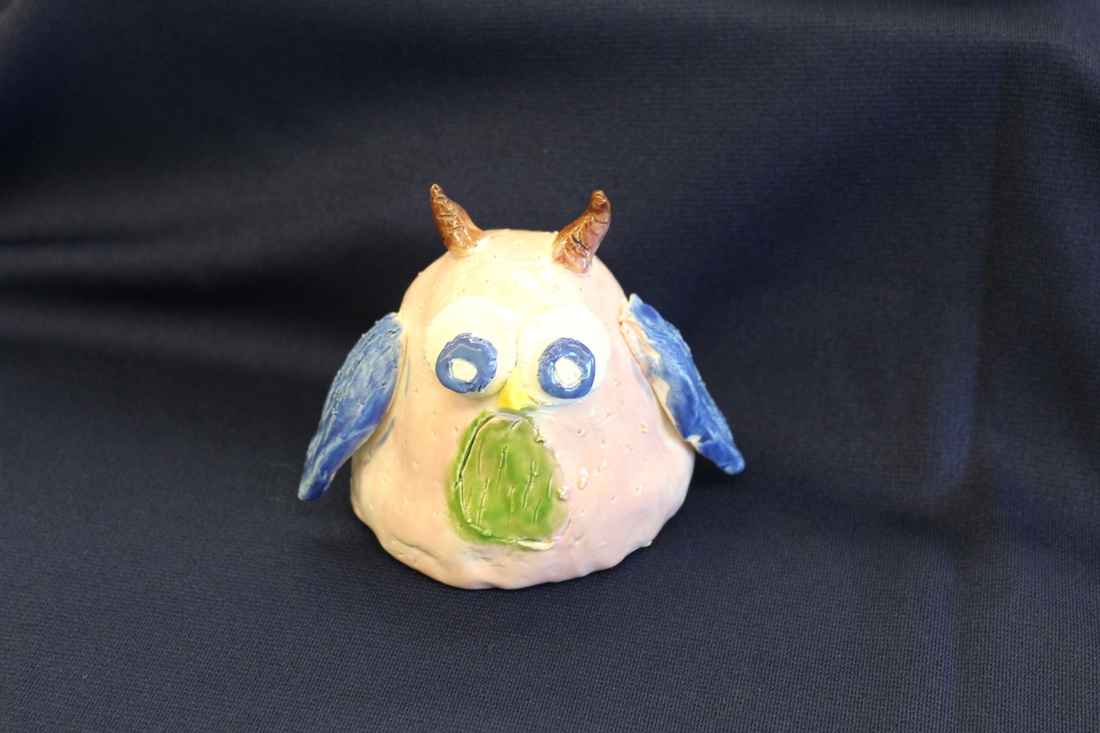
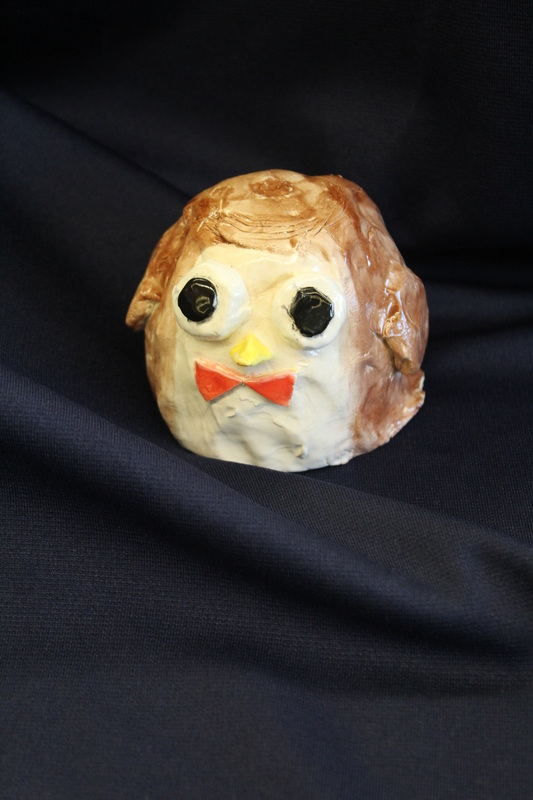
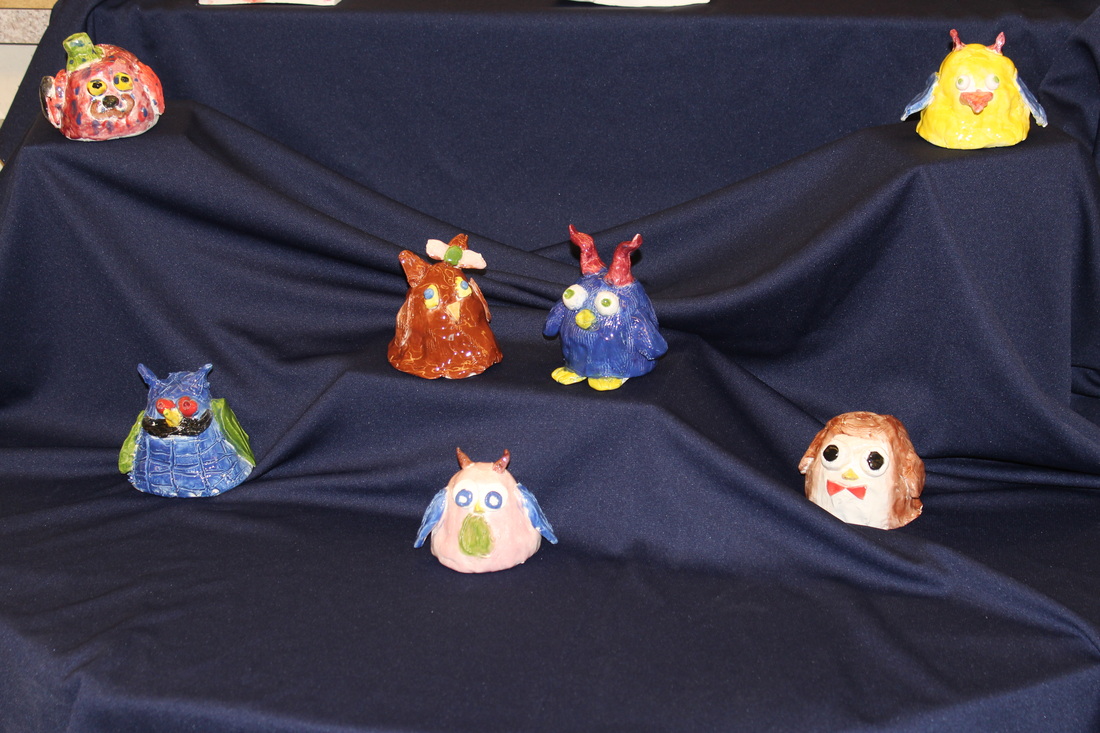
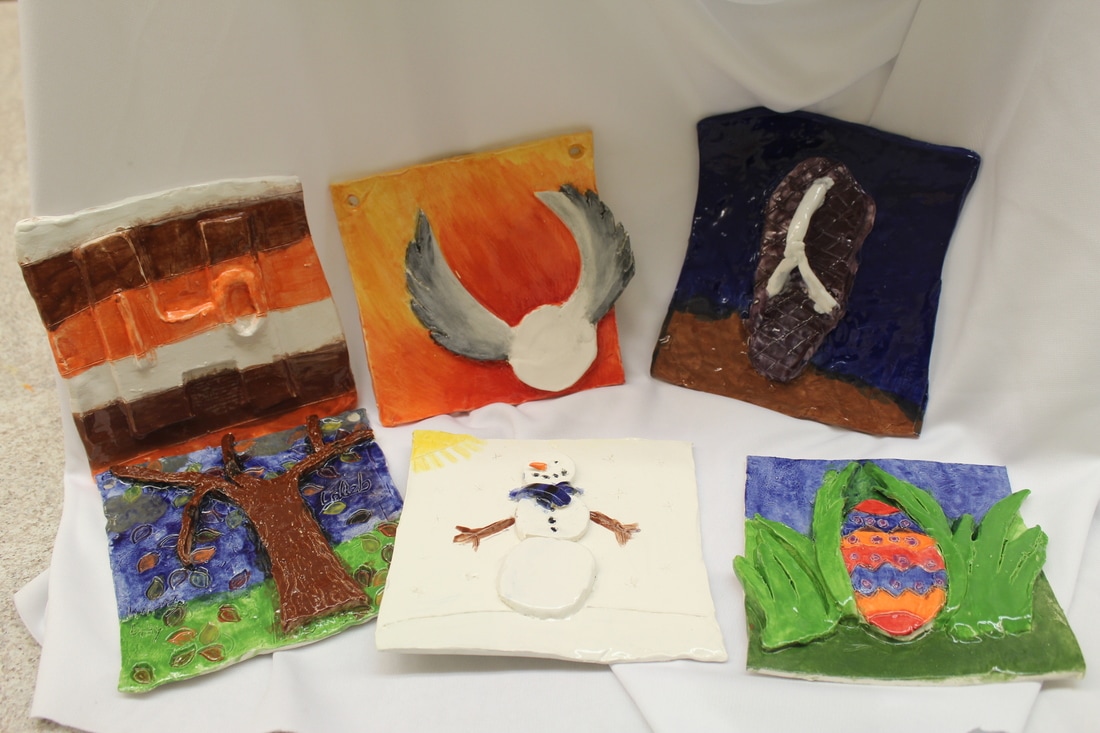
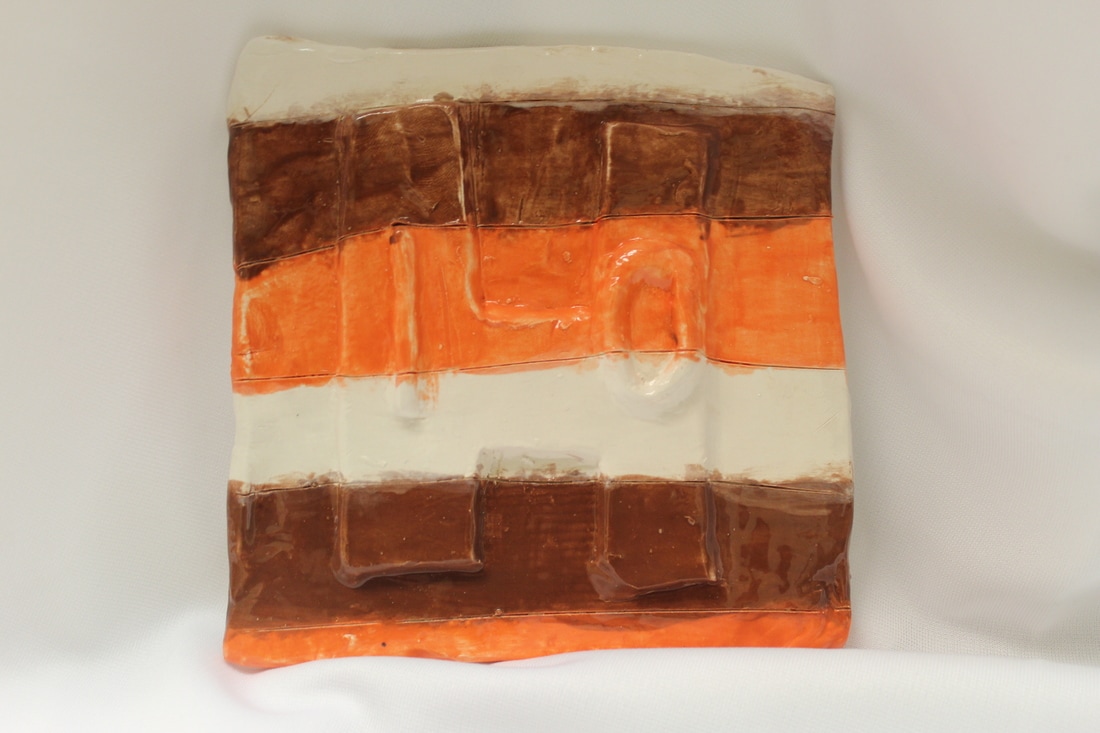
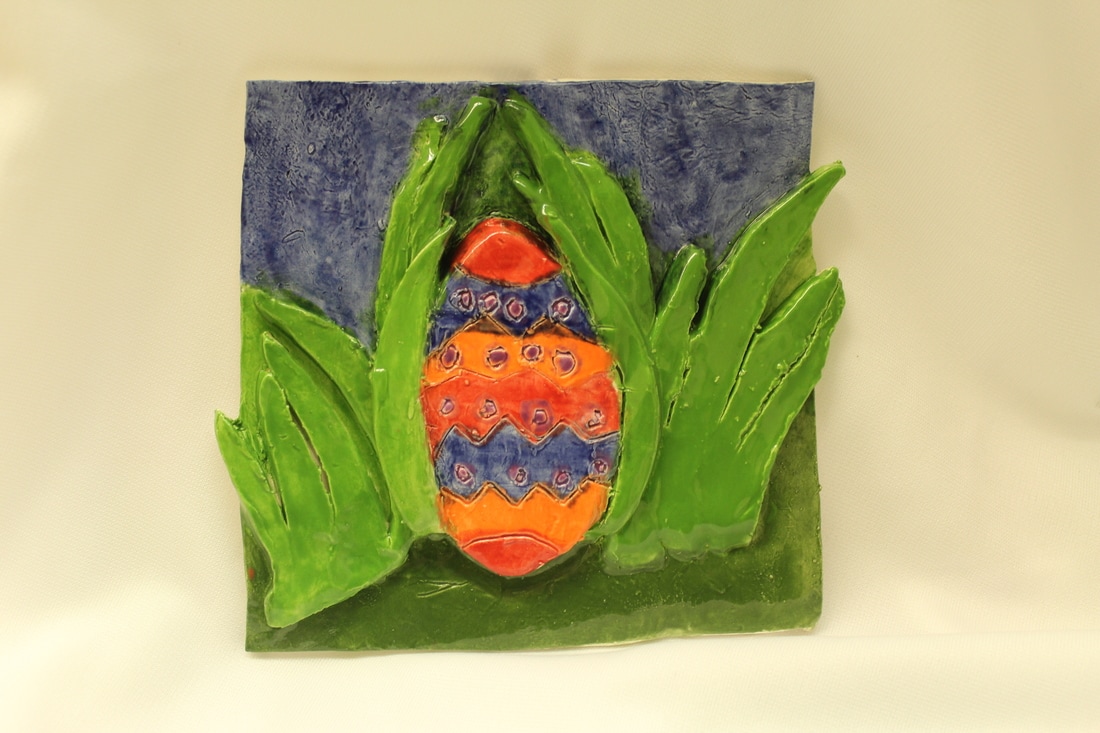
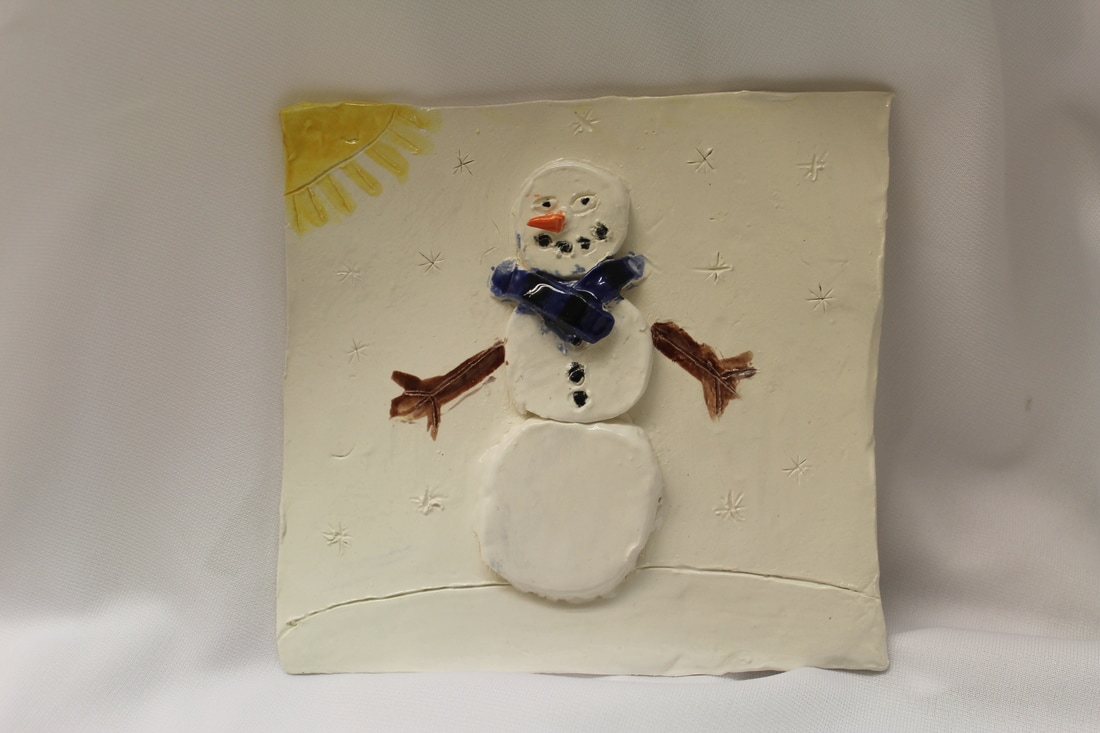
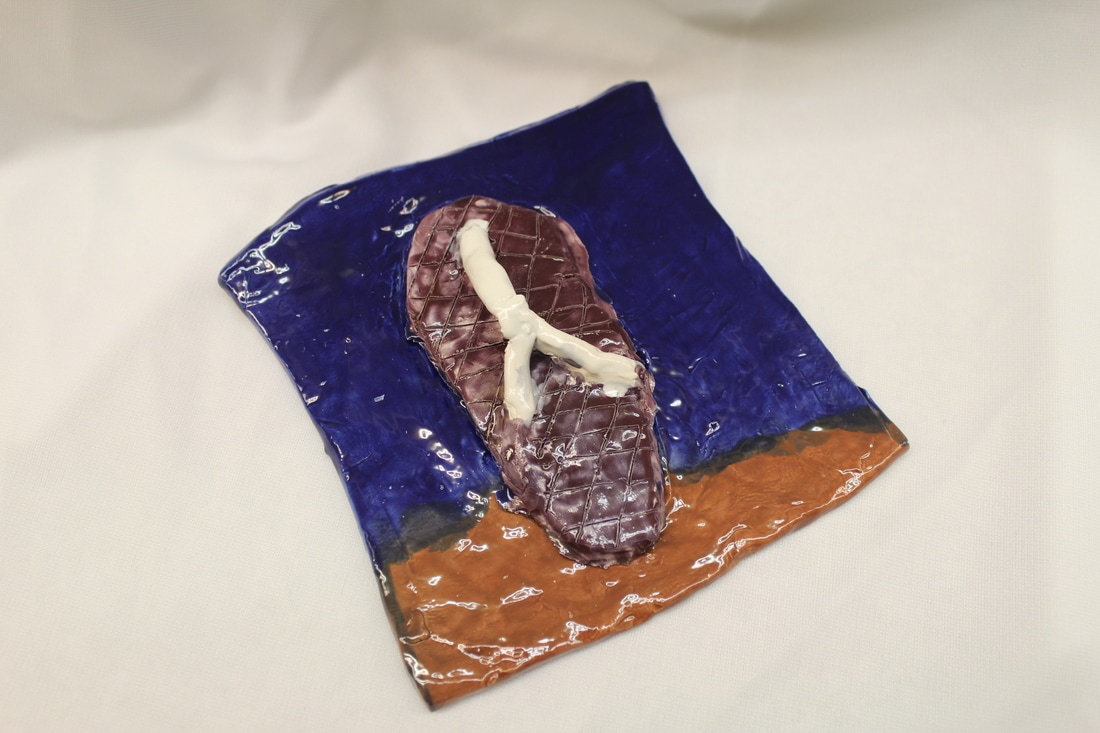
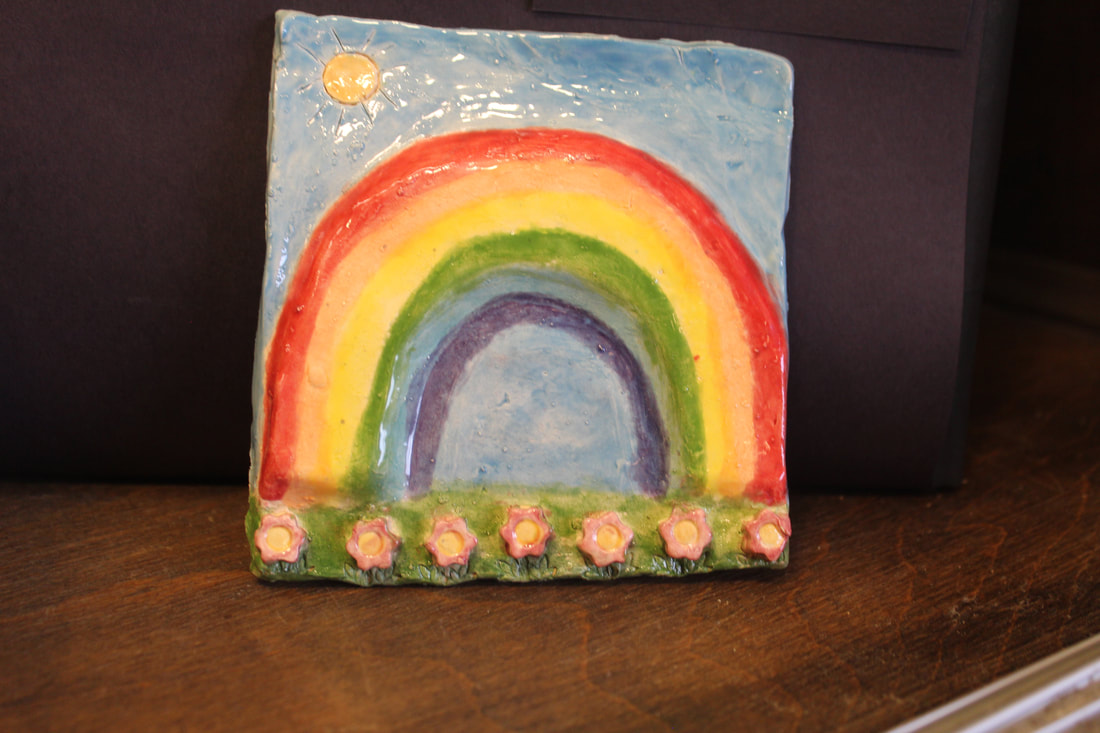
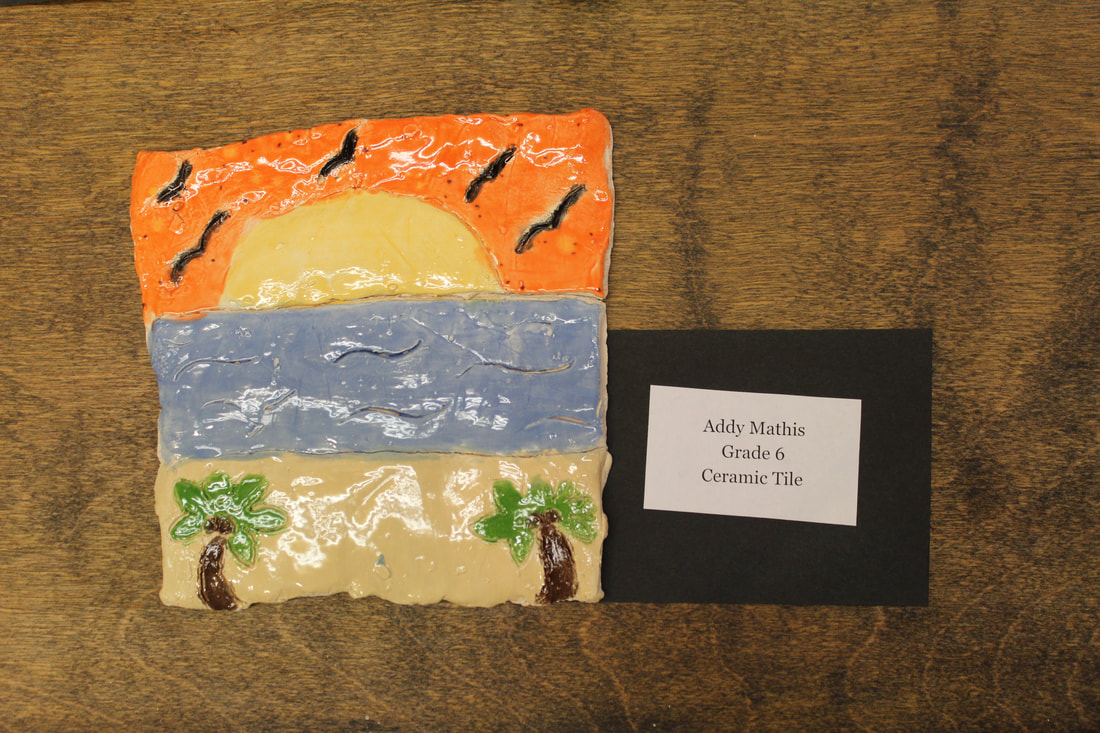
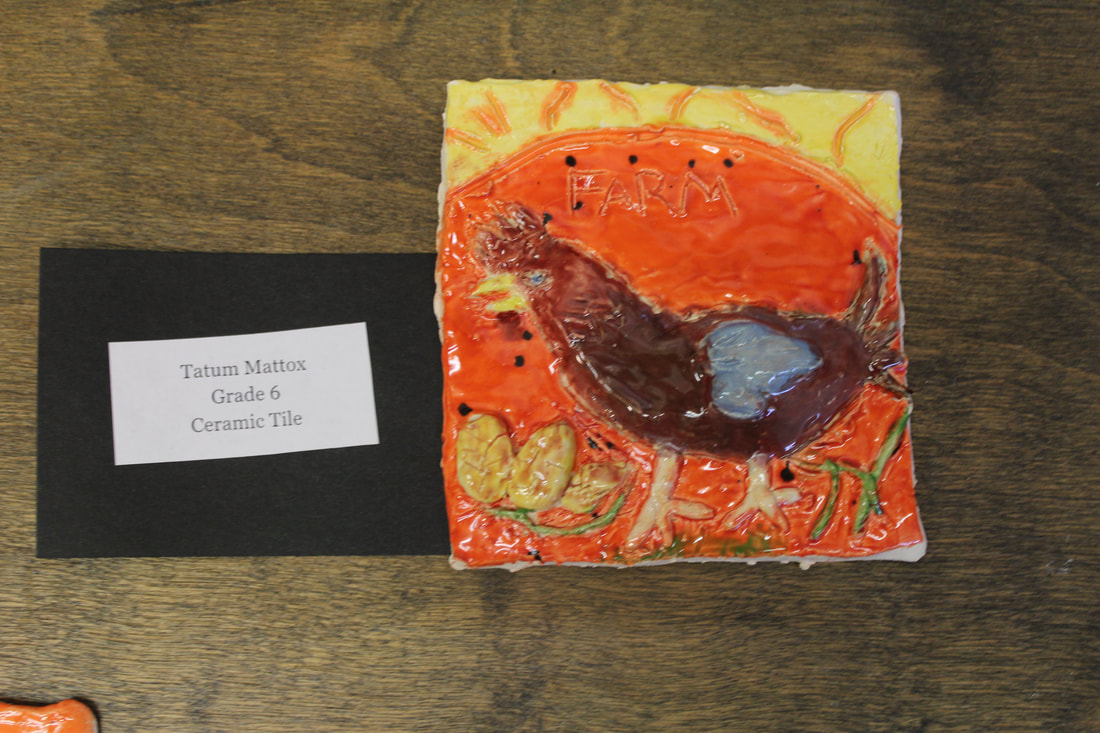
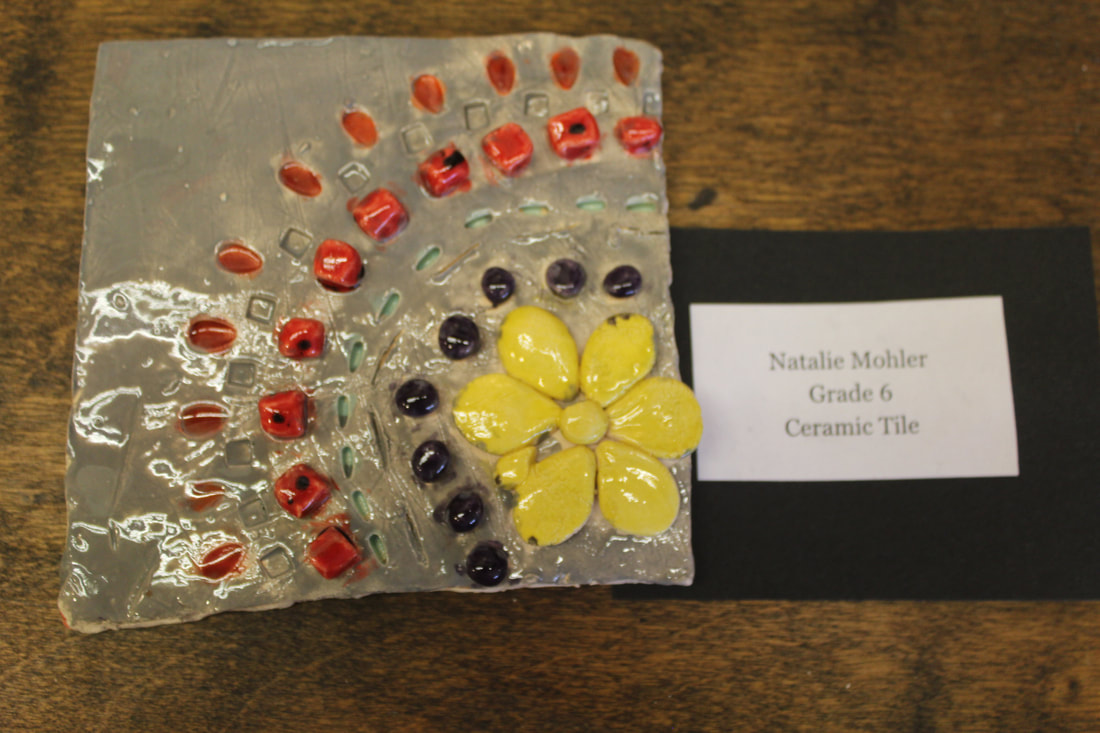
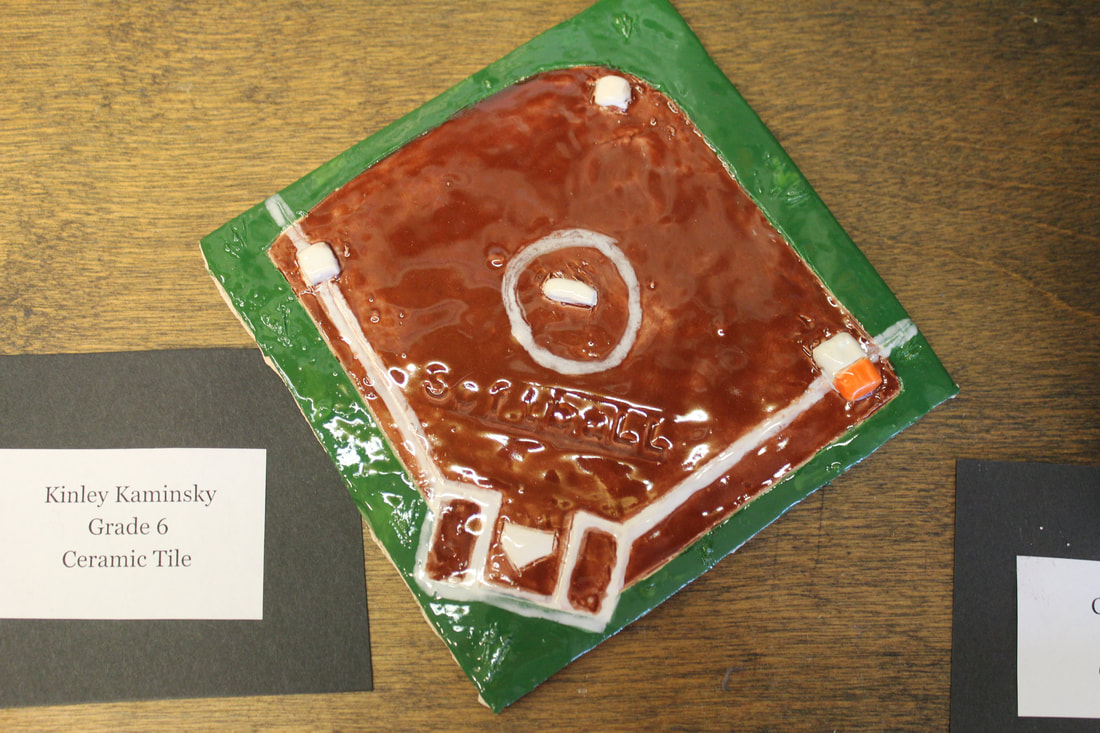
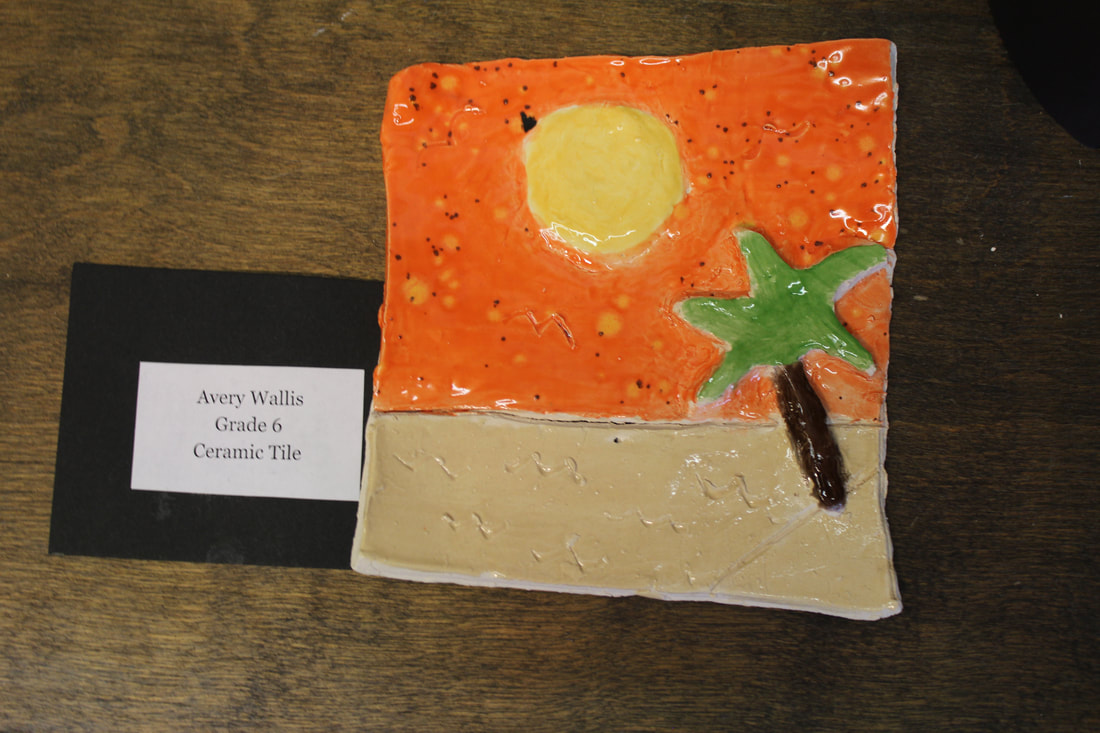
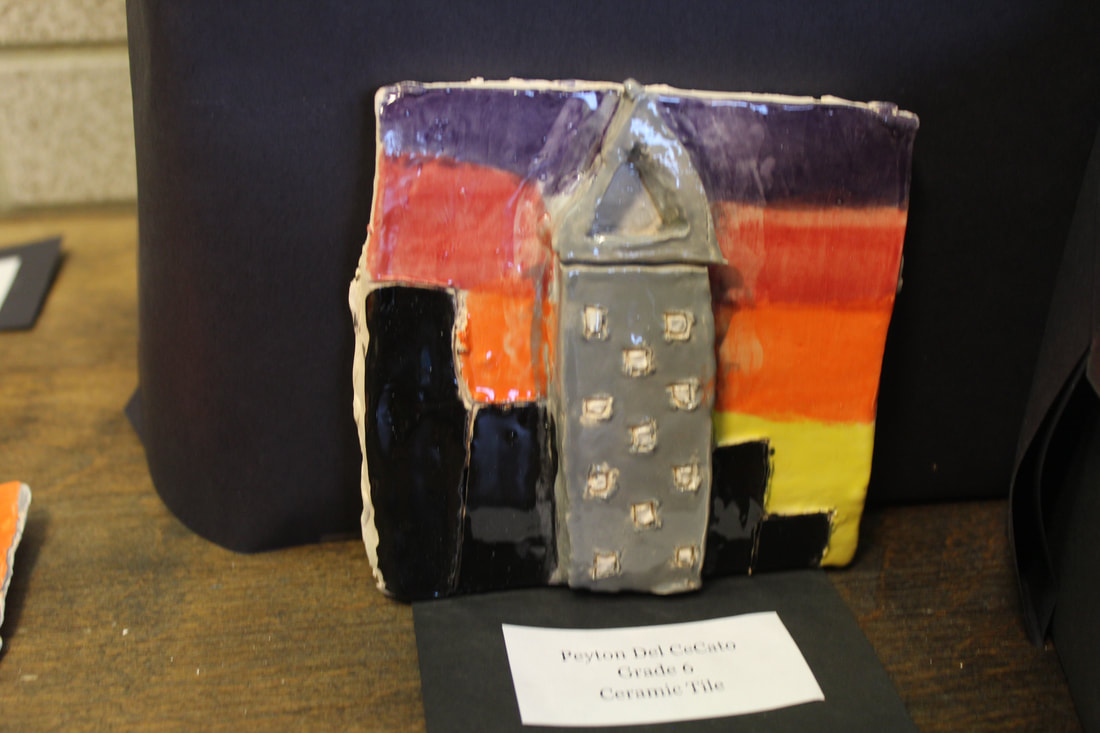
Clay tiles and Owls

|
For this unit students worked on learning how to use clay (other than model magic and air dry clay) for the first time. Students learned about the properties of clay, stages of dryness, when to build, when to carve, what tools to use, etc. Students designed their own tile with any theme that they wanted. Some of the ones you see here are "Frozen" the movie, OSU or other sports, and a basket that was made for a student's mom. Students learned the slab building technique with the tiles, and they also learned the pinch pot technique to build clay owls, also designed how they wanted, some even got a mustache.
|


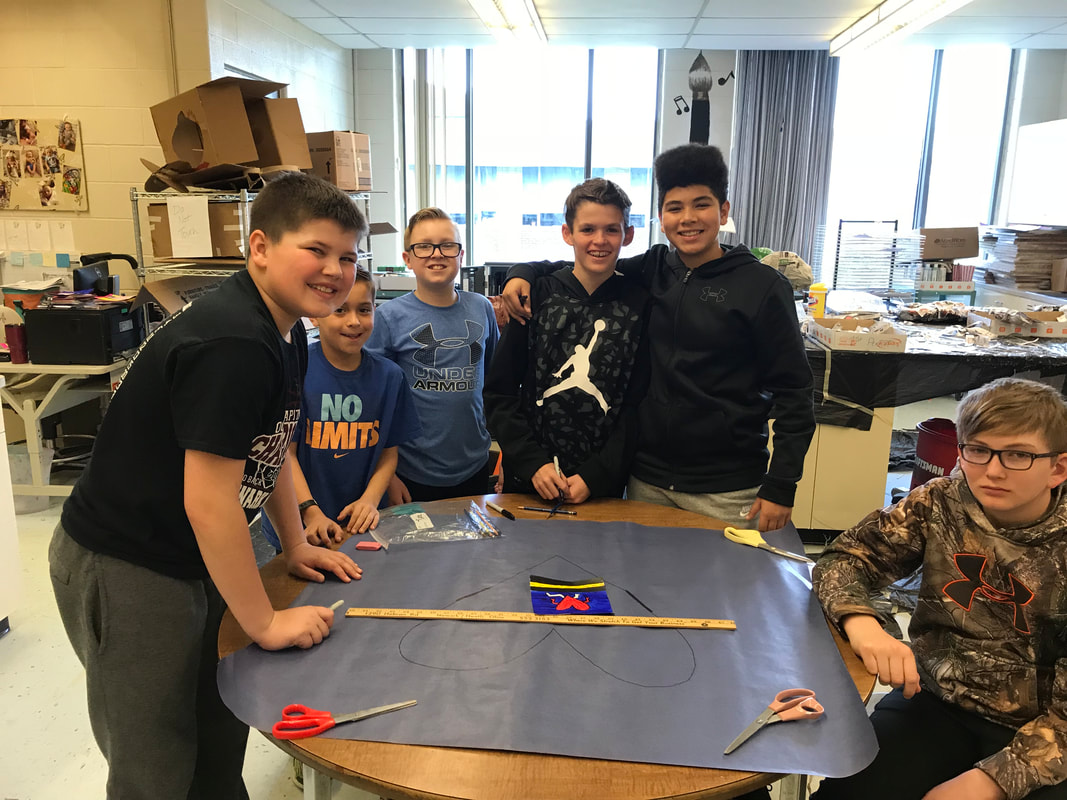
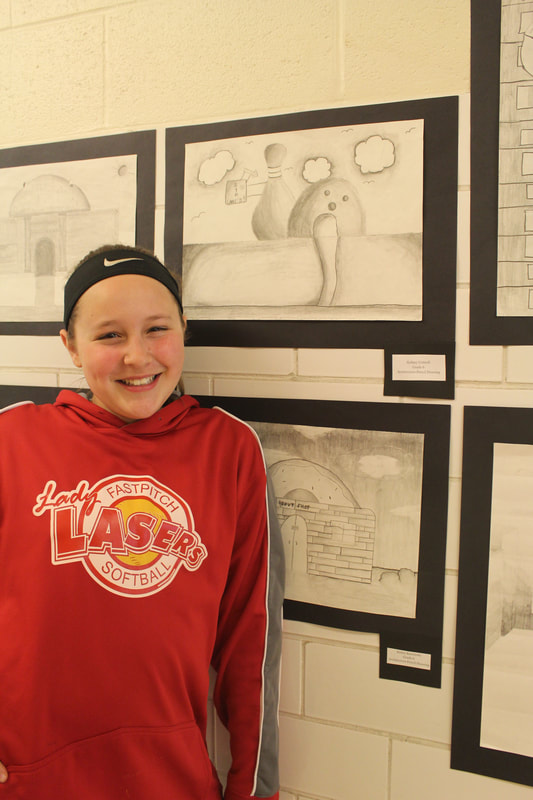
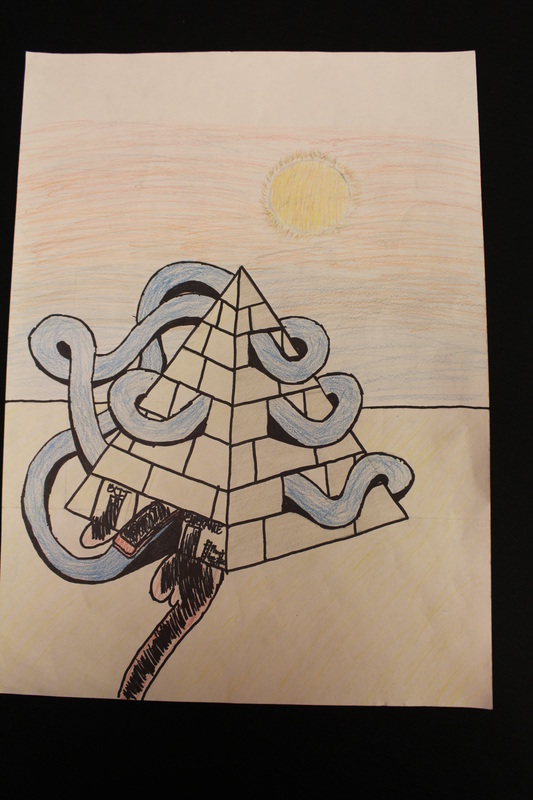
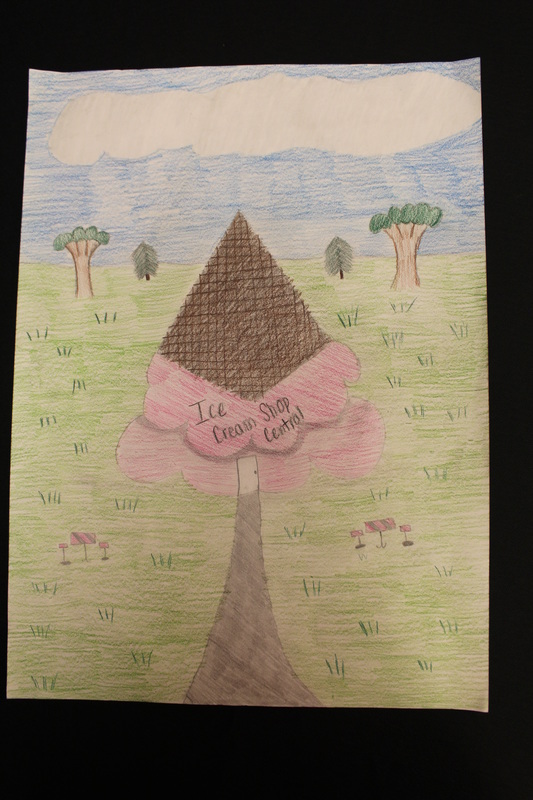
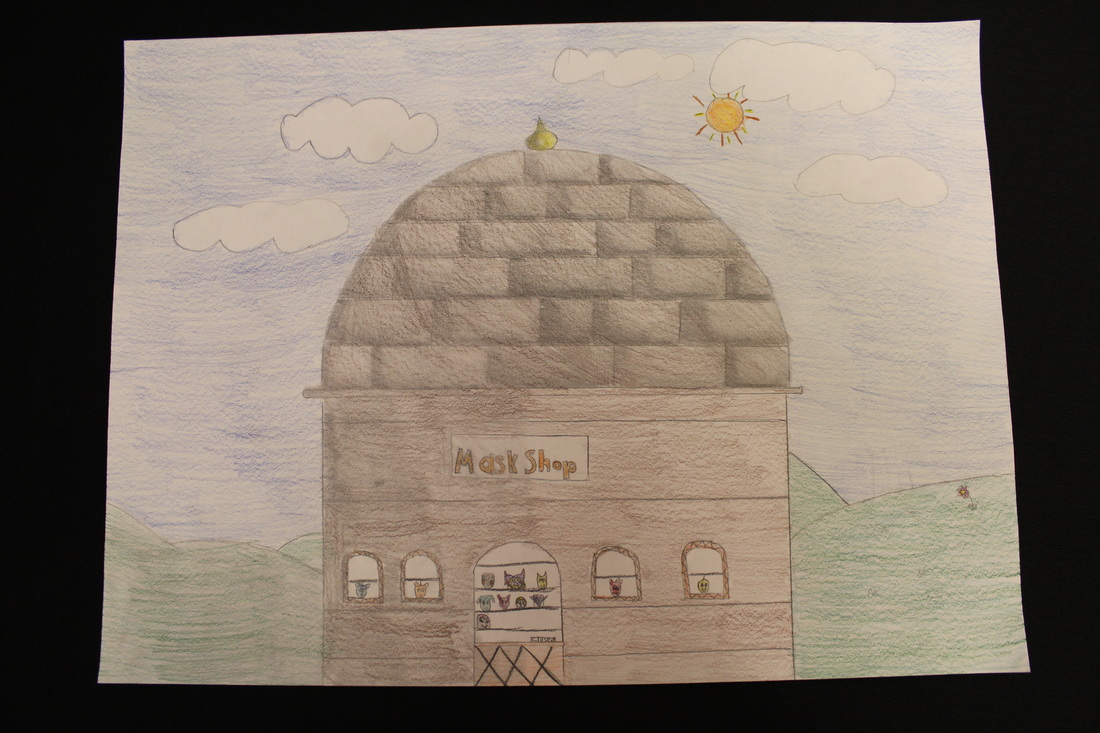
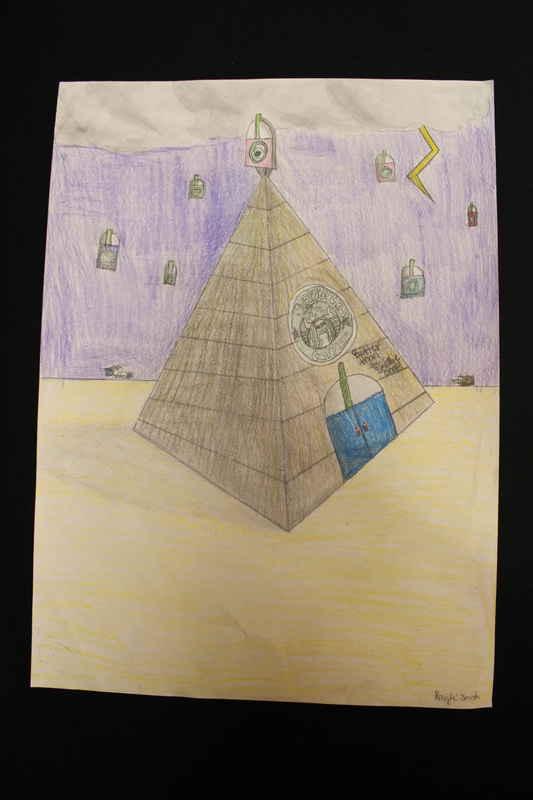
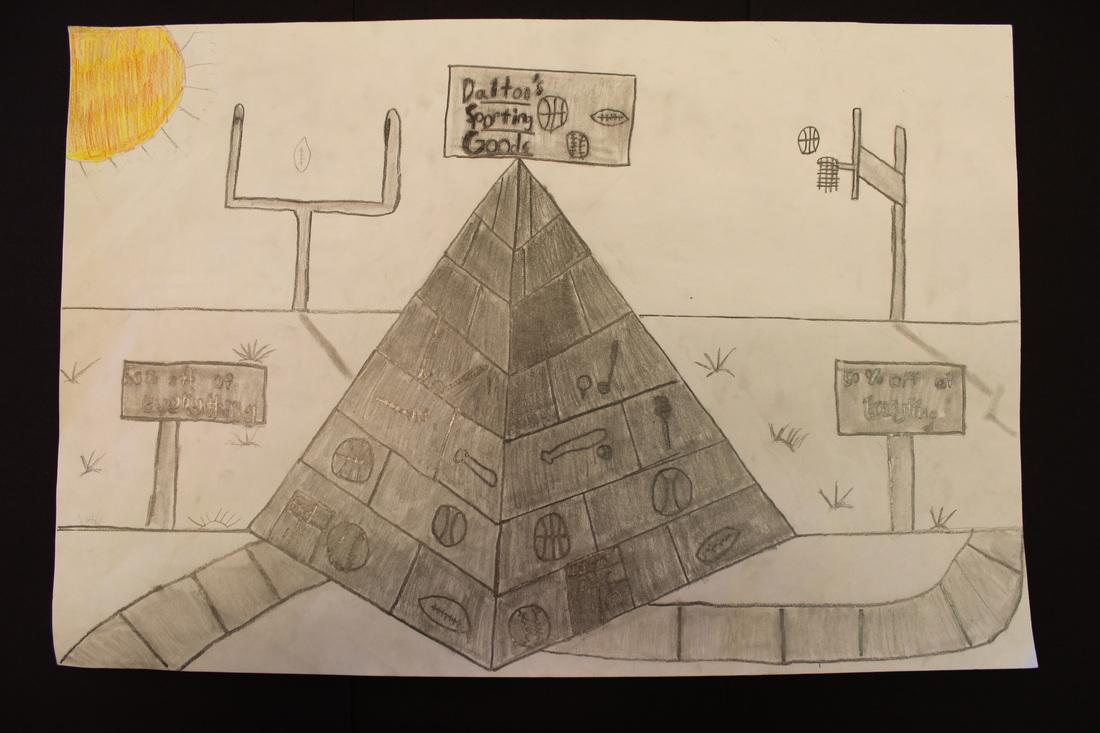
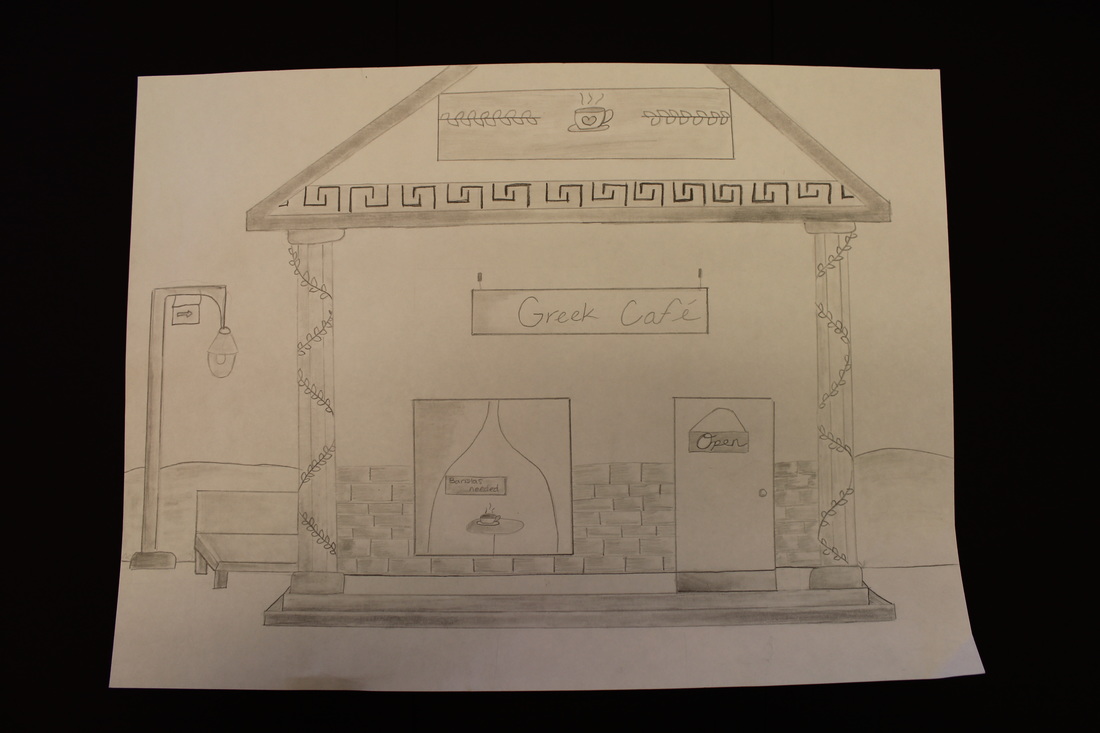
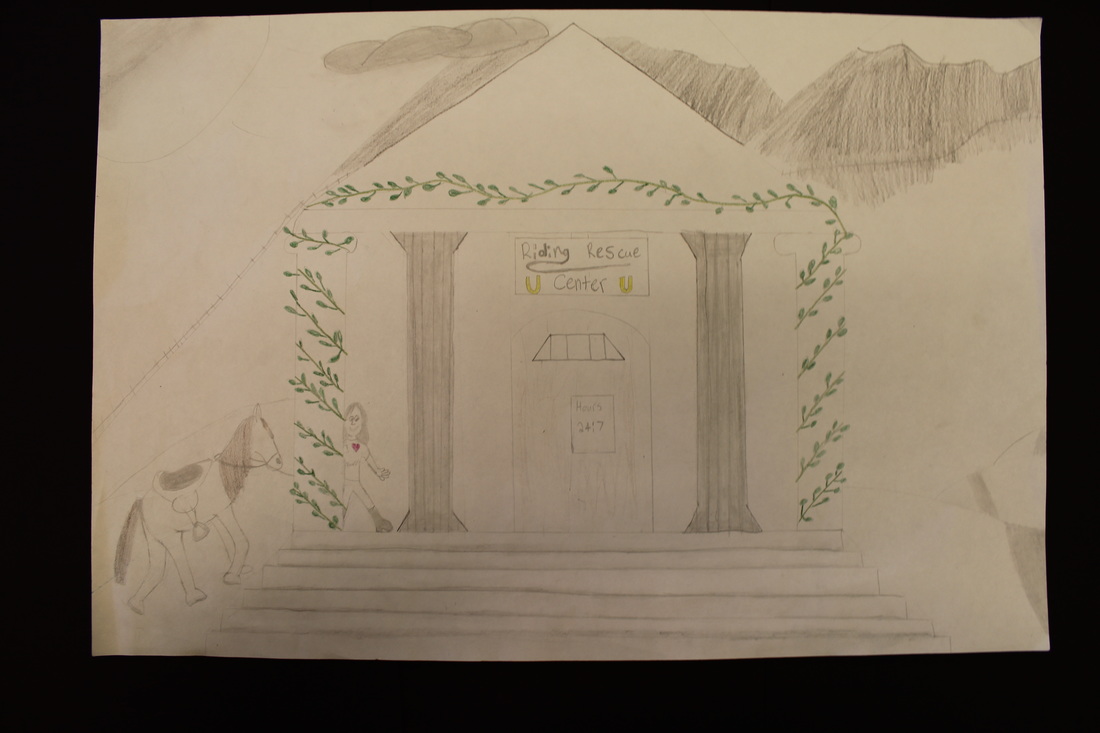
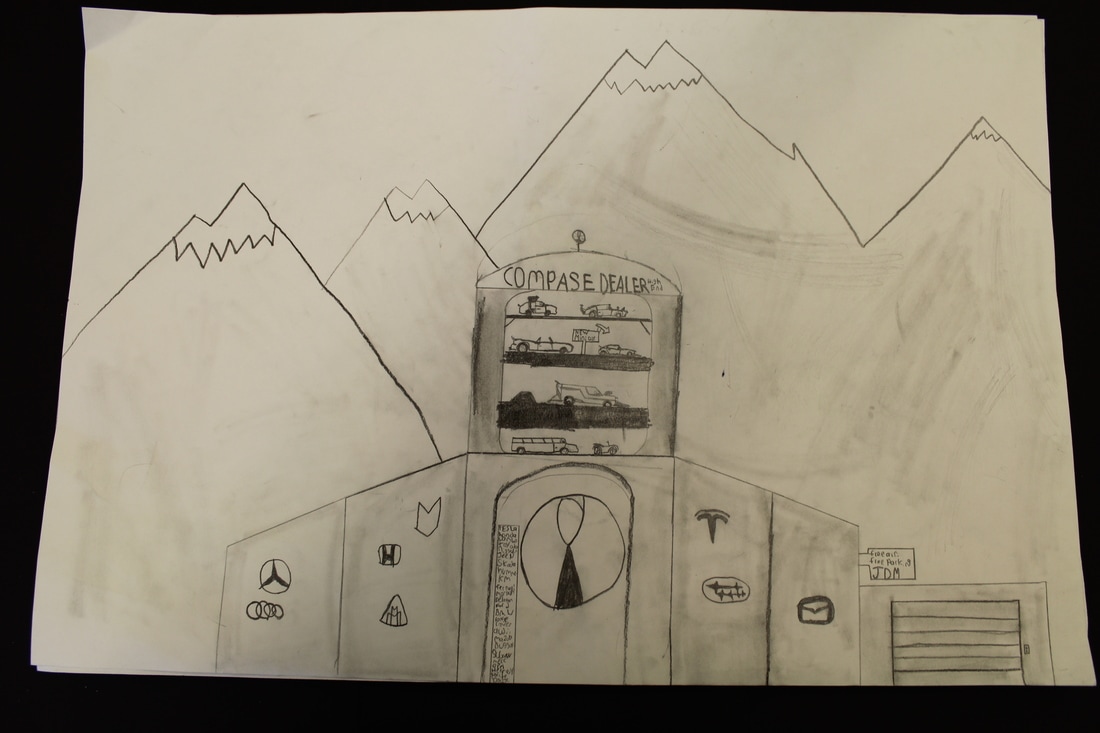
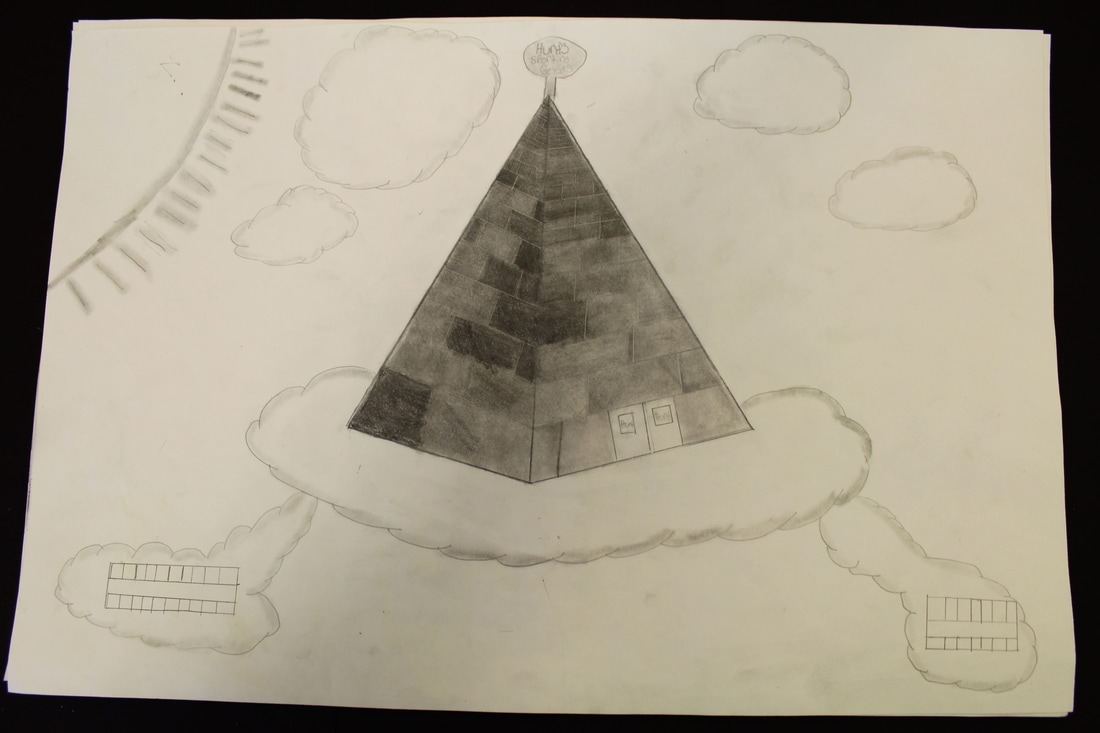
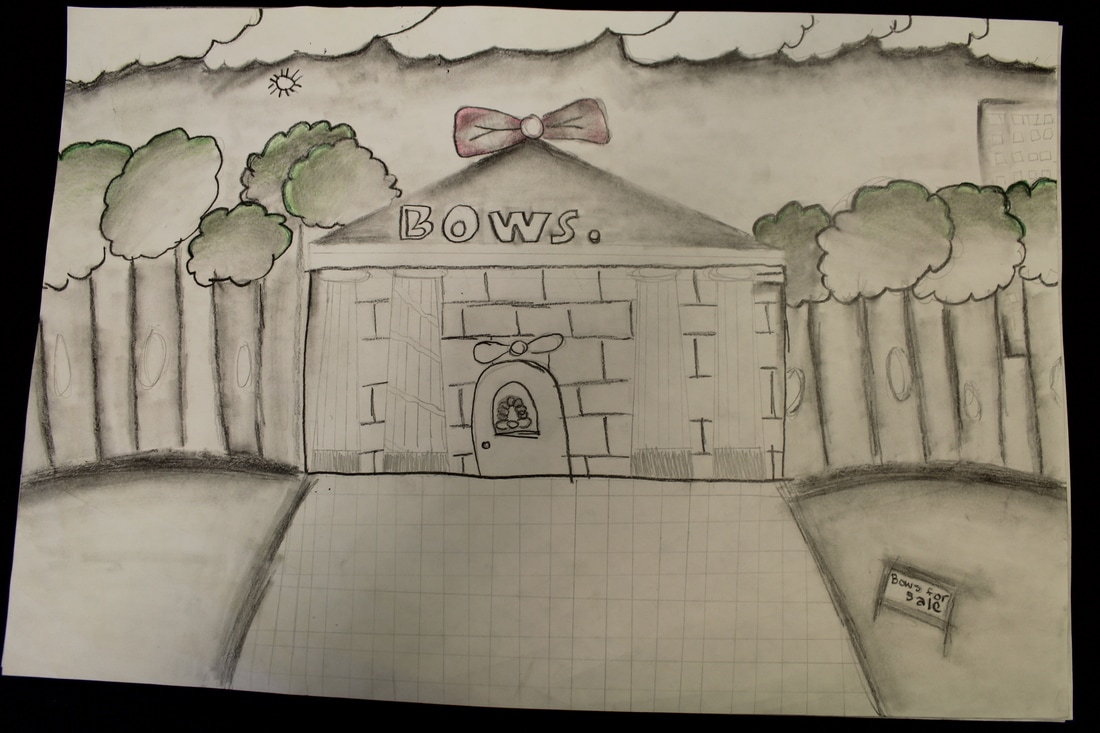
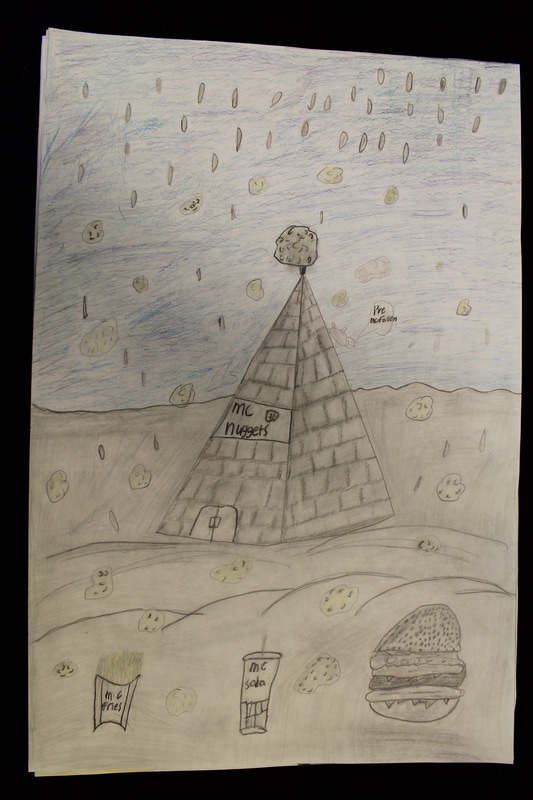
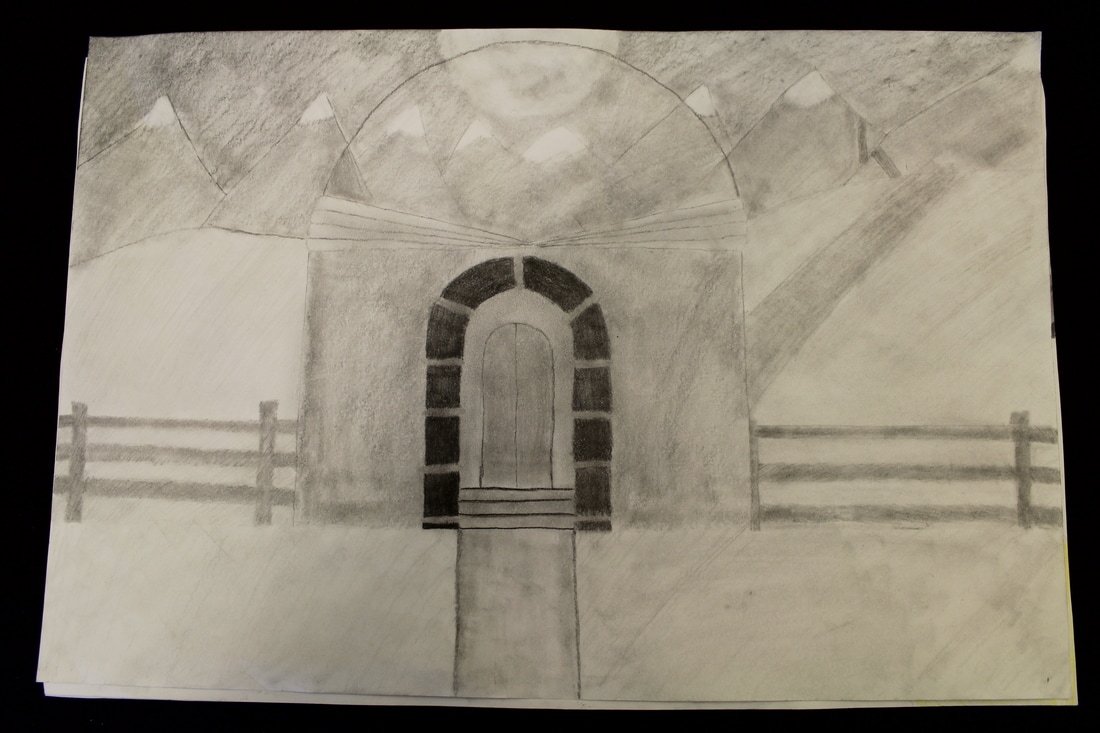
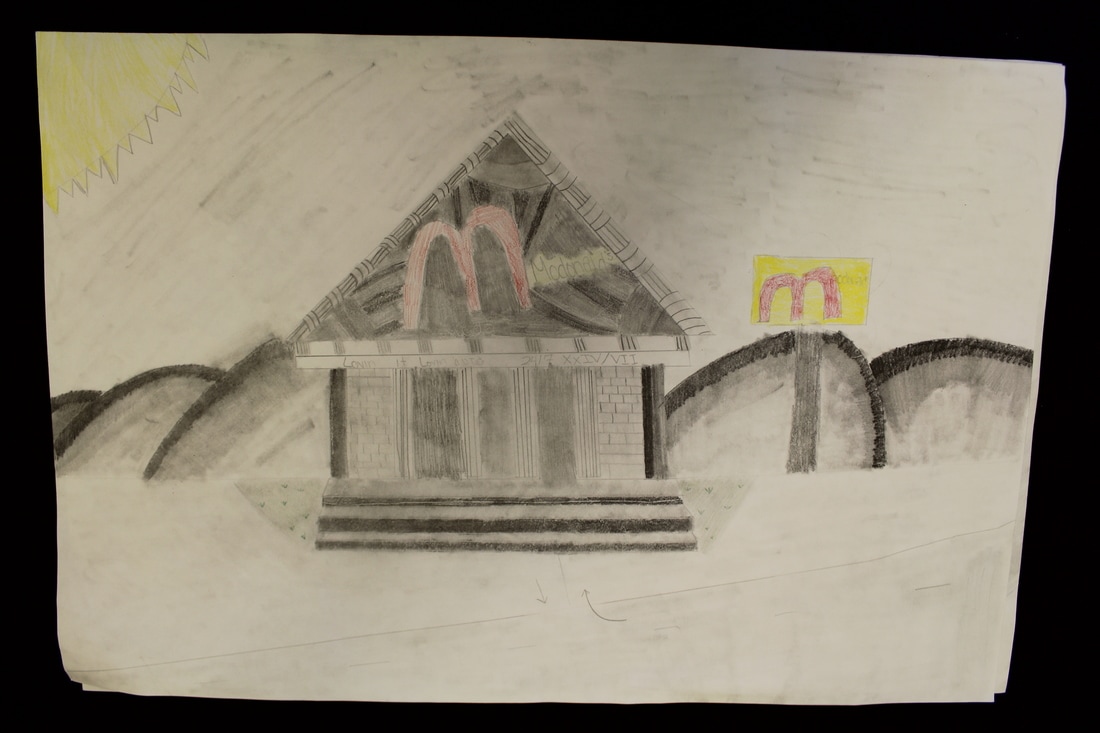
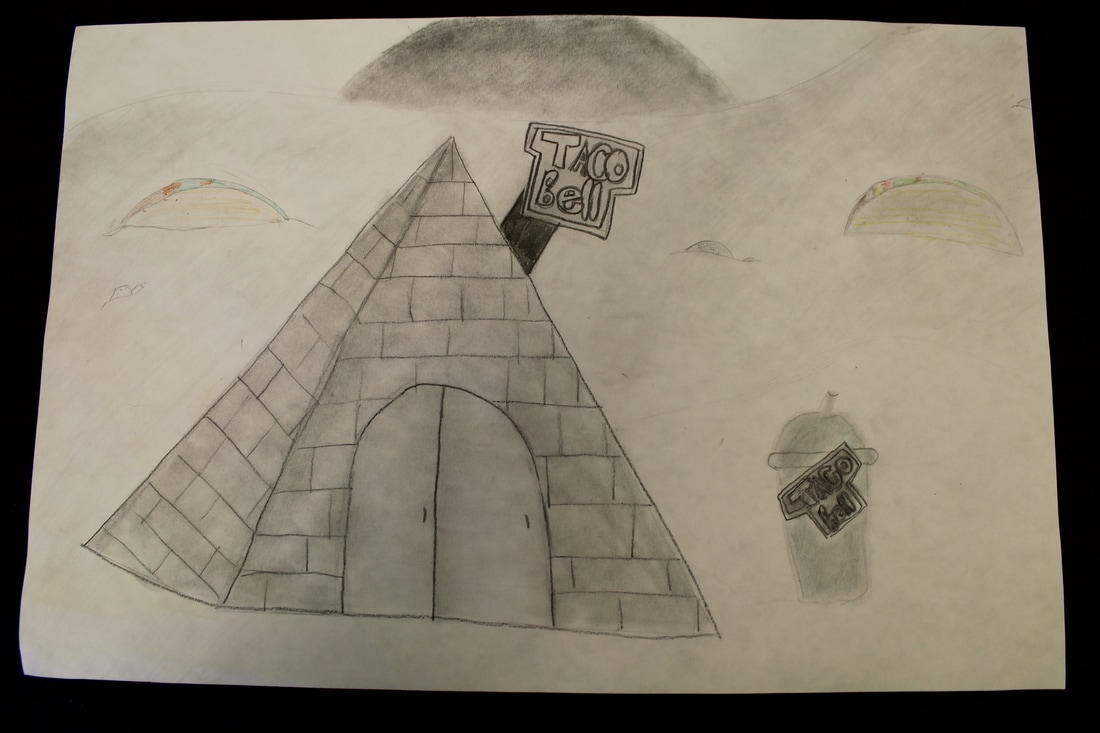
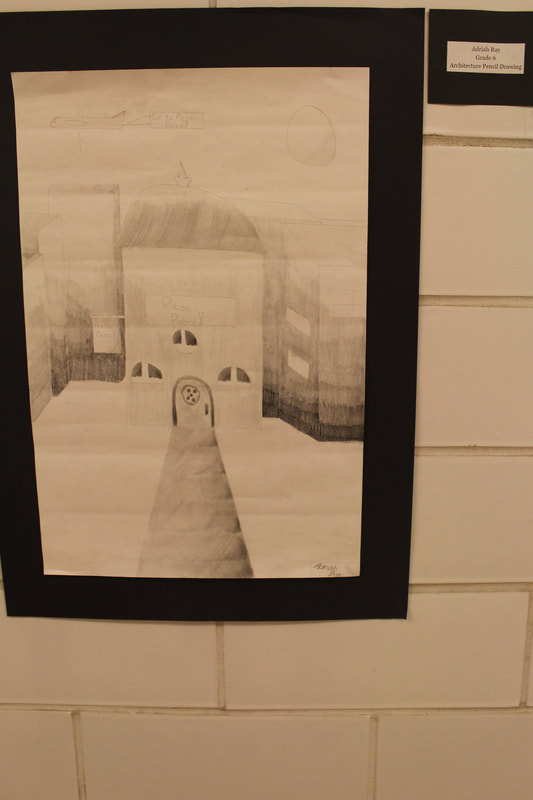
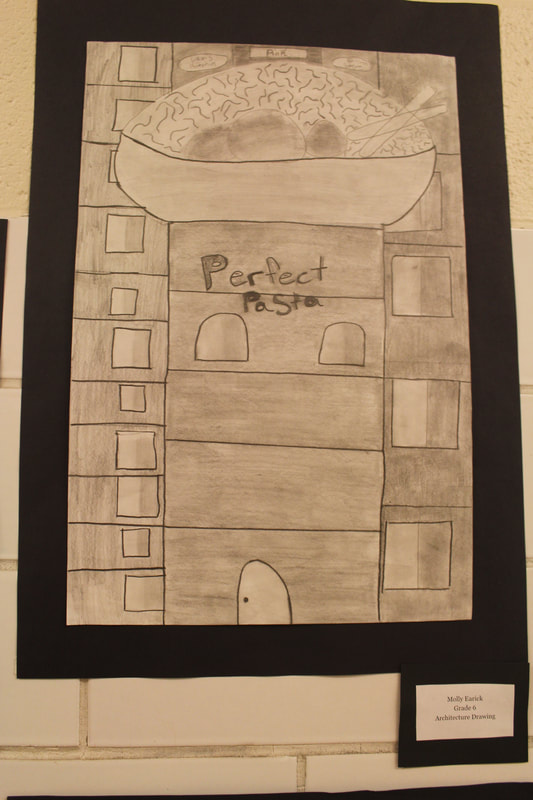
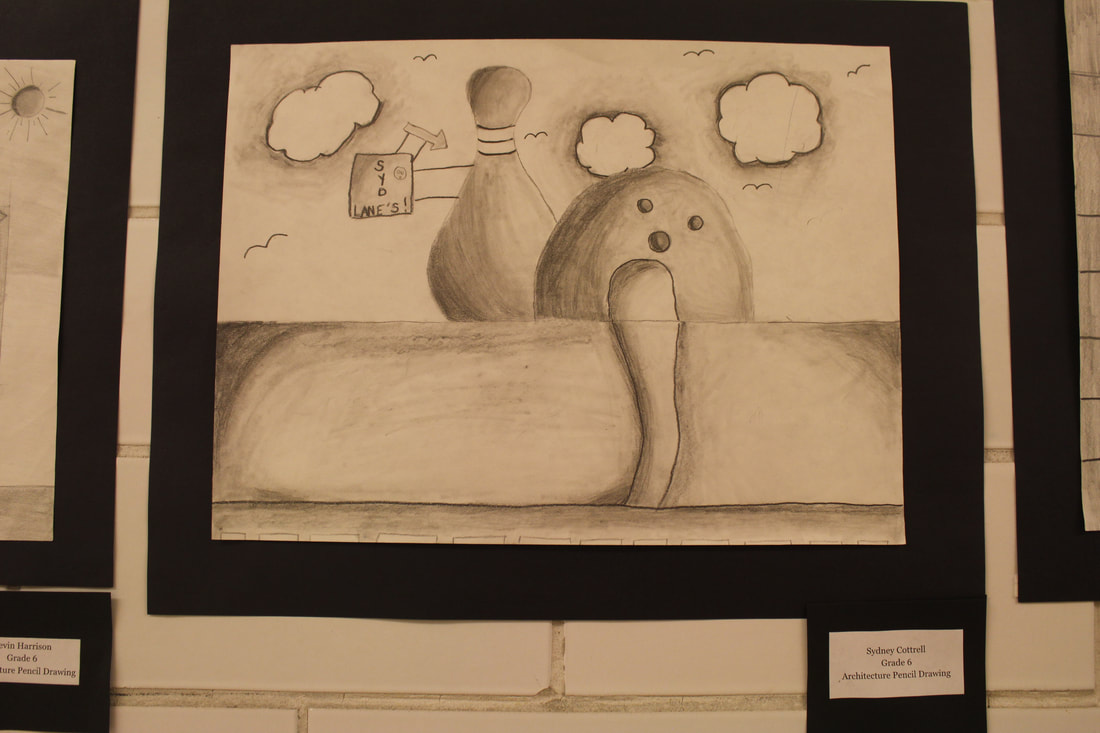
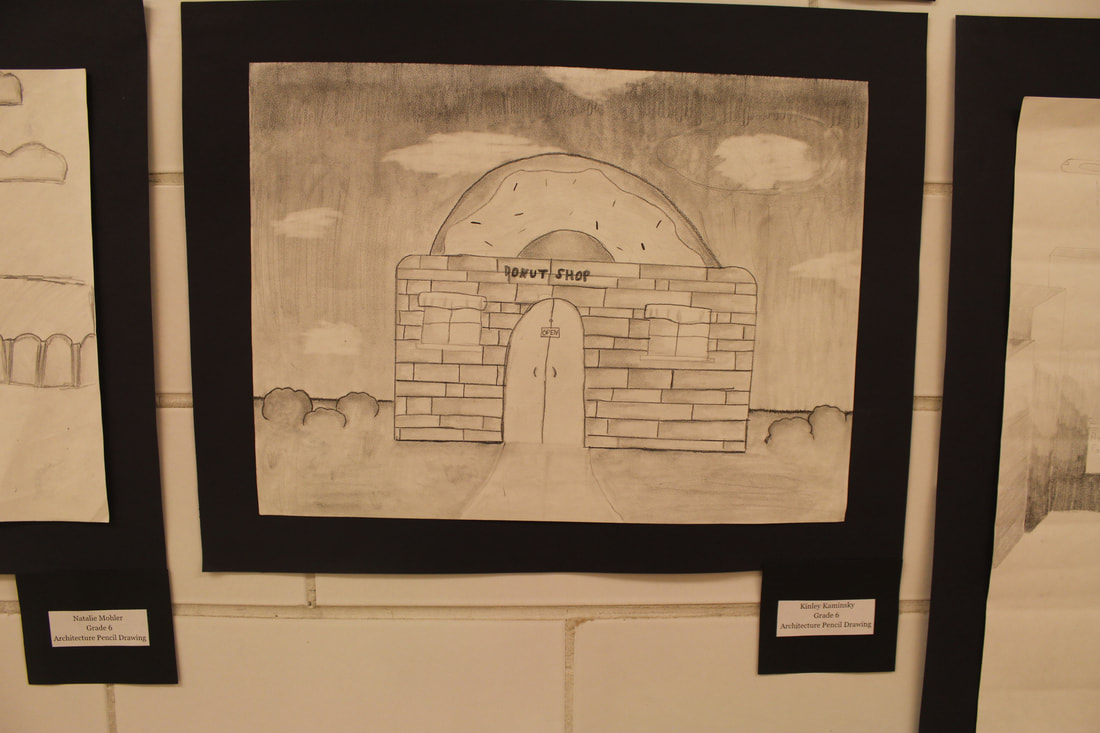
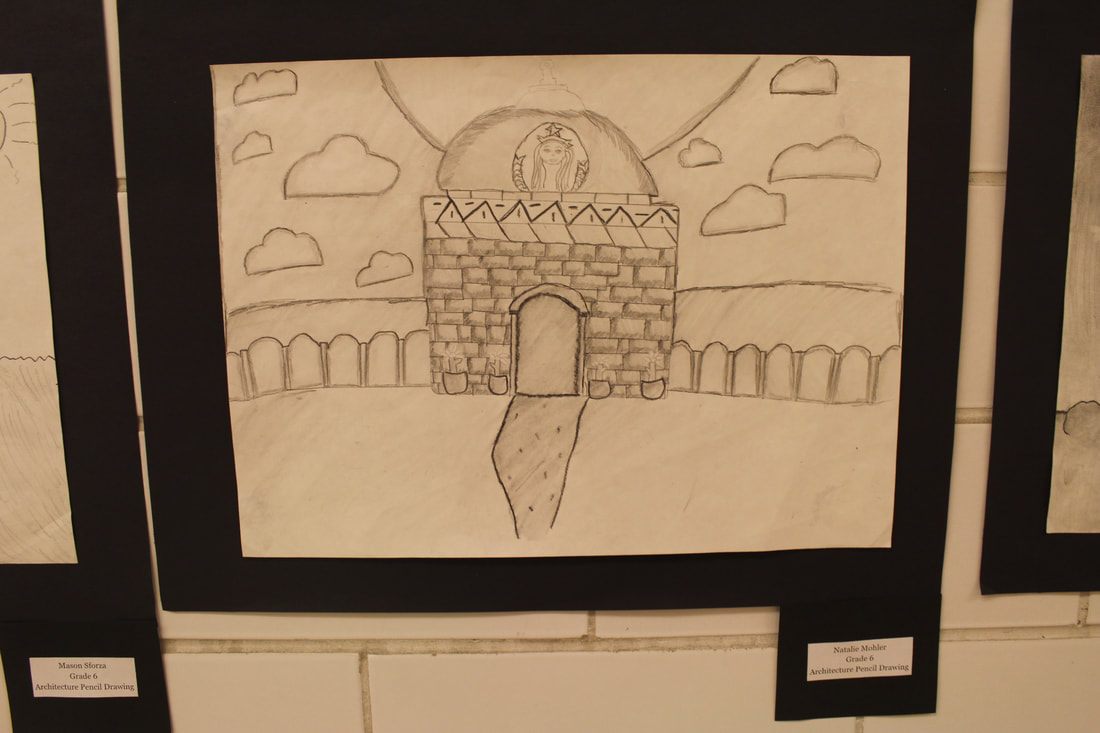
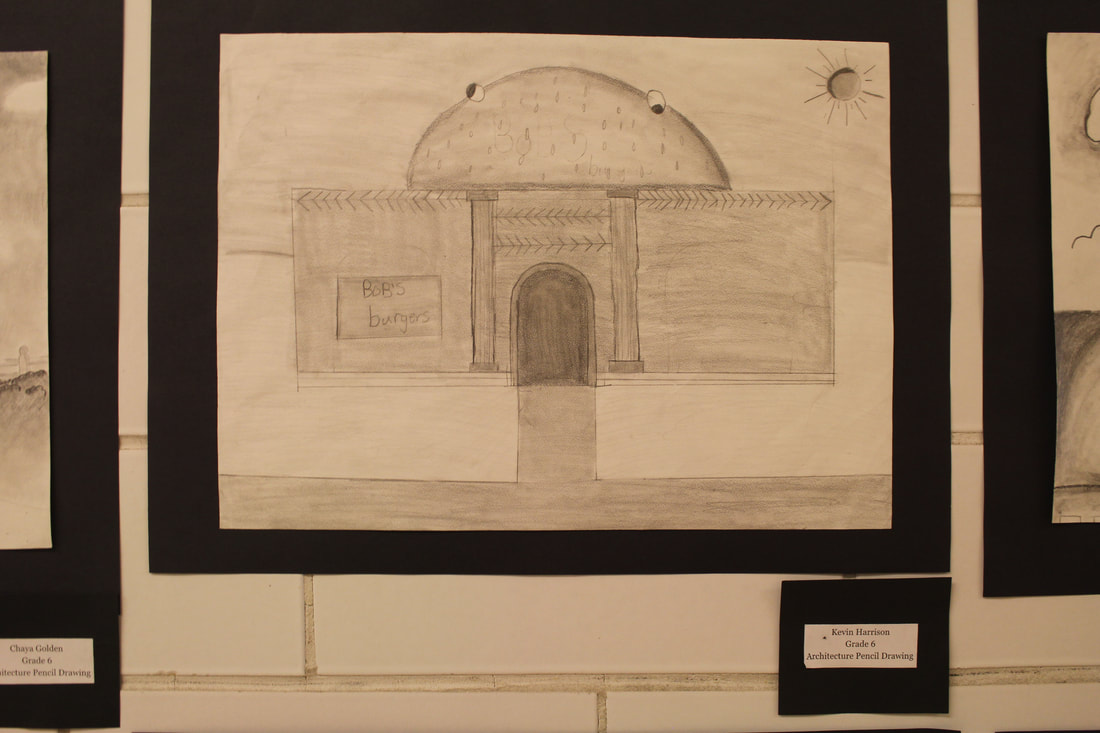
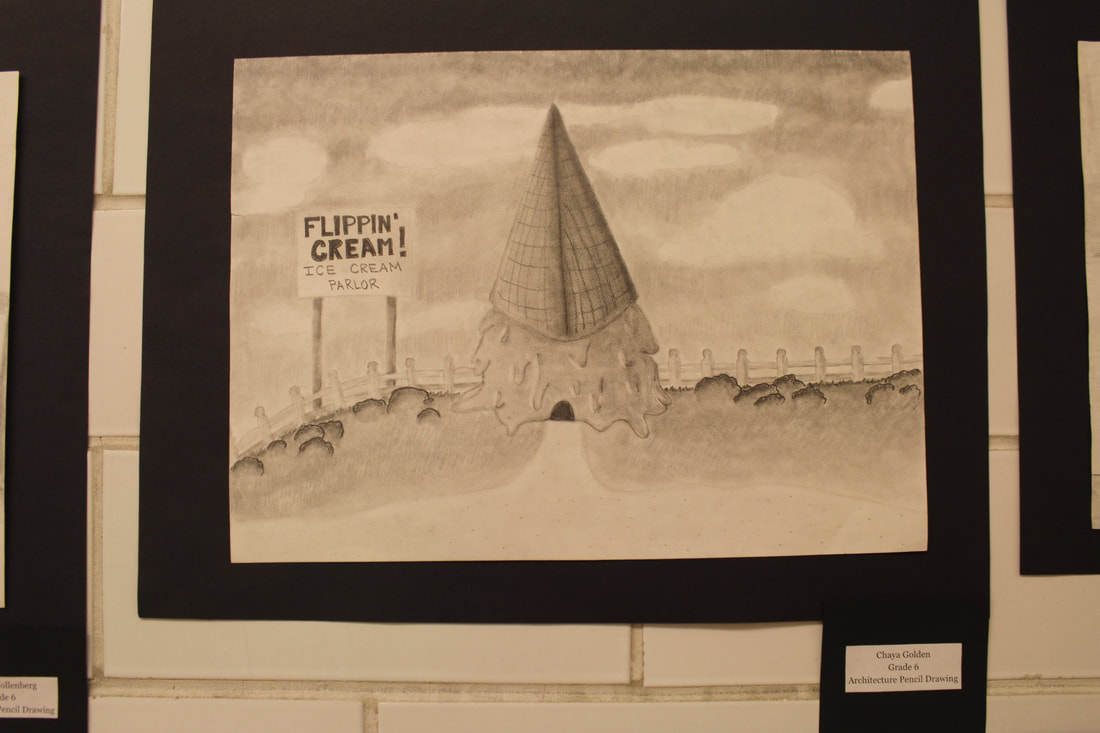
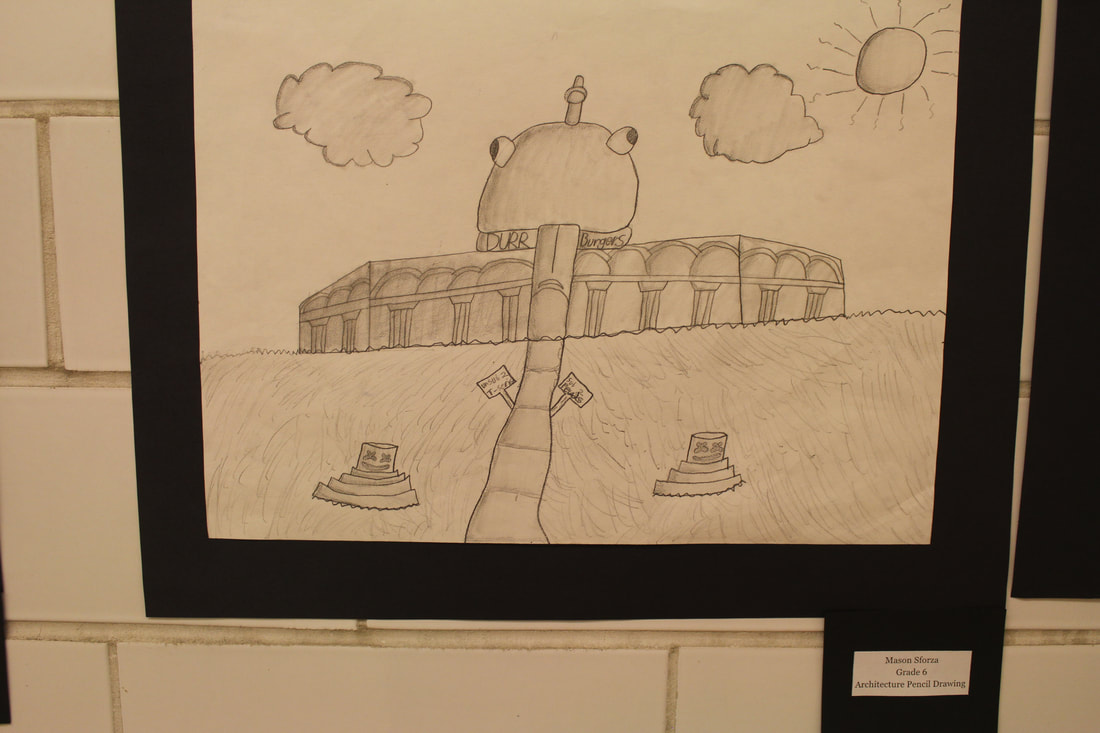
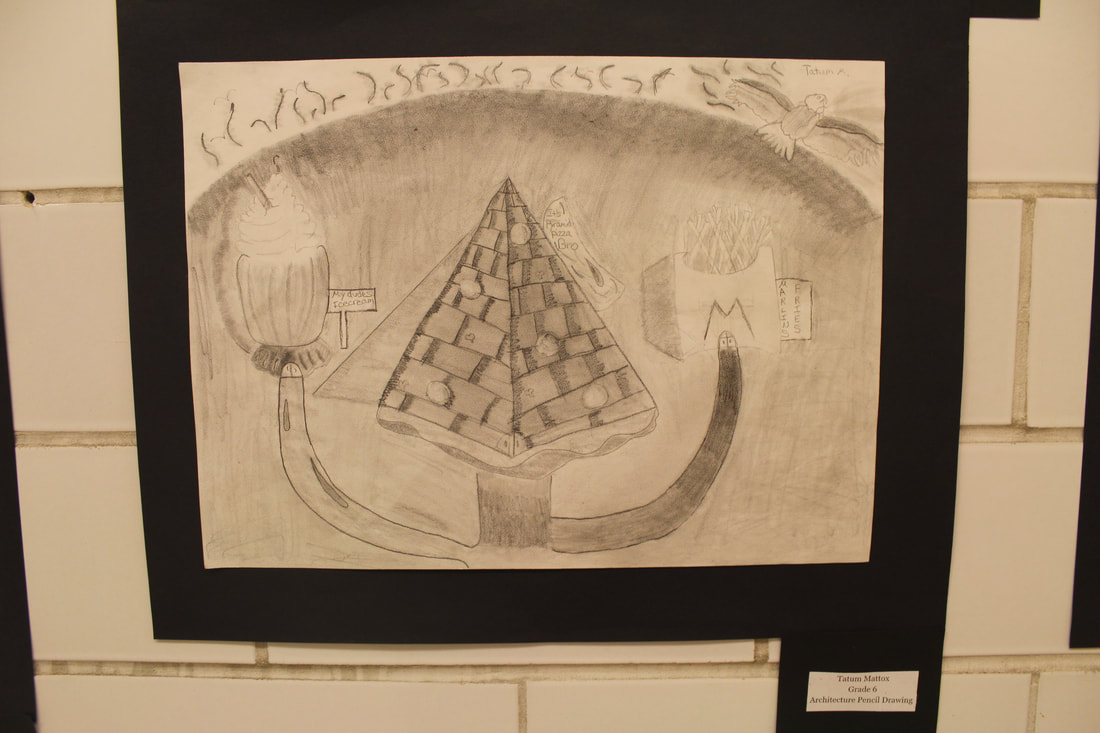
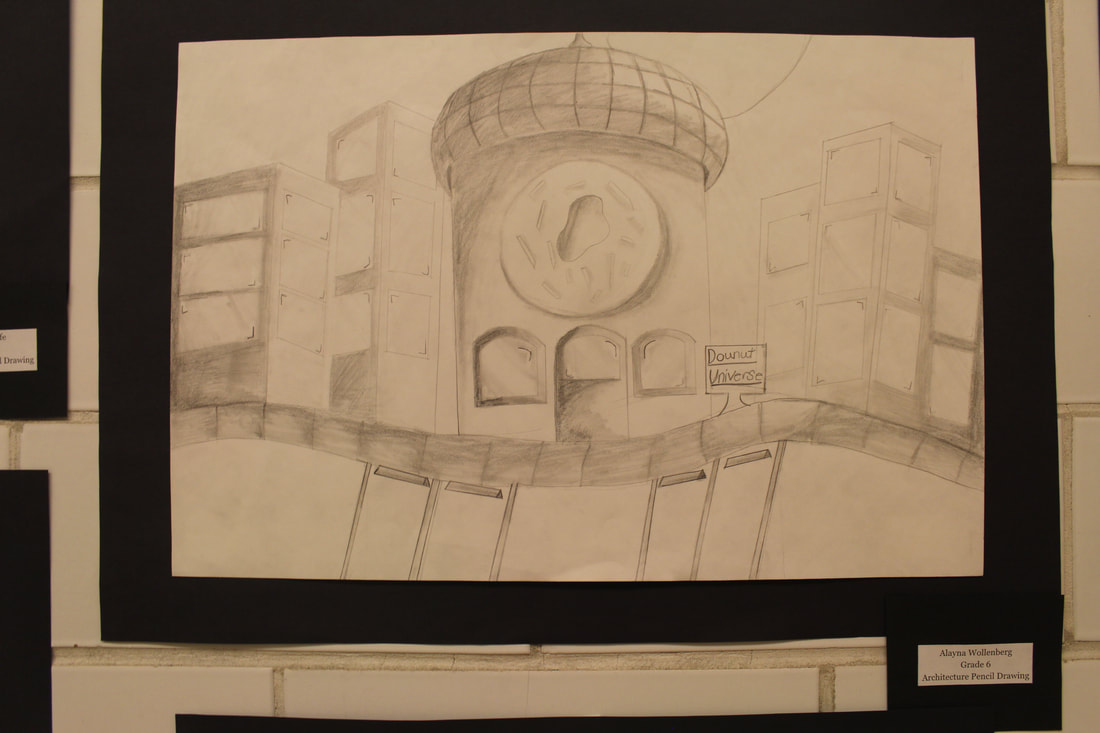
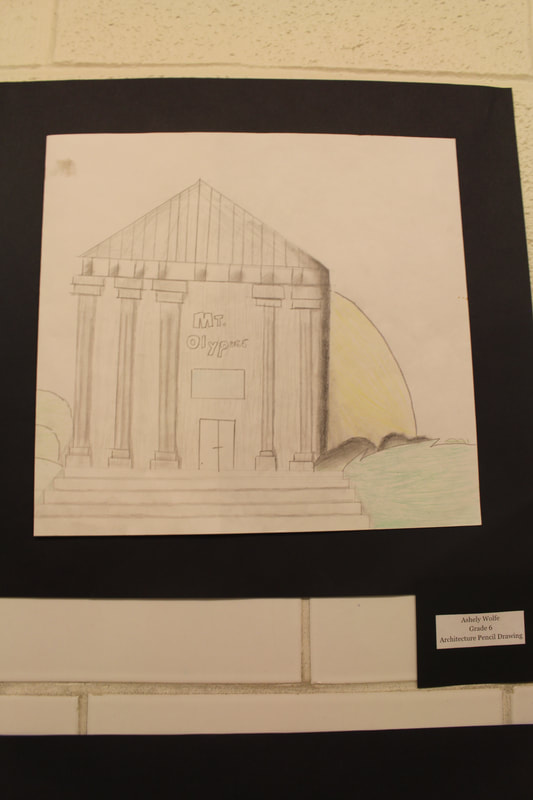
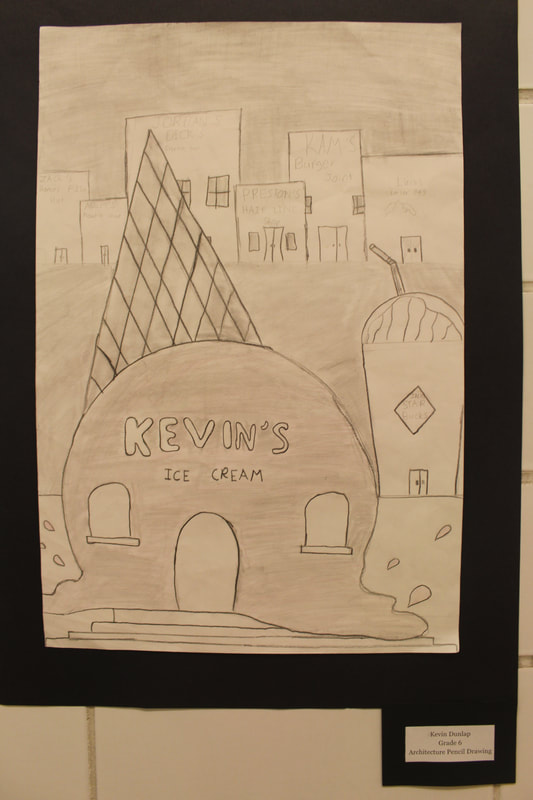
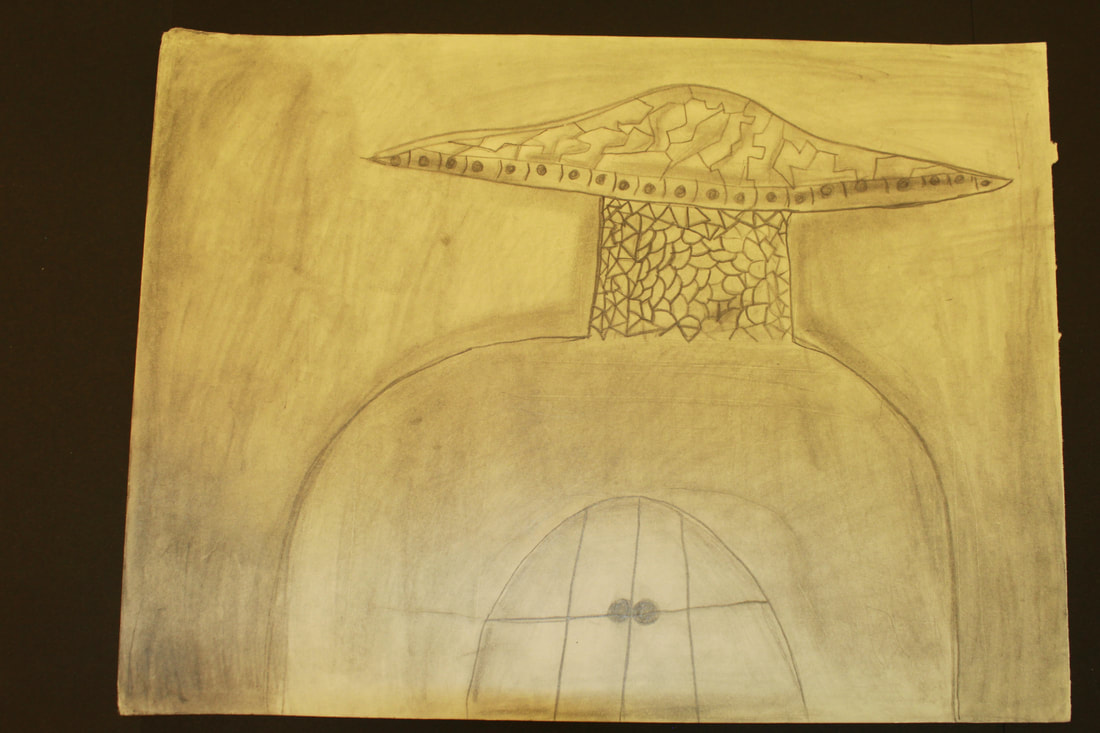
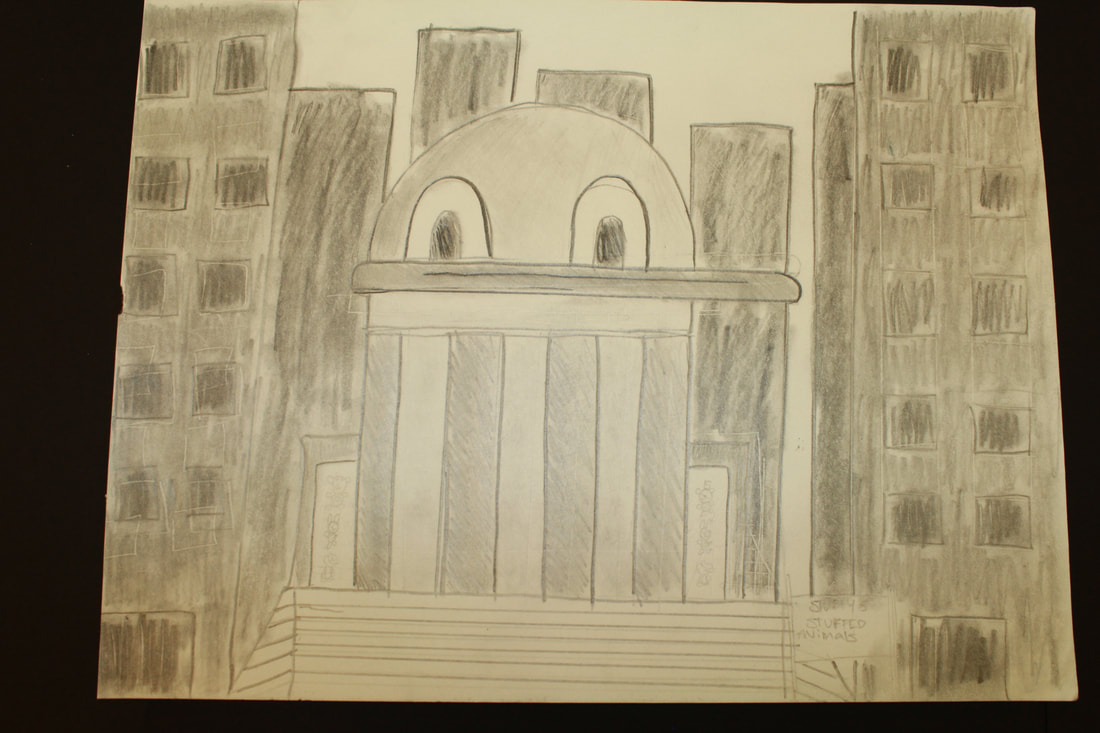
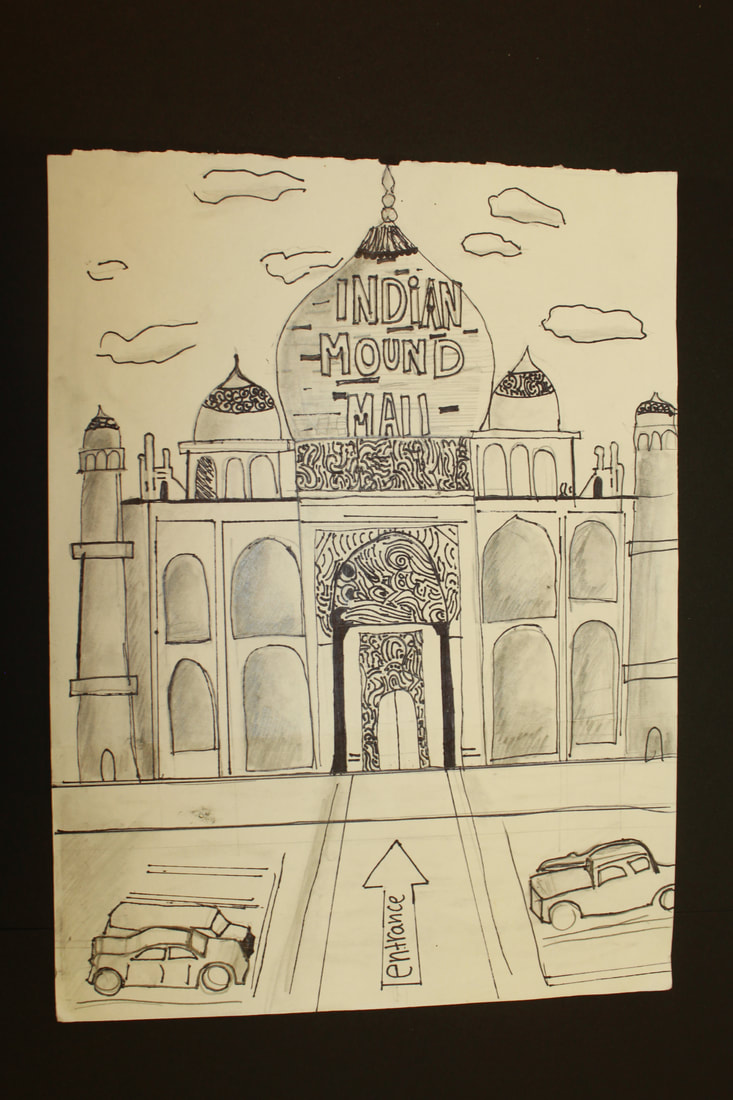
Architecture unit

For this unit students learned about three main ancient architecture types: Greek, Indian (or Islamic) and Egyptian. We talked about how ancient Roman/Greek architects would build their buildings on high ground so they often included steps and they also used columns built in the post and lintel style. Then we talked about Egyptian architecture and how the building style was often a pyramid. The Egyptians mimicked the shape of their ancient stone called the Ben-Ben which was triangular. They also built the structures tall because they believed it made them closer to their gods. Finally we talked about ancient Islamic/Indian architecture and how the buildings often contained horseshoe shaped arches and domes. After learning about the different types of ancient architecture we watched a few videos on Egyptian and Greek artwork and took a virtual tour of Dome of the Rock and the Great Pyramids of Giza. Then students set out to pick one of those ancient types of architectures to base their own building design off of. They turned out great!
|
|


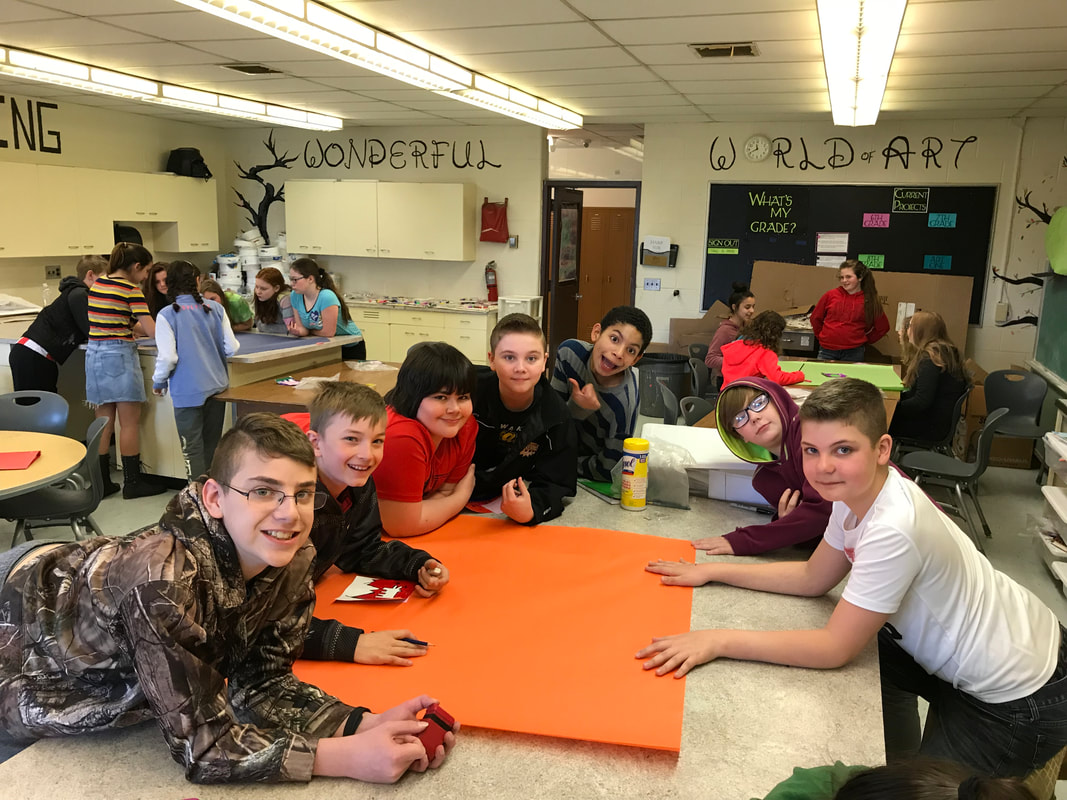
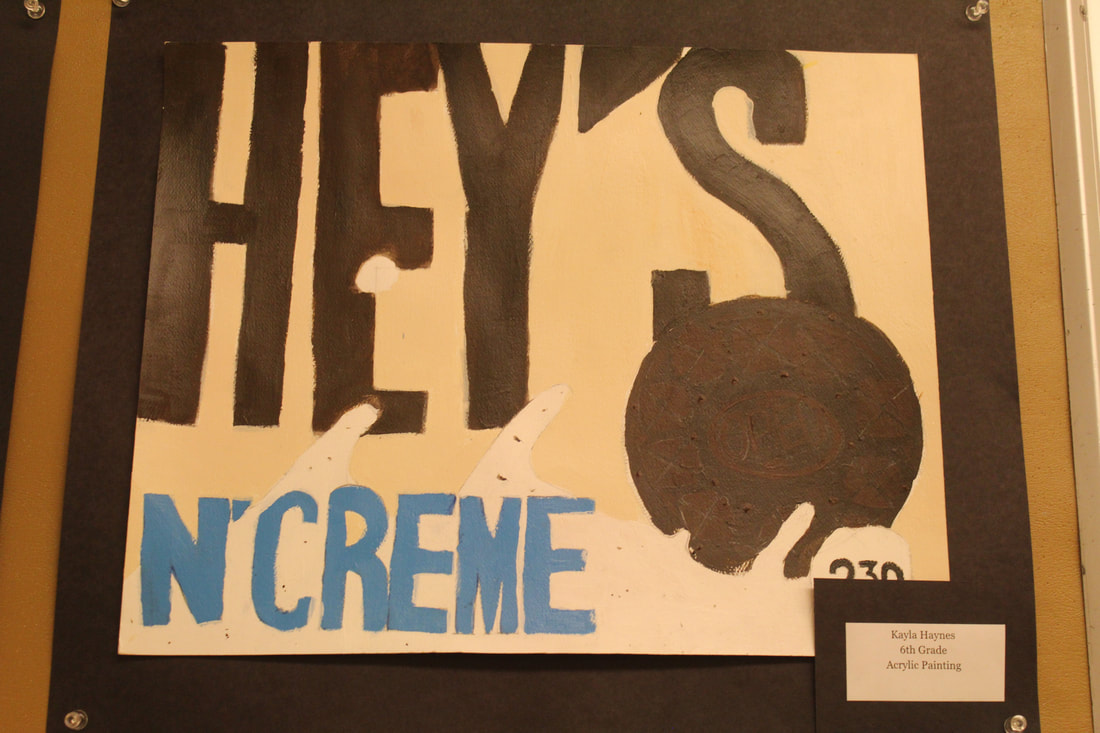
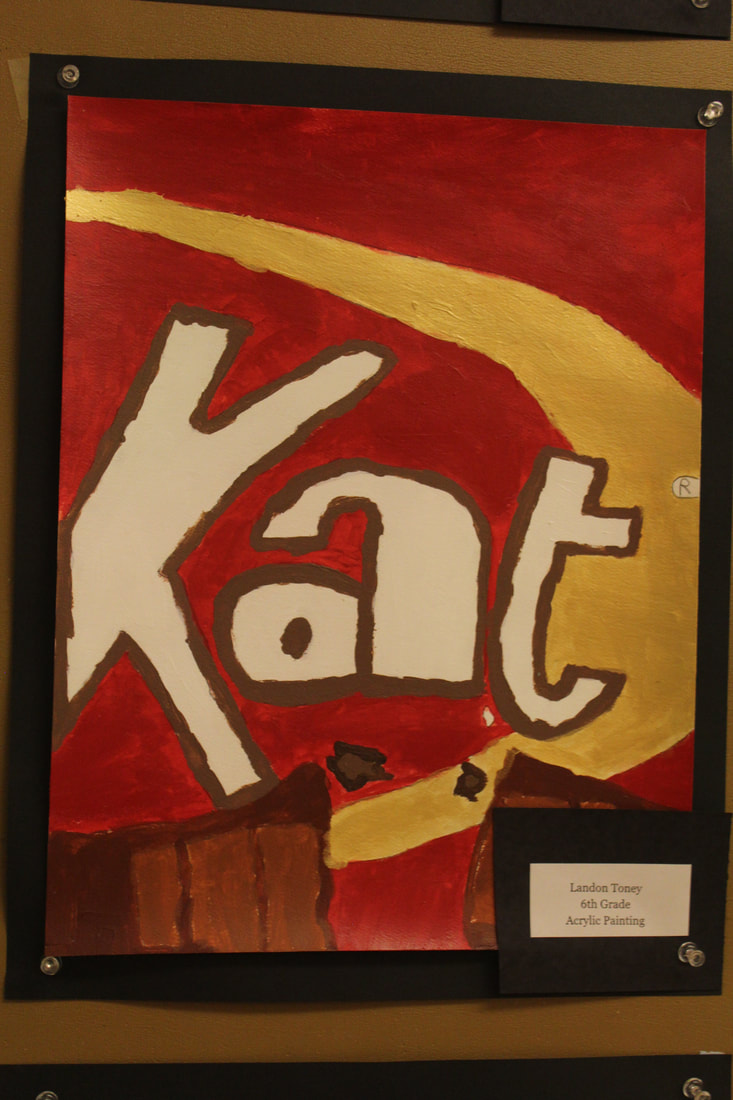
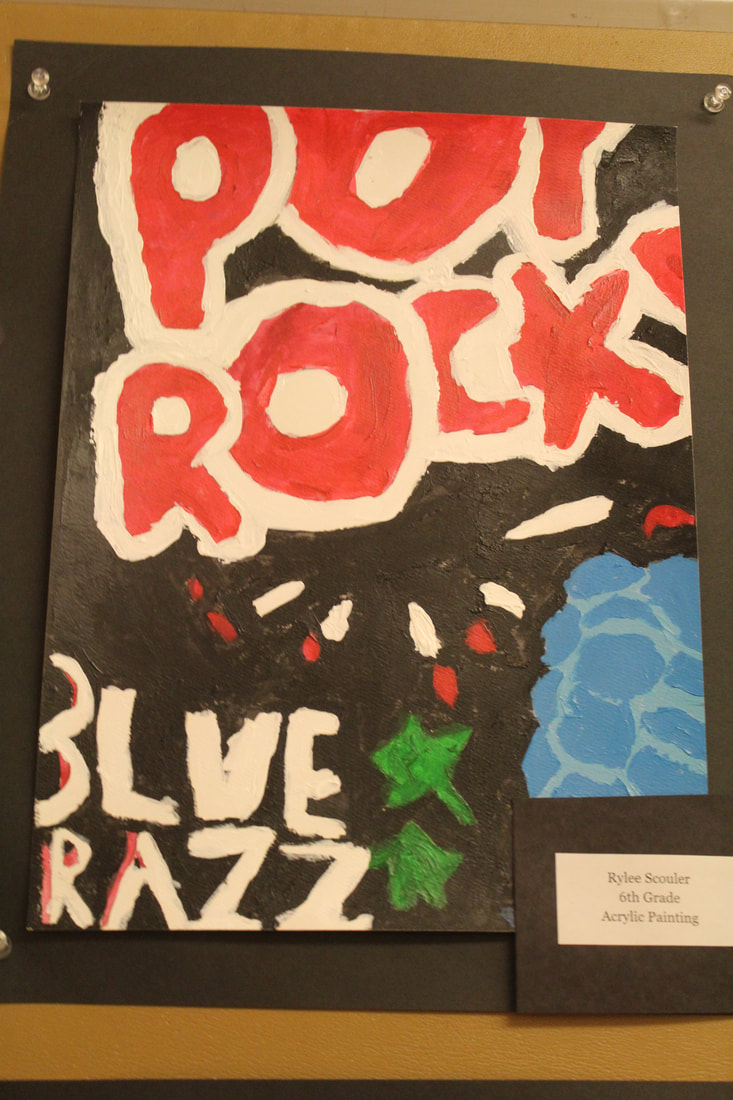
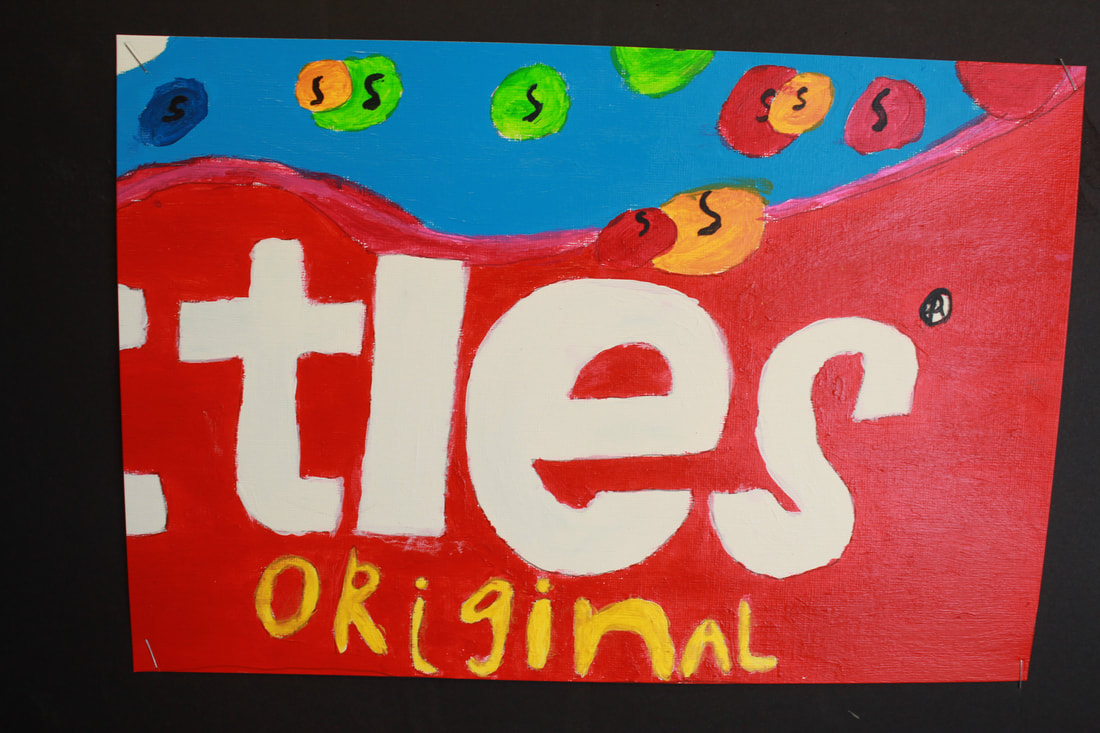
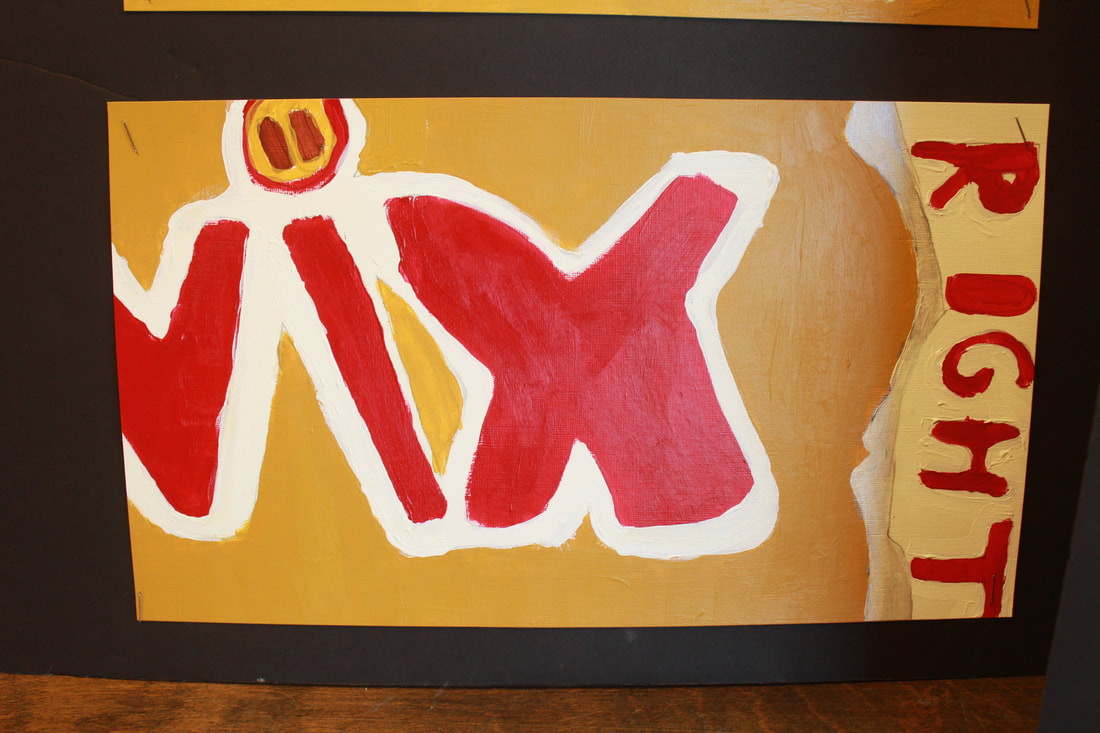
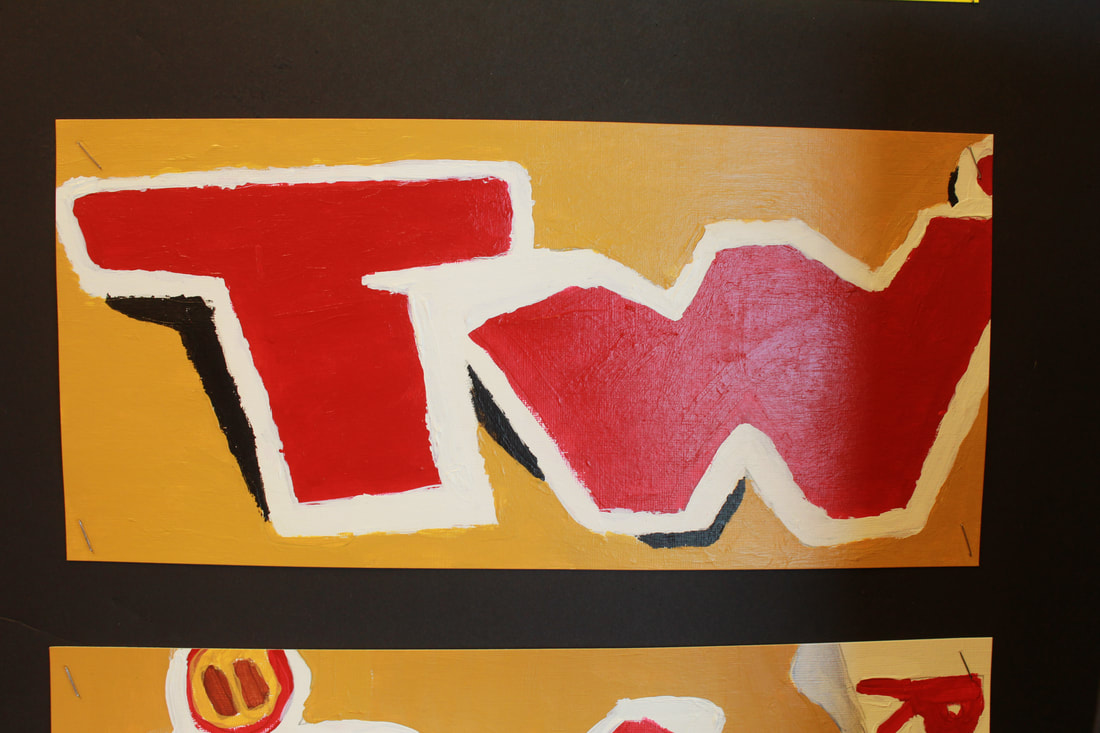
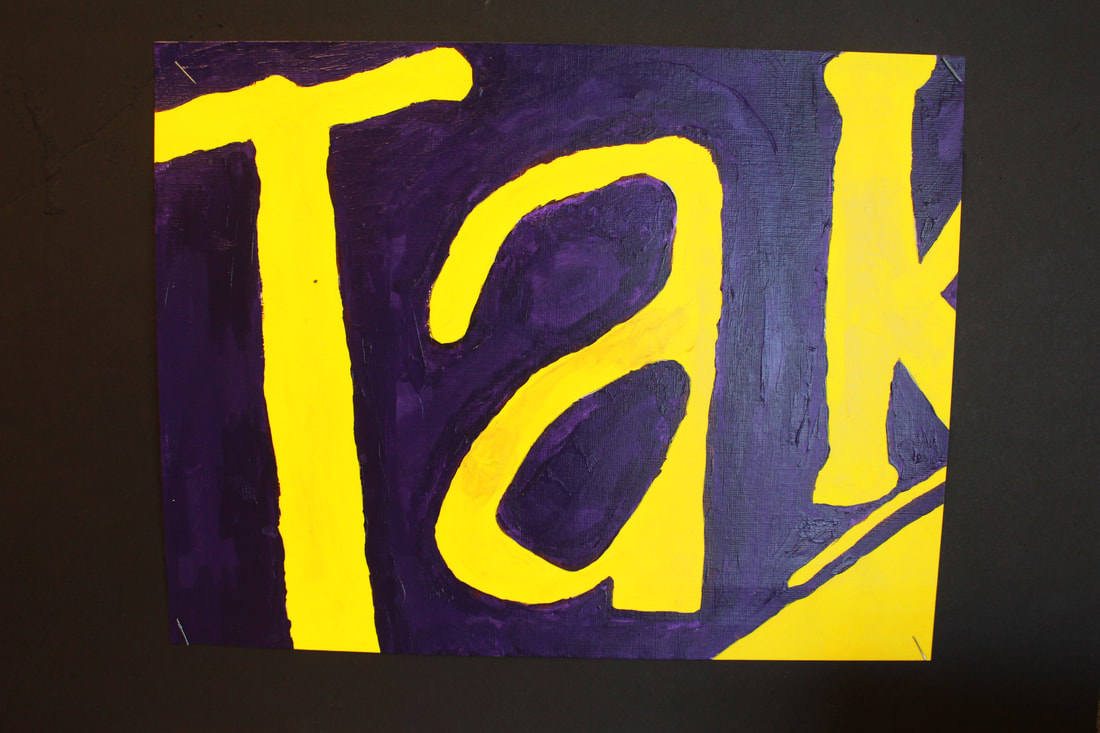
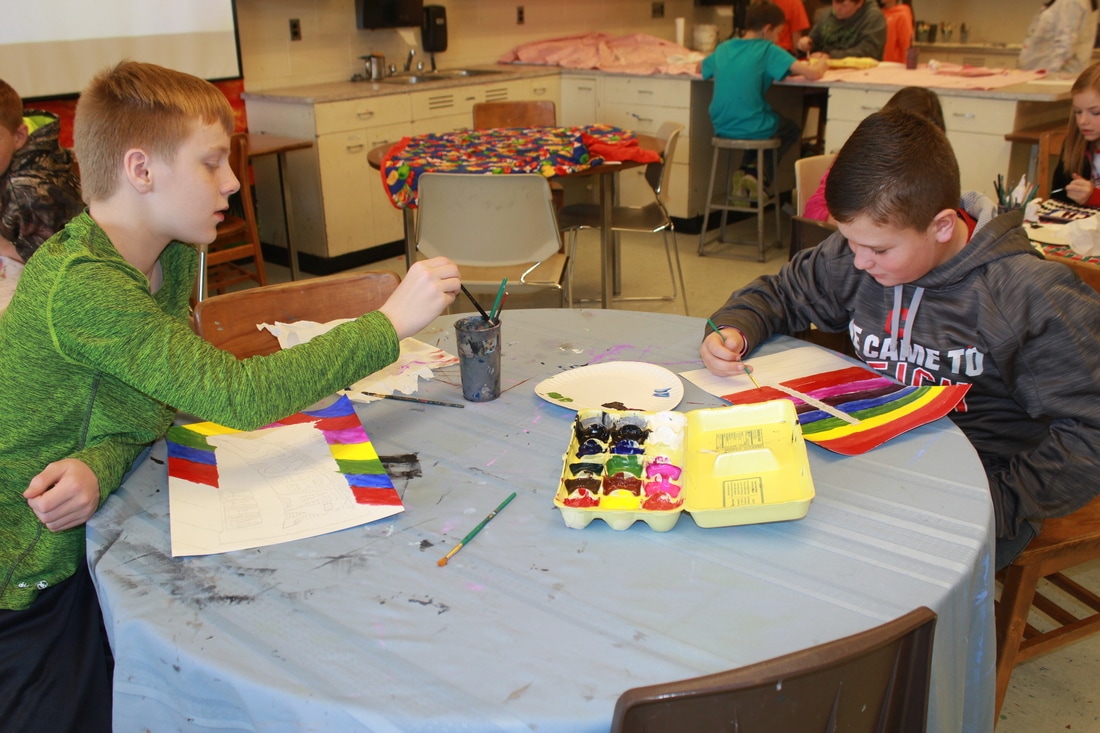
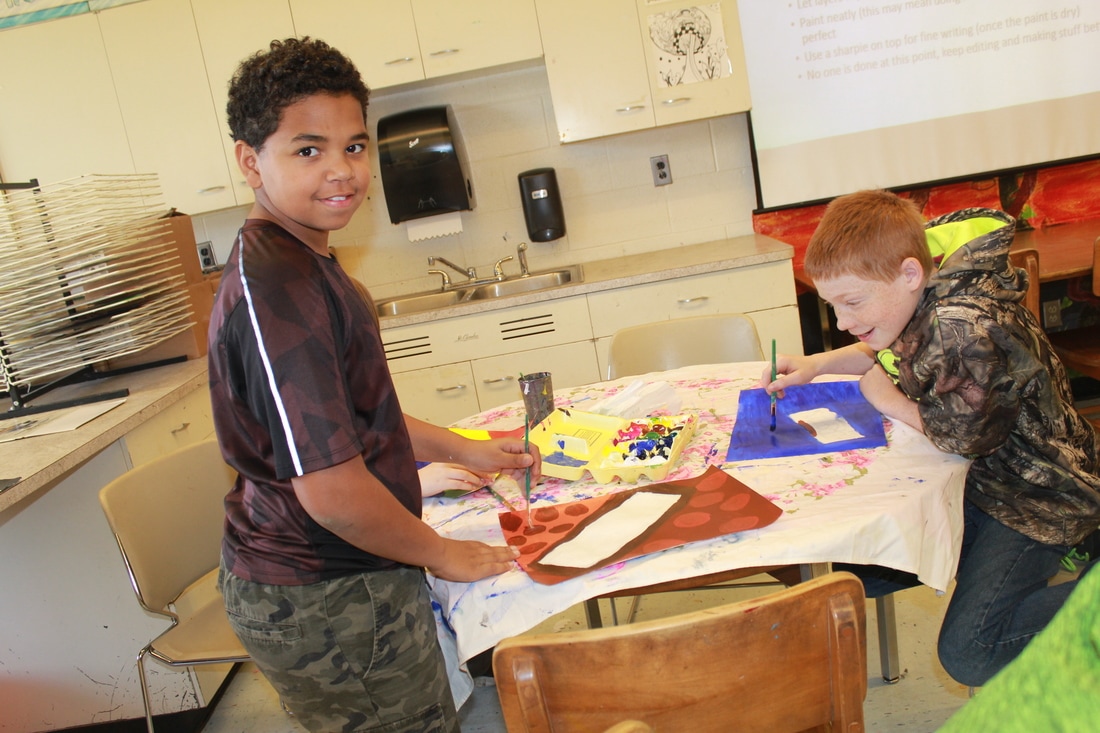
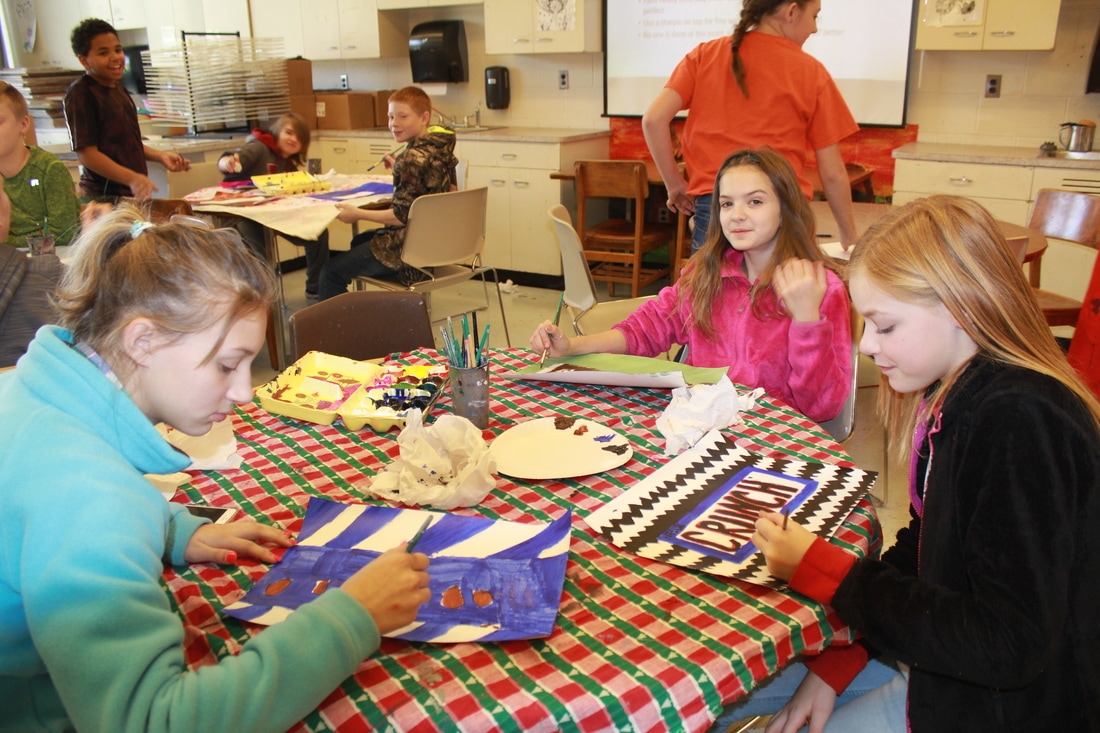
Candy Paintings
"I want candy!!" For this project students chose their favorite candy as inspiration for a painting project. Students started with a rough sketch to help them plan out the background and colors they would be using. We then talked about beginning painting skills such as mixing colors, making tints and shades, the secret to painting a thin straight line, and layering. Students then began by drawing their chosen candy on their final paper, then carefully started painting the background. Finally they painted the candy wrapper, paying close attention to the fonts and colors used to help the painting appear realistic. They turned out great!
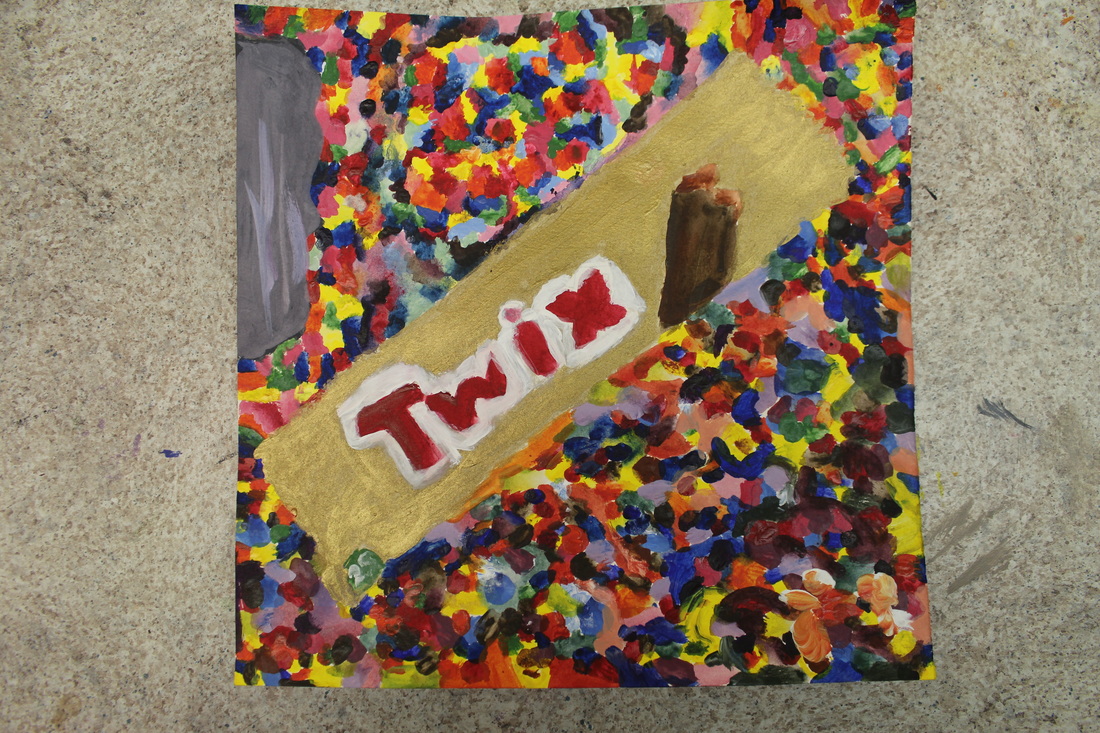
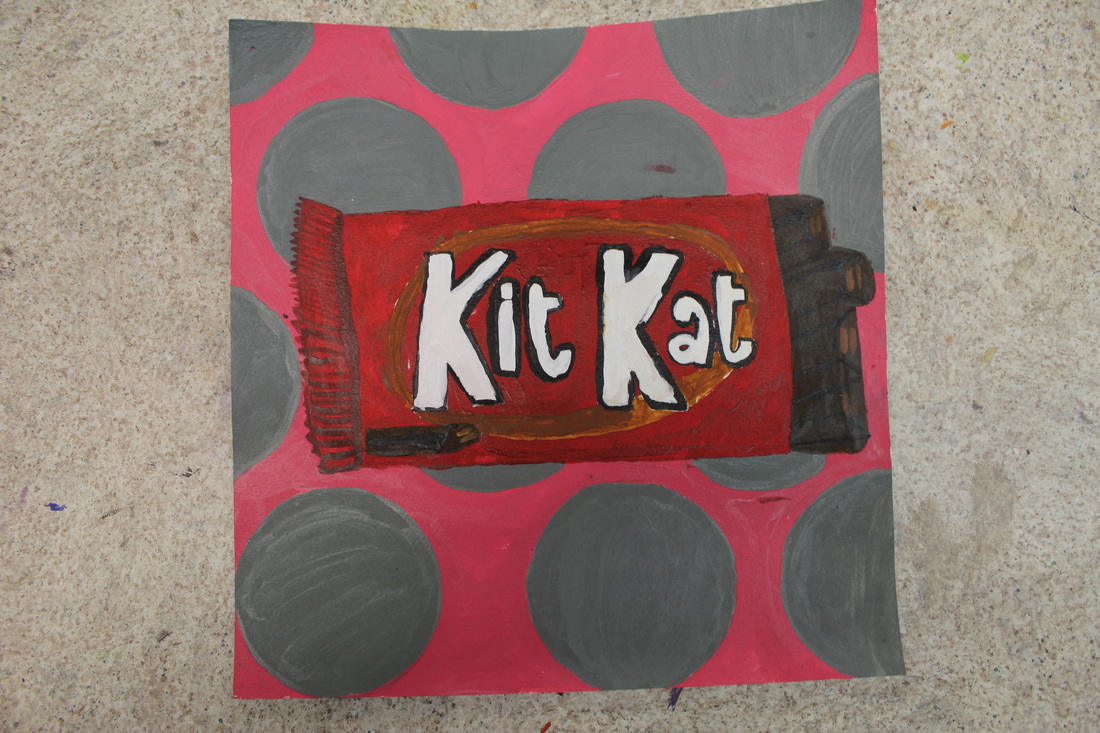

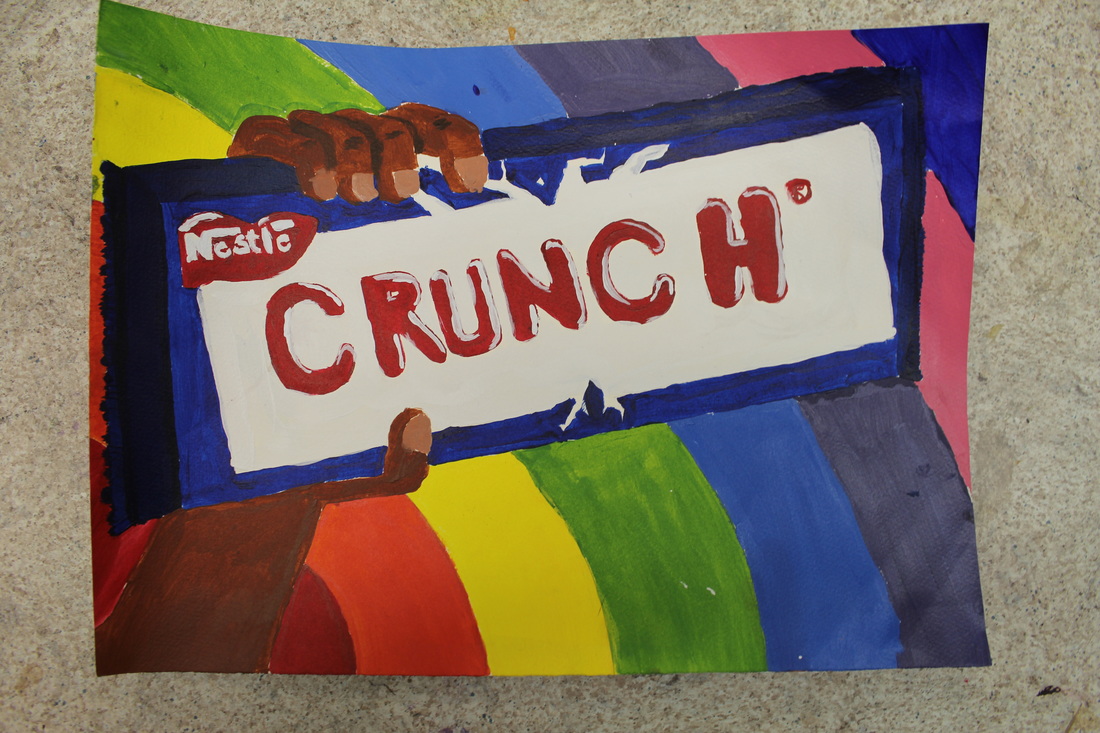
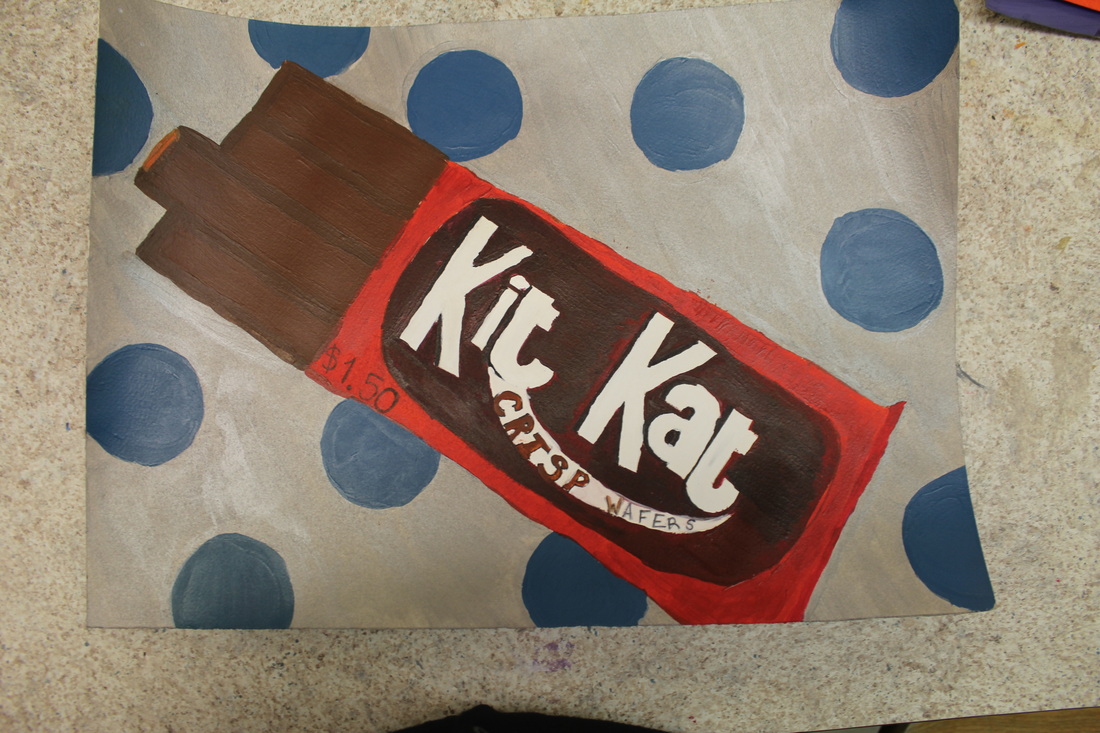
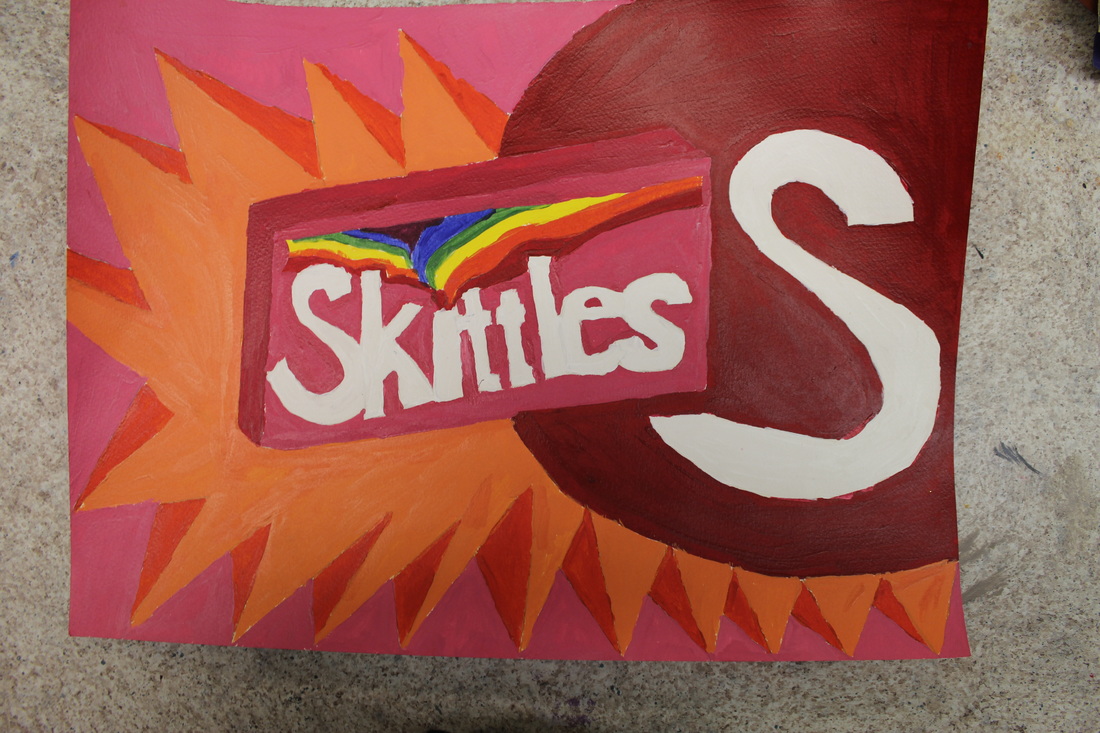
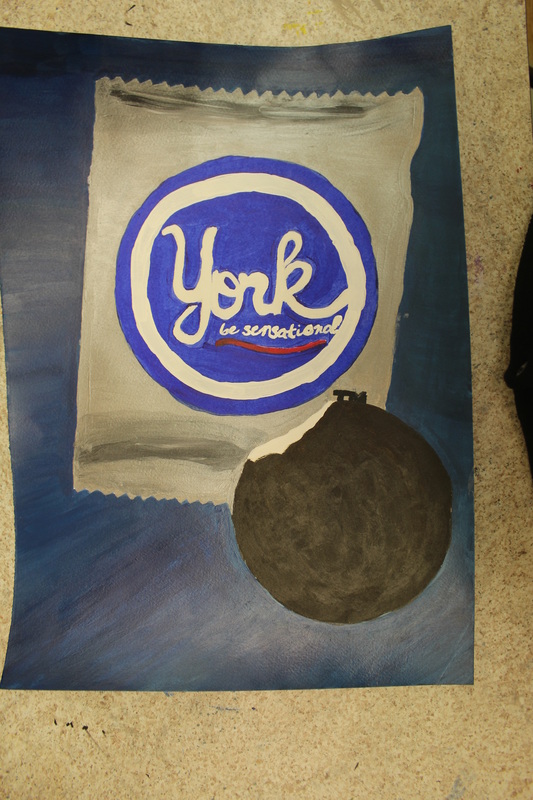
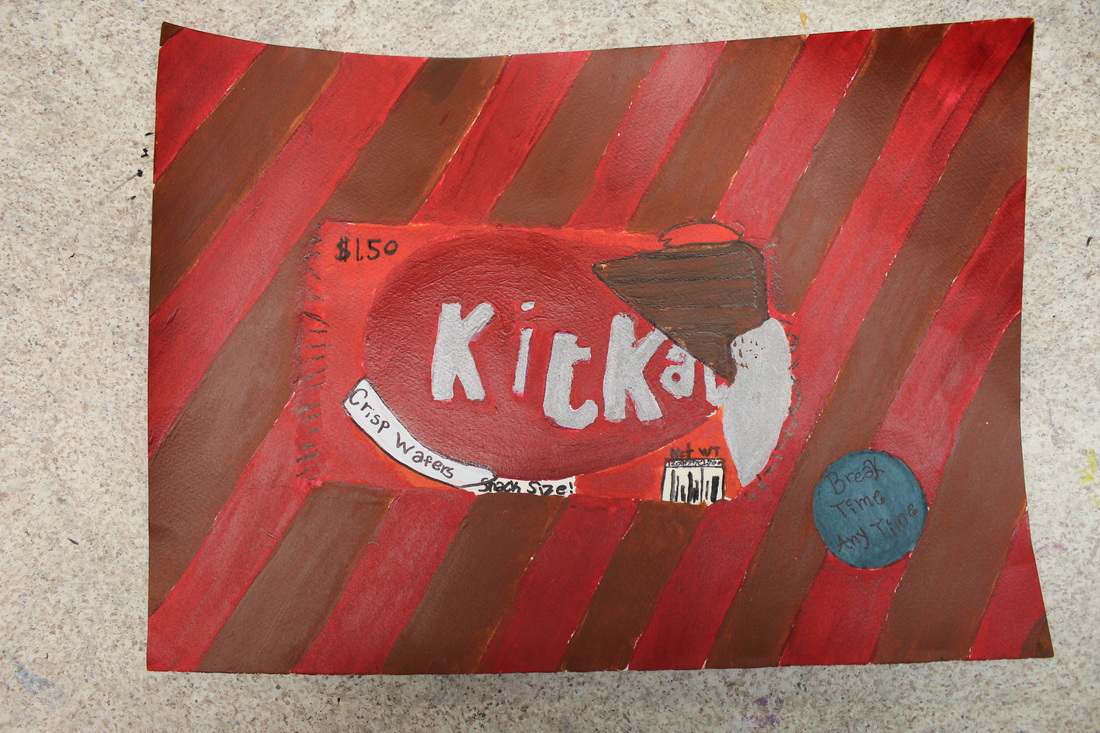
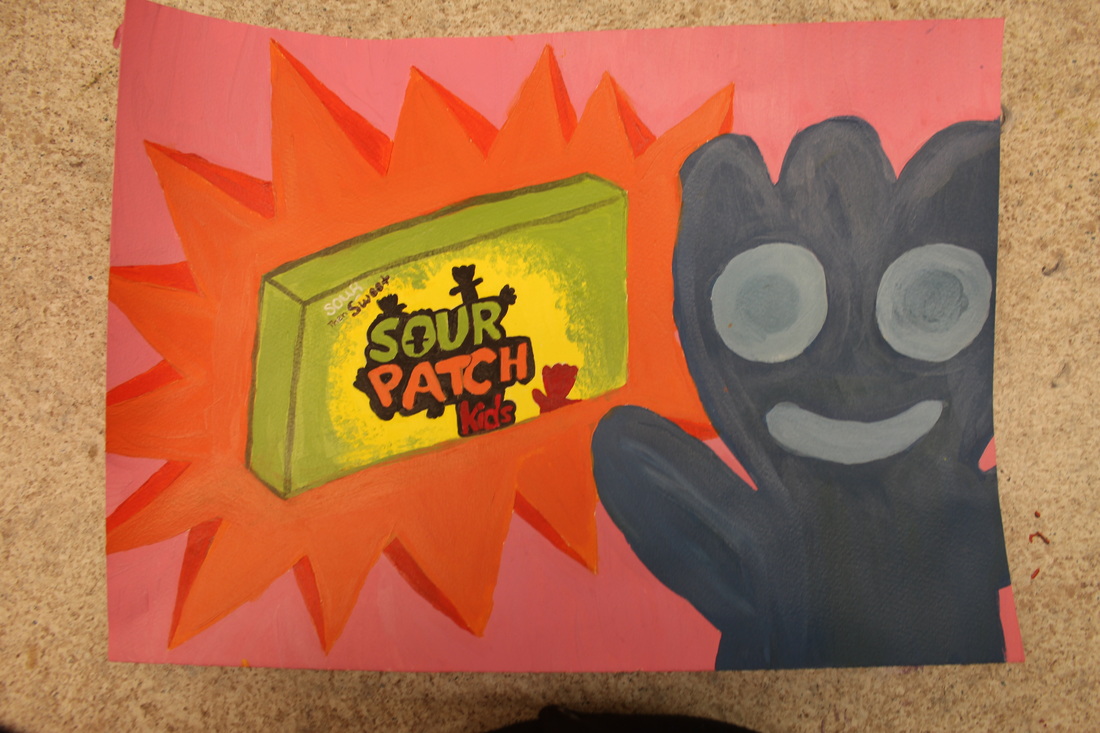
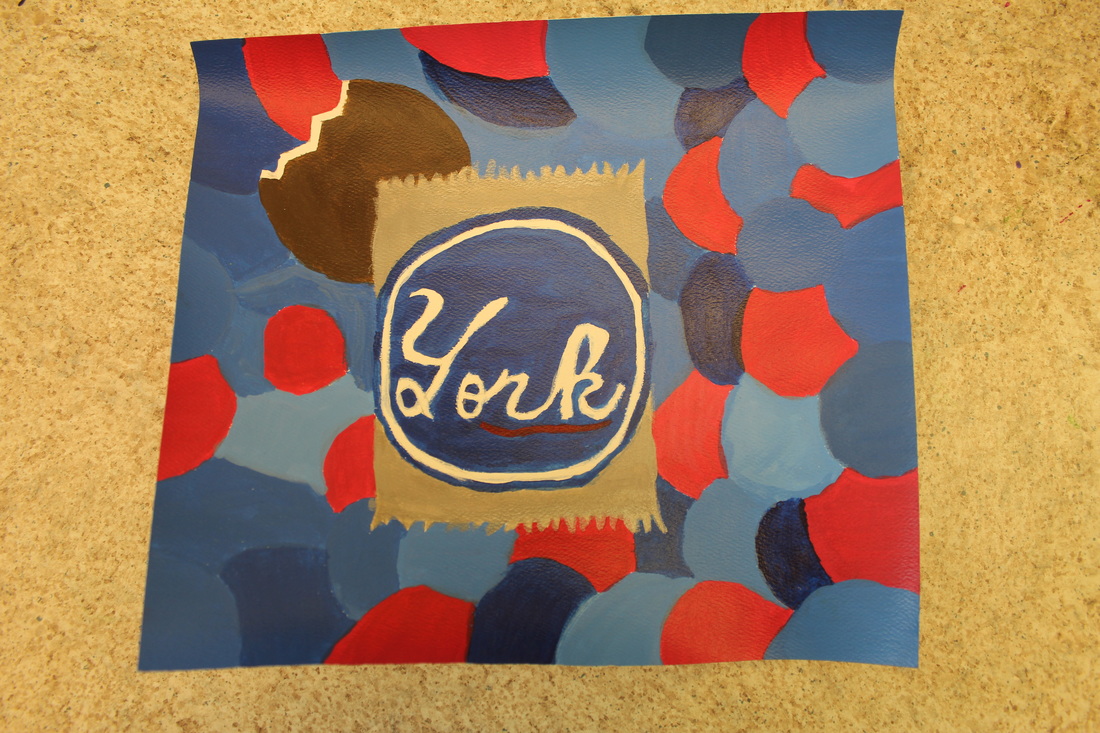
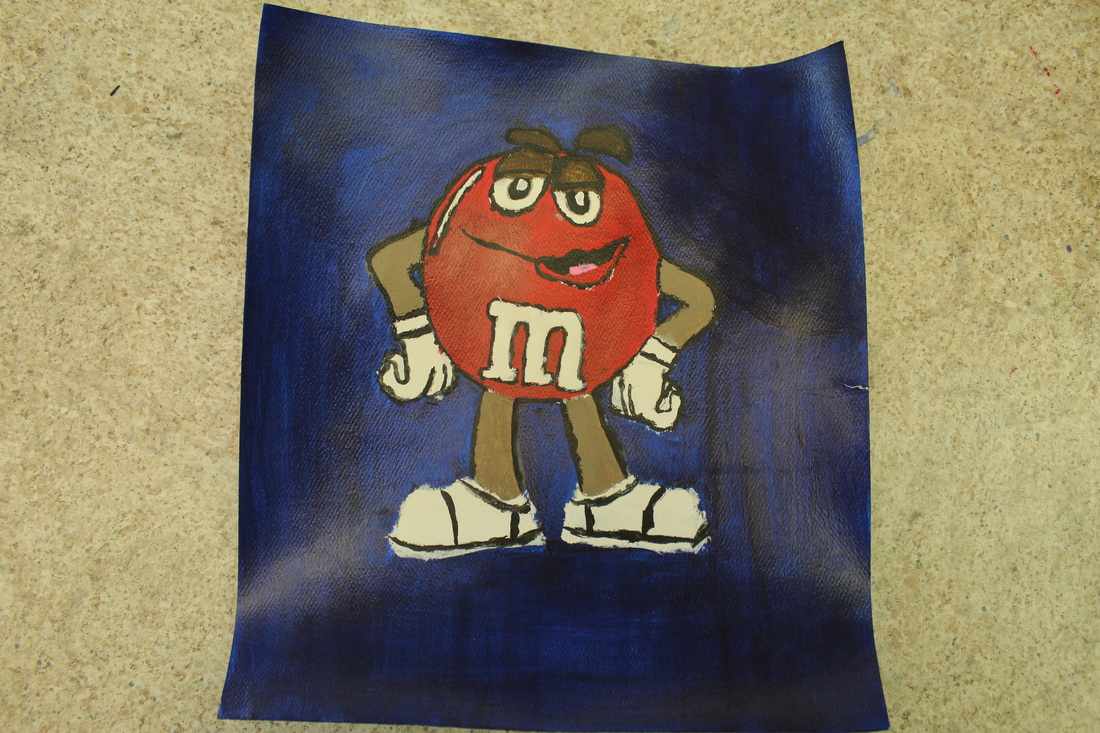
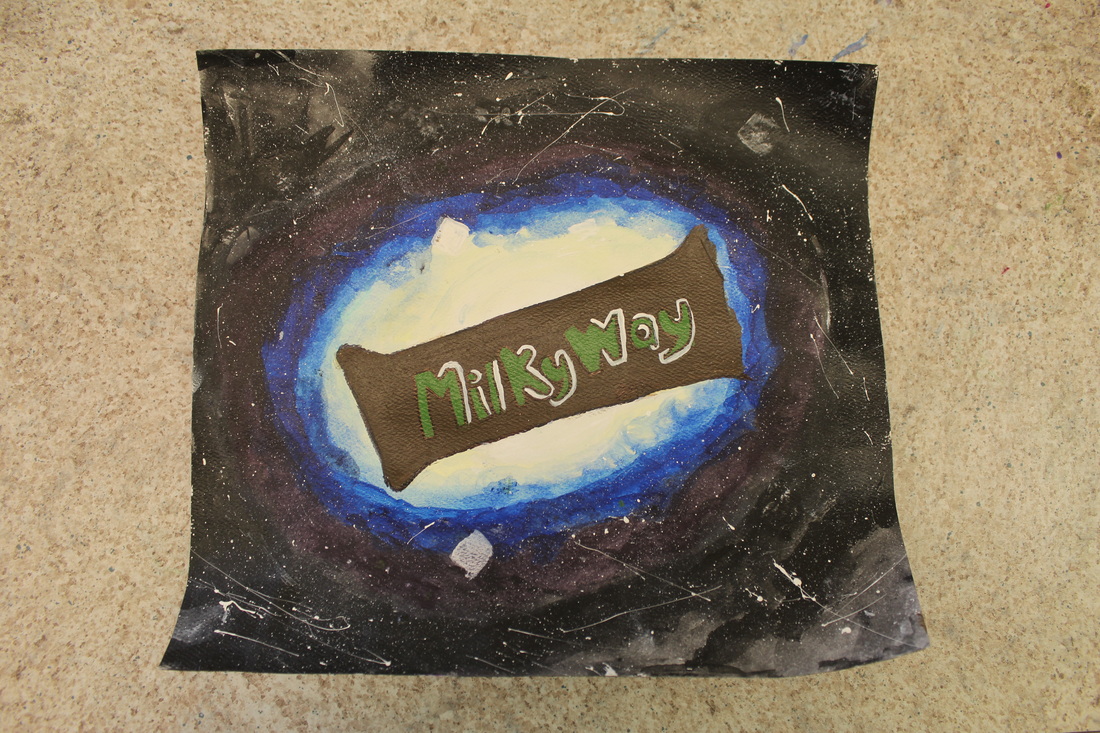
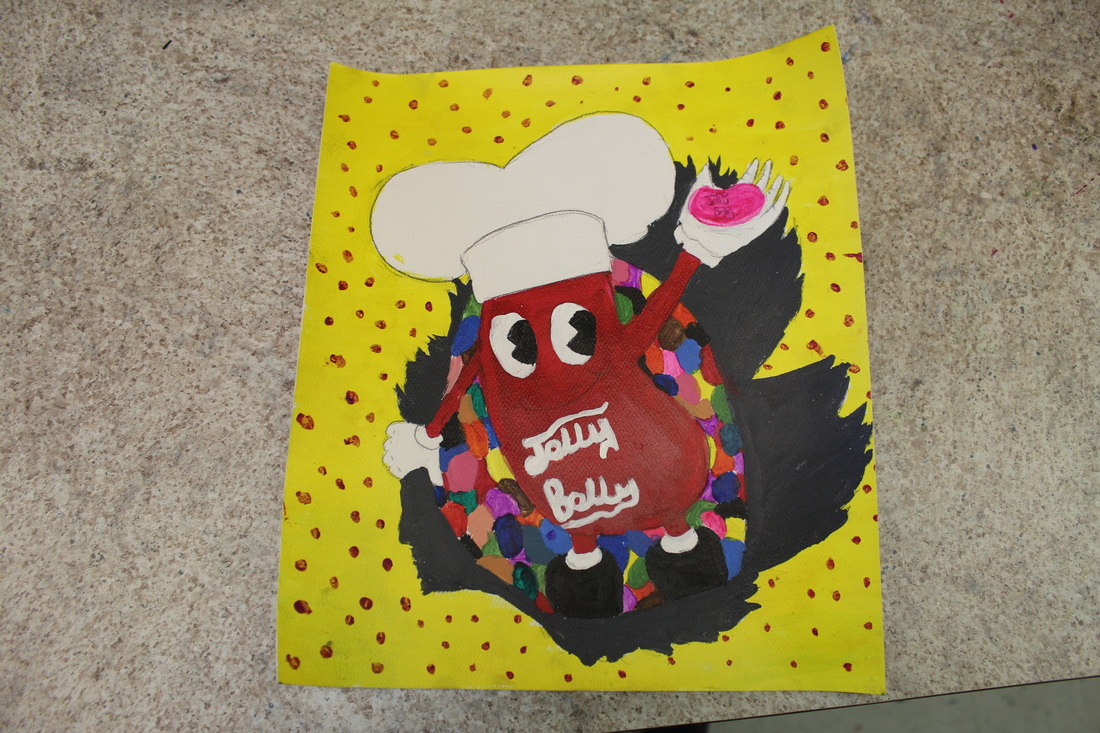

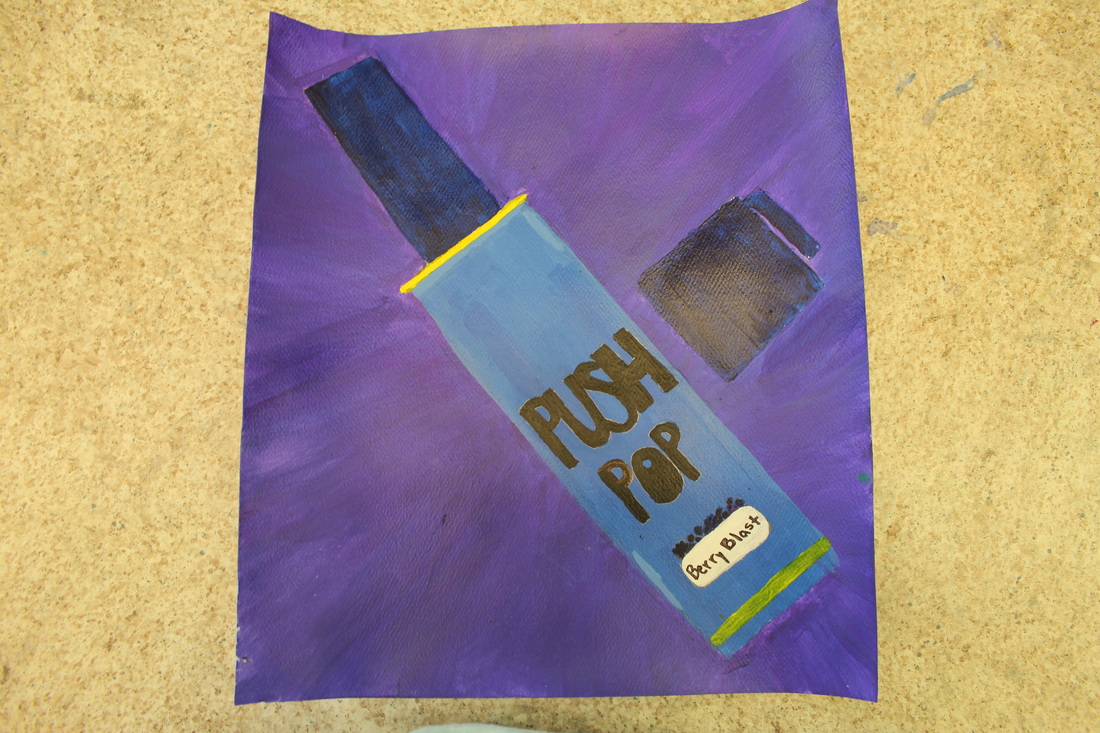

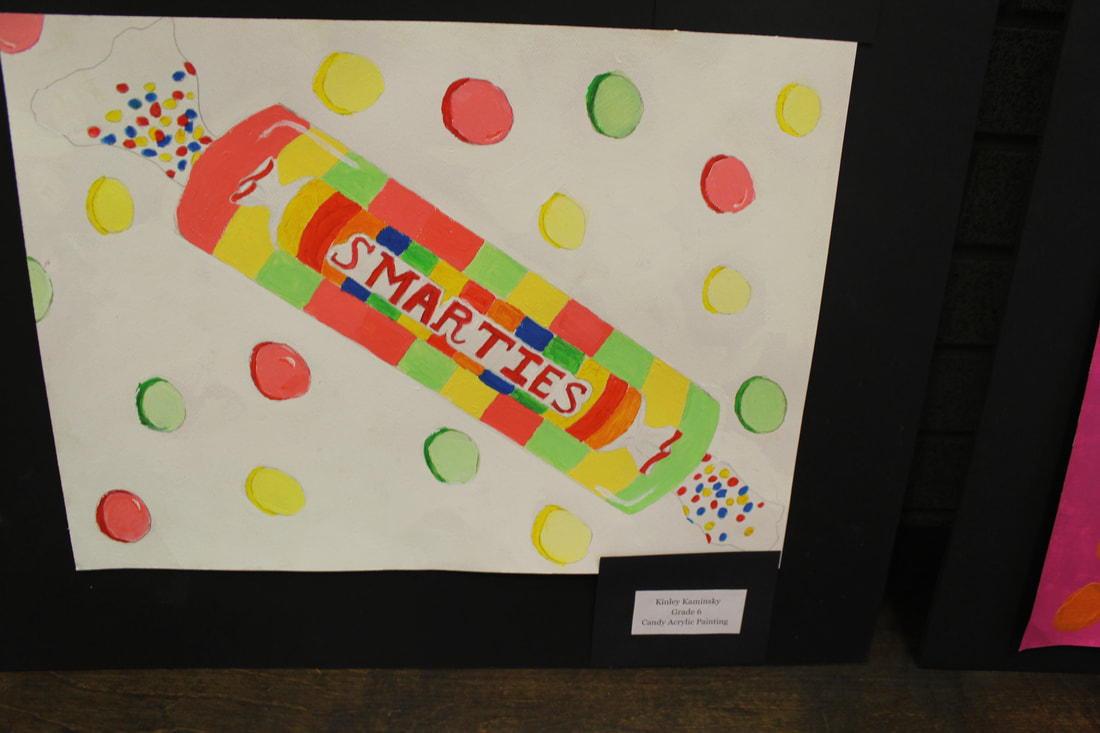
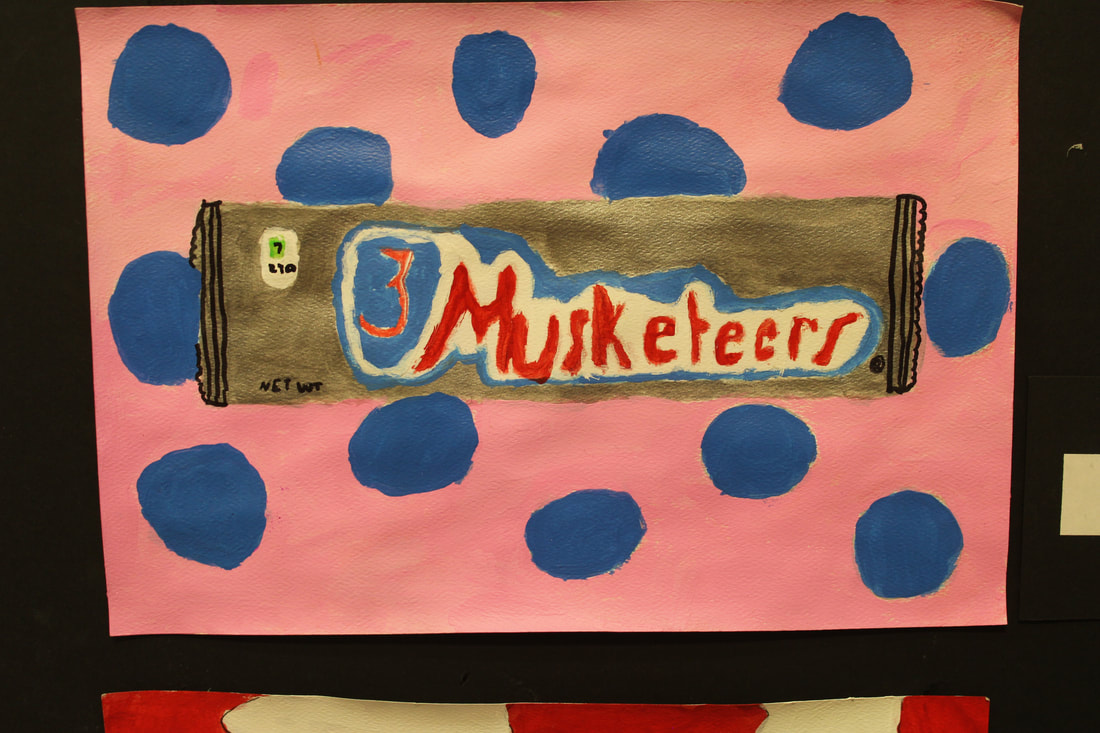
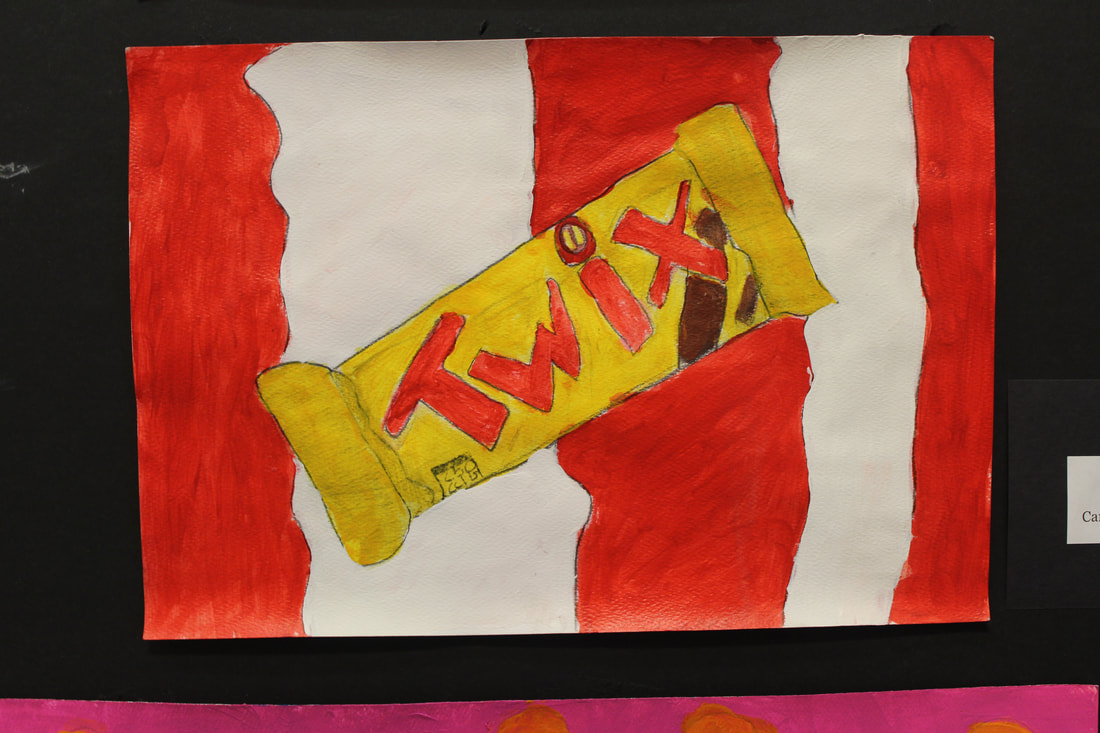
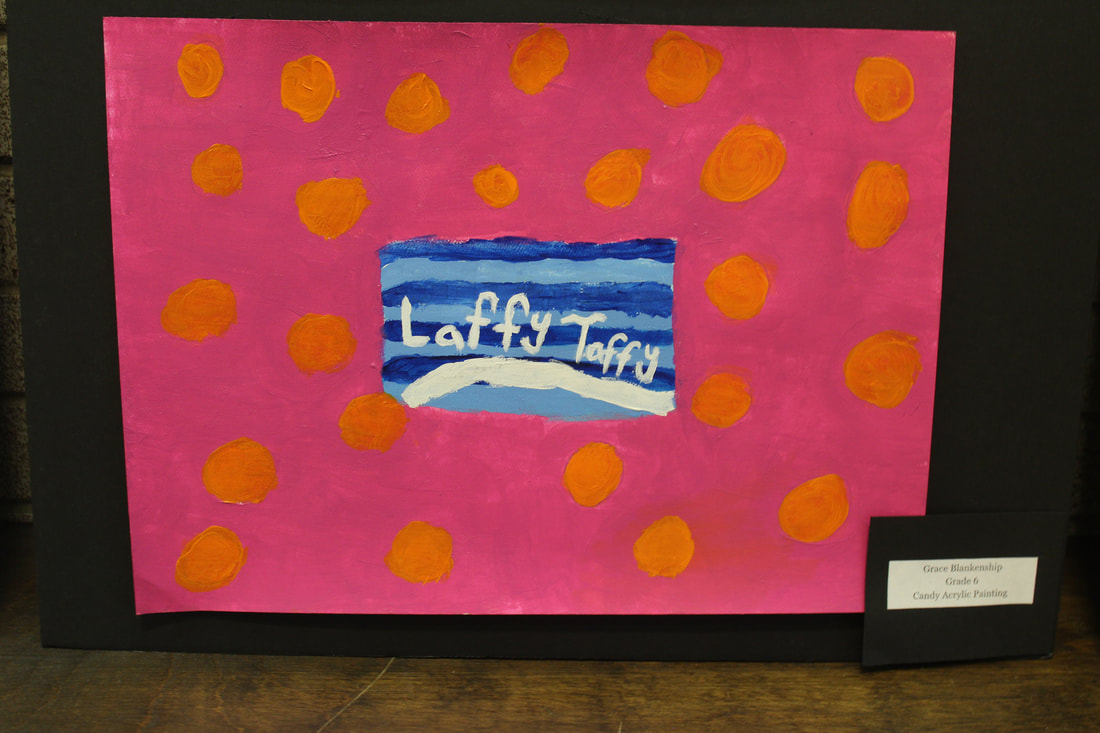
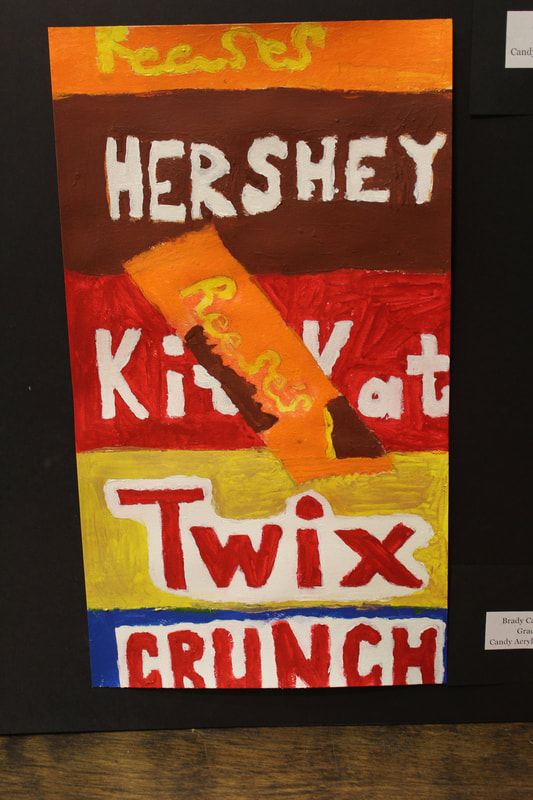
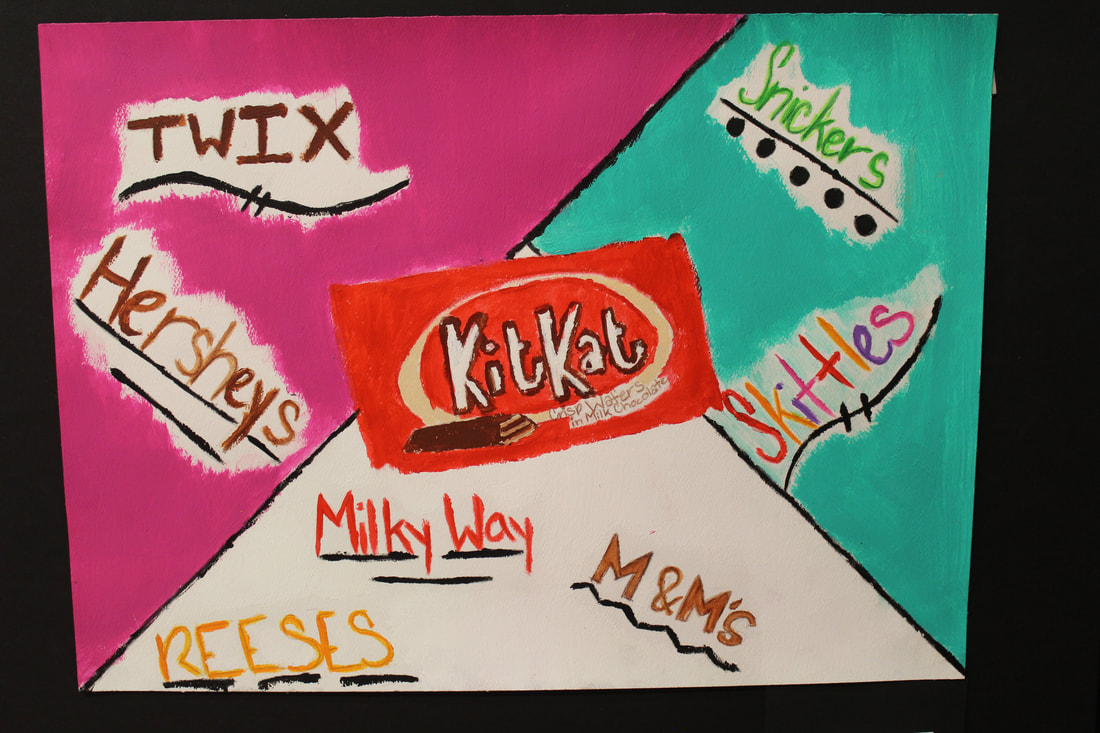
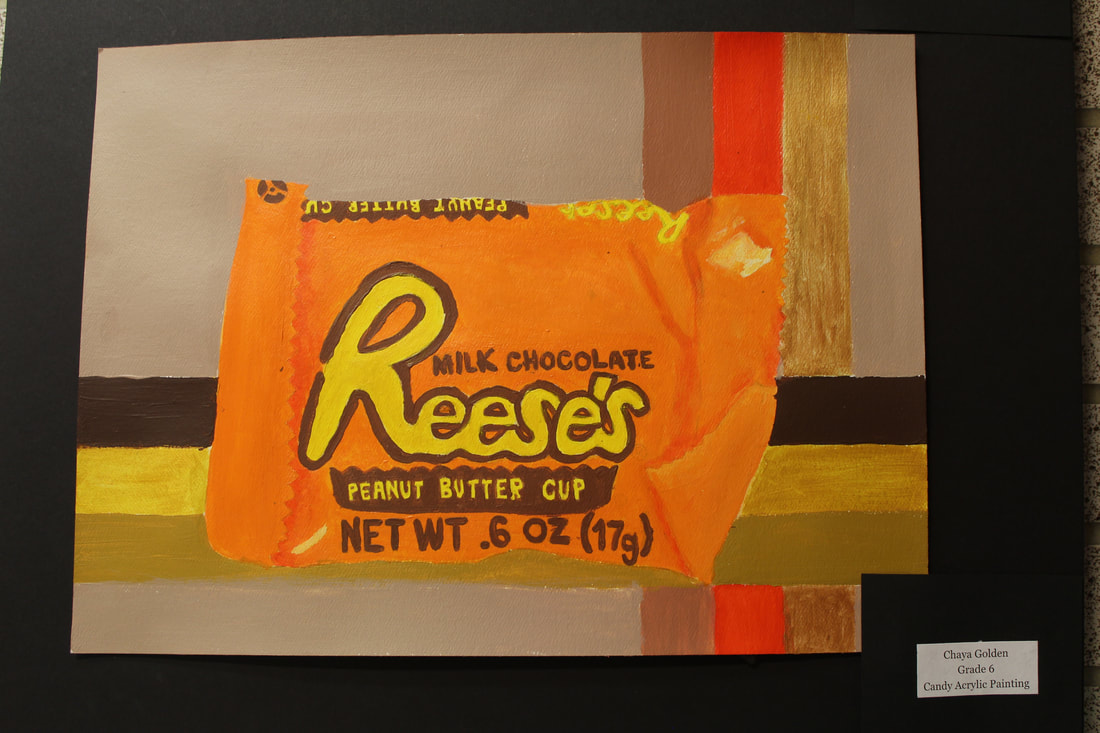
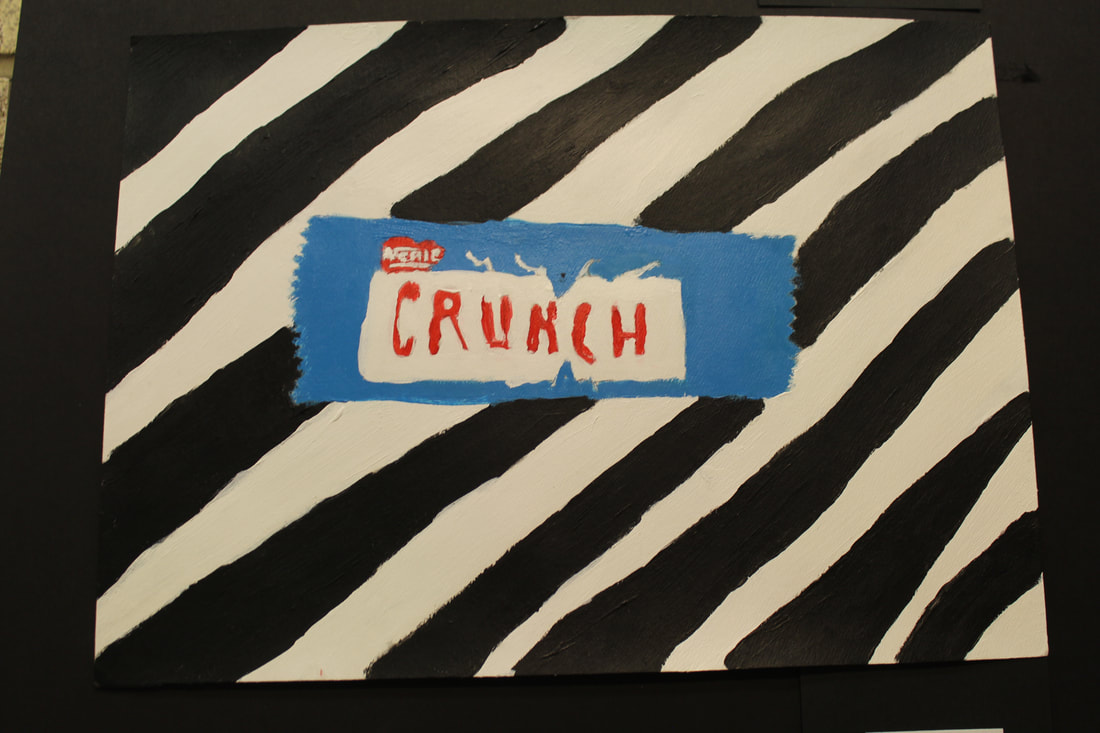
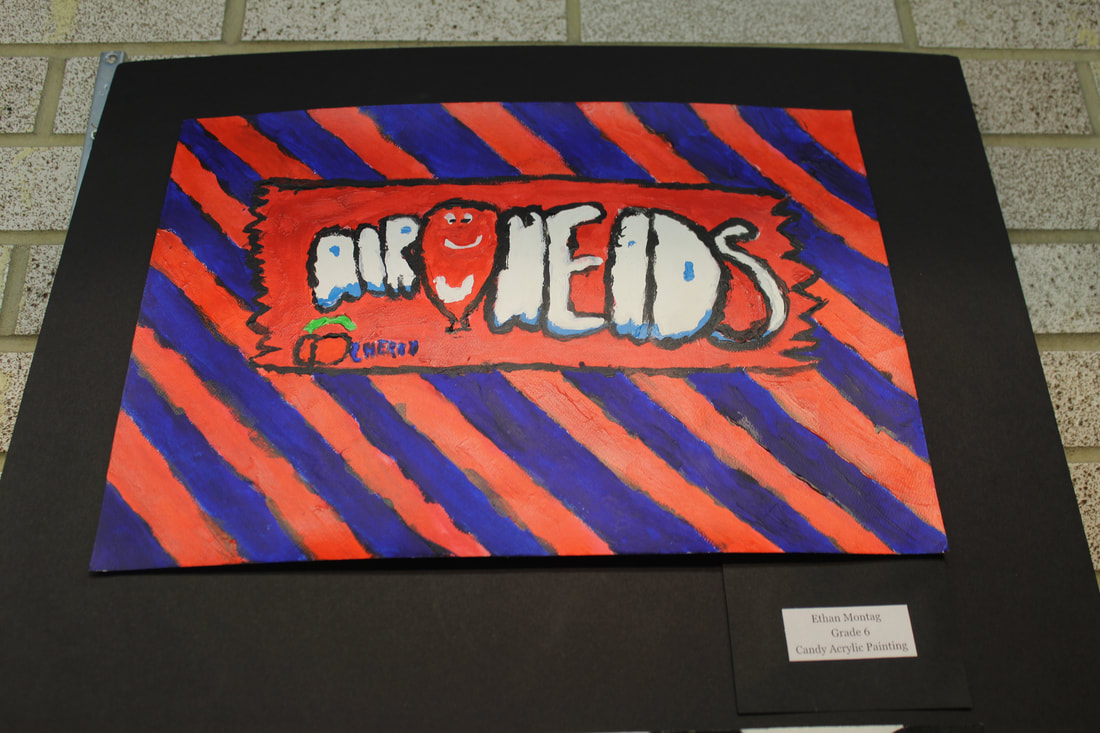
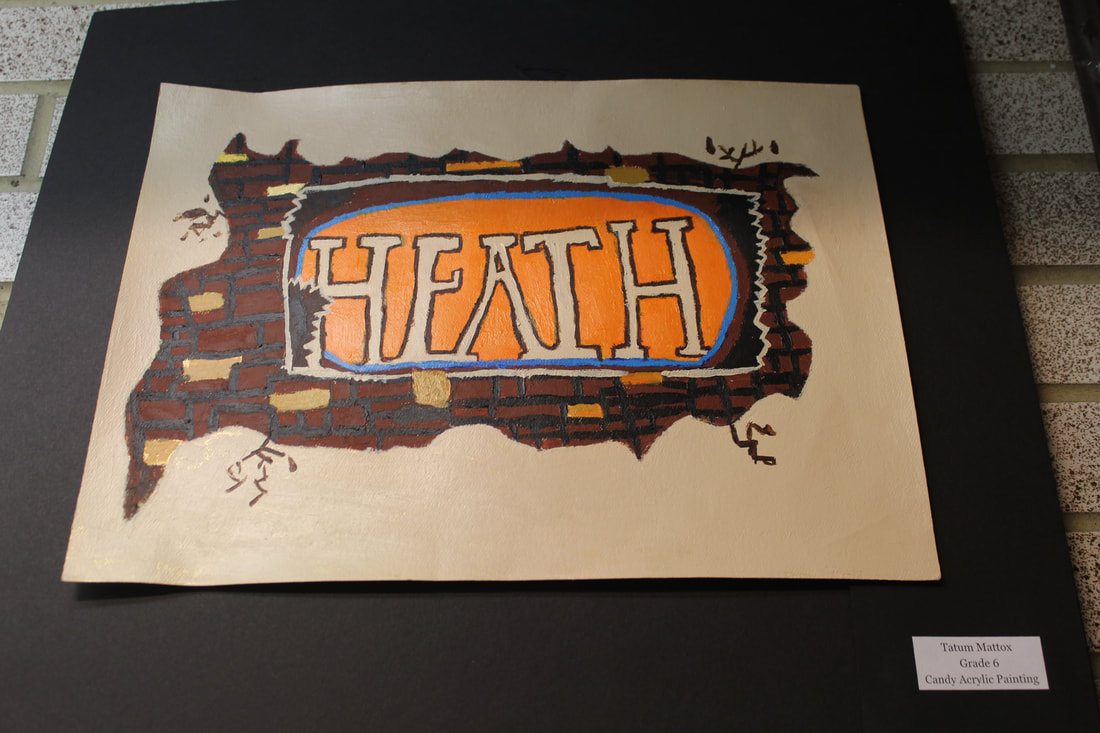
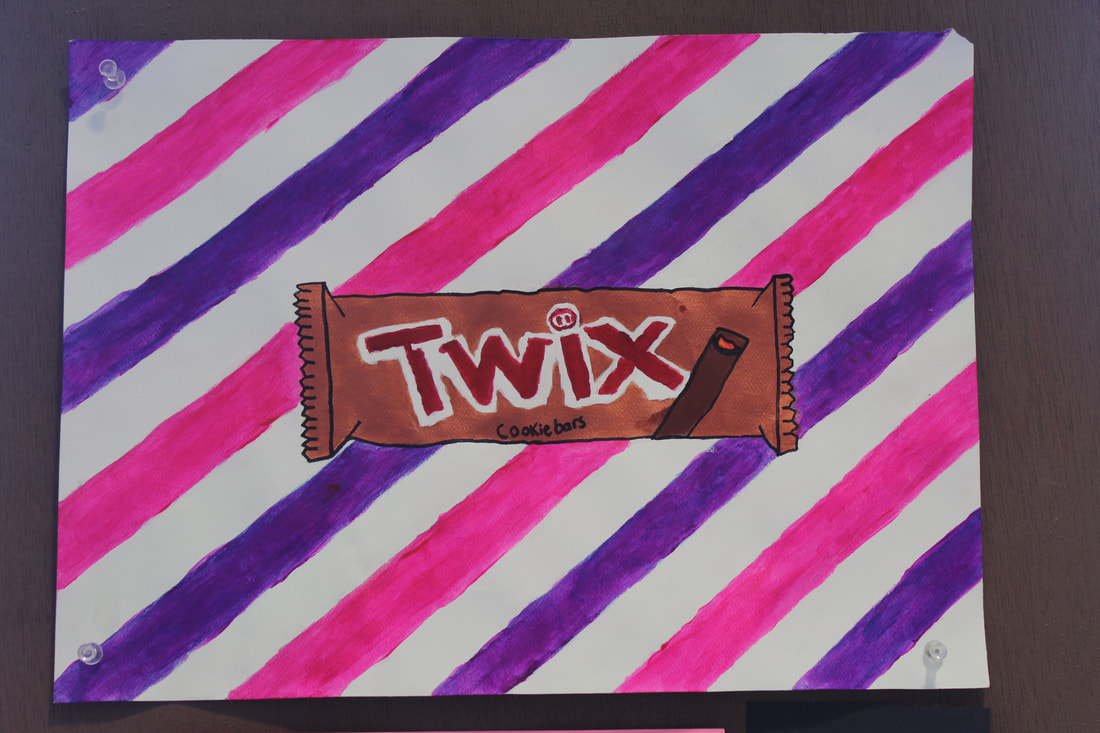
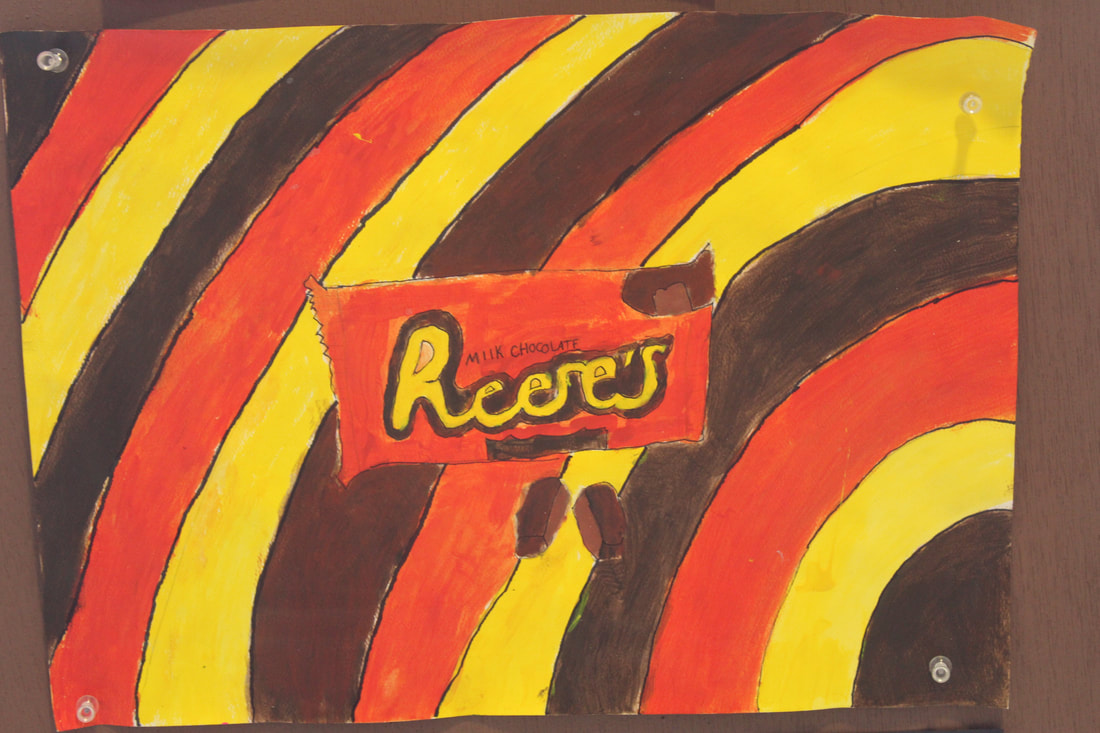
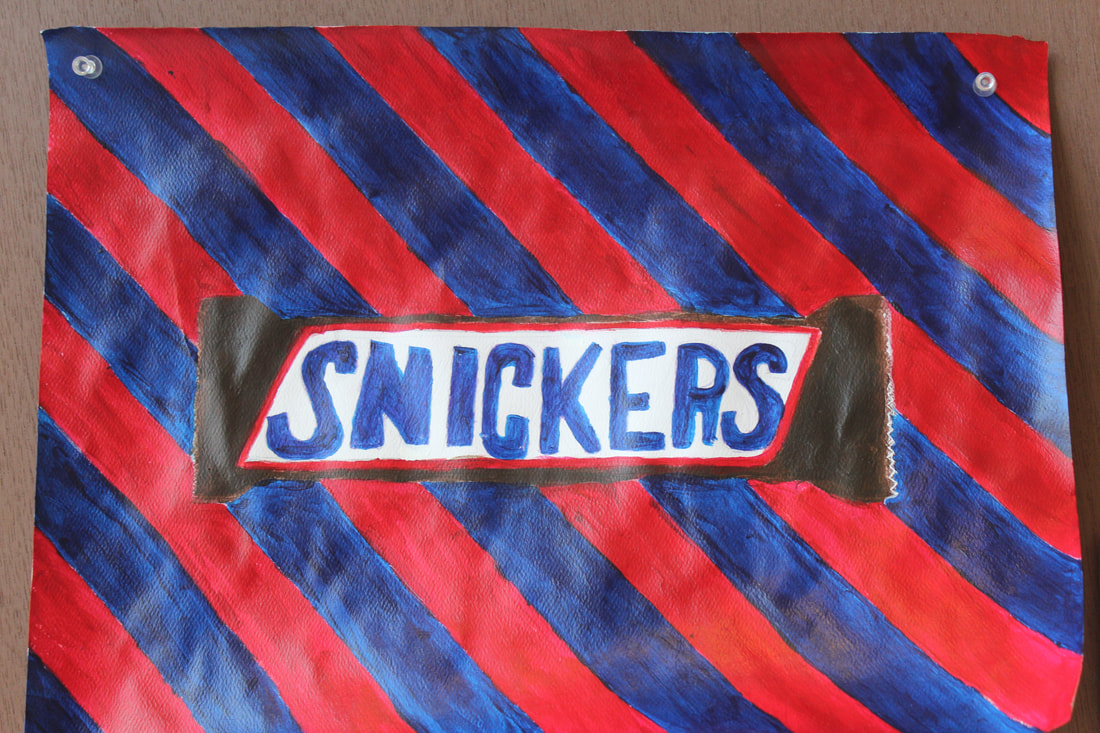
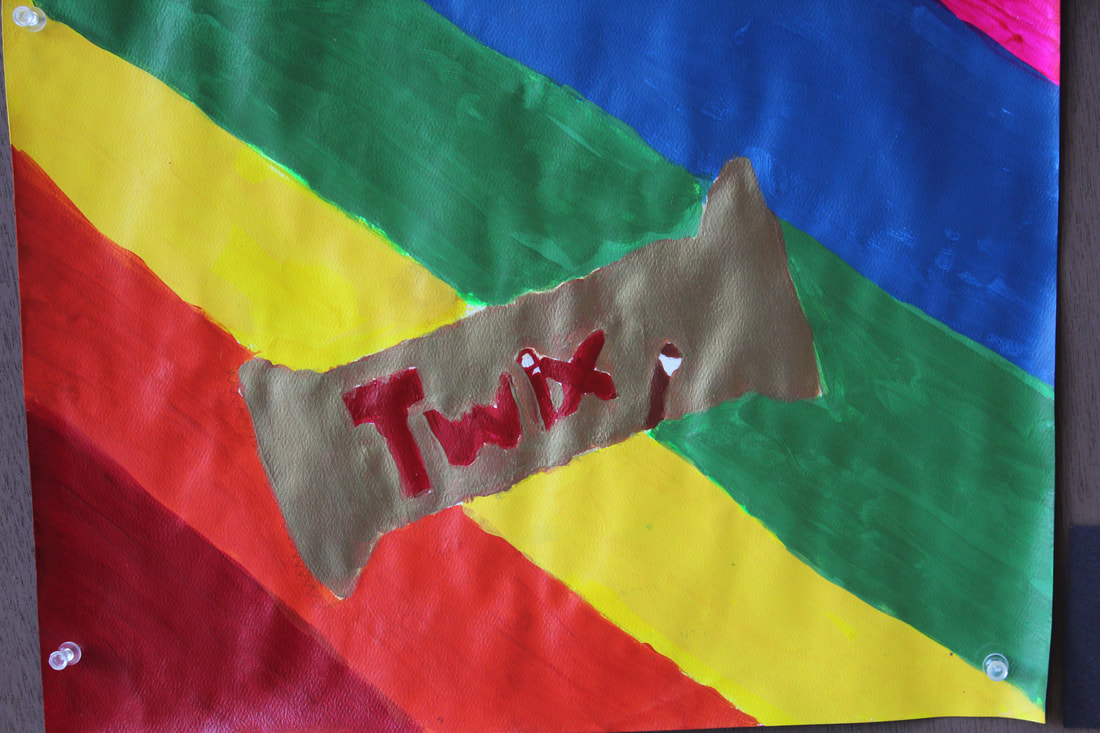
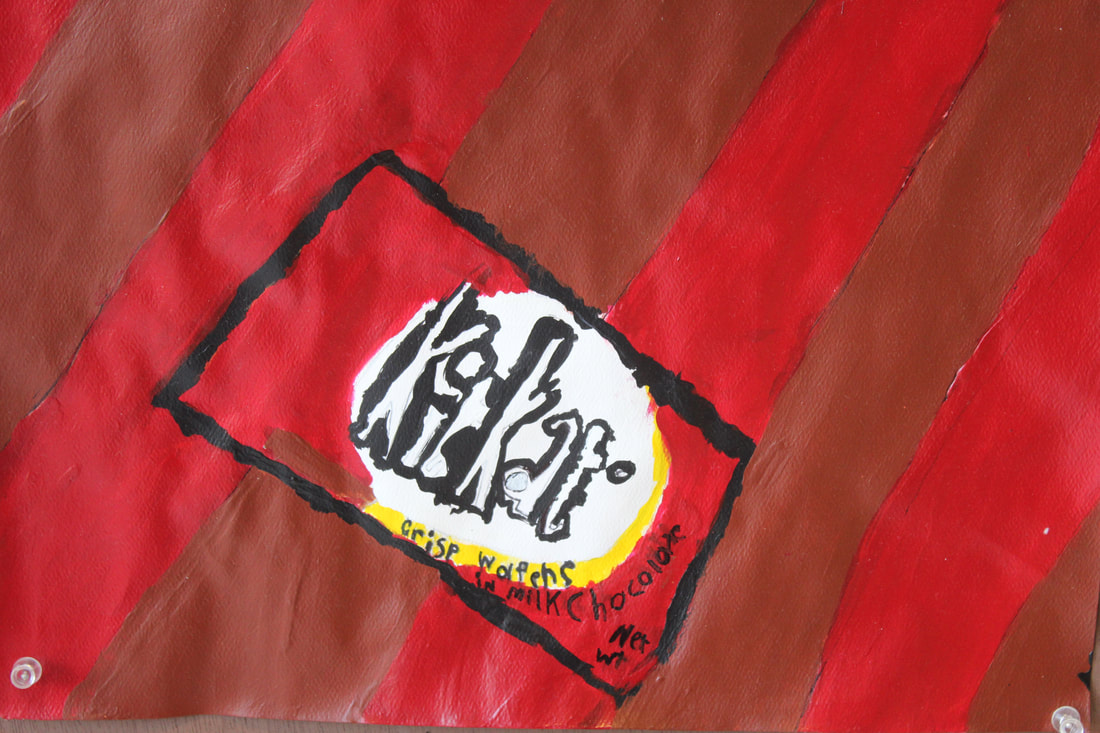
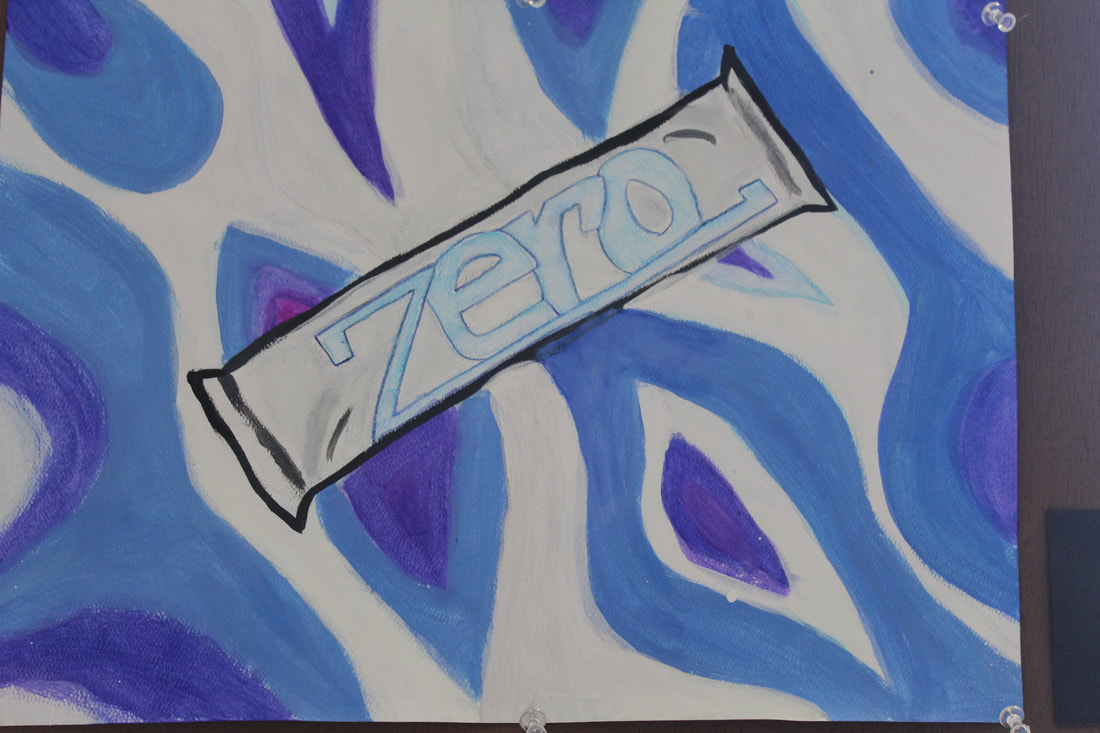

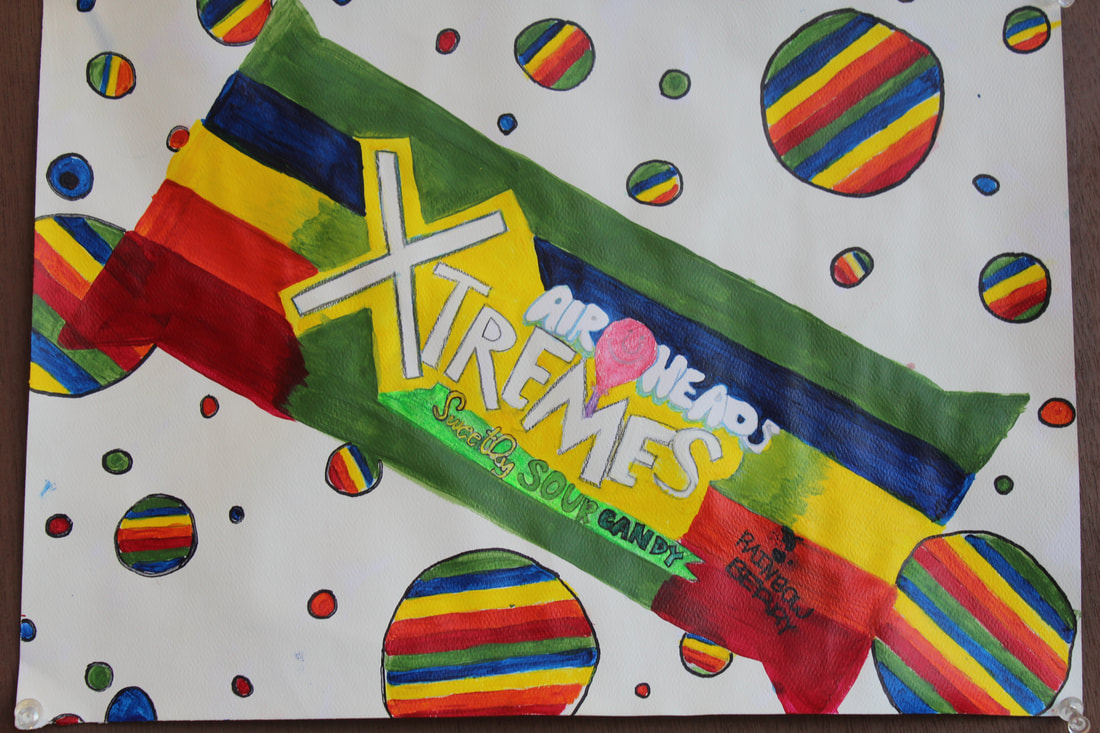


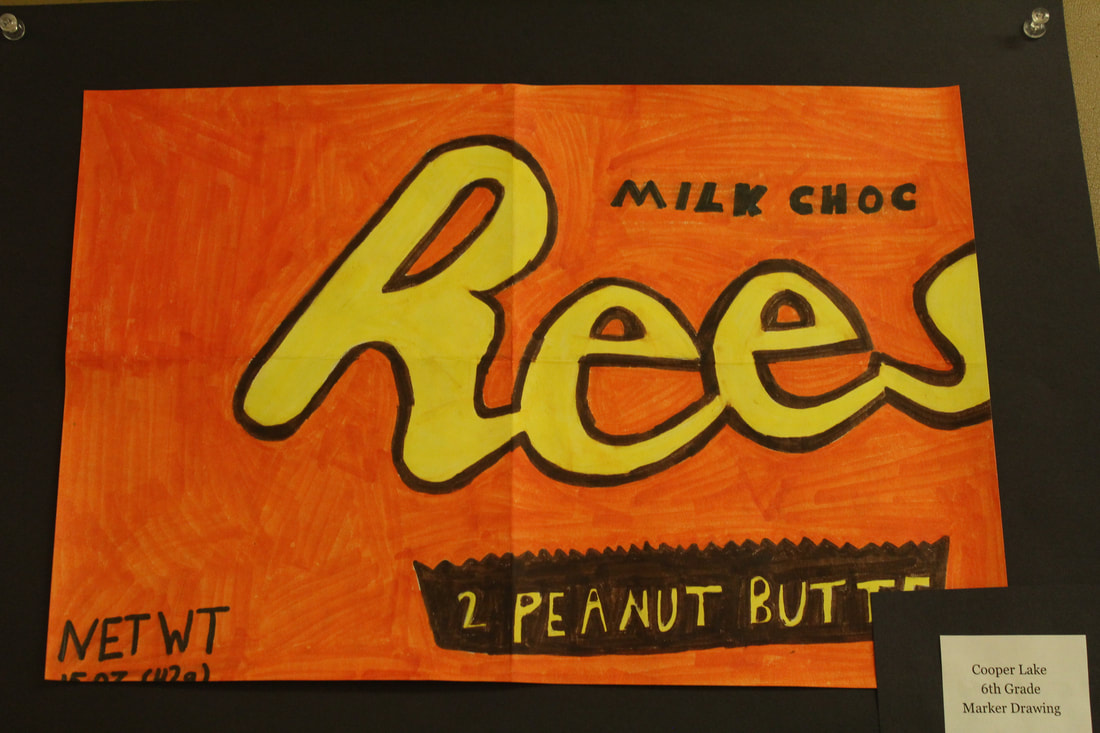

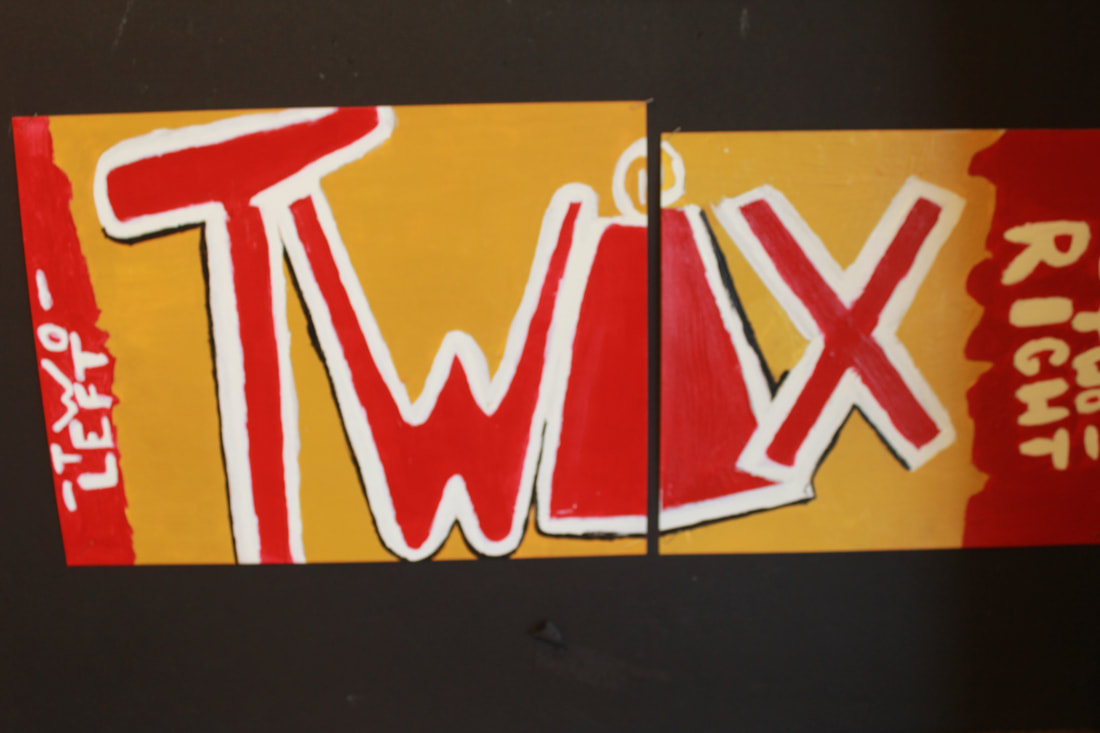
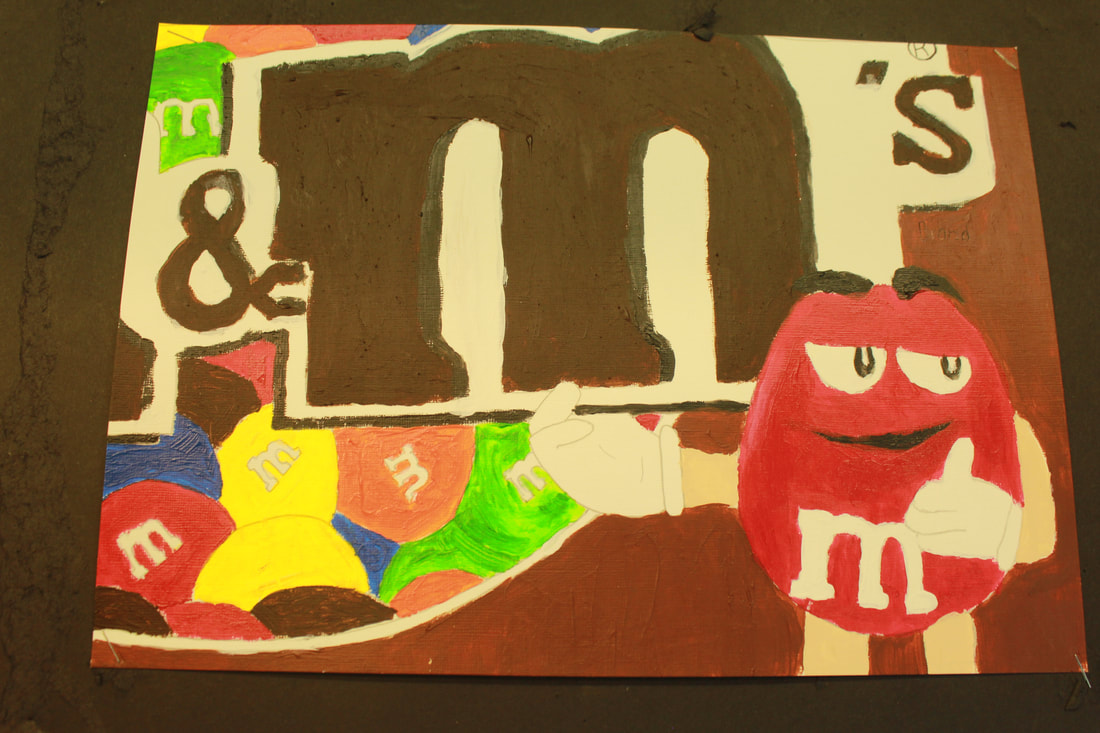
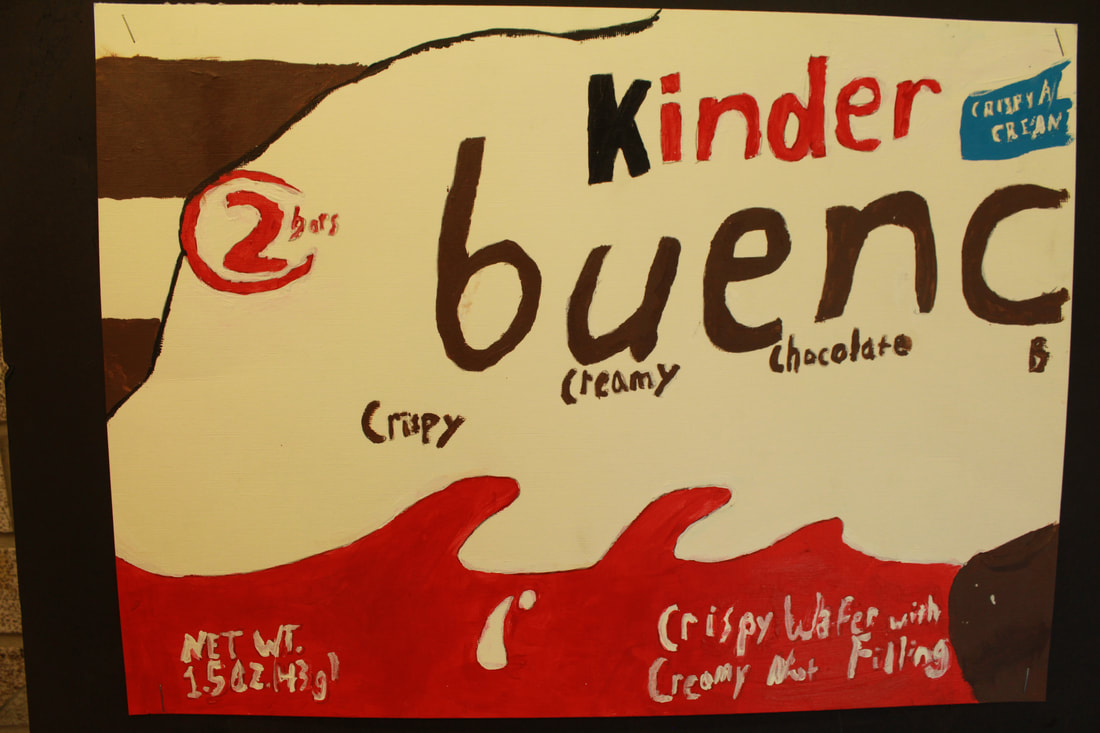

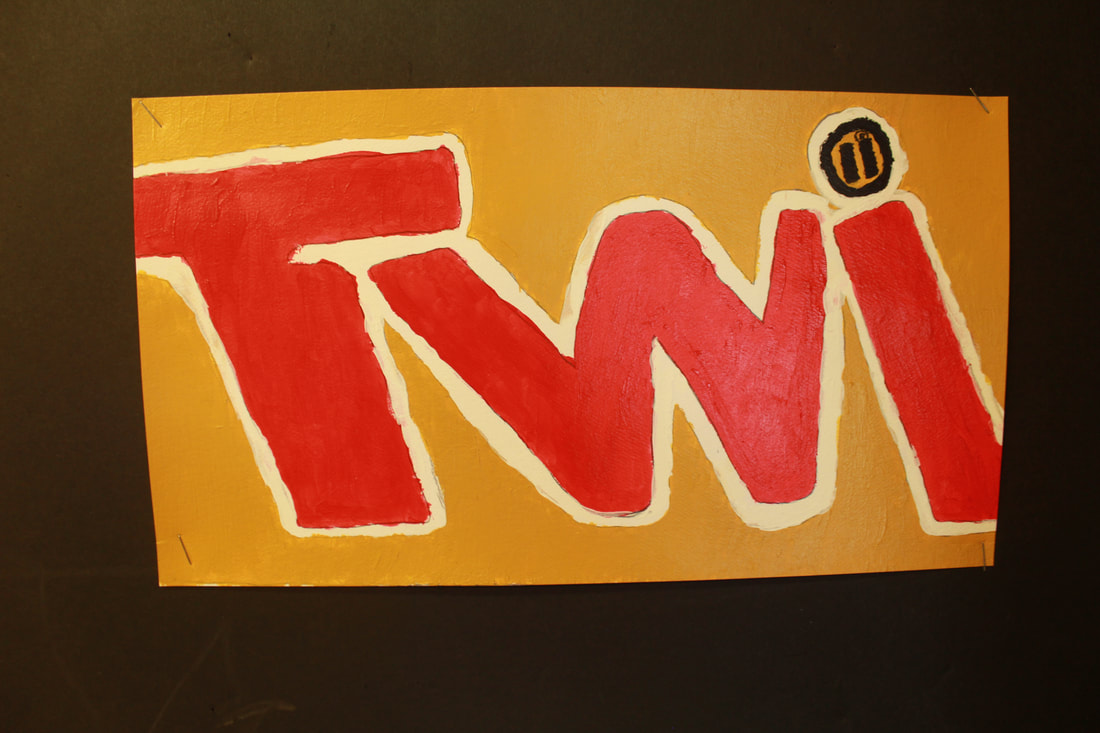
Students working hard designing and painting their candy paintings. Audra uses the computer to reference her candy bar design, while other students work steadily at painting. (Teacher tip: Egg cartons have worked well for us to distribute paint)
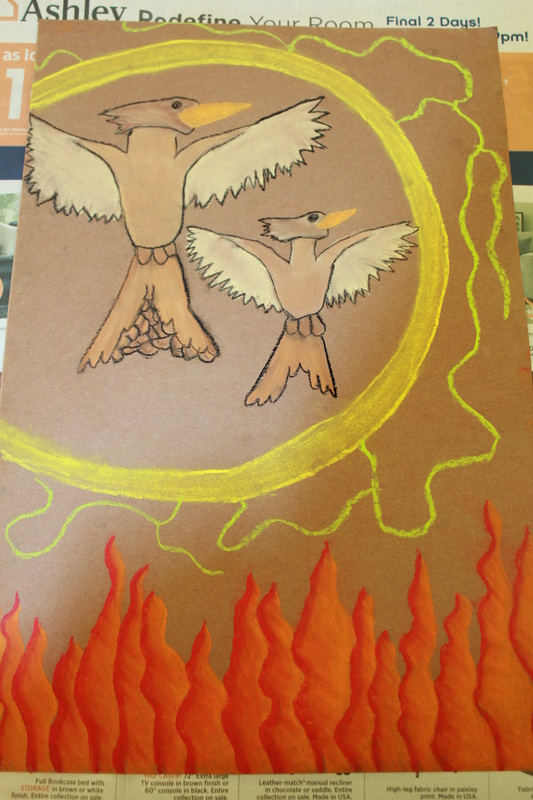
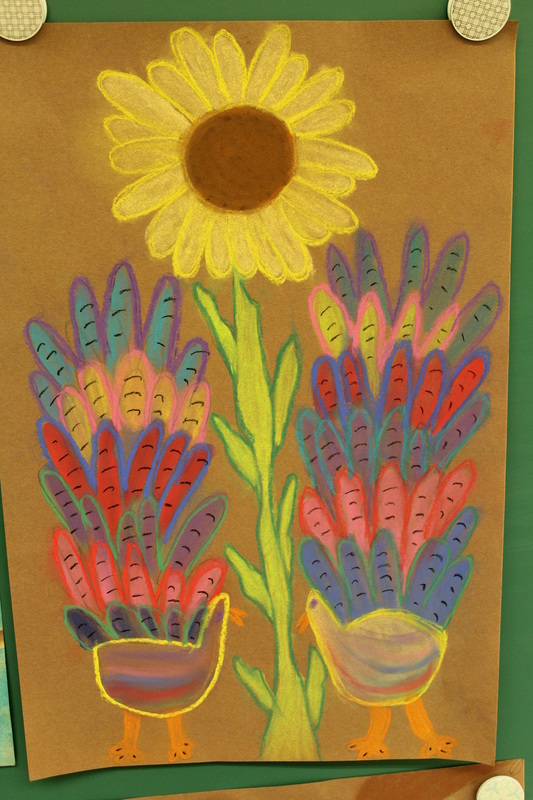
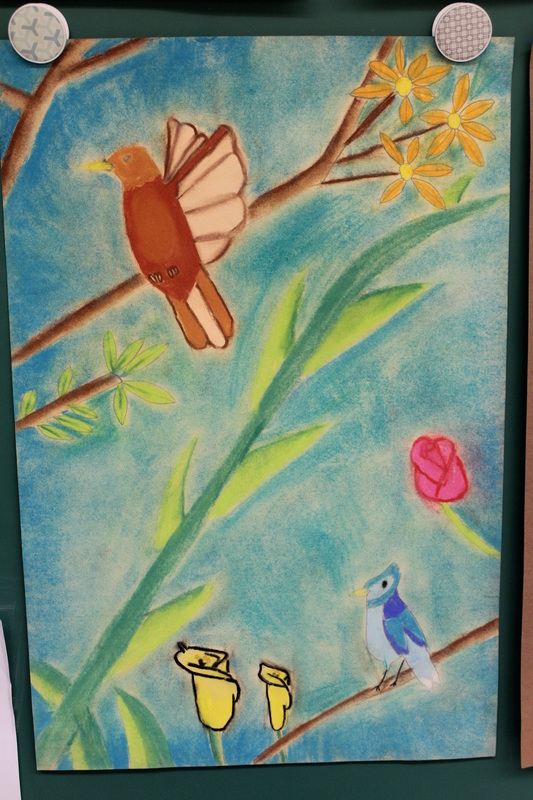
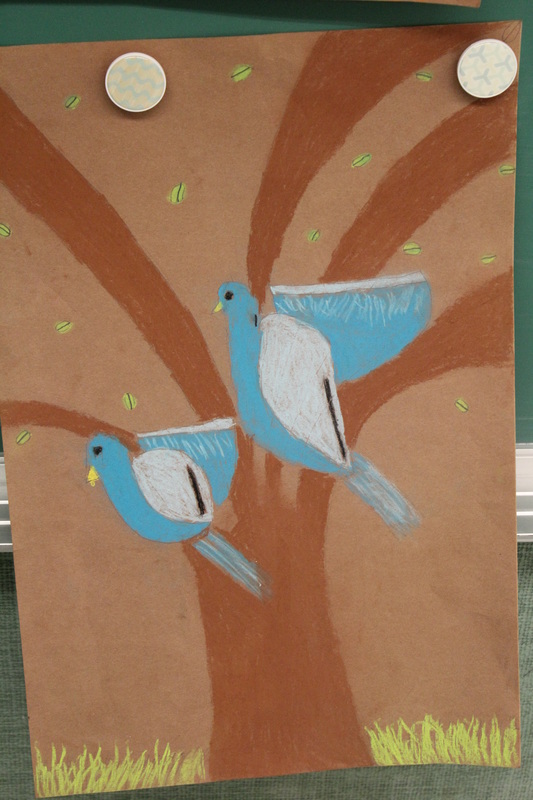
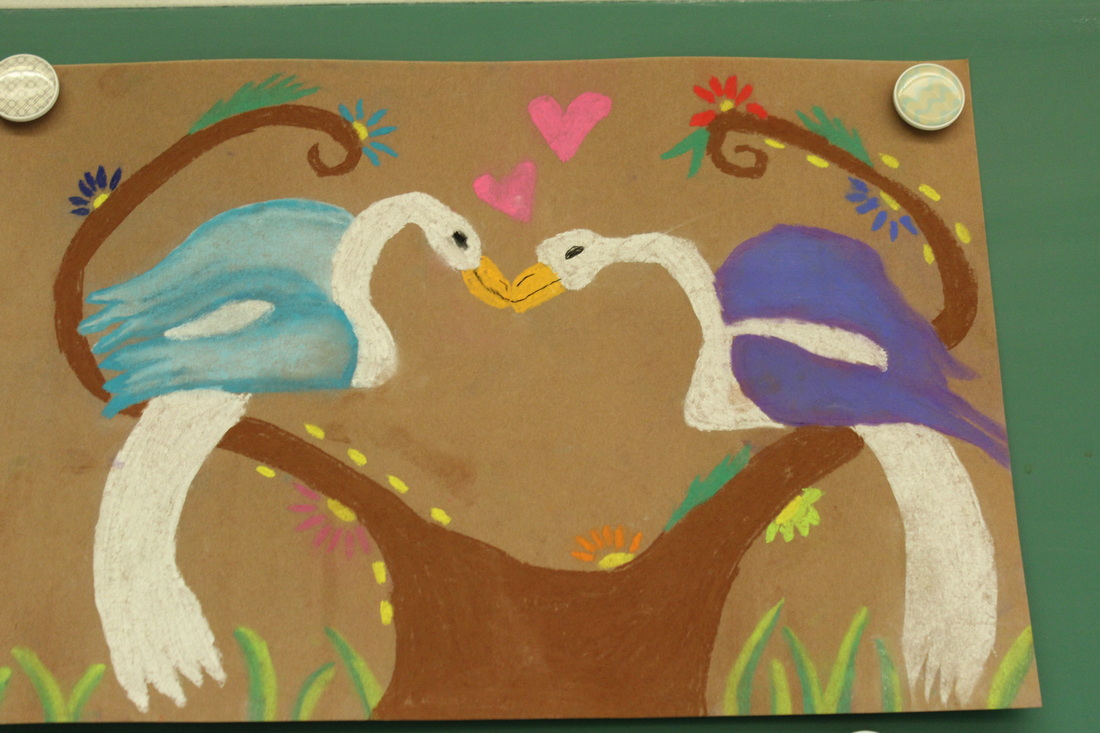
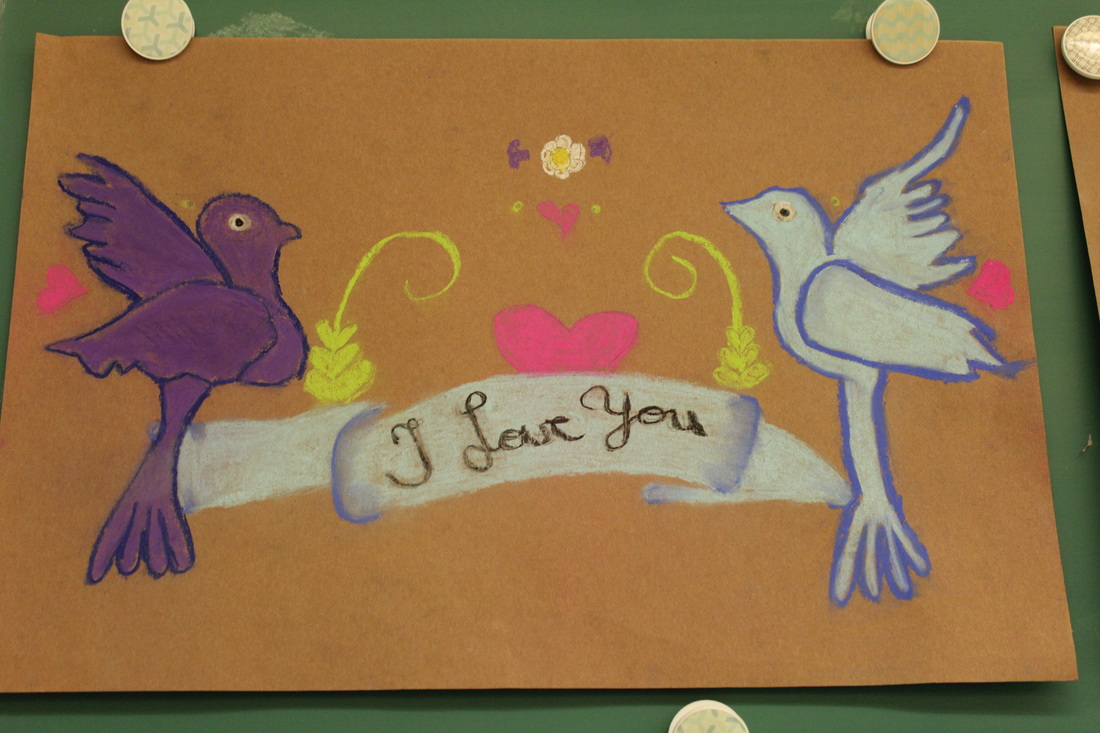
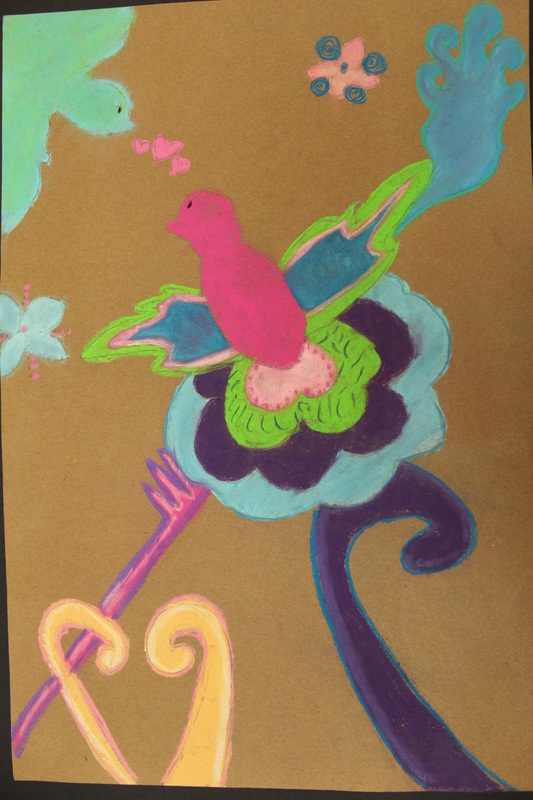
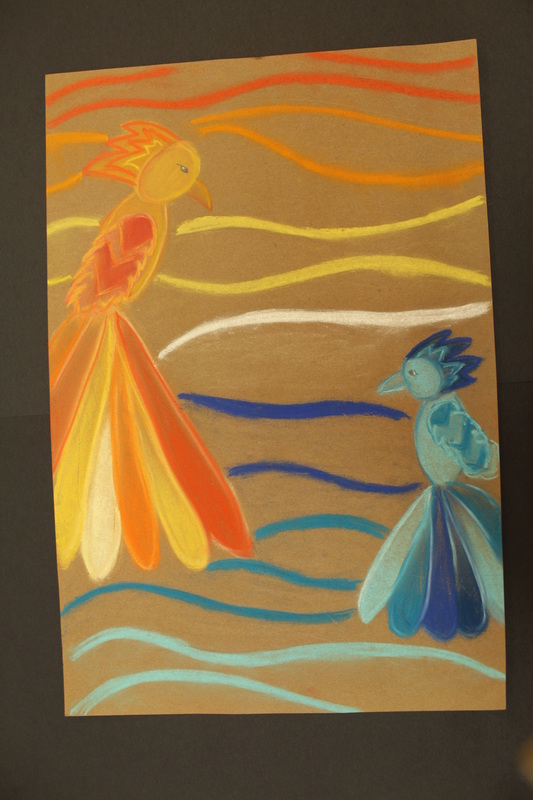
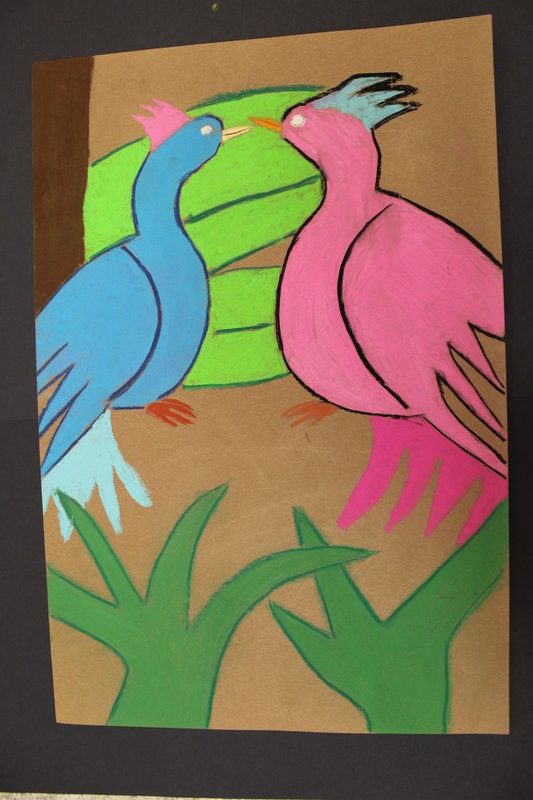
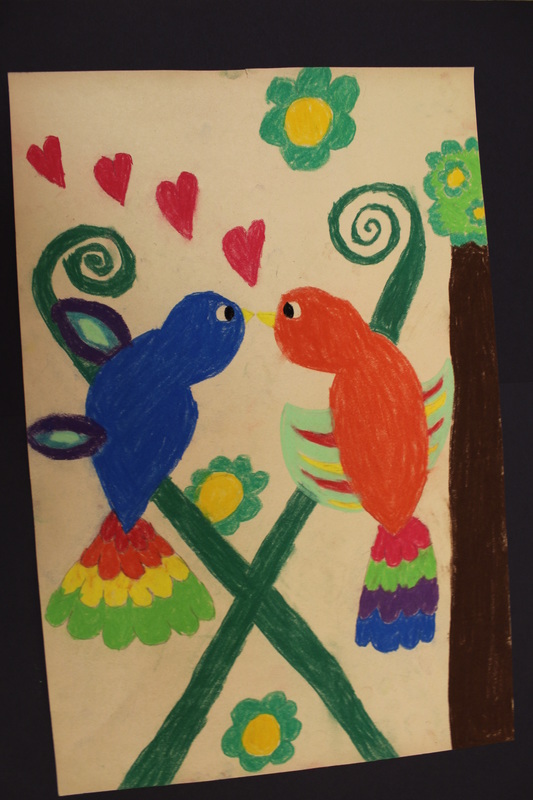
Amate bird chalk drawings

For this project students learn about the Mexican art form of "Amate Bird Paintings". Amate, is not a type of bird, but the type of handmade paper that the Mexican artists use. To begin this project we look at real life examples of Amate Bird Paintings and the process of making the amate. From there students begin a rough draft of their own bird drawing. We talk about the meaning of "ornate" because the traditional bird paintings were highly designed with ornate tails, headpieces, feathers, and backgrounds. After practicing the birds, students choose a paper color for their background. Many choose brown paper to more closely resemble the artists who worked on amate, but others venture out and choose different background colors to compliment their birds! We then learn about chalk pastel techniques, how to smudge, blend and create clean lines. They always turn out to be a stunning display of colorful birds!

Foil sharpie art
For this project students chose a subject of their choice to draw out on paper. After drawing out their design on paper they transferred it to foil and then used sharpies to add color. Trick with sharpies on foil is waiting for the colors to dry so they don't smear! They turned out awesome!
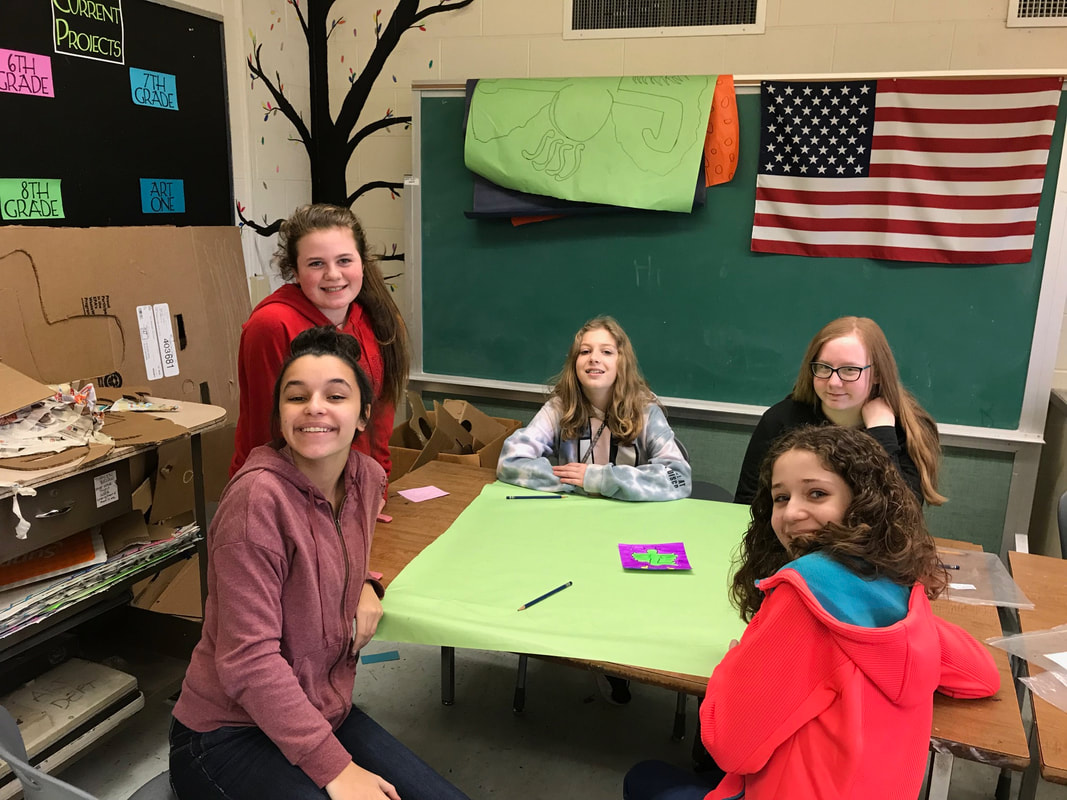
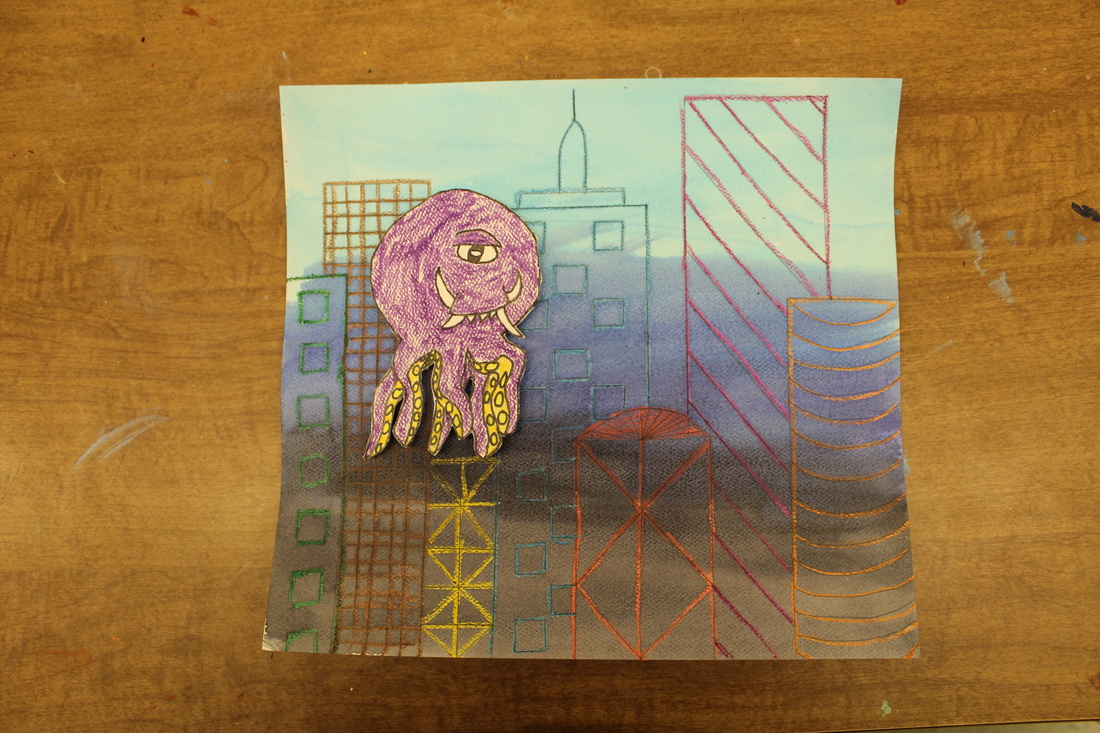
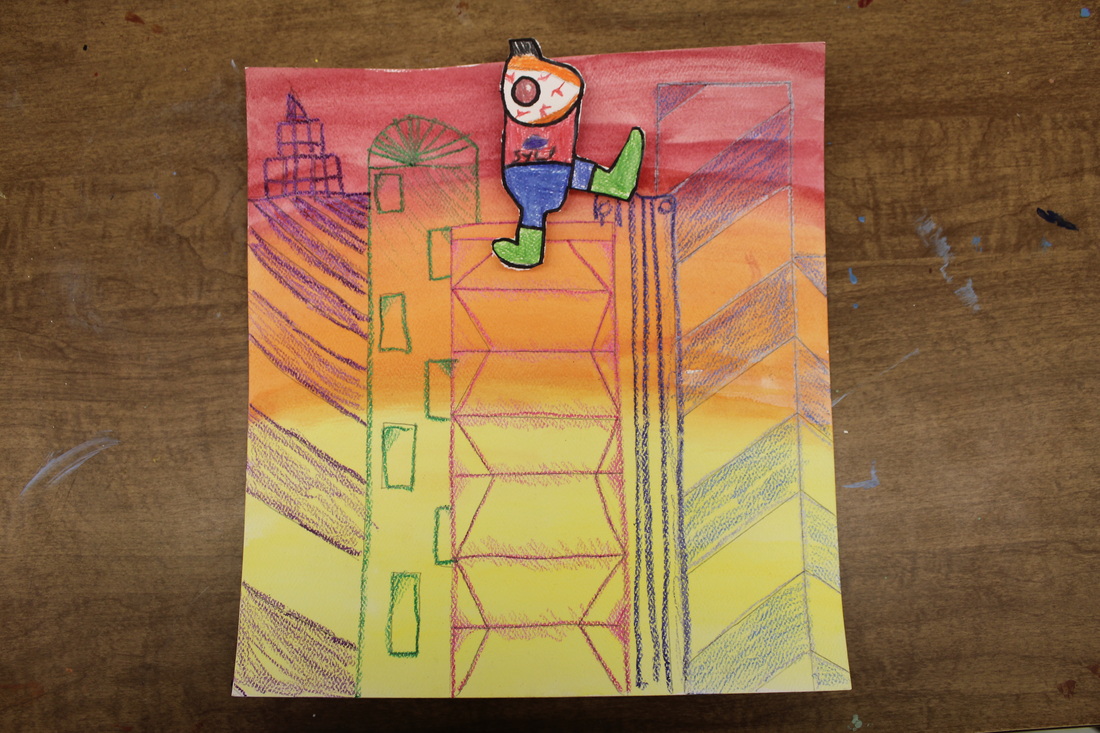
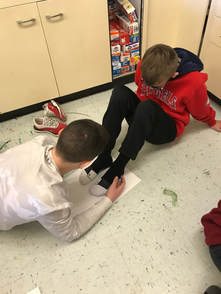
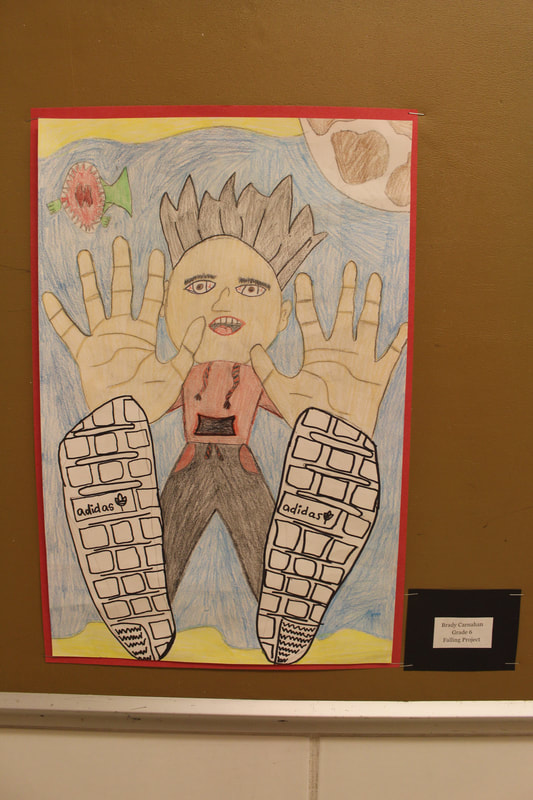
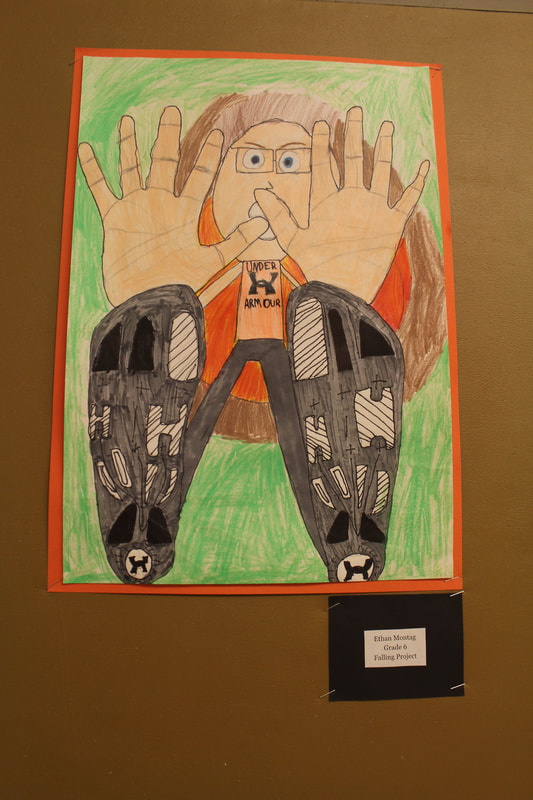
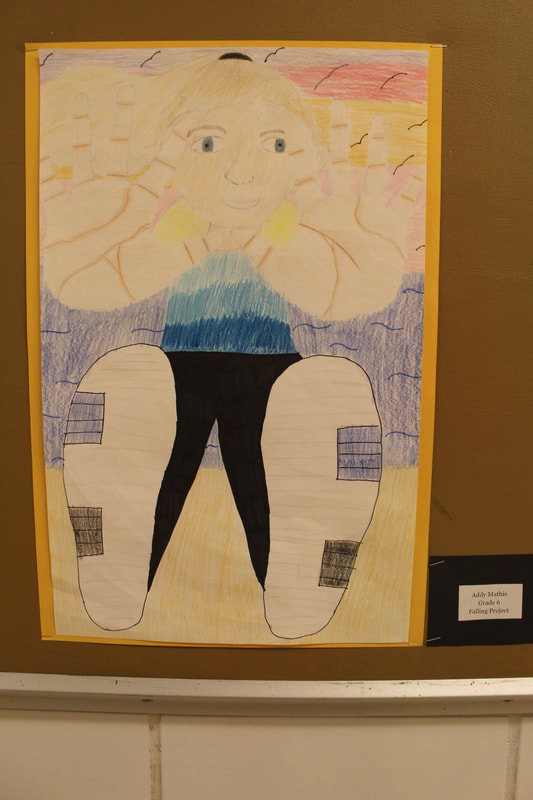
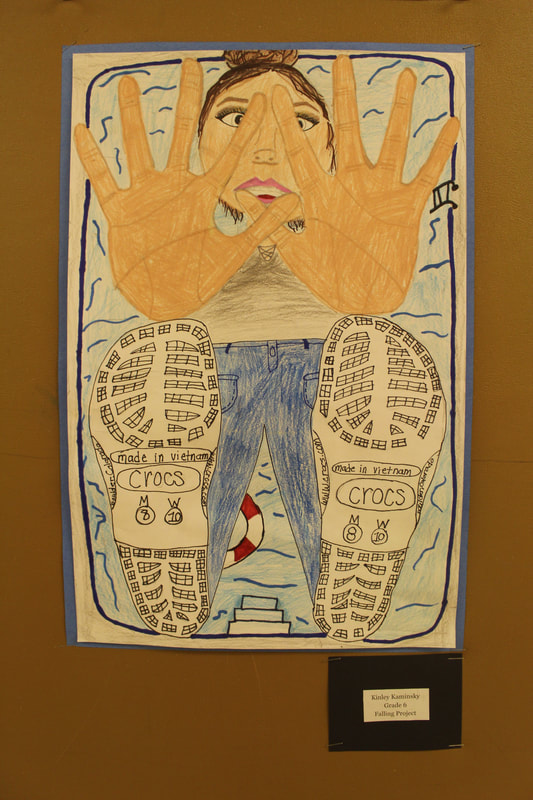
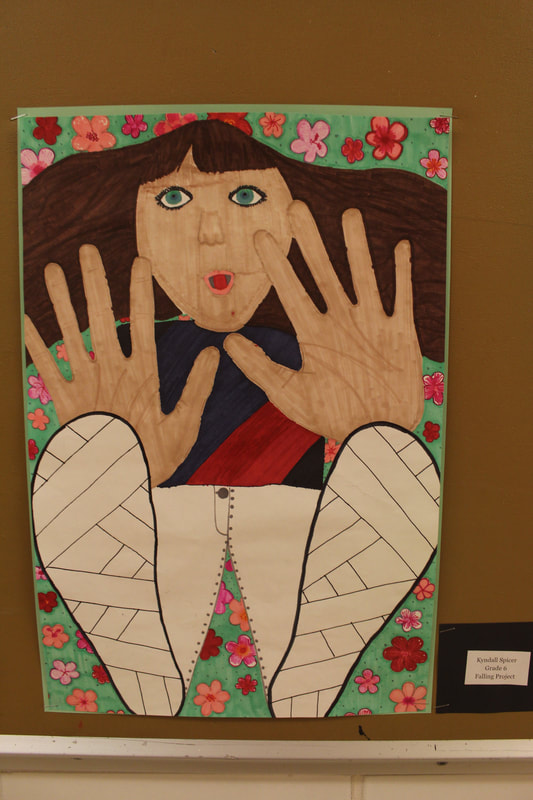
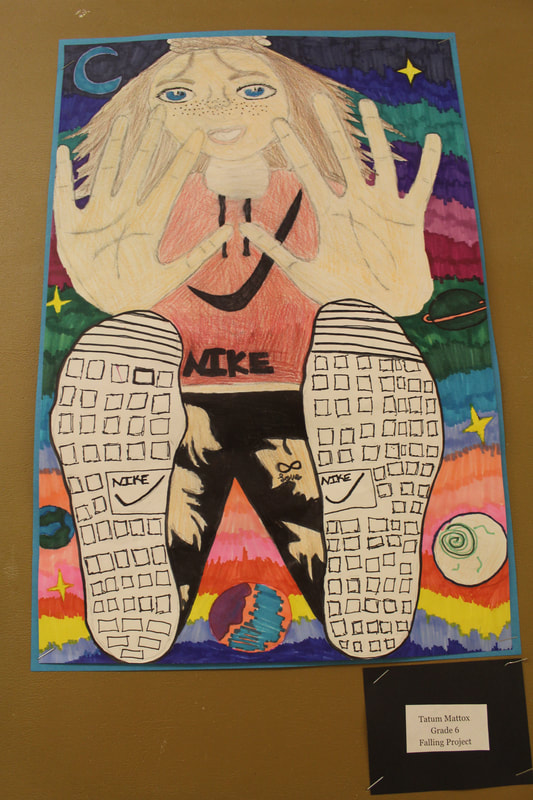
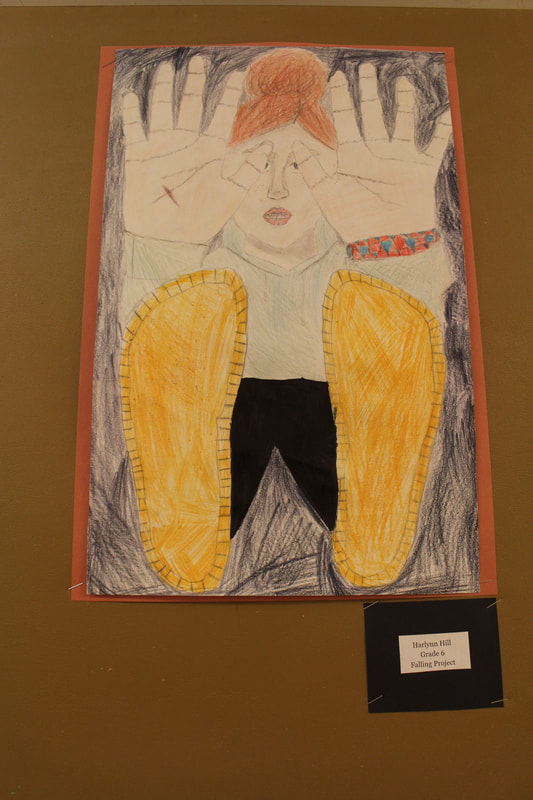
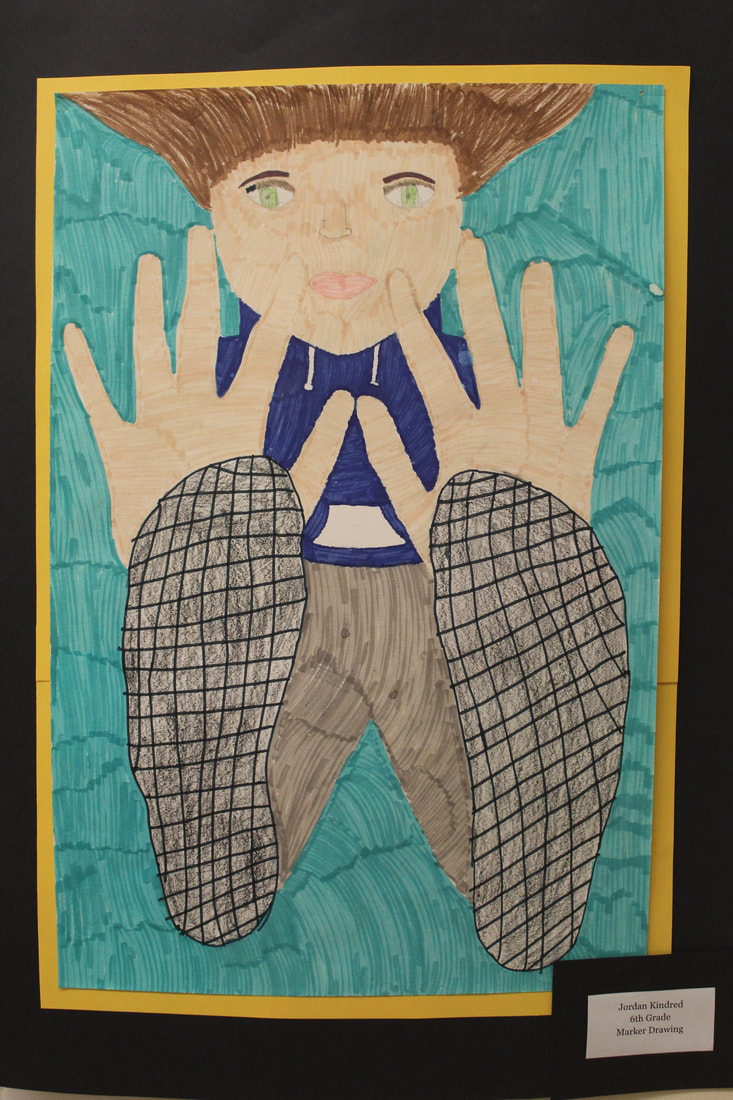
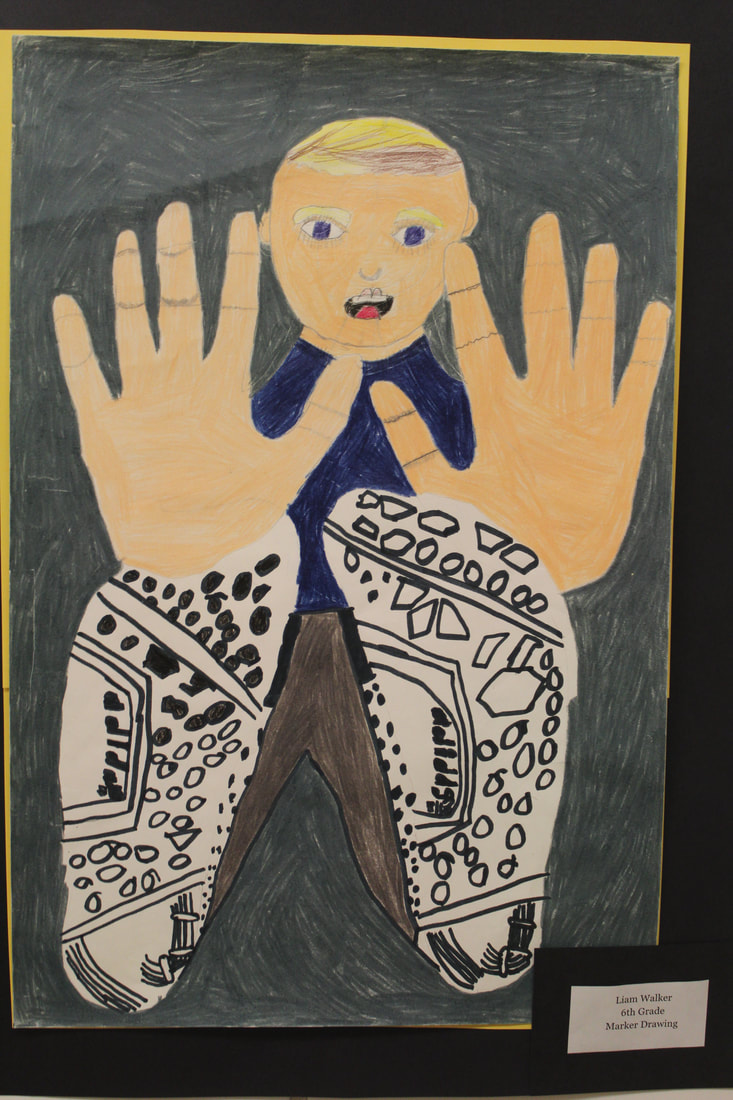
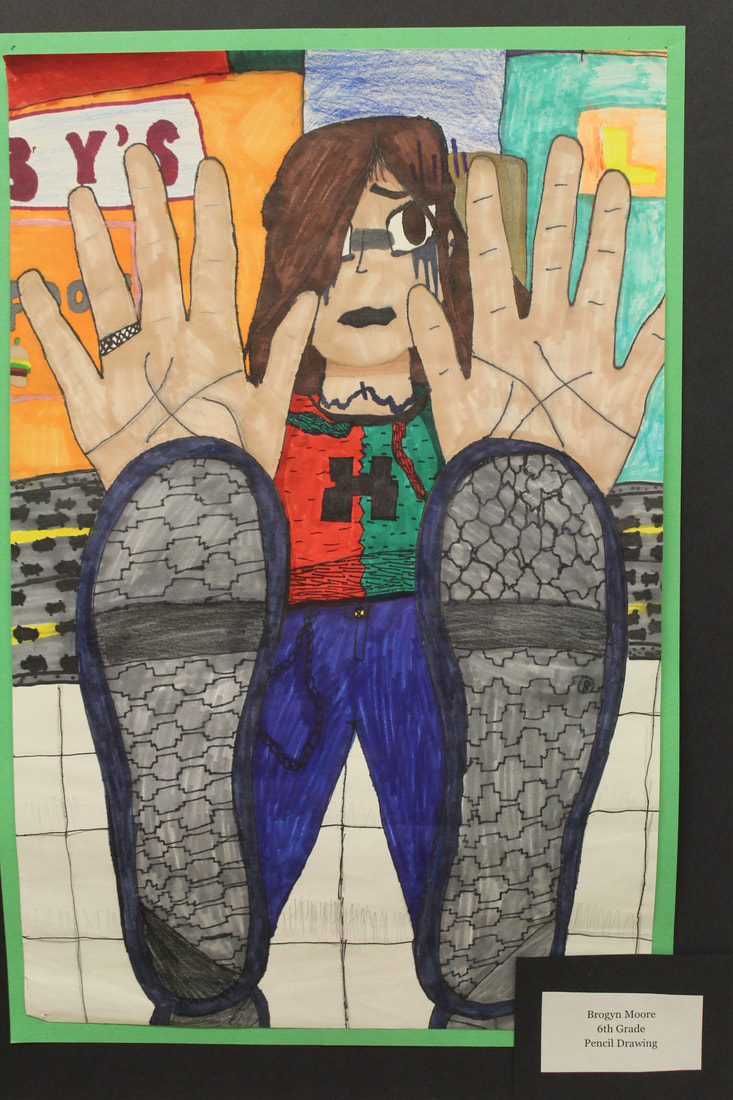
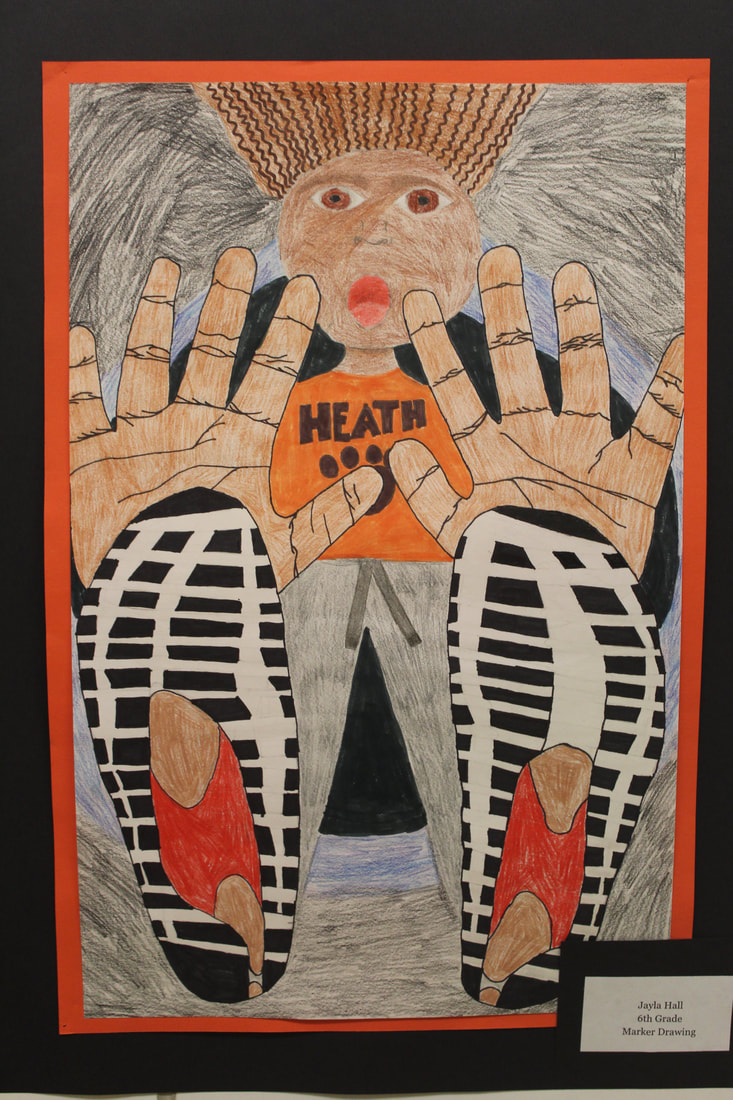
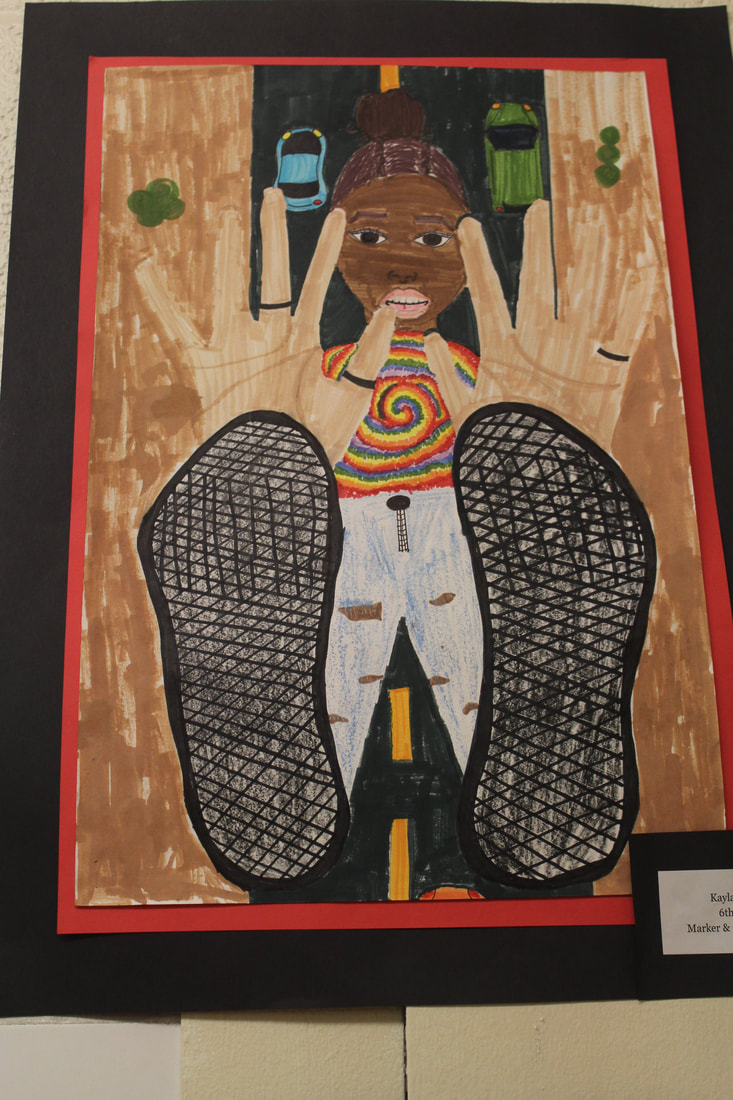
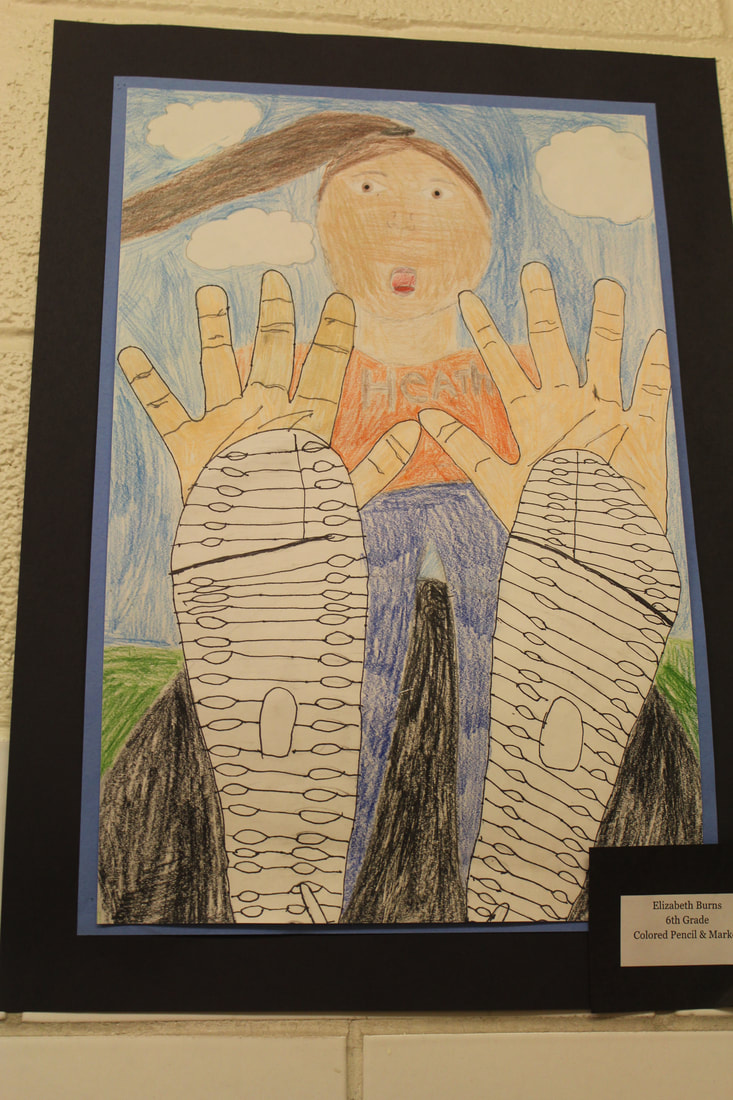
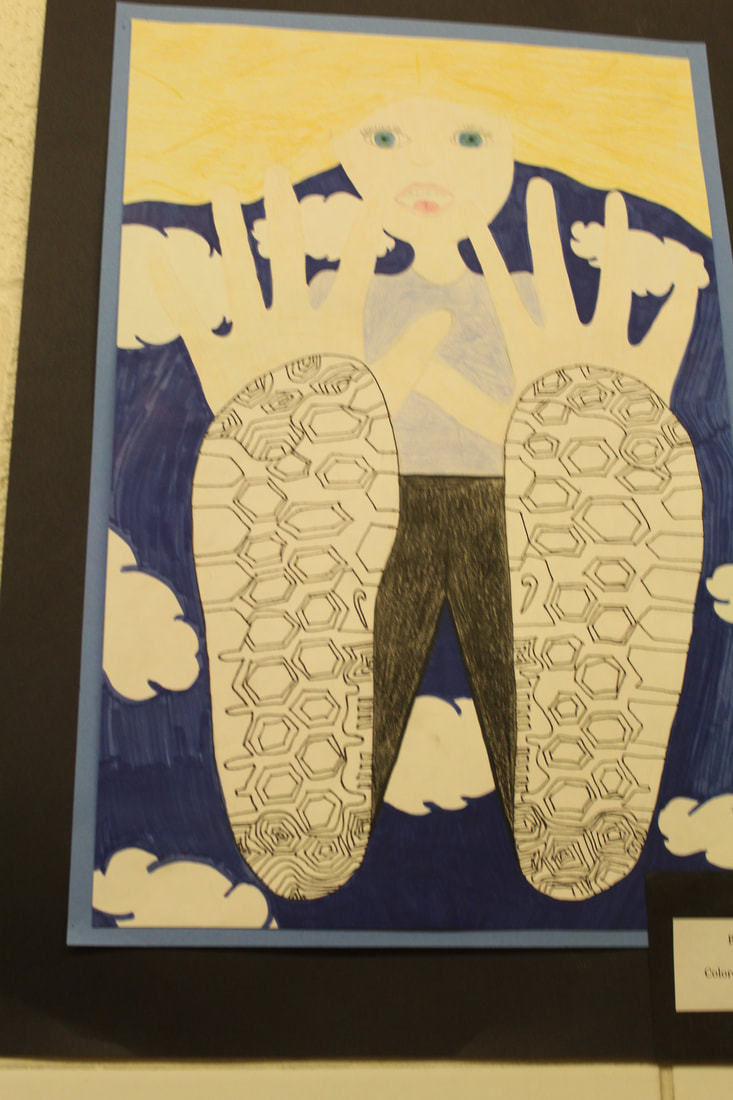
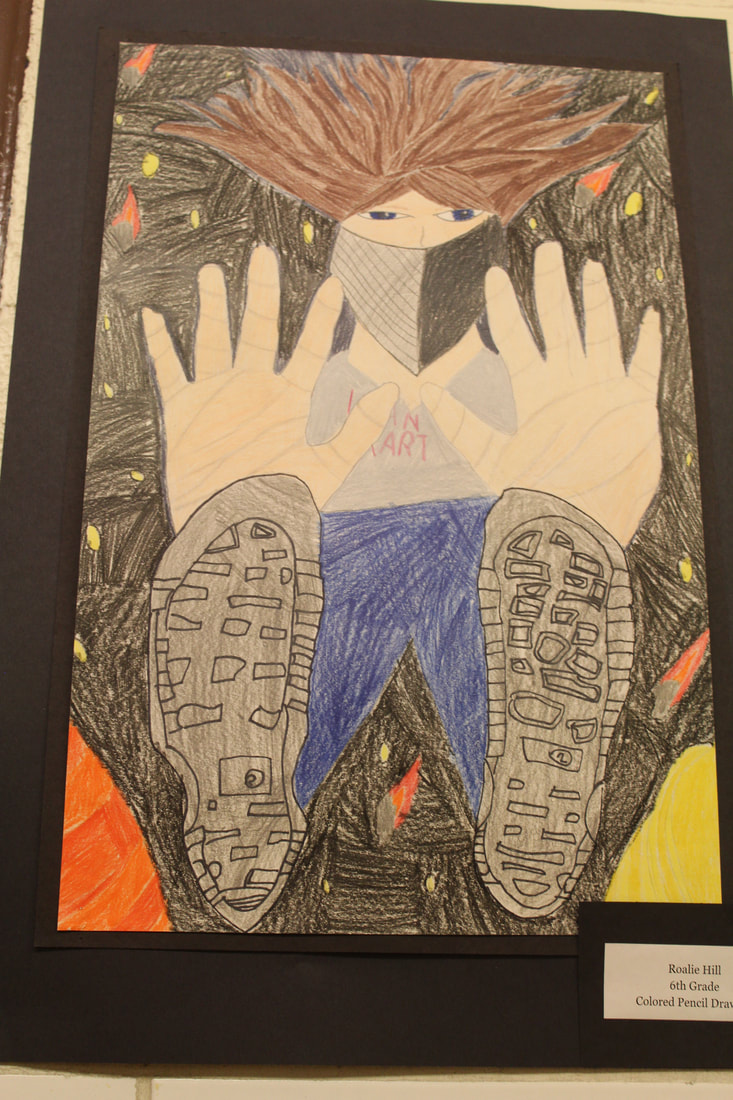
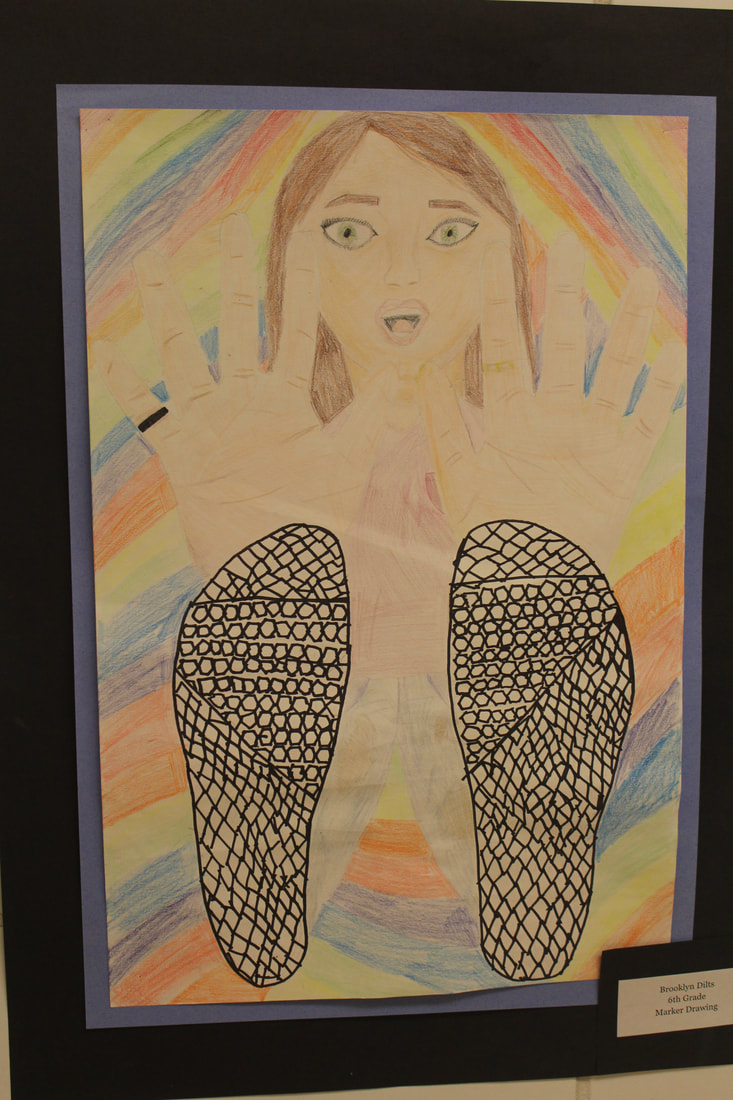
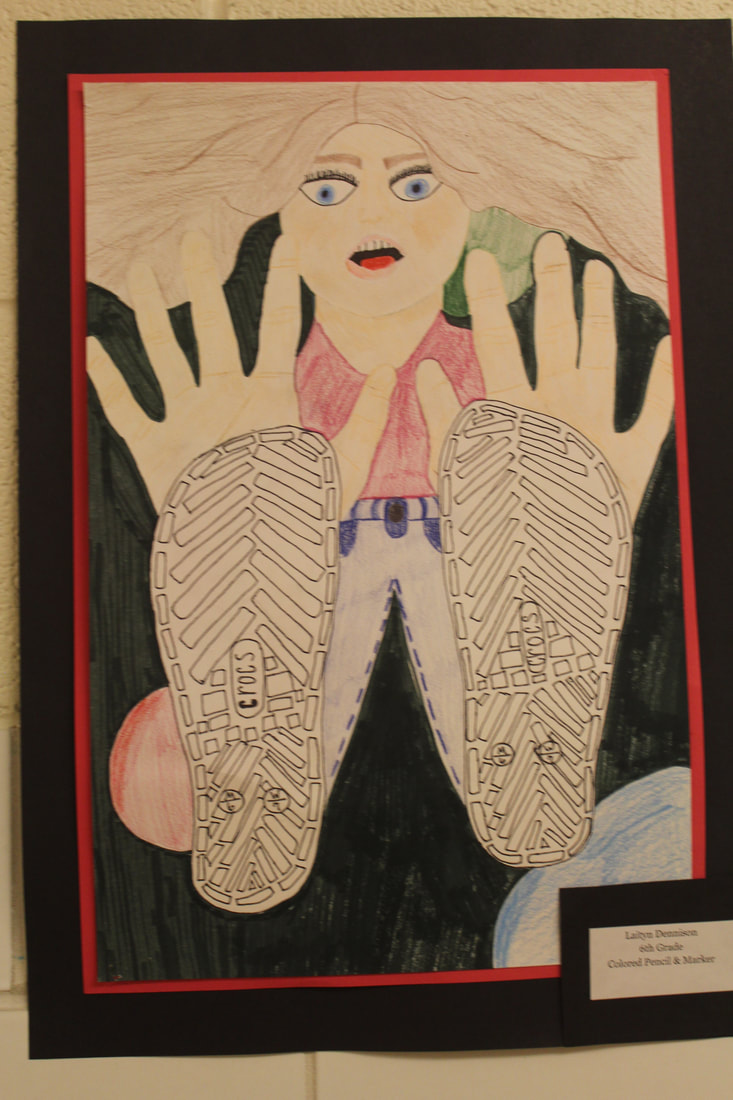
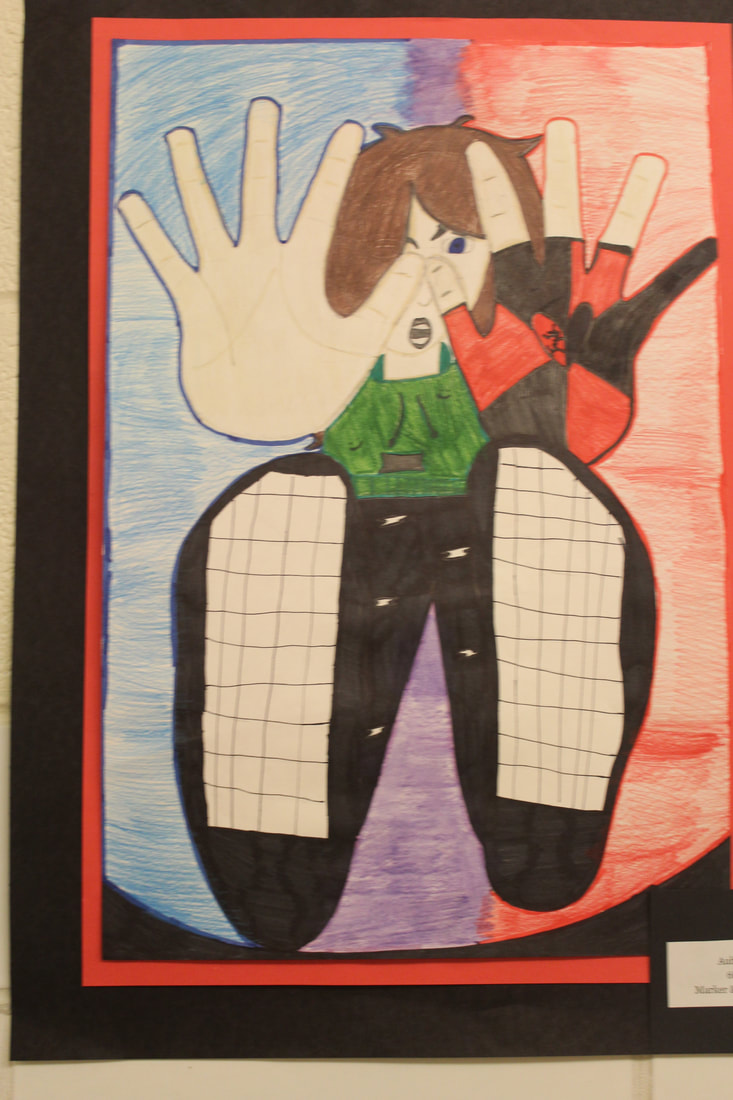
"Falling" a lesson in foreshortening
Students hard at work on their "Falling" Project
|

|
|
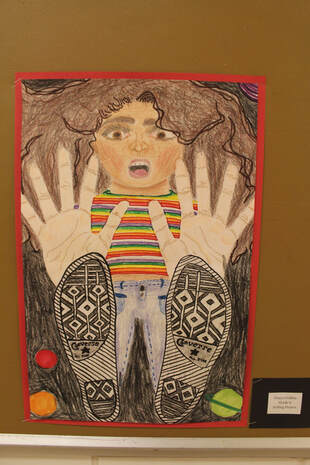
For this drawing project students learn about the vocabulary word "Forshortening" and how you draw an object coming at you, or in this case falling away from you. If the viewer is watching the person fall, we are seeing the person's hands and feet first and their body is further in the distance. We set out to begin this drawing by partnering up and began by tracing their hands and feet on their final draft paper. We then drew in the body, starting with the legs, making sure to only draw what wasn't blocked by the hands and feet. This is a hard drawing concept, drawing only what is seen and blocked by another object. Students thought about what they could be falling in to- space, water, flowers, a trampoline- and added their backgrounds. Afterwards we talked about textures in our shoes and how to draw them realistically, how to make hair look like it was moving, and what clothing looks like in a drawing. Students had the final option to use colored pencils, shading pencils, markers, crayons or a combination of all to add color/value to their final projects.


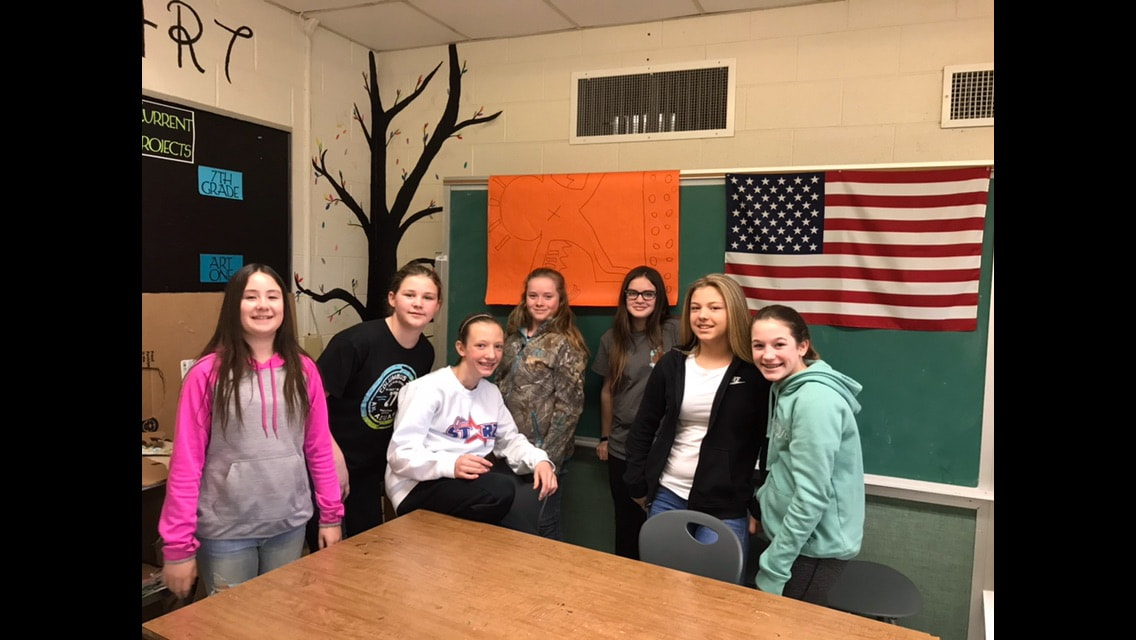
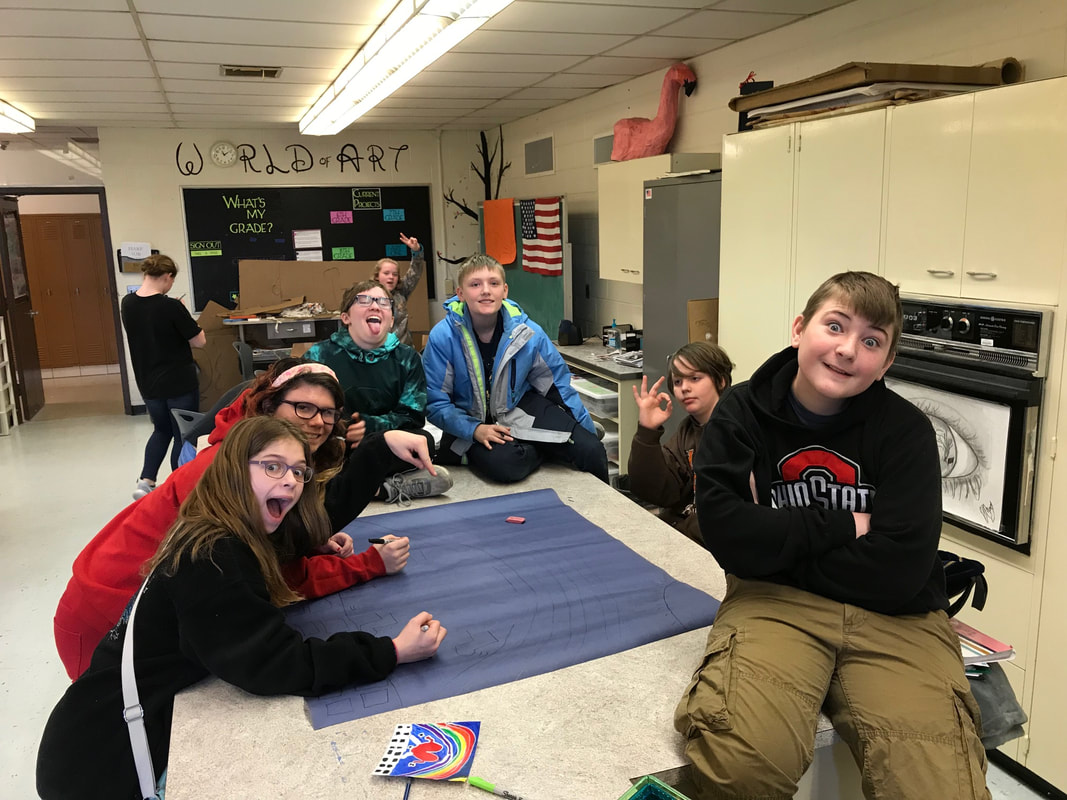
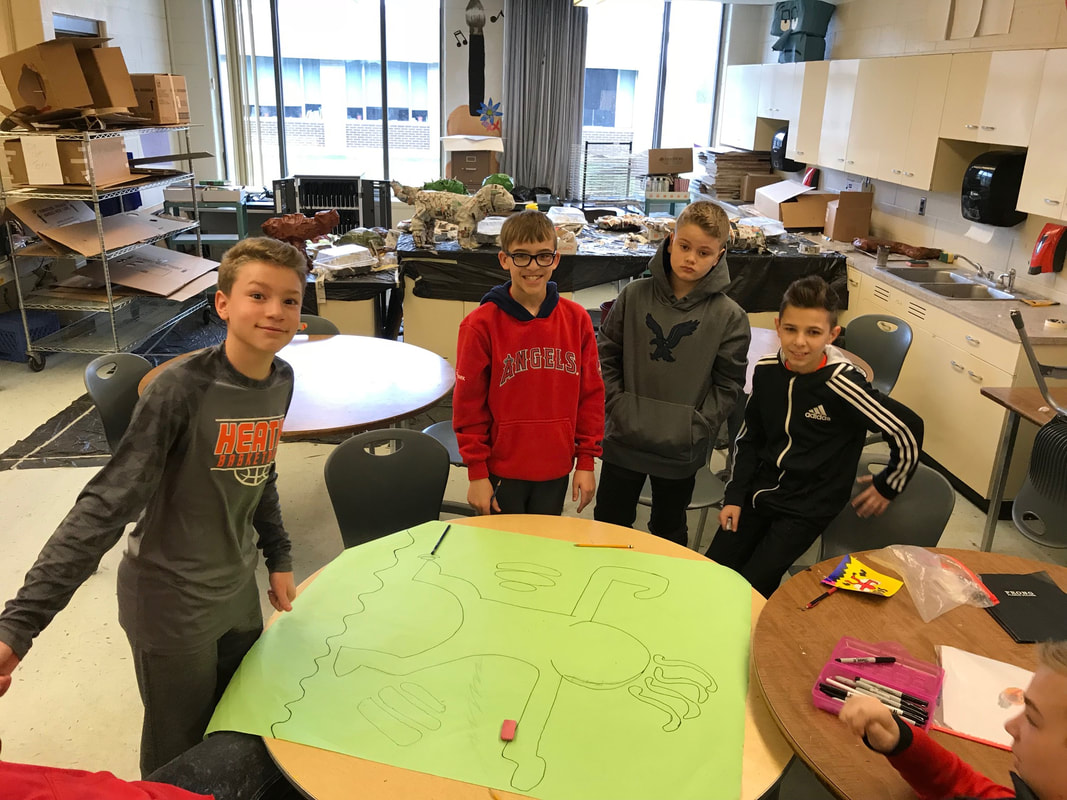
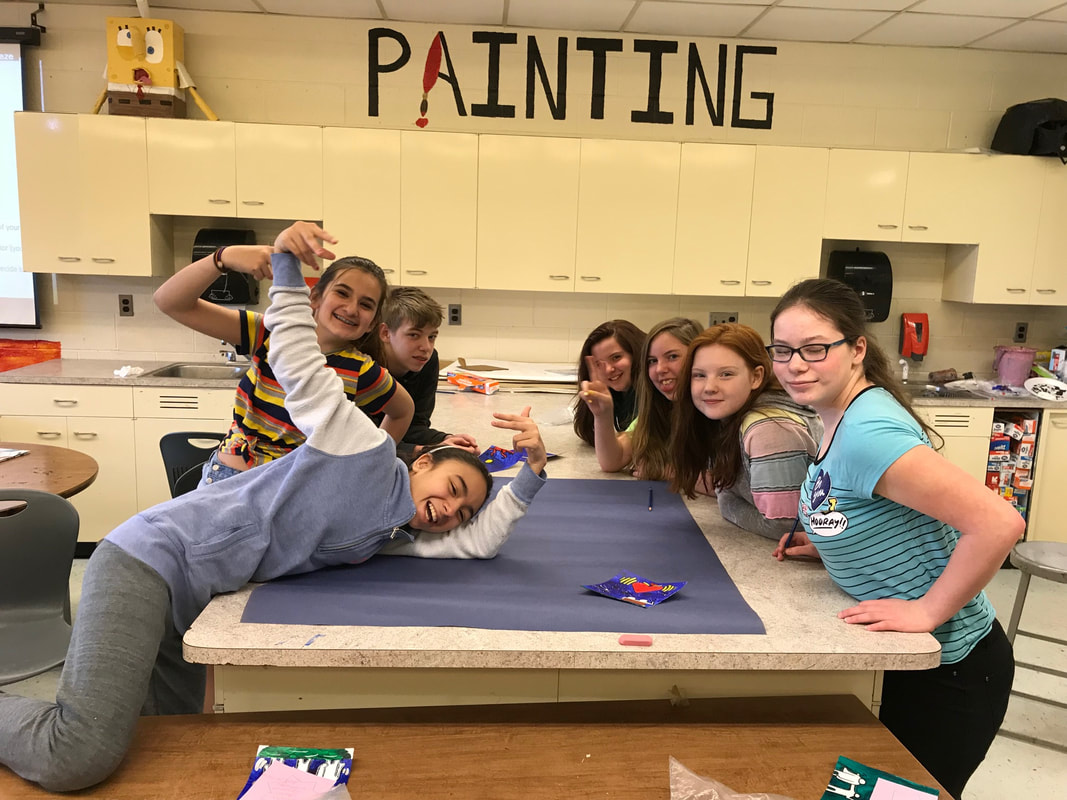
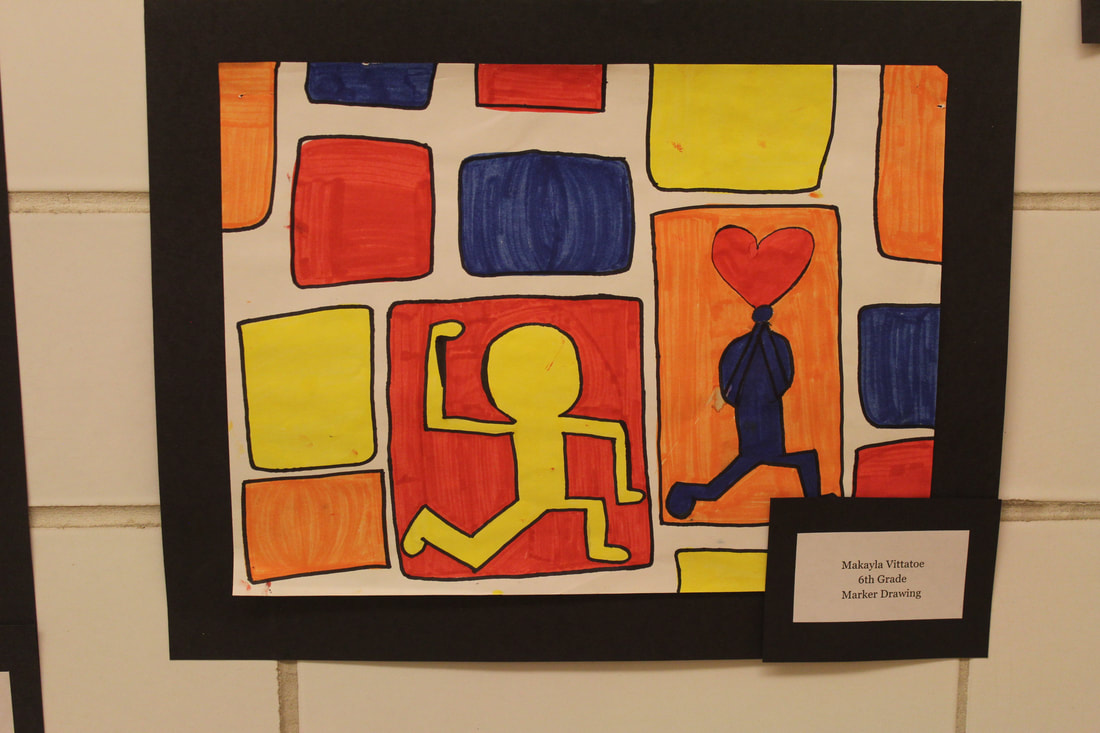
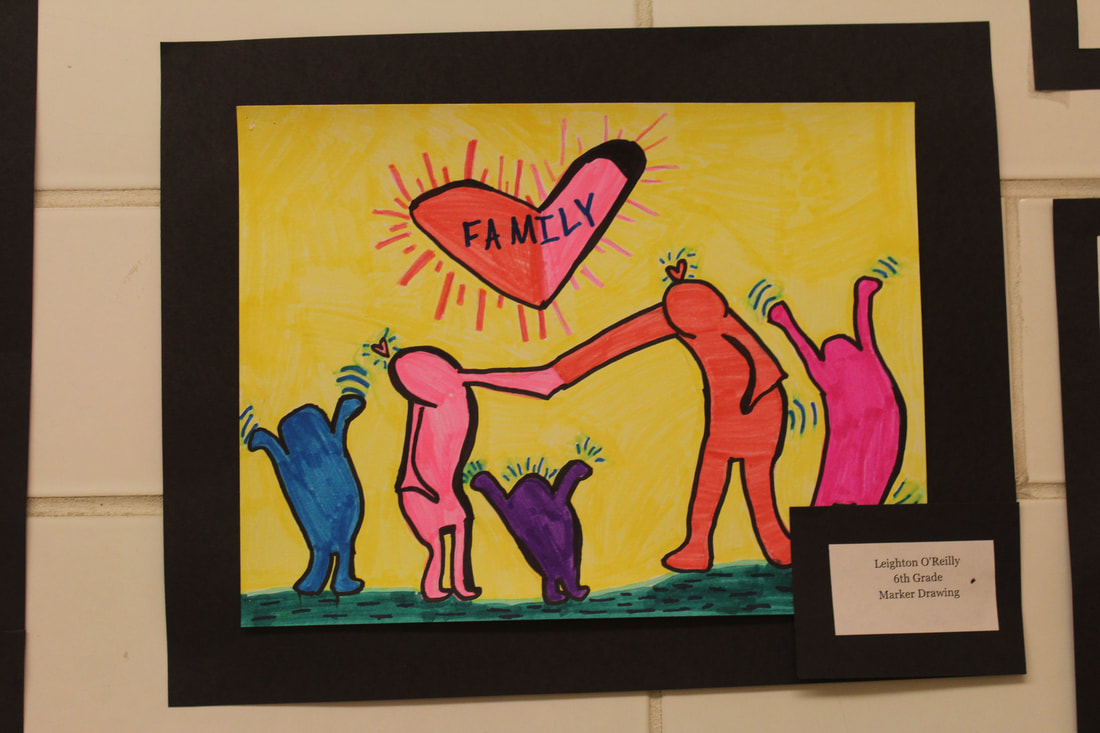
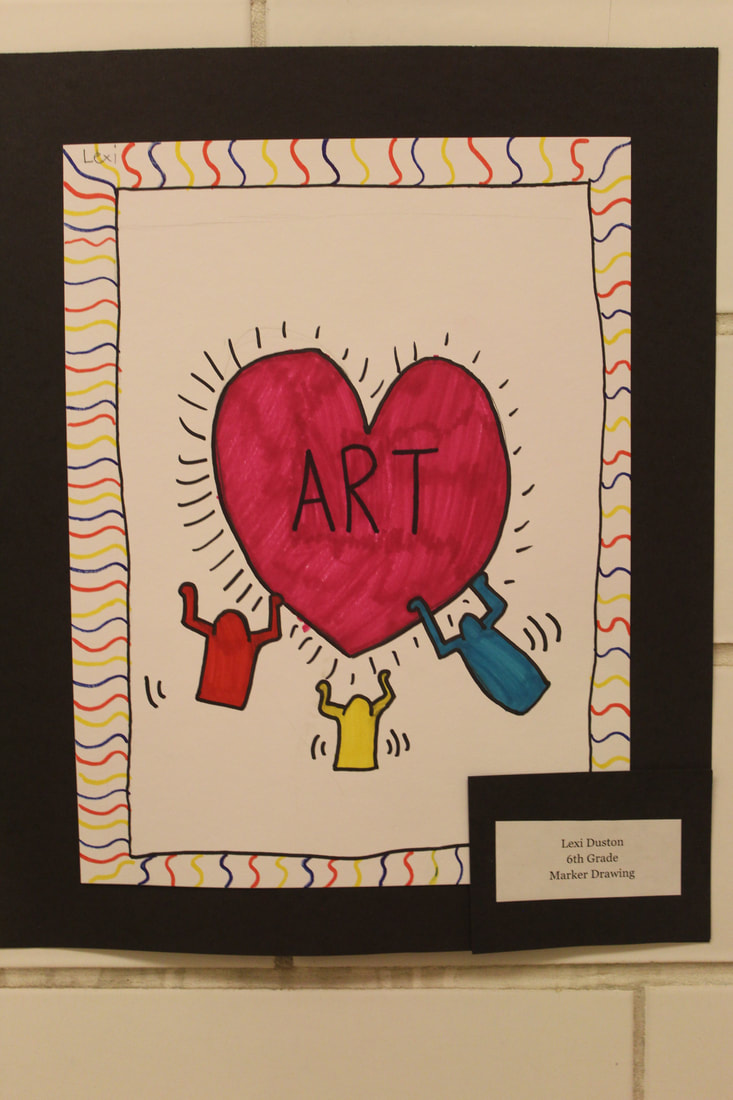
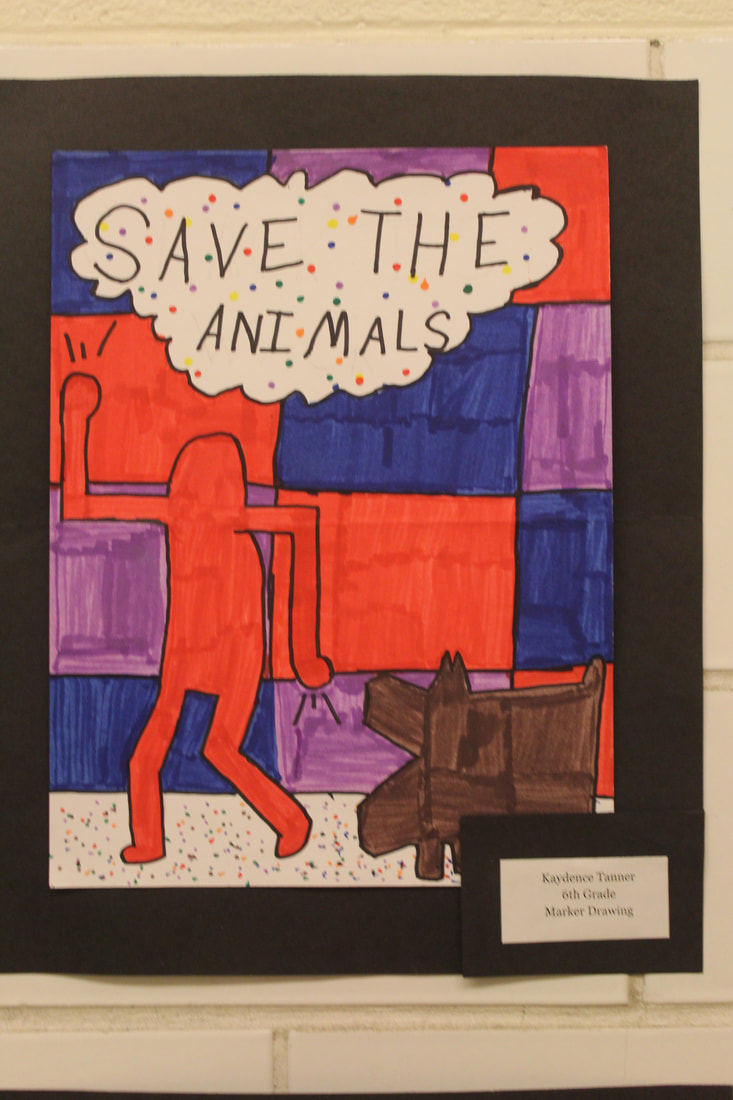
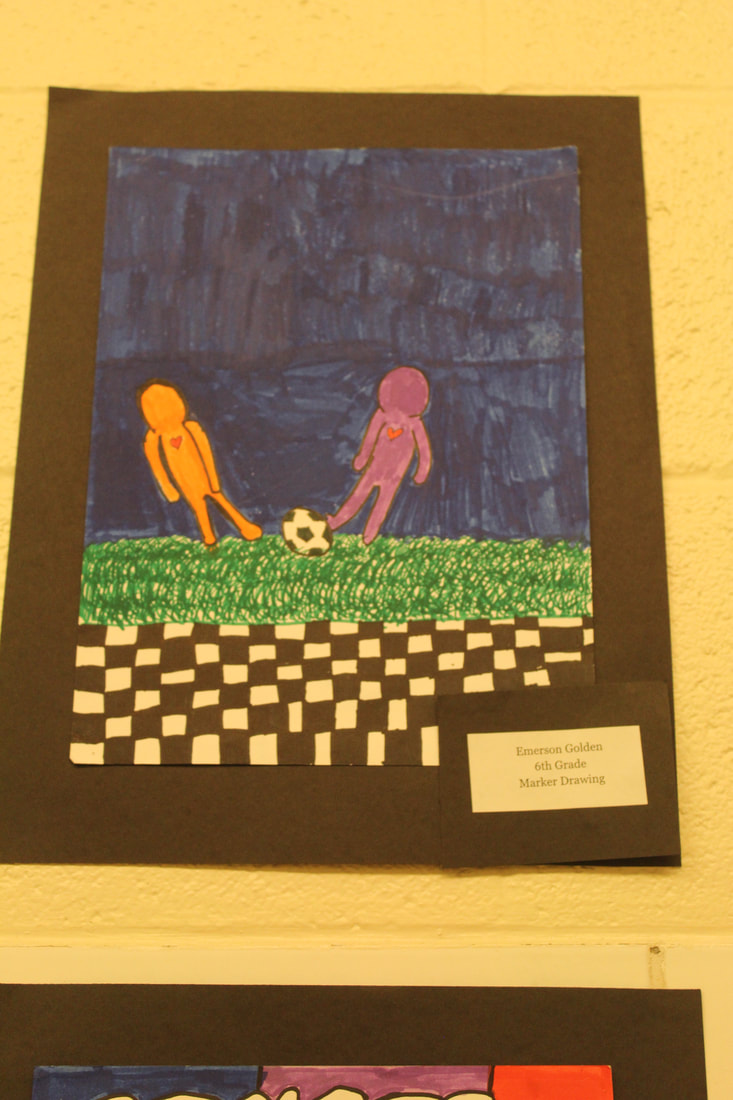
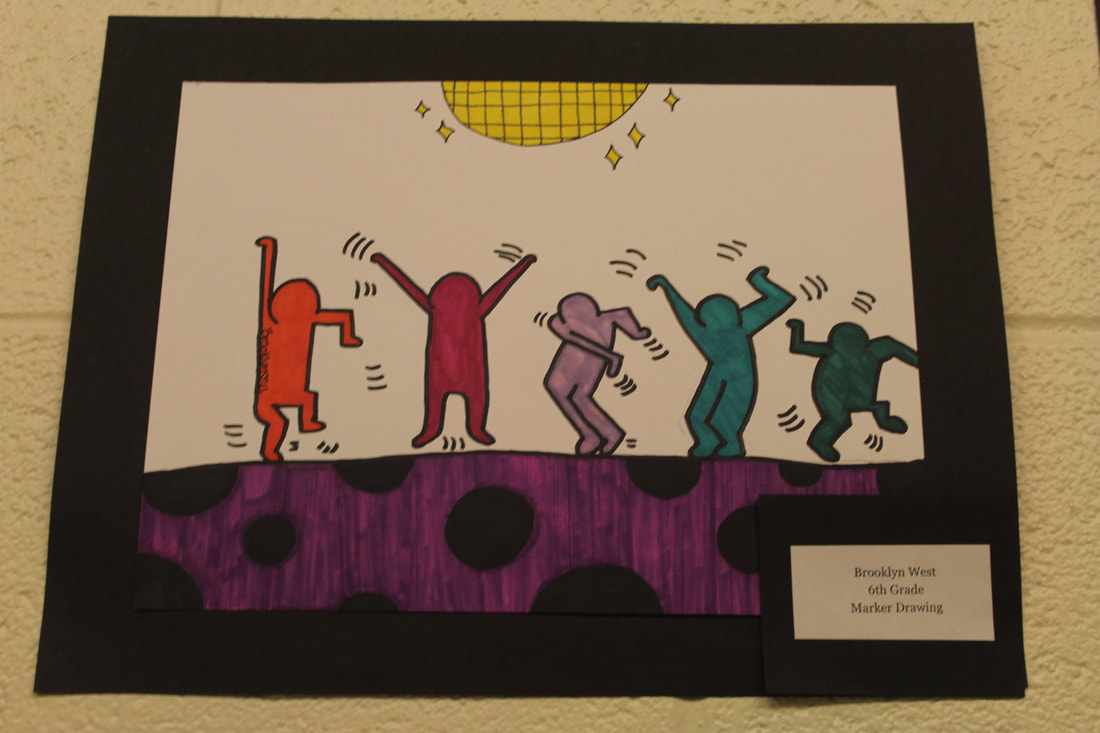
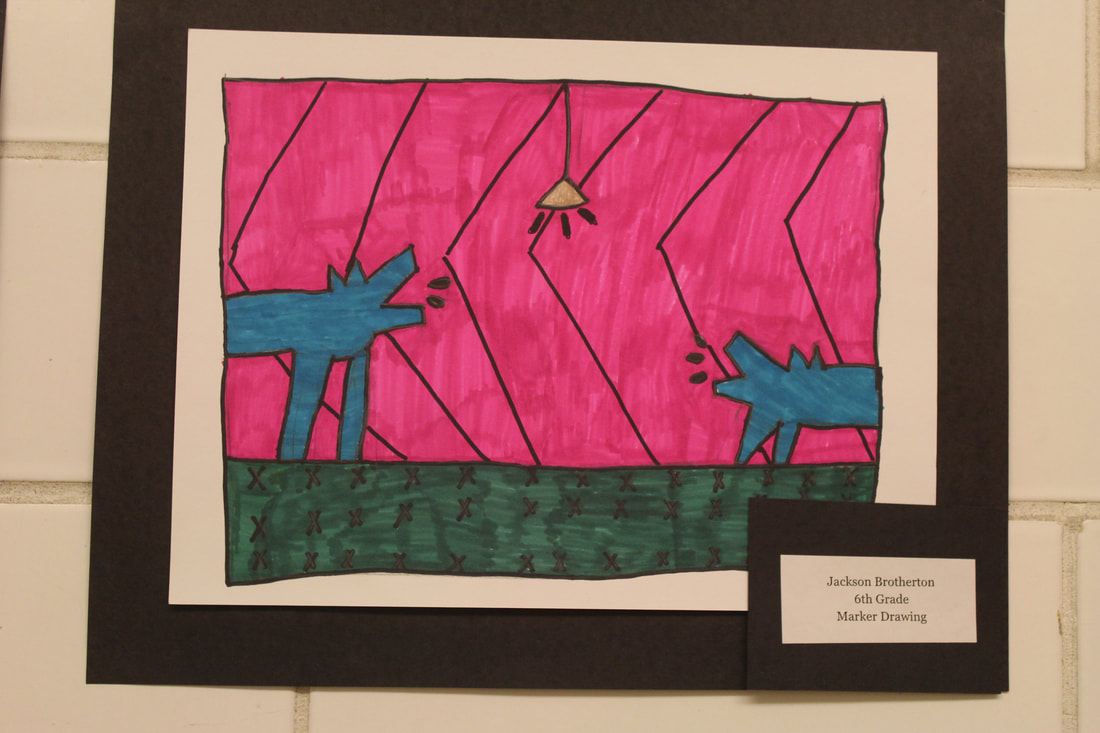
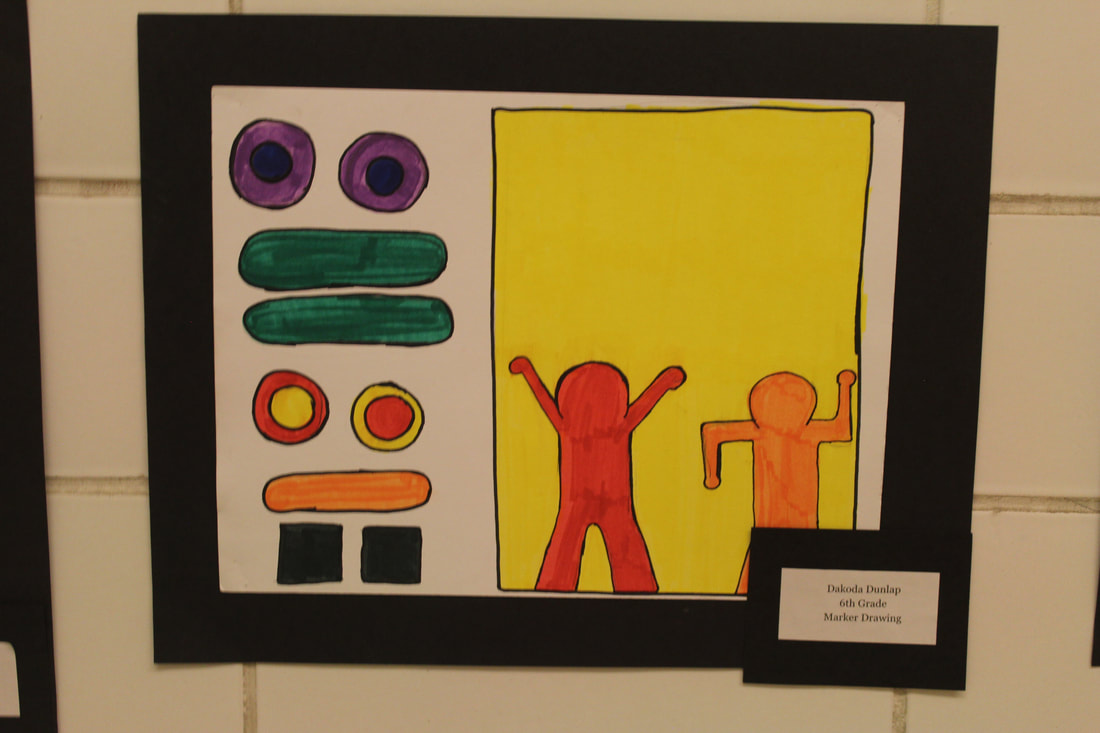
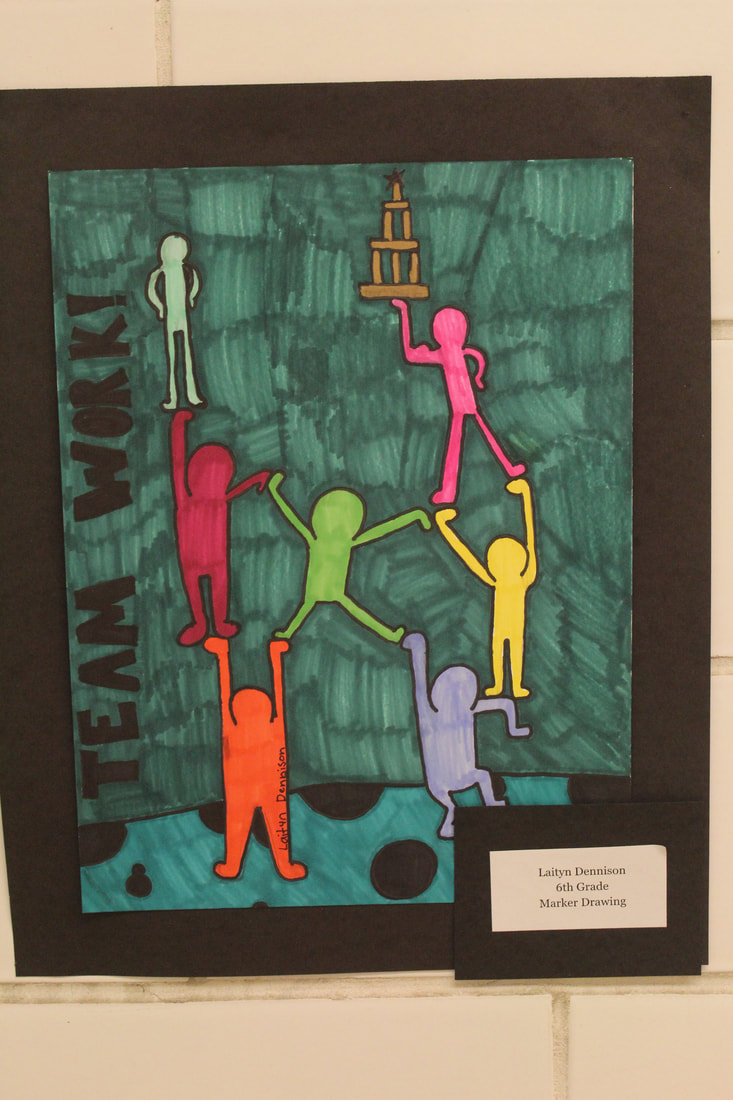
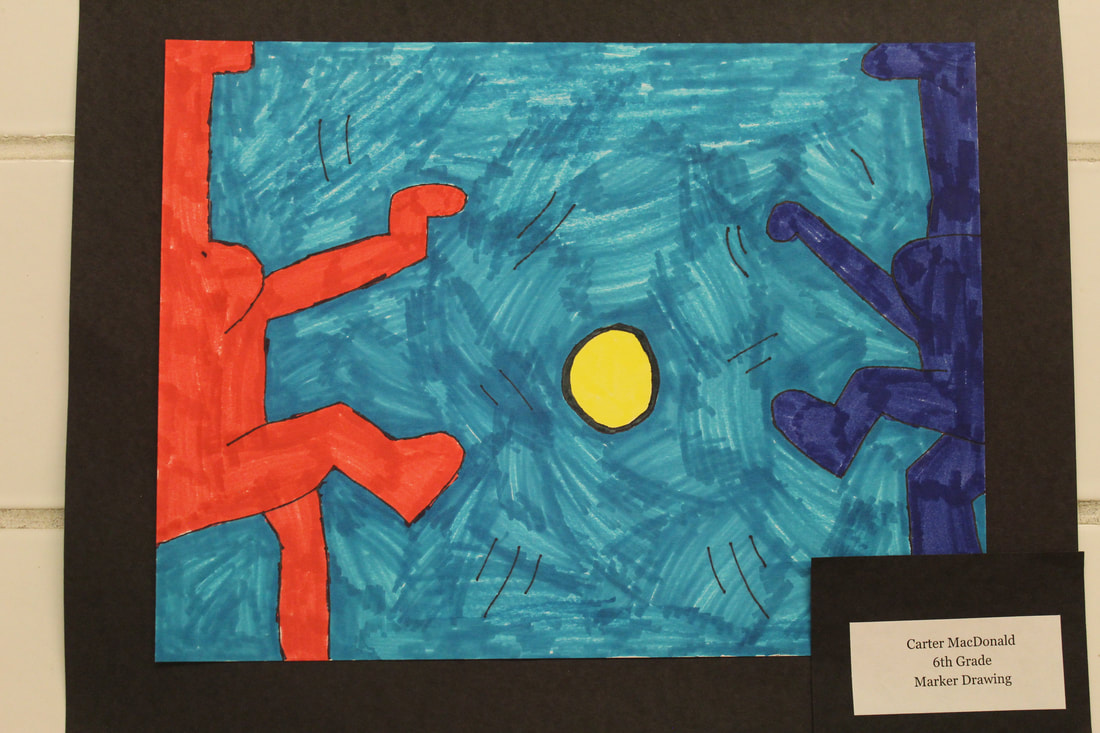
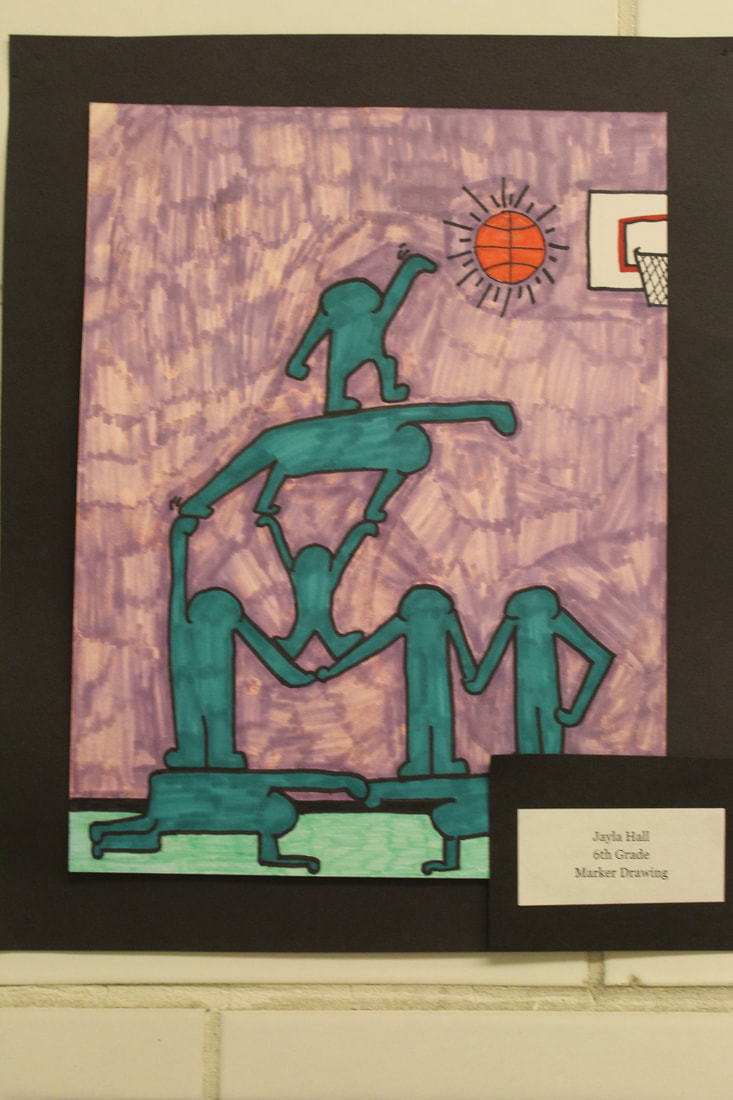
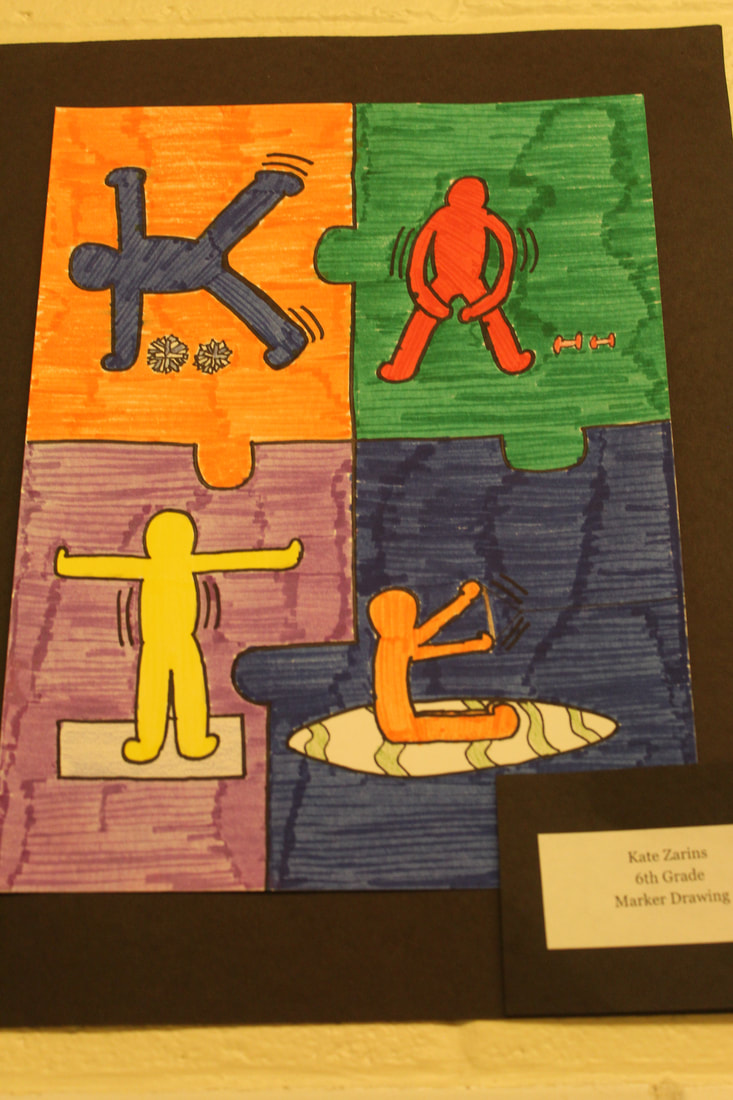
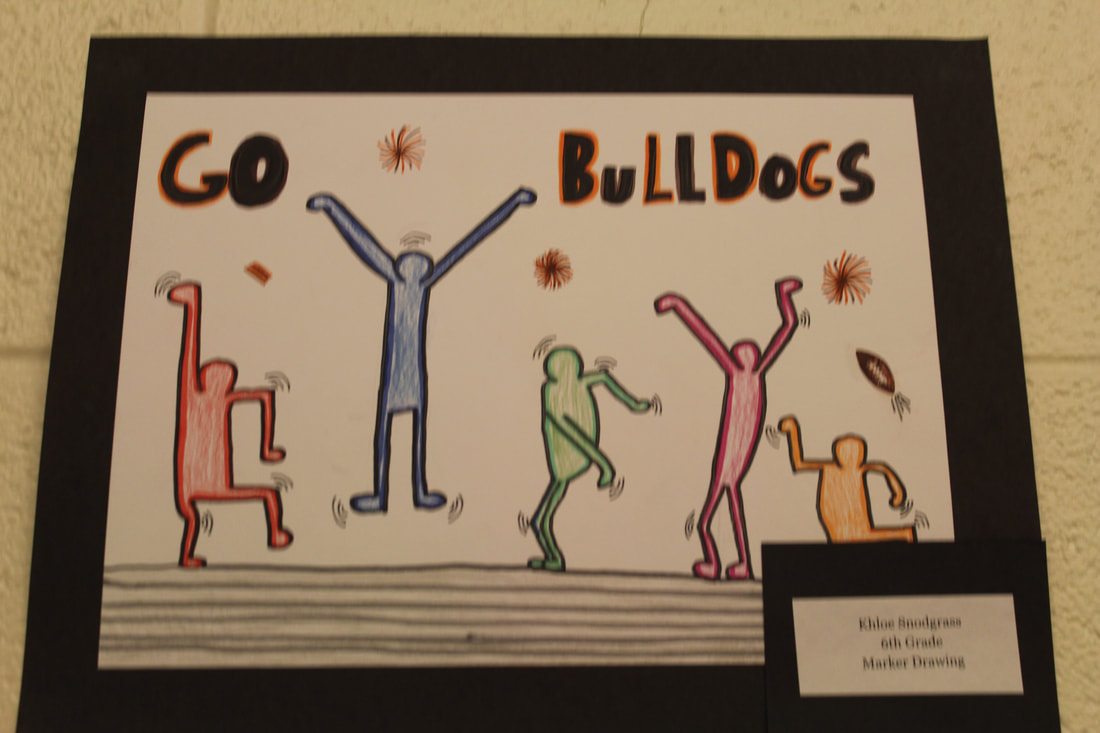
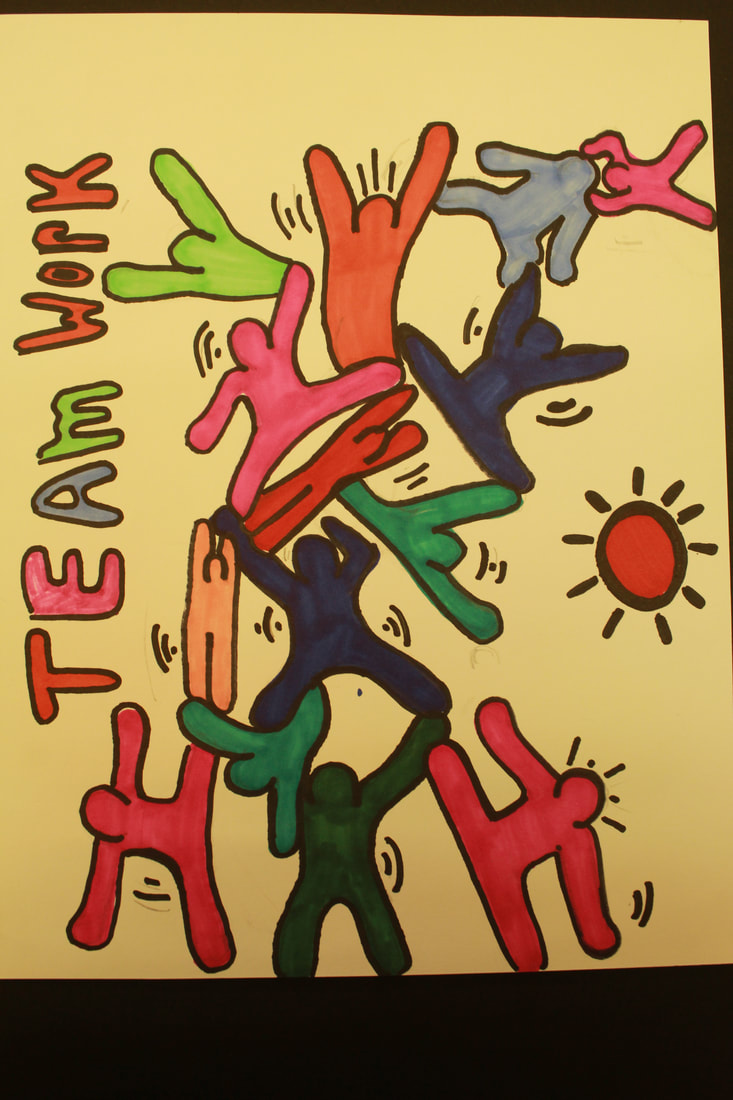
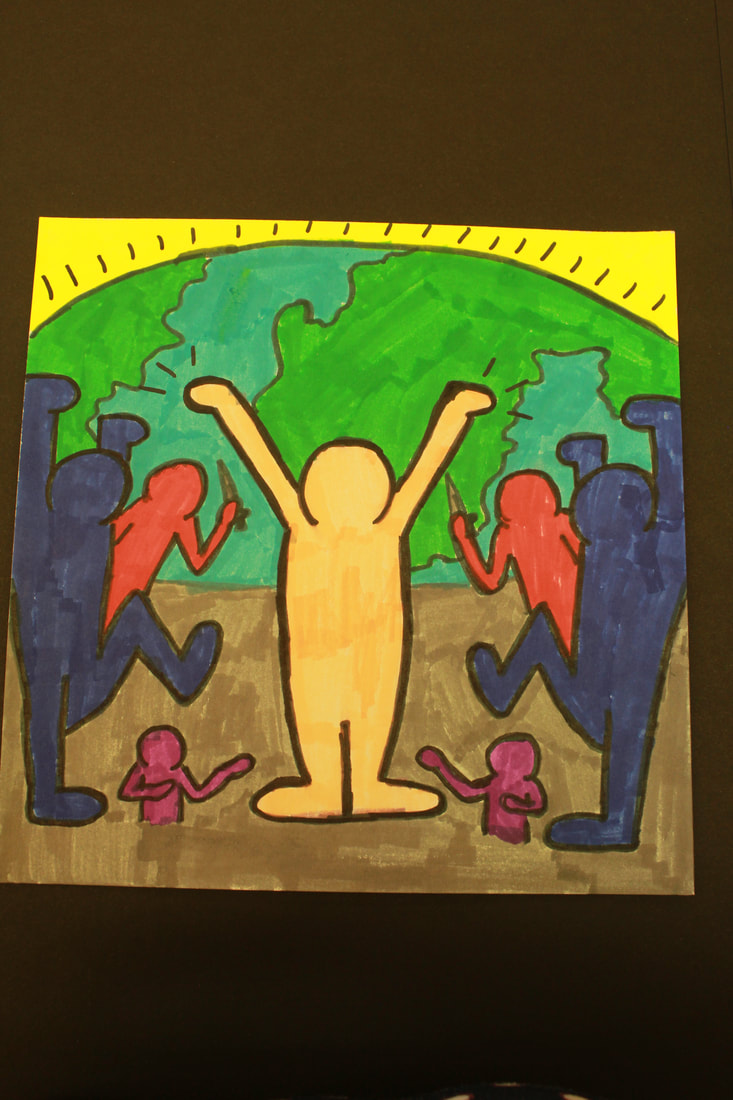
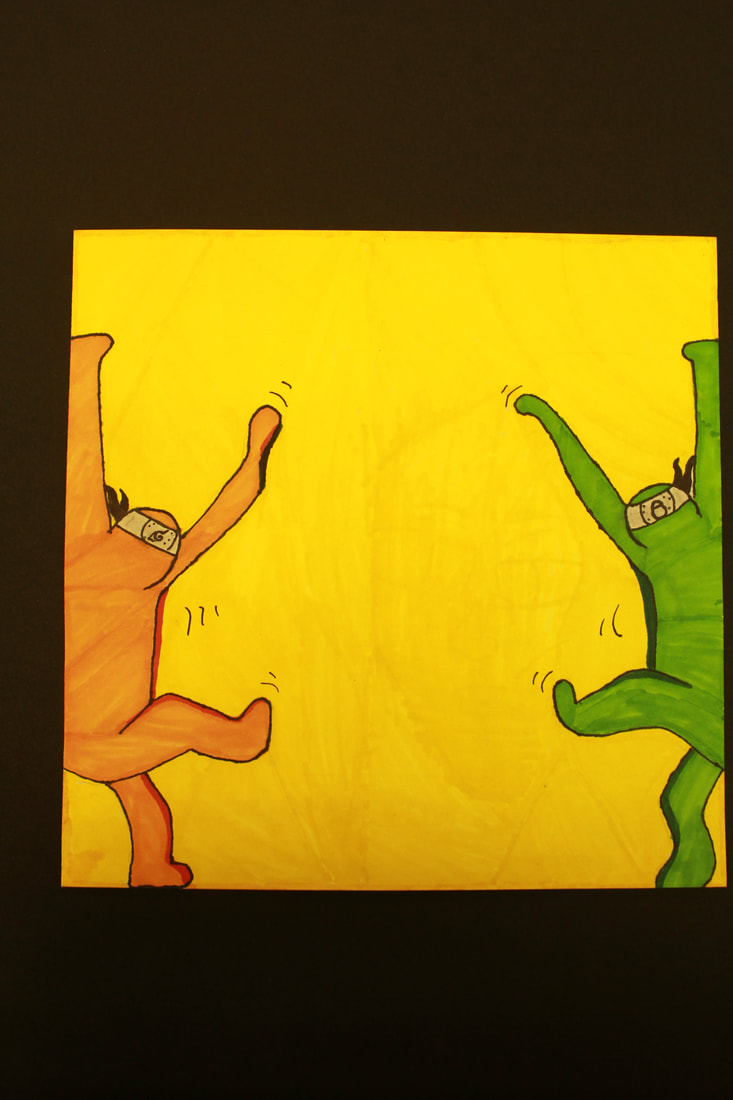
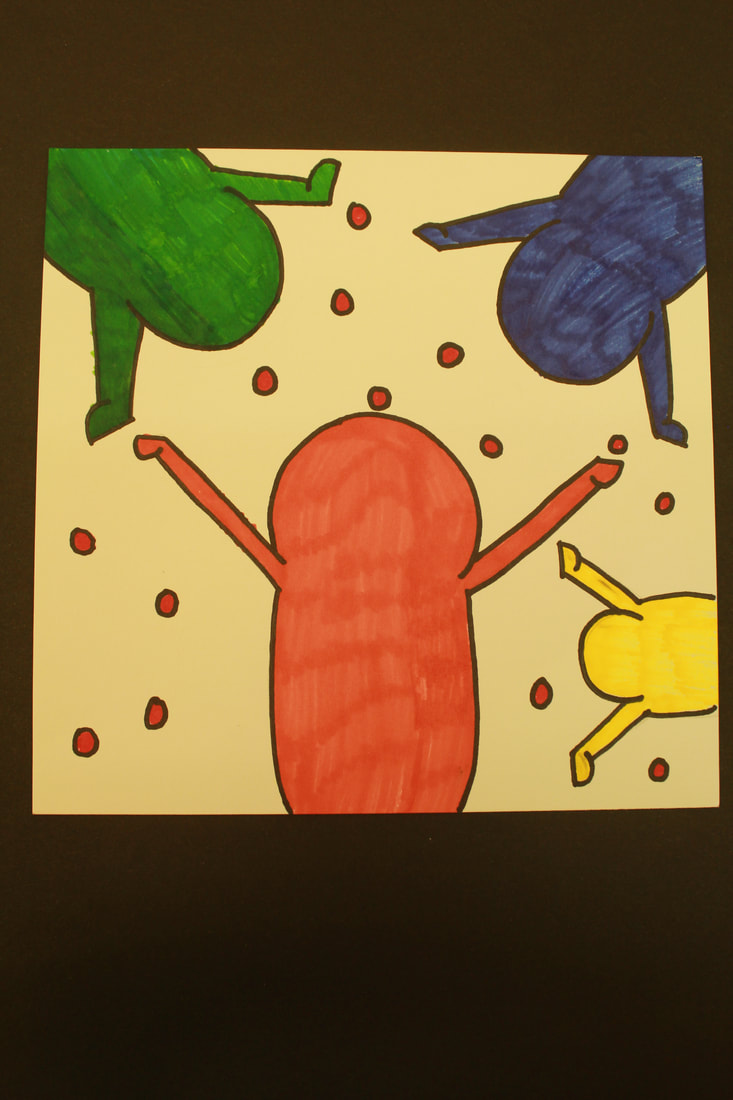
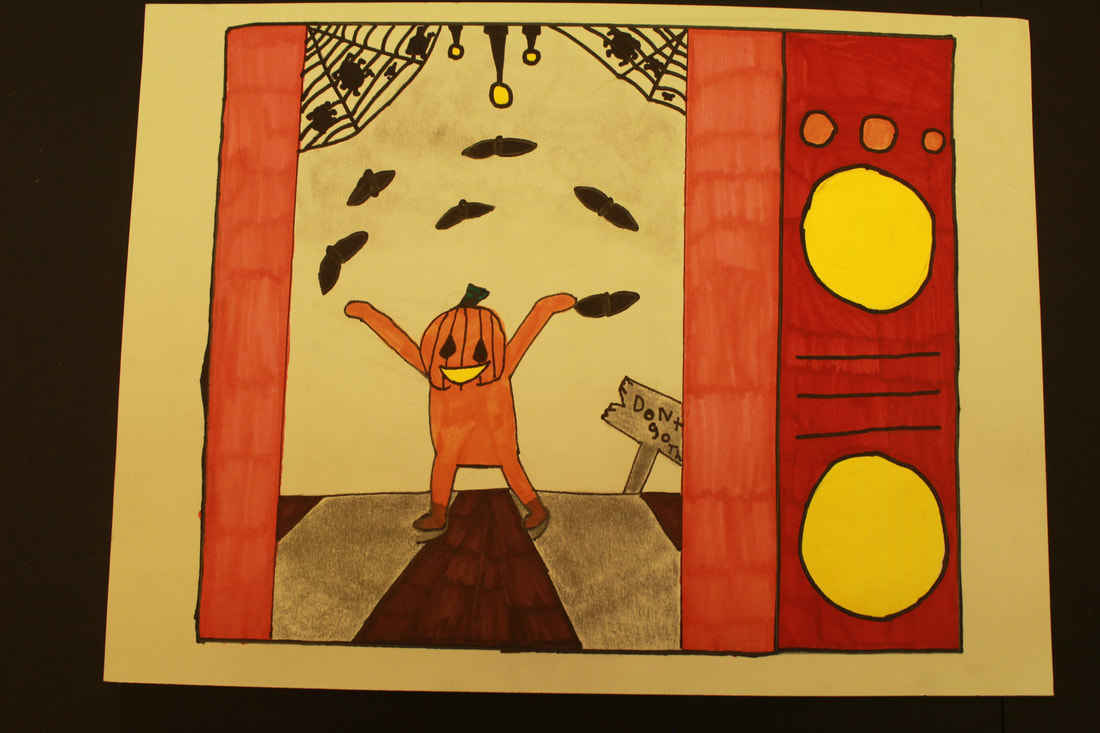
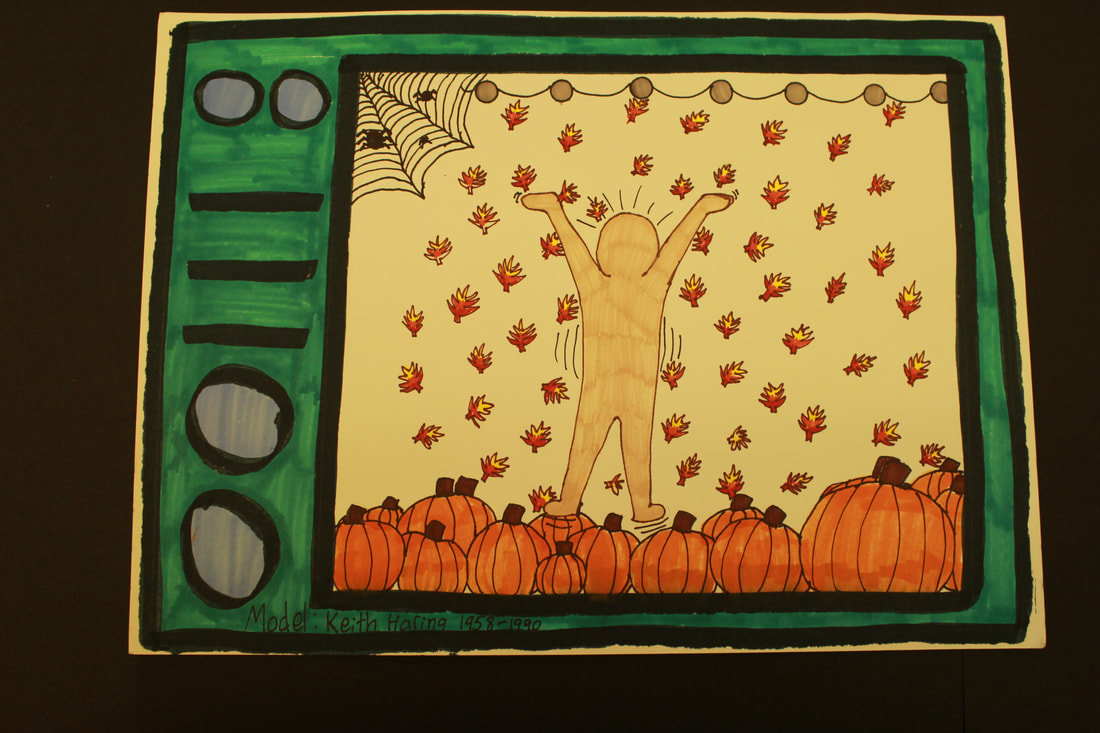
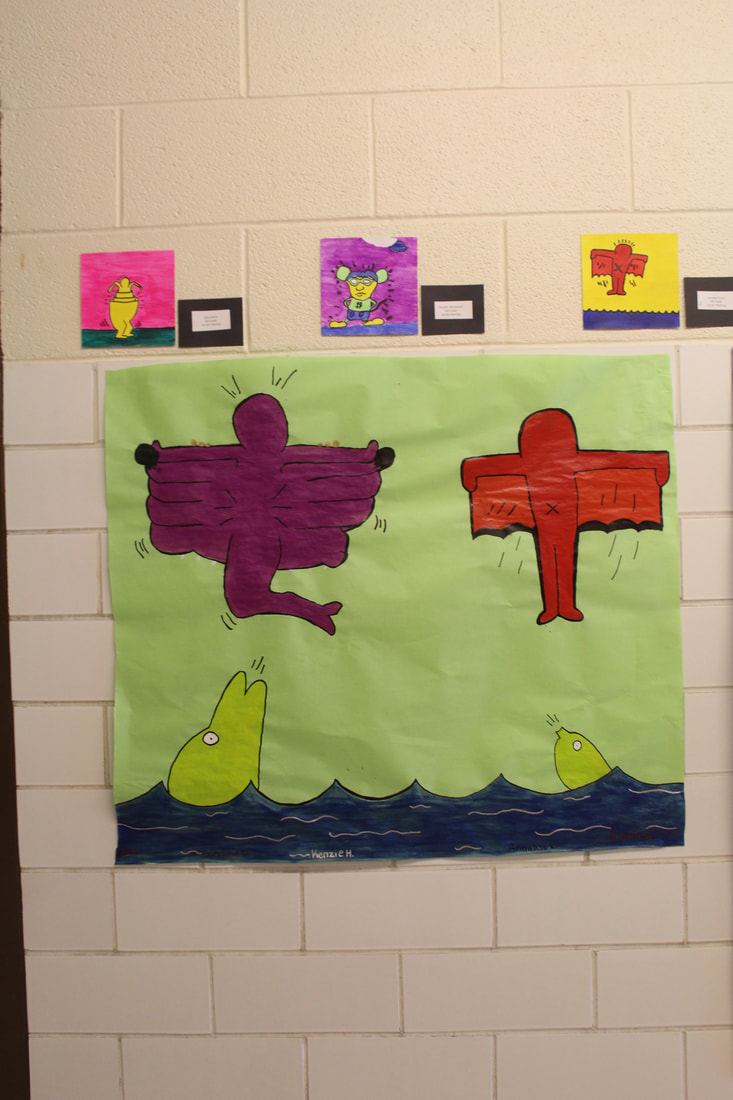
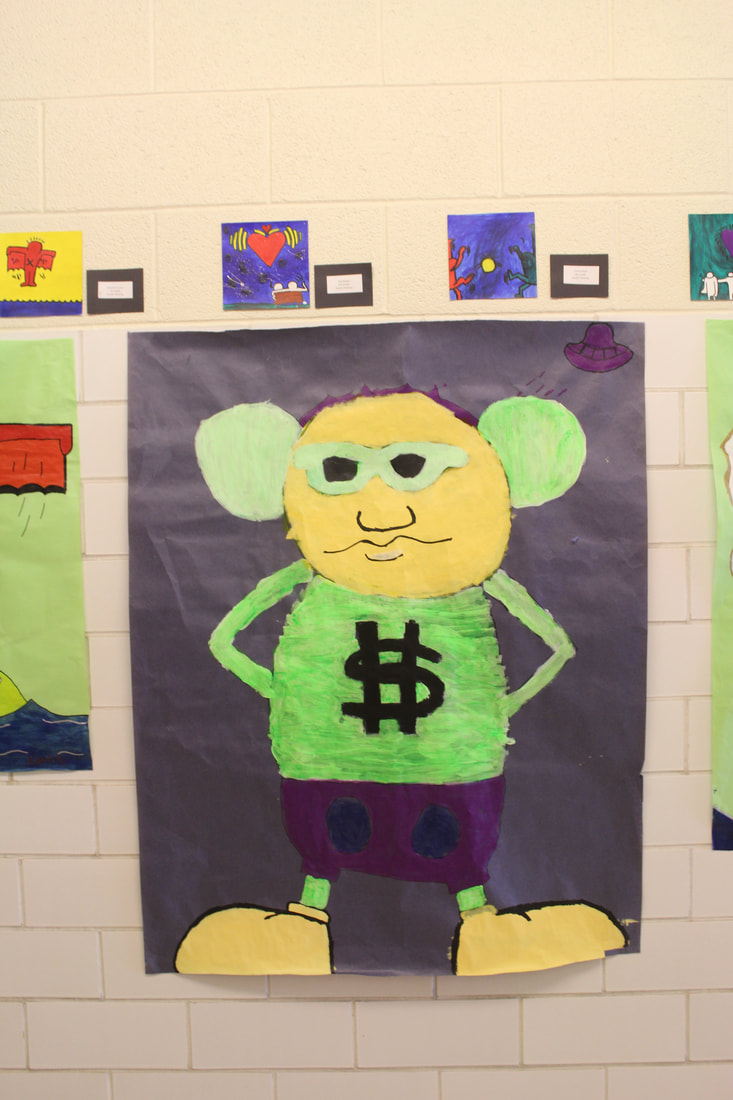
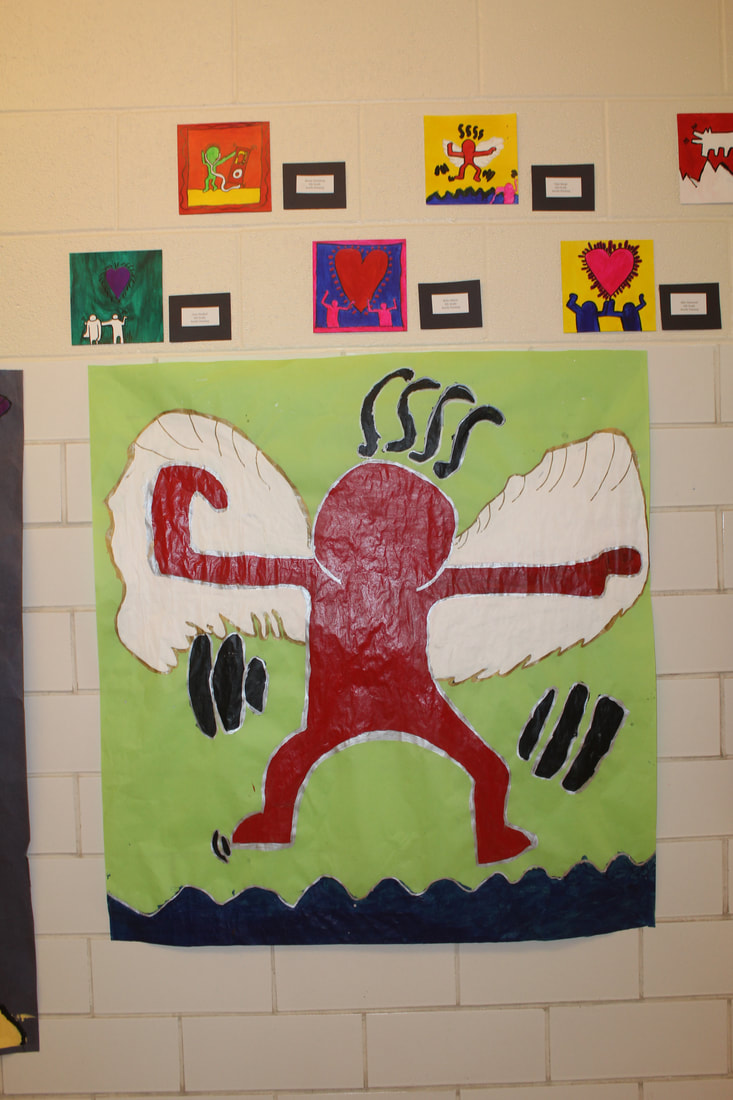
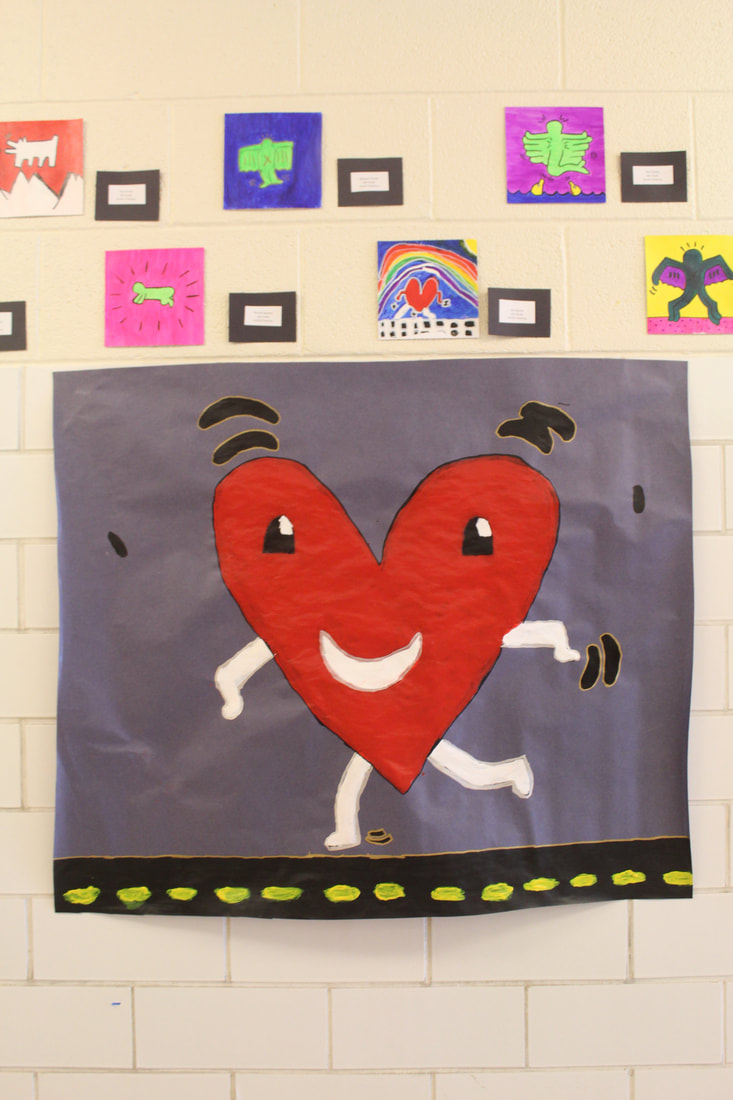
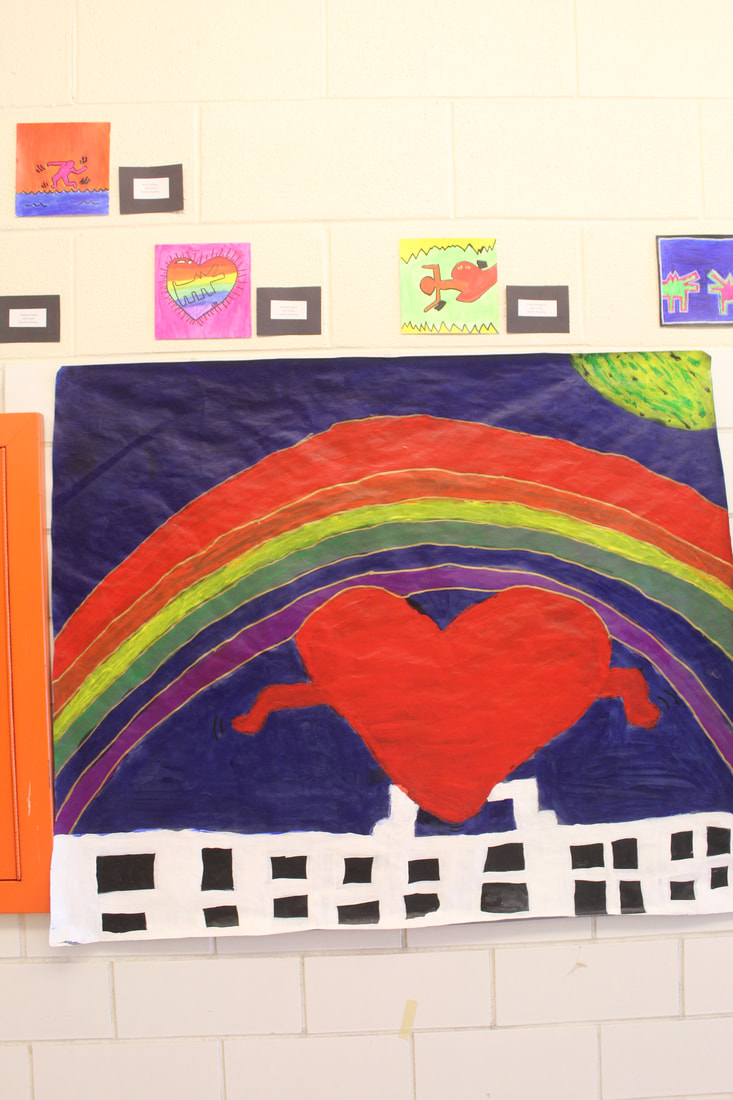
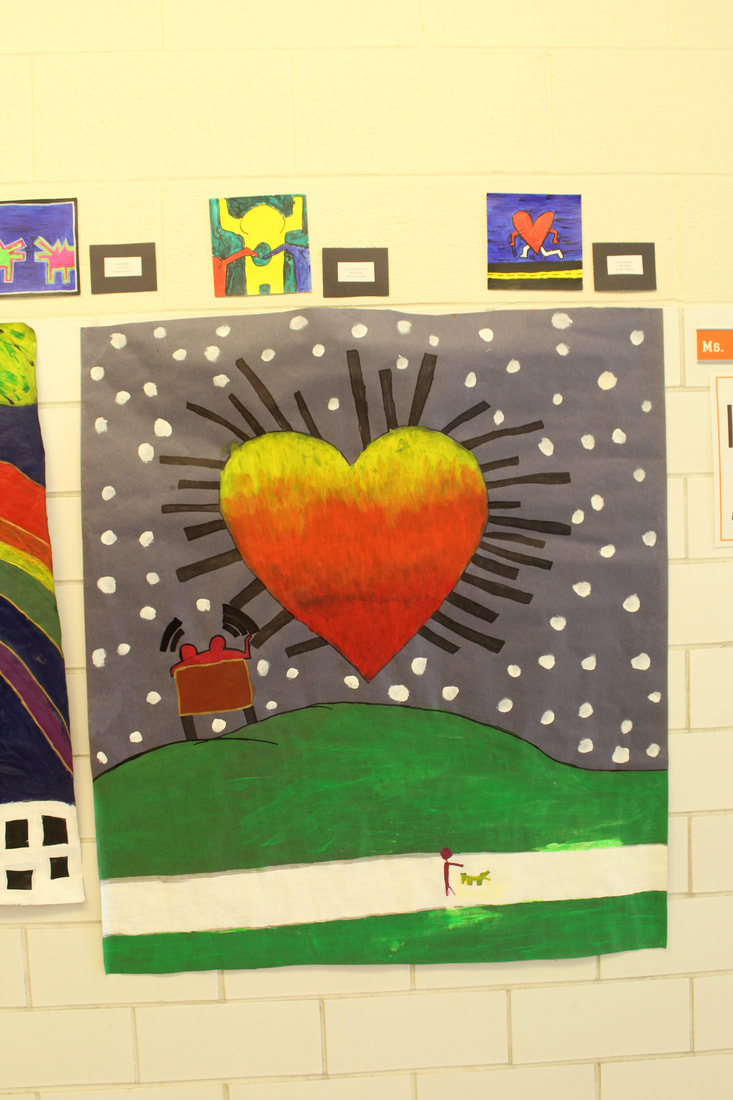
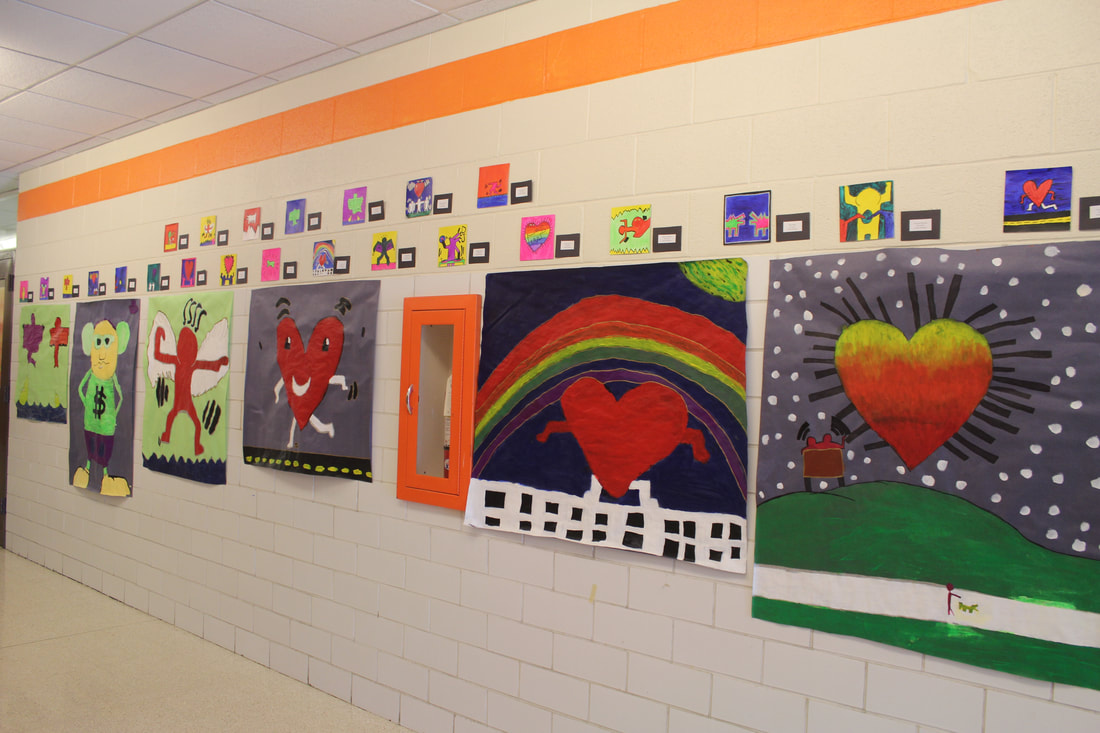
Keith Haring Inspired Murals
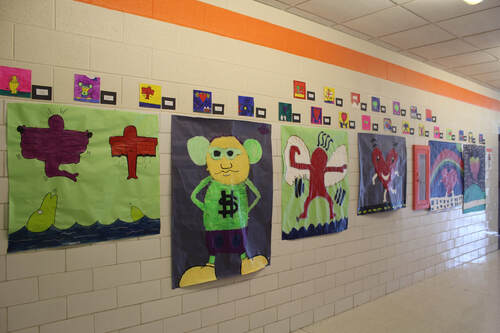
bStudents learned about a famous muralist named Keith Haring for an upcoming painting project. This artist was well known for his bright fun characters and designs. We talked about some of his well known murals, his life and activism, and set out to find inspiration for their own mini Keith Haring inspired painting. Students worked on their design skills and created a mini painting based off of one of Keith Haring's works. They learned about painting basics, use of color, and neatness. After completion of their mini paintings students were put into groups and created a group Keith Haring inspired painting. Students took each of their individual paintings and voted on which one to use as inspiration for their group mural. Though I don't often do group projects, mainly because then it is hard to send an artwork home with one student, when many have put efforts into it, but this group project turned out so good! Students really learned about working together and creating something with many people, when to assert their opinion and when to fall back, how to show off their strengths, while honoring the strengths of others, and that it is fun to paint on the floor in the hallway :)
|
|
Students hard at work on their group murals!
|